4 Ways to Crop Video in DaVinci Resolve (+1 BONUS TIP)
I’ve noticed that there are a lot of questions on DaVinci Resolve crop video or how to do it. There isn’t only one answer to this question either as there are many variants of “cropping”. Therefore I’ll try to cover most of them in this article. Let’s start with the most basic crop and end with the most advanced.
Every method described in this article will be done from the Edit page.
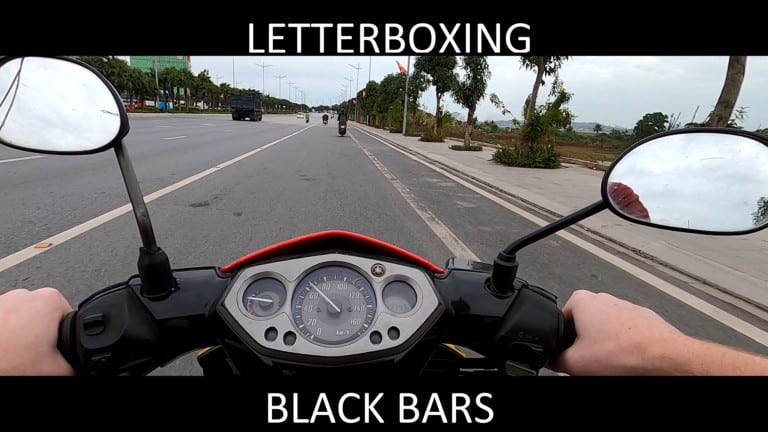
1. Simple “Black Bar” Crop
This is what most people refer to as cropping so let’s start with how to do this one. What you want to do is select the clip you want to crop in the timeline. Then you head to the inspector (right side) if it did not open click on “Inspector” which I’ve made a red circle around in the picture below. To expand this menu click on the arrow in the white circle.

Now once you have the inspector open you can scroll down to where it stands “Cropping”. Double-click on it to open it.

Now you have the option to crop it from whatever side you would like! Just drag for example “Crop Right” and you’ll create a black bar which will cover part of the video.
That’s the most basic method!
Here’s another awesome method:
2. Zoom to Crop (Crop Without Changing the Aspect Ratio)
This is also a way to crop your video, by zooming you will crop it from all sides or only 2 depending on how you are positioning the frame. What you do here is simply zooming in on what you want to keep and the parts getting outside the viewer are cropped.
The great part of cropping this way is that you don’t get the black bars on a normal 16:9 ratio screen. If you want to know more about letterboxing (black bars) and aspect ratio, I’ve written an own article on that topic, which I really recommend you read if you want to understand this concept fully. Click here to read, it will open in a new tab so don’t worry about losing one.
How do you do it? It’s about the same process as the cropping in method 1. Once again select the clip in the timeline you want to zoom and head over to the inspector.
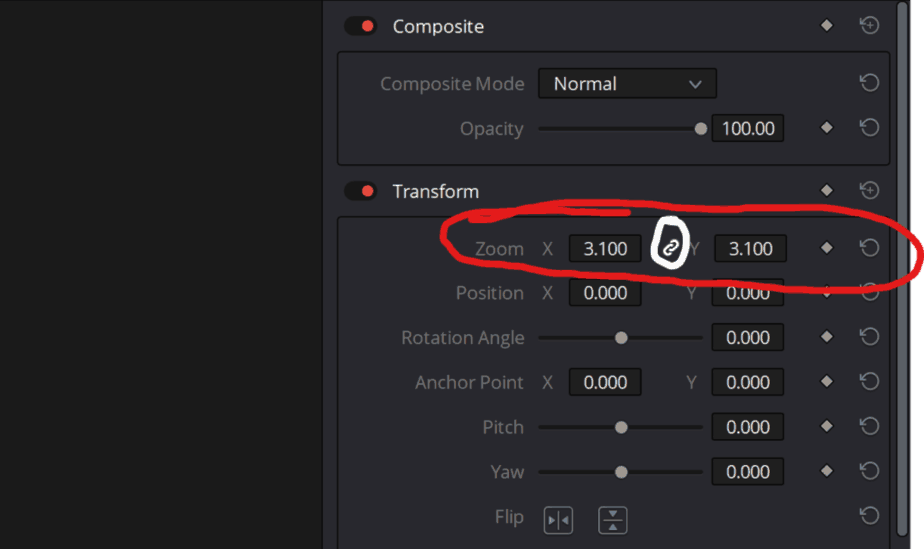
Here you just hover your mouse over the boxes I’ve circled and drag to the sides to zoom in or out.
You can also see I’ve made a white circle around that chain/link sign. Which means they are linked together. Whenever you change the X-axis you’ll also change the Y-axis.
So by clicking on the sign it will change color from white to gray which means they are now unlinked. Then if you change one of the axes, you are literally just changing one of the axes. This result in squeezing and destroying the footage. But if that’s what you want cool. If you want to undo whatever happend just hit that “arrow circle” on the right-side.
3. Cropping by Changing “Aspect Ratio” (Fake Letterbox)
This method is if you want to letterbox or add those black bars to get that cinematic look which you get by cropping the top or bottom. You can of course also add vertical black bars bars also known as pillarboxing.
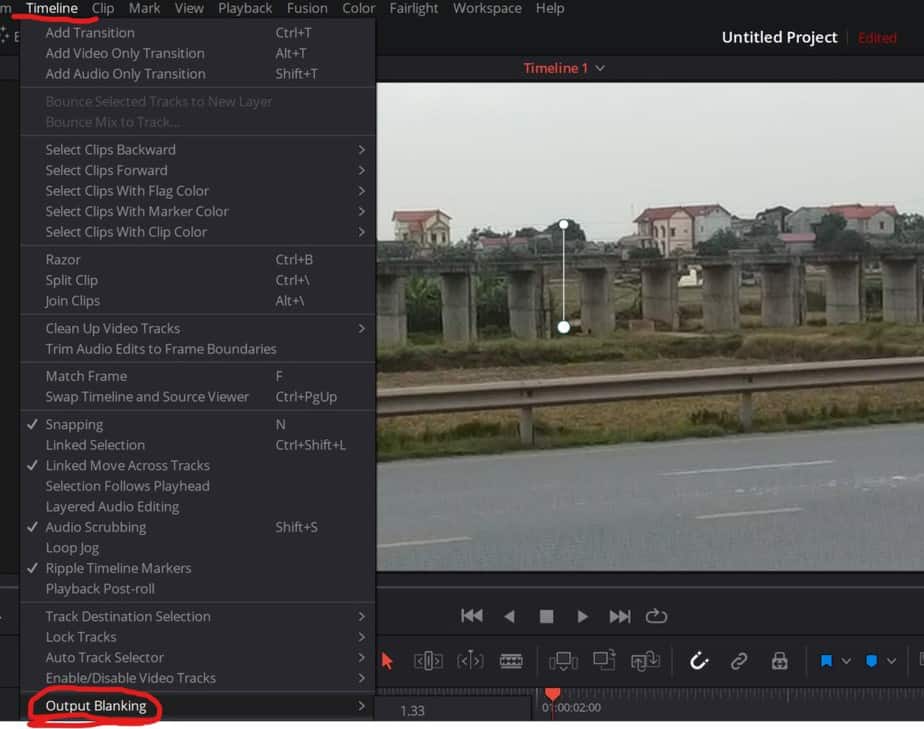
This is really easy, just go to “Timeline>Output Blanking” and choose whatever aspect ratio you would like.
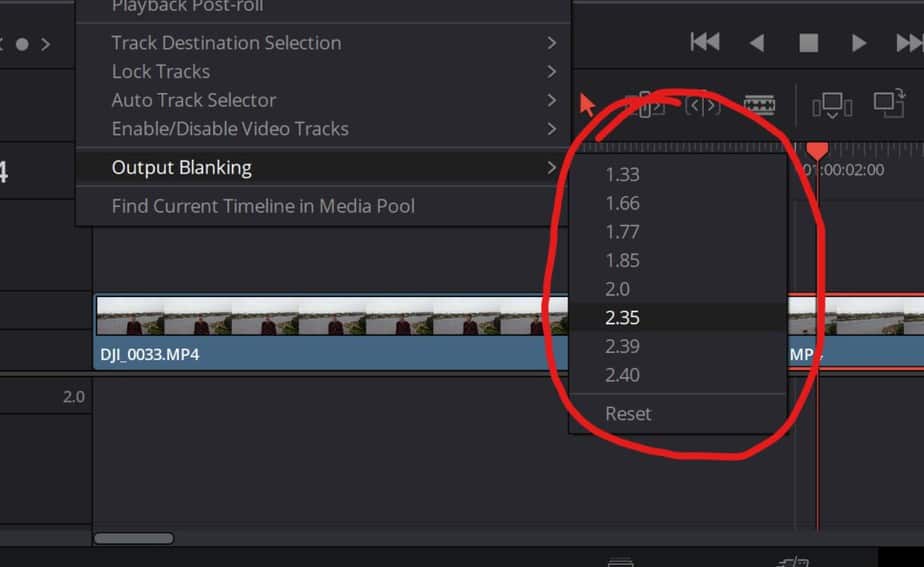
Every number lower than 1.77 will crop from the sides and every higher number wil crop from top and bottom.
You can do really cool things with letterboxing, and even make your video format fit the screen in the cinemas or just wide monitors. To learn about this, here is an article I’ve written, that shows different ways to do this. Just scroll down the page and check if you find it interesting. It will open in a new tab, so don’t worry about losing this article.
4. Changing Output Resolution
This will change the resolution on the timeline or your whole project. It will “not” change your video.
For example: Your video is in 1920:1080 also known as 16:9. If you want to play your video to fit a wider screen without getting those black bars on the sides since it’s not wide enough. Or maybe the screen is higher than normal and you don’t want black bars on top and bottom. This method will prevent that!
Let’s say you want to play your video on a 21:9 monitor, then if the video is 1920:1080 you need to increase the aspect ratio. On a 21:9 monitor those numbers are normally 2560:1080.
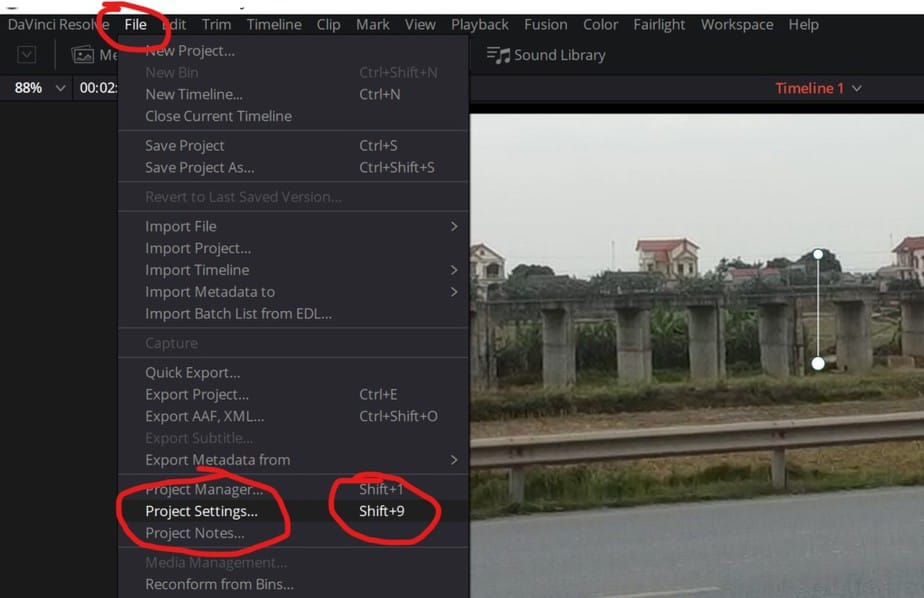
Let me show you how to change this. Go to “File>Project setting”, shortcut: Shift+9
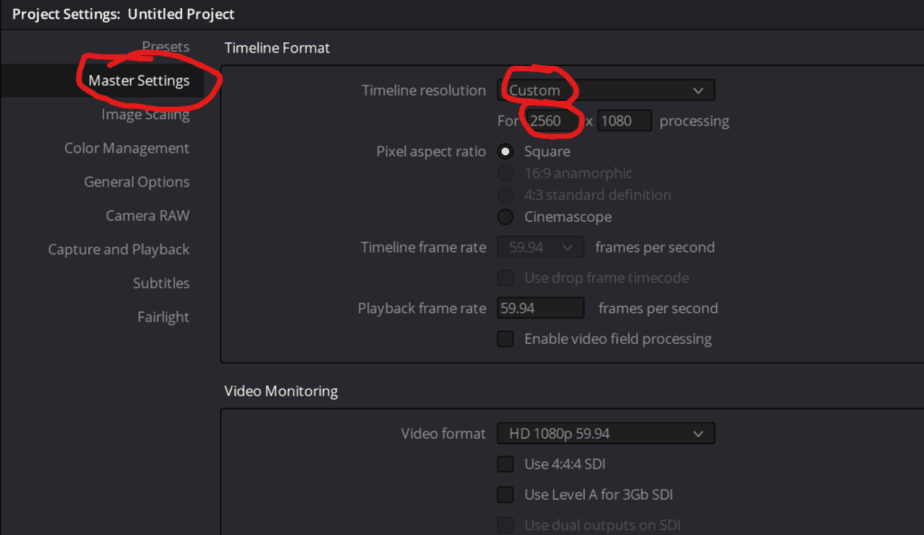
Now in “Master Settings”, change Timeline Resolution to “Custom”. Now change those numbers to whatever screen you want to fit. I changed mine from 1920 to 2560 since I want 21:9 ratio as mentioned above.
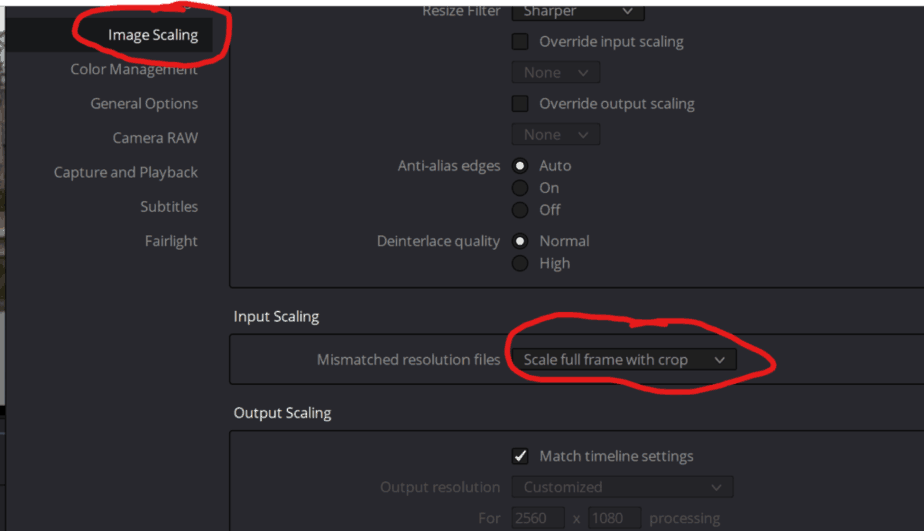
Next go to “Image Scaling” and Input Scaling. Here change set “Scale full frame with crop”. Then go ahead and save the new settings.
Now you’ve successfully changed the resolution of the video. So when you’re playing it on whatever type of monitor you’ve set it for you won’t get those black bars ruining it. Here’s a link to learn more about this, it’s something I recommend you learn if you are going to edit a bit as it’s a topic much discussed in this industry.
5. BONUS TIP: Cropping/Zooming
This is just a bonus tip on how you can crop and zoom without having to open the inspector. Instead, you can simply do it from the viewer which may be a preferred way of doing it for someone. So let’s get to it.
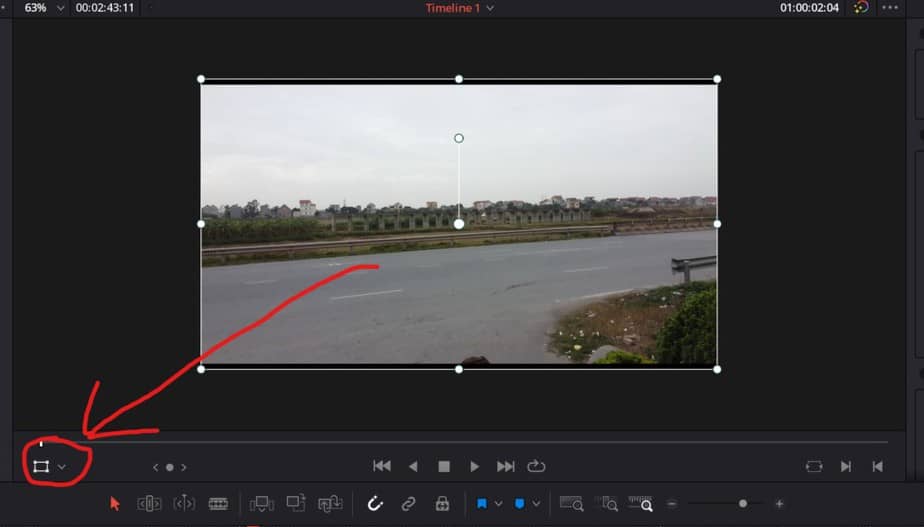
Down in the right corner of the viewer you have this rectangular button, which when you click on will expand.
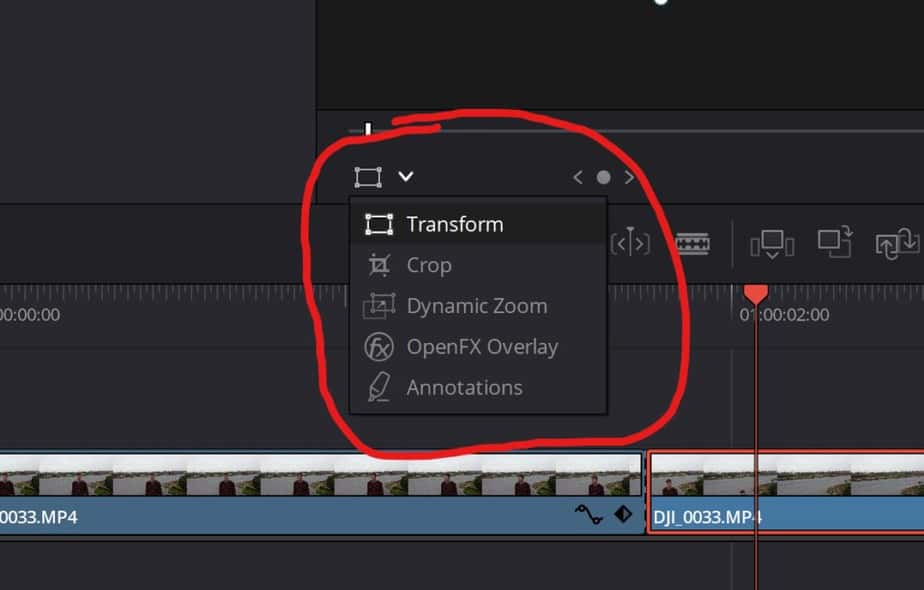
Then it will look something like this (maybe alittle different at the time you’re reading this).
Here you have some different options to choose from, the two first “Transform” and “Crop” are the same as the zoom and basic crop I talked about in method 1 and 2.
I’ll be showing you how to use these and also I want to show you the Dynamic Zoom real fast as that one is really cool.
Let’s start with the zoom!
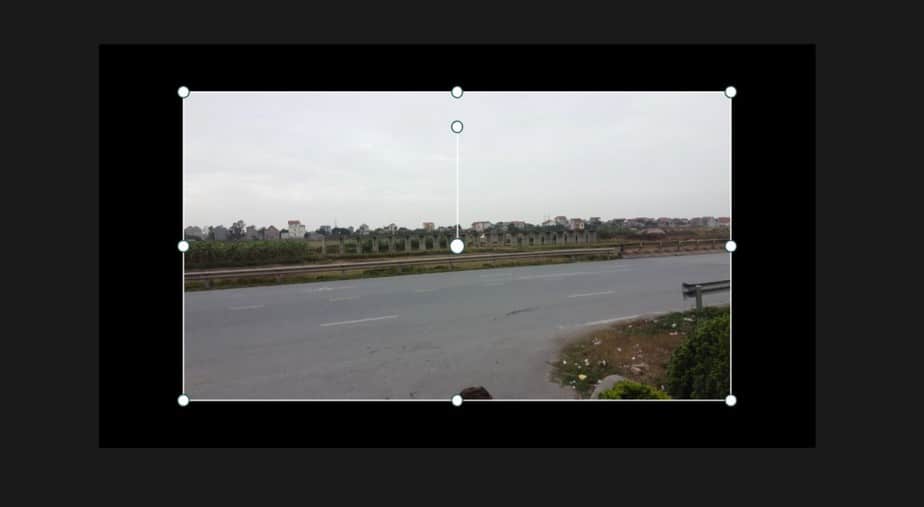
This is basically the same as “Zoom” in the Inspector only now you controll it by grabbing one of those white dots and dragging them in whatever direction you like.
Notice in the inspector that when changing something like this, it will change there as well. So if you regret something you have done, you can just undo in inspector with that “circle-arrow”
Next, we have the “Crop”
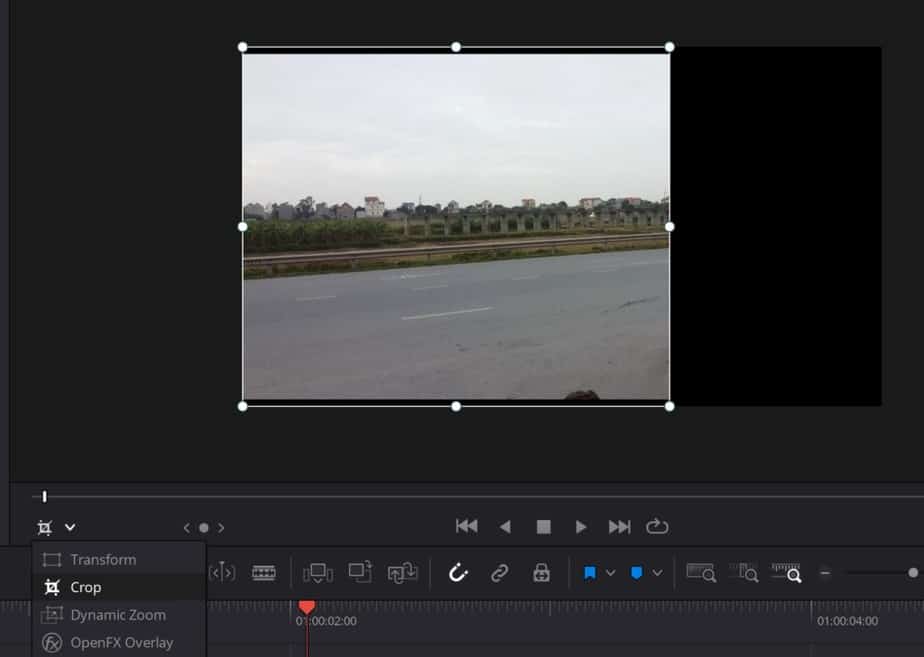
This works exactly the same as the “Zoom” only now your cropping when dragging the white dots. It will also change in the inspector if you were to regret something you did.
Then it’s the Dynamic Zoom.
This one will create a zoom in or out motion. Which you can be nice to use in some situations.
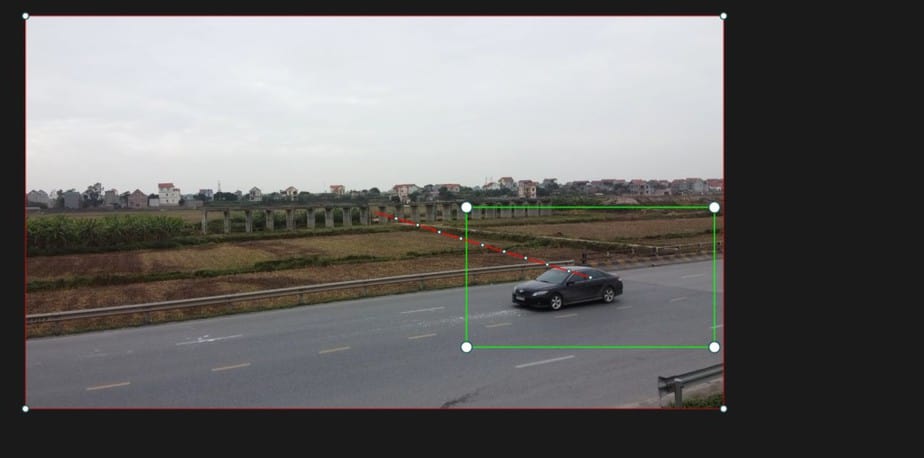
When you choose Dynamic Zoom you’ll get this yellow rectangle on the viewer. You can drag it where you want and regulate the size with the white dots in the corner.
So it gets applied to the clip you have selected. By default settings it will zoom out, but you can set it to zoom in as well. Anyways how it works when zooming out. When the clip you’ve applied it to start playing what’s inside the rectangle will fill the whole screen. And by the end of the clip it will be fully zoomed out, like in the picture above.
How fast it zooms depends on how long your clip is. If you want to to happen faster, then you just cut your clip where you want it to end.
If you want it to start fully zoomed out and then zoom in, you change this is the inspector. Like in the picture below. You then want to set it to “Ease in”.
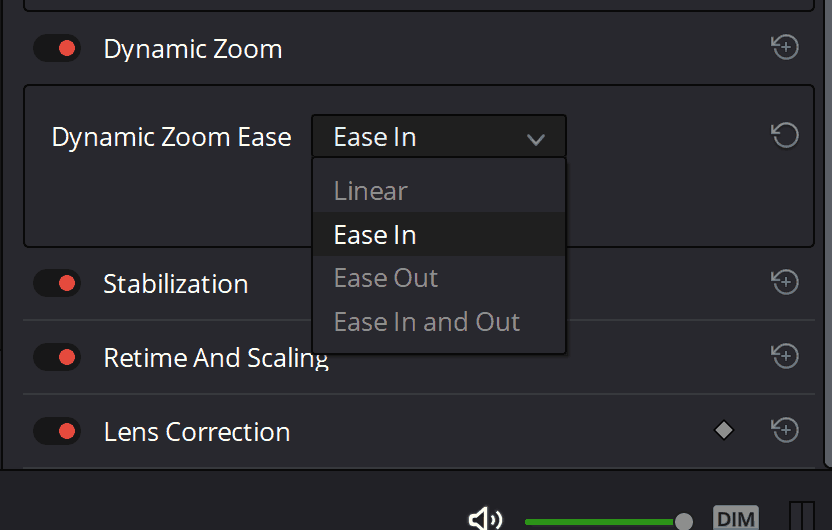
As you can see you also have the option “Ease In and Out”. It all depends on what you want the video to express, so it’s no answer for which is best. But they are all pretty neat.
I hope this article was helpful and that you found your answer!
Cheers,
Jens