Change Clip Duration in DaVinci Resolve (+ Fix issues)
In this article, you’ll learn the best ways to change clip duration in DaVinci Resolve.
Depending on your situation, the method used will vary a bit. Therefore, I’m going to show you a few really good ones!
If you want a quick answer:
To change clip duration in DaVinci Resolve, right-click the clip in the timeline, and select “Change Clip Duration.” In the menu that appears, set the duration you want and click on “Change.”
Click on the links to go directly to a specific method in the article:
- Stretch Clips
- Use the “Change Clip Duration” Menu
- Change Duration of Multiple Clips in DaVinci Resolve
- Use In- and Out points
- Video Tutorial
1. Stretch Clips
Changing the clip duration by stretching is the simplest yet excellent way of changing the clip duration.
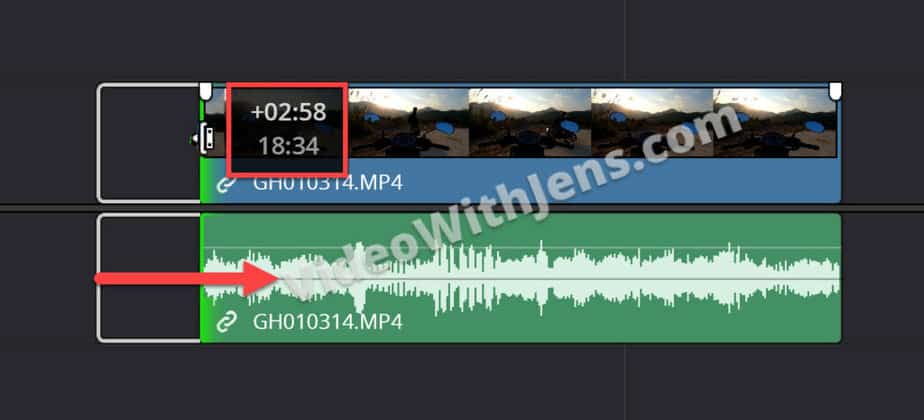
- Once the video has been added to the timeline, place your mouse cursor at either the end or beginning of the video clips, and you will see the cursor change to a stretching icon.
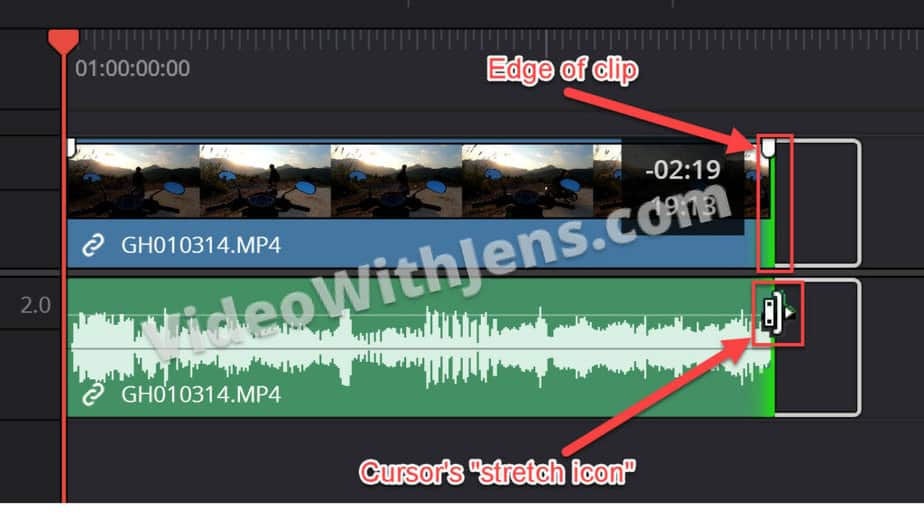
- If you want to increase or decrease the length of the video clip, place the mouse cursor at the end of the clip.
When the cursor shows the “stretch icon,” click, hold and drag to the right to increase the length of your clip, or drag to the left to reduce the length.
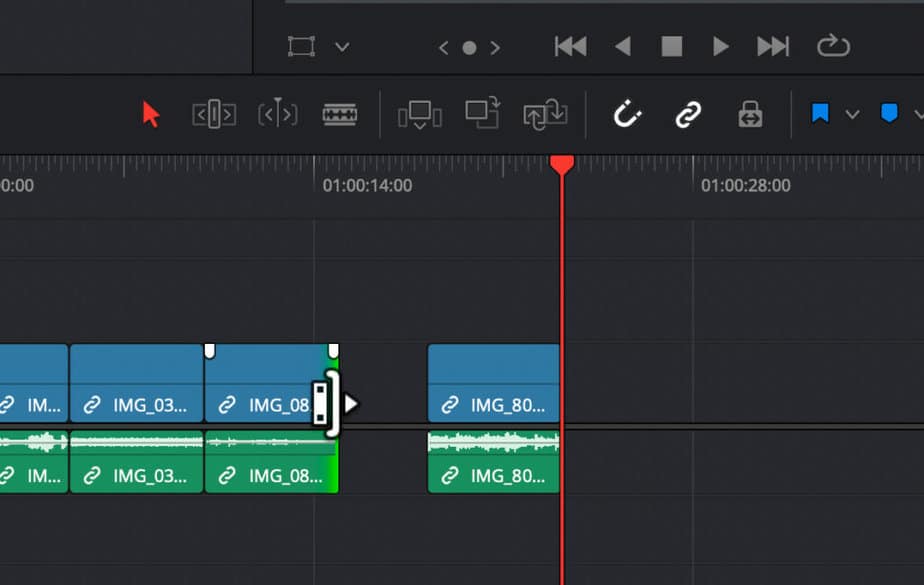
- If you want to change the starting point, do the same by placing the mouse over the beginning part of your video and dragging the video to the left or right to change the duration accordingly.
So, how can you stretch multiple videos, and what are the other ways you can change the length of the video?
Continue reading as we also discuss other ways that you could use to change the length of your video file.
How to Extend Clip Without Overwriting in DaVinci Resolve
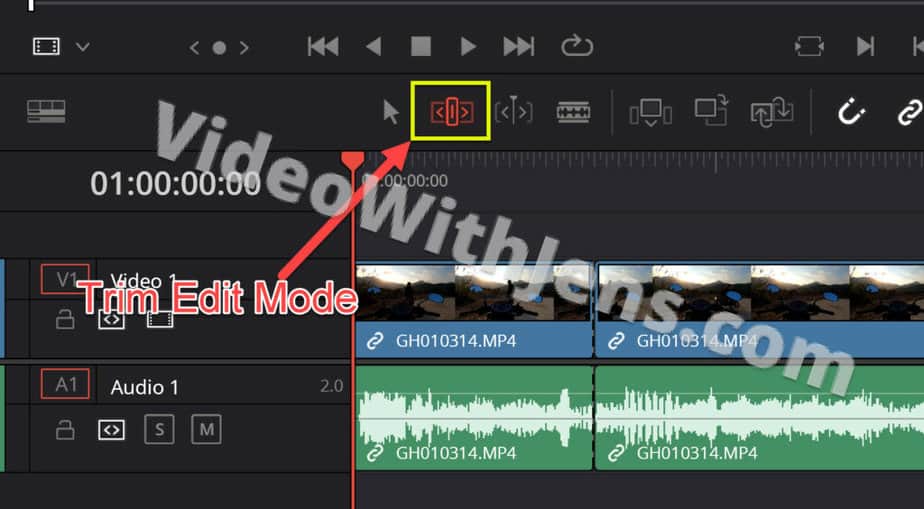
To extend a clip without overwriting in DaVinci Resolve, open the “Edit” page and click on “Trim Edit Mode” in the toolbar above the timeline. Alternatively, press the keyboard shortcut “T.” Now you can stretch the clip without affecting the other clips.
Here’s how to do this:
Go to the “Edit” page:

Then, activate “Trim Edit Mode” by clicking on it (located in the toolbar above the timeline).
When it’s colored red, it means you’re in “Trim Edit Mode”:
Now can stretch/extend the clip without overwriting:
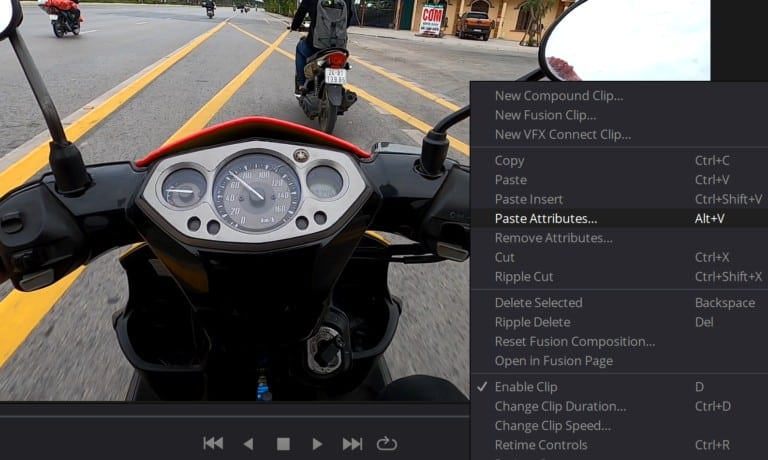
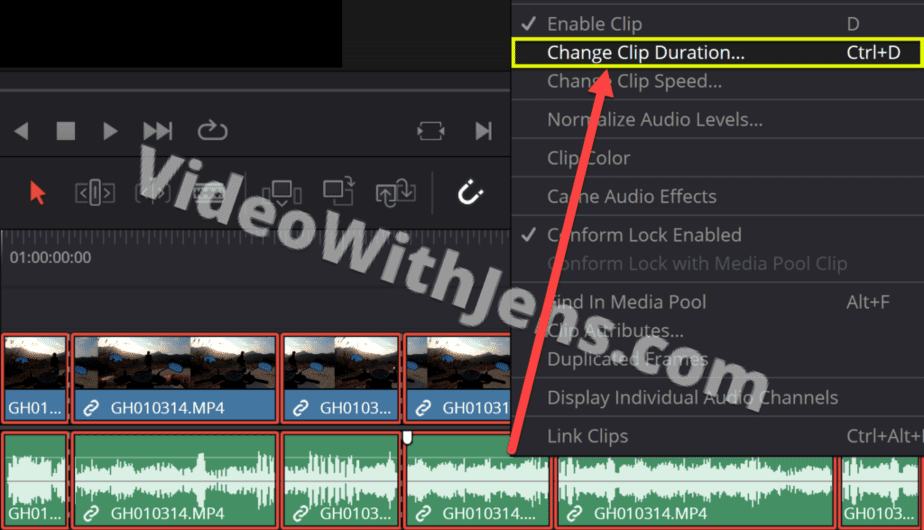
Another way to change duration is by using the “Change Clip Duration” menu itself:
2. Use the “Change Clip Duration” Menu
- Select “Trim Edit Mode” to prevent overwriting of neighbor clips.
- Press “Ctrl + D” simultaneously on Windows or “Command + D” on macOS to open the “Change clip duration” menu. Alternatively, you can right-click the clip and select “Change clip duration.
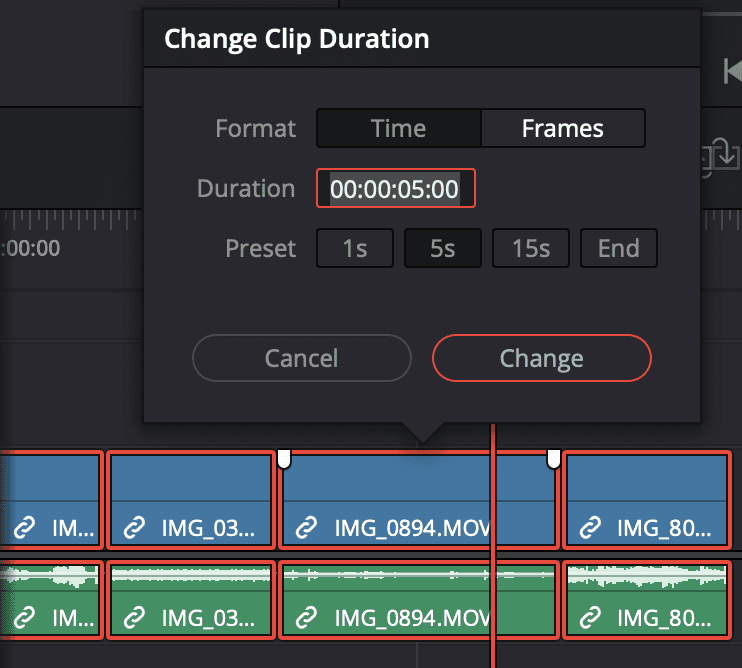
- After opening the “Change clip duration” menu, choose the length/duration you want to change your video and then click on “Change.”
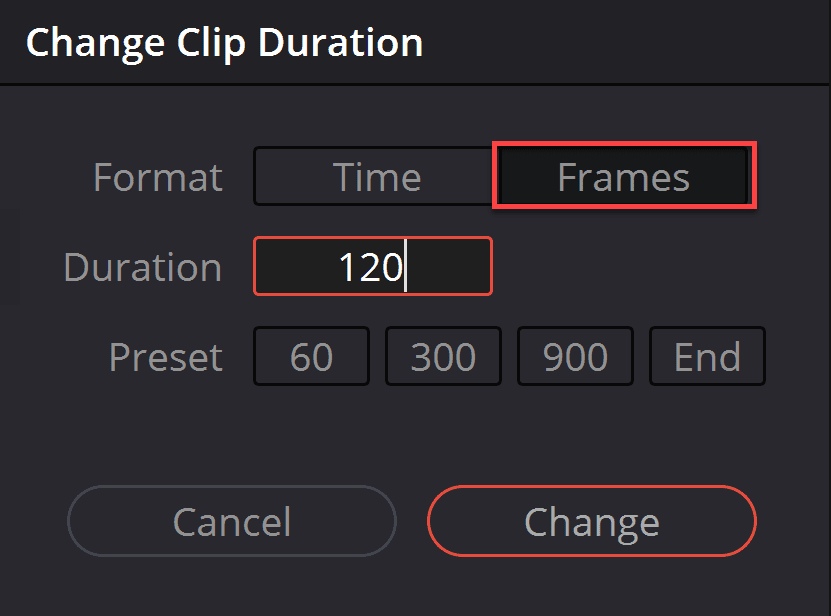
“Time” tab:
If you want the clip to be 1, 5, or 15 seconds, you can choose one of the presets.
Inside the menu, you can either adjust the clip duration in seconds (time) or frames.
If you want your clip to be, let’s say, 3 seconds, then type “00:00:03:00”.

“Frames” tab:
Depending on your timeline’s framerate, if it’s 30 FPS for example, then 30 Frames is 1 second.
If you want to adjust the number of frames, you can choose the presets, which tell you how many frames to set the clip to.
Or you can type in the number of frames in the “Duration” box:
3. Change Duration of Multiple Clips in DaVinci Resolve
- Go to the “Edit” page.
- Enable “Trim Edit Mode” in the toolbar above the timeline.
- Select the clips while pressing the “Ctrl” or “Command” key.
- Right-click one of the clips and select “Change Clip Duration”.
- Set the duration and click “Change”.
Detailed Explanation
If you want to change the duration of multiple clips, press the “Ctrl” or “Command” key while selecting all the clips you want to change.
If you’re going to change the length of all clips, press “CTRL + A” or “Command + A.”
Alternatively, right-click the clips and select “Change Clip Duration“:
Before doing anything else, ensure that you are in “Trim Edit Mode” to avoid any problems. Press “T” on your keyboard to enable it.
Once you have selected the clips, press “CTRL + D” on Windows or “Command + D” on a Mac.
In the “Change clip duration” box, enter the length you want to set for all your clips, and then hit the “Change” button:
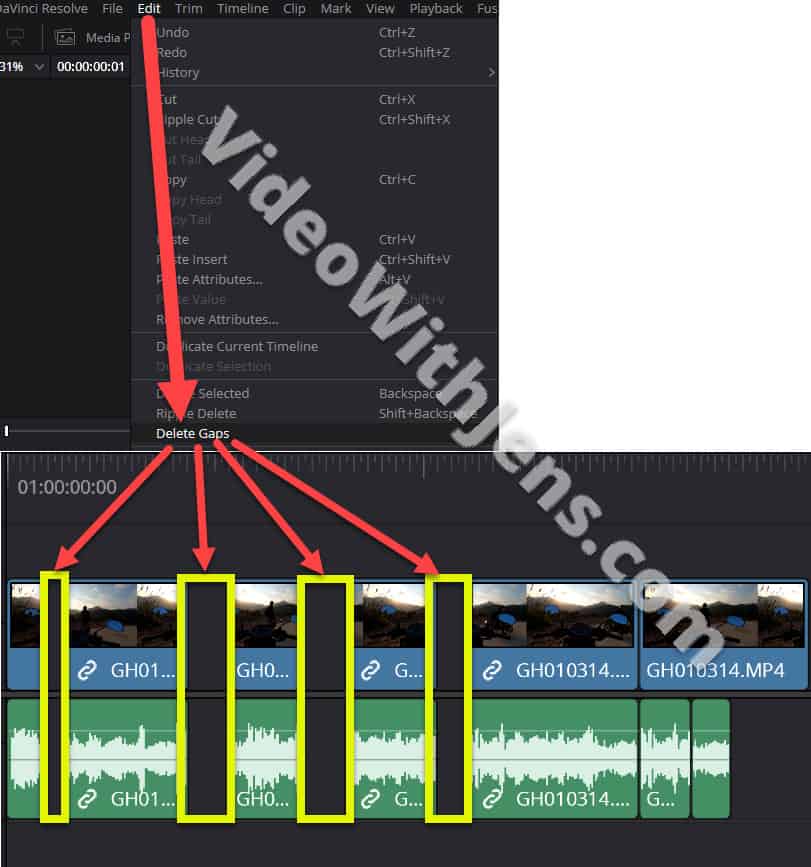
If you didn’t select the “Trim Edit Mode” and change the duration of the clips, you will see lots of gaps and uneven clip durations.
To fix this, either press “Ctrl + Z” or “Command + Z” to undo, and then activate “Trim Edit Mode” before changing the clip duration. Or click on “Edit > Delete Gaps”.
The last method I want to show you is fantastic, as you can change clip duration before even adding them to the timeline! =time saved.
4. Use In- and Out points
Another excellent way to change the duration of the clips is by using In and Out points. It is one of the most exciting and easiest ways to change any clip’s duration.
In this method, you don’t change the duration after moving the clips to the timeline. In fact, you select the length of the clip first, and then you move it to the timeline editor.
Here’s how to use the In- and Out points effectively:
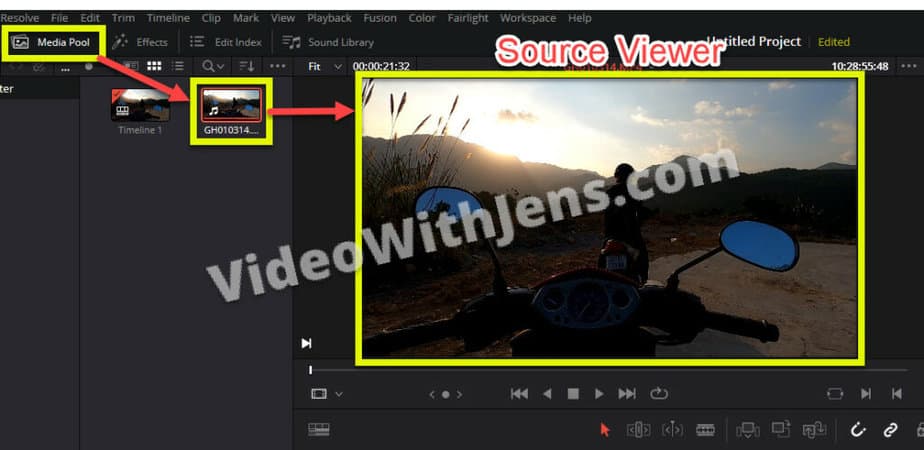
Double-click on the video file you want to move to the timeline in the “Media Pool.” You will see it open on the “Source Viewer”:
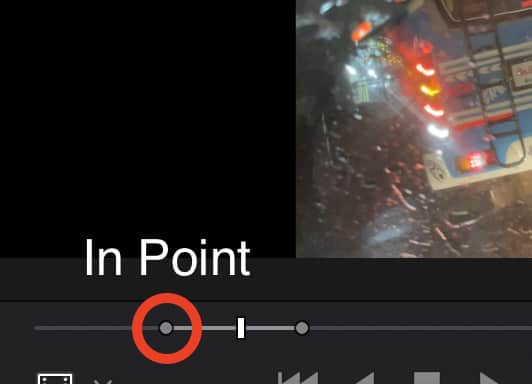
Press the right-arrow key to play it. Once you have a point you want to set as the start point, press the “I” button on your keyboard to enter an in-point, and then hit the right-arrow key to resume the video playback to select the out-point.
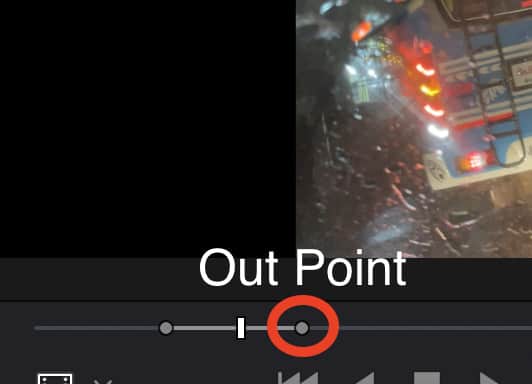
- Once you have your out-point, click “O” to set the out-point.
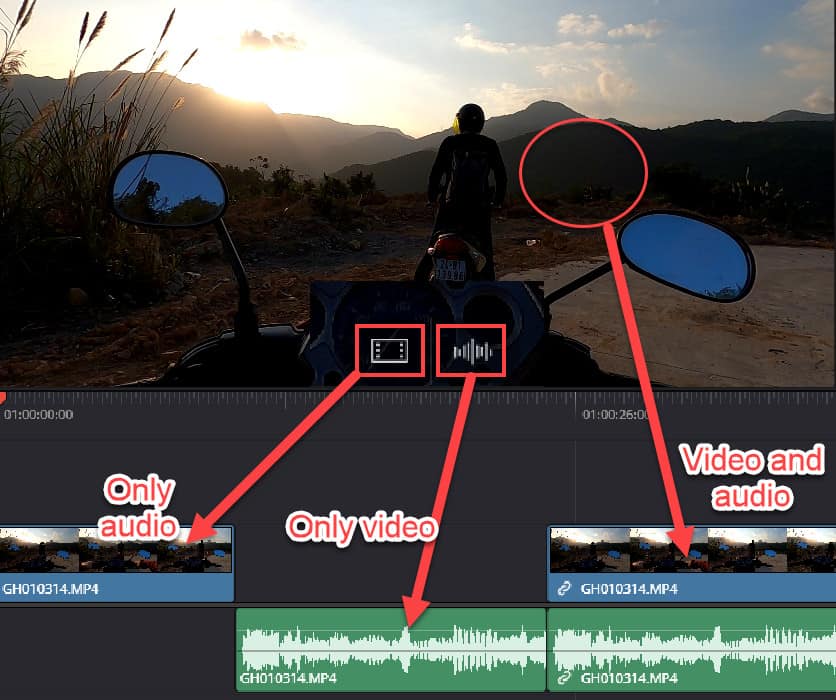
- Next, move your mouse over the viewer, then you will see two icons inside the viewer, one in the shape of a “film” and another in the form of a “waveform.”
- If you want the video portion, click on the Film icon and drag it across onto your timeline. If you only want the audio clip, click on the waveform icon and drag it across onto your timeline.
- If you want both the audio and video, don’t select either icon; click on the video in the Source Viewer, drag it across, and drop it in the timeline.
If you didn’t select the clips’ In and Out points properly and you brought the video and audio to the timeline, here’s how to quickly correct them:
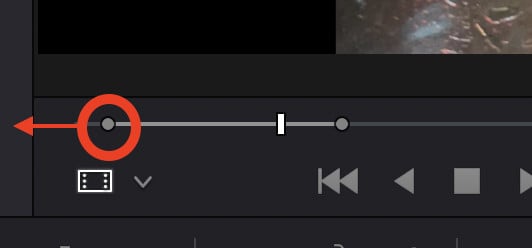
- Double-click the clip in the timeline to open the “Source Viewer”. Now you should be able to see the in- and outpoints again:
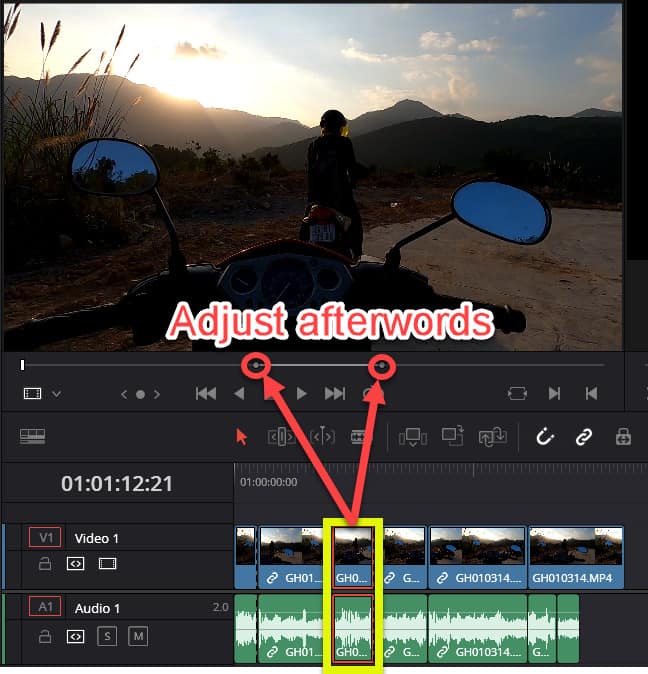
- If you want to change the length of the clips, you can adjust the in- and outpoints:
5. Video Tutorial
Here’s a video I made on the different methods. Be aware that the second method where I change the duration of multiple clips is not possible anymore. However, the second video will show you a workaround!
How to change duration of multiple clips using the stretching method:
While you’ve first mastered changing clip duration, why not learn about ways to change clip speed as well? Check out our 8 favorites here.