How to Change Text Color in DaVinci Resolve (+ Cool effects)
In this article, you’ll learn how to change the color of your text in DaVinci Resolve.
Not only that, but I’ll also show you how to make a gradient (rainbow) colored text, and how to make the text color change over time.
Click on the links below to jump to a specific part of the article:
- Change Text Color.
- Make Rainbow/Gradient Text.
- Animate Text Color (Make it change over time).
How to Change Text Color in DaVinci Resolve
- Go to the “Edit” page.
- Open “Effects” > “Titles,” and add the “Text+” to the timeline.
- Select the text in the timeline, and open the “Inspector” tab.
- Click on the box next to “Color,” set a color, and click on “OK.”
Here is a more detailed description with images:
Open the “Edit” page inside Resolve:

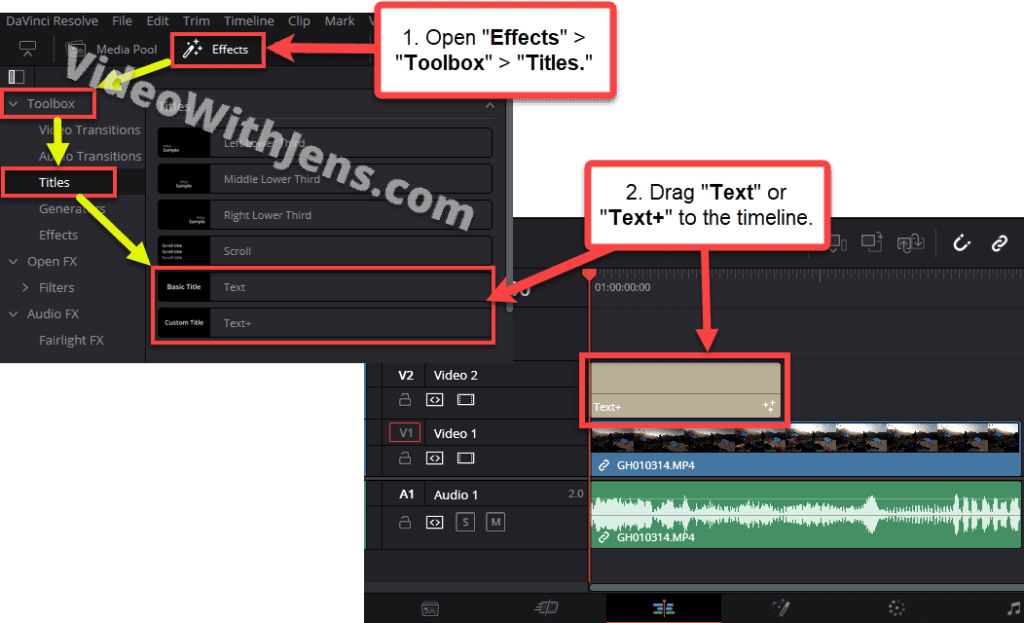
Then in the top left-hand corner, click on “Effects” and then “Titles” under “Toolbox.”
Locate the “Text+,” then drag and drop it into the timeline.
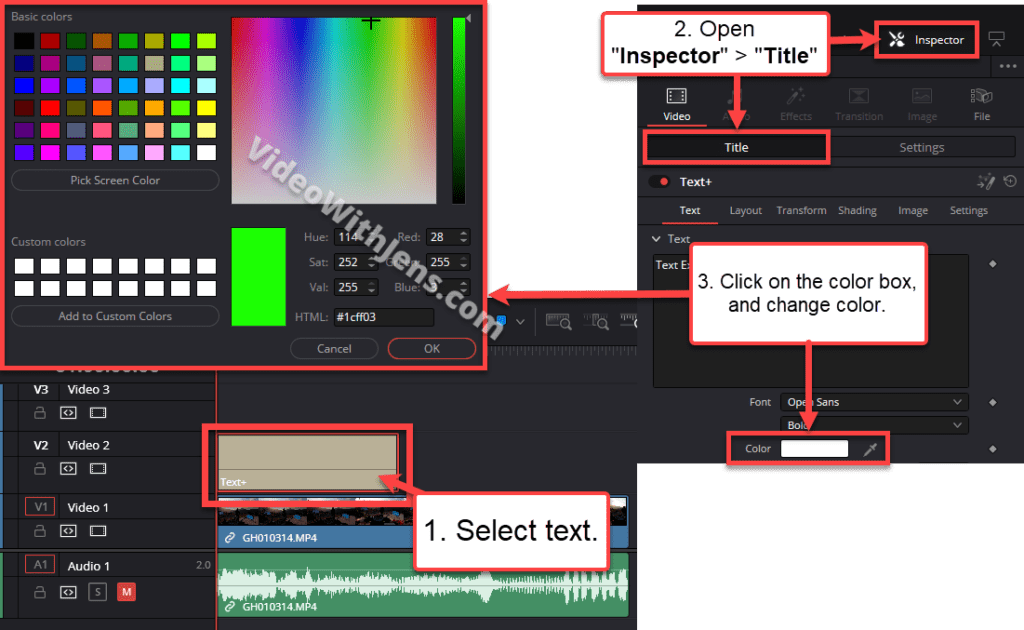
Select the text in the timeline, open the “Inspector” tab, and then the “Title” sub-tab.
You should then be able to see the “Color” option; click on the white box to change the text color.
In the window that pops up, adjust the text color by either clicking on one of the “Basic colors” or using the “color map.”
To adjust the brightness of the text color, use the scale on the right side of the “color map.”
Click on “OK” once you are satisfied.
How to Make Rainbow/Gradient Text in DaVinci Resolve
Next, you’ll learn how to make your text color gradient.
Using this method, I’ll show you how to create rainbow-colored text.

To do this, we will be on the “Edit” page.

Next, add a “Text+” title to the timeline, as I showed you here.
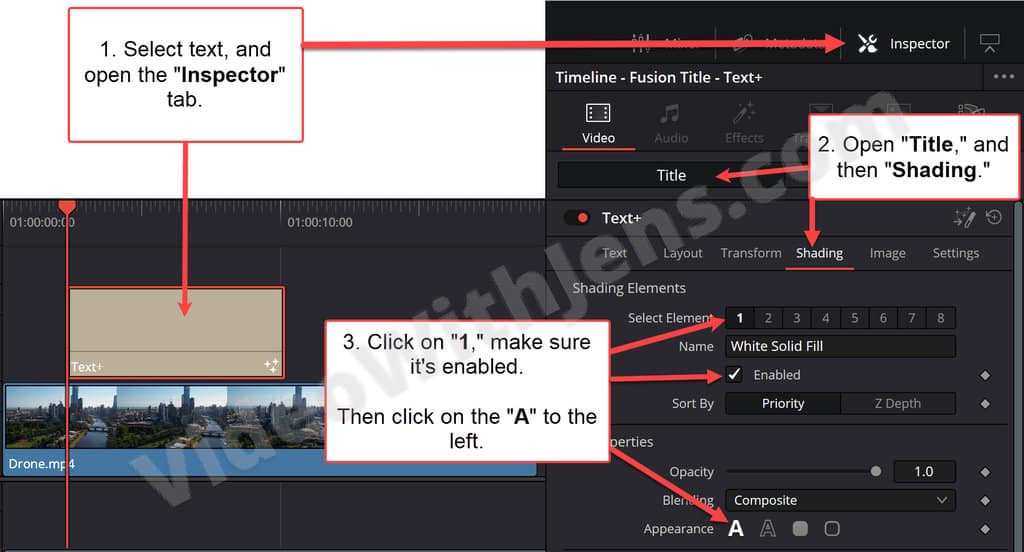
Then select the text in the timeline, and open the “Inspector” tab (top right-hand corner).
Inside the inspector, open the “Title” sub-tab and then the “Shading” sub-sub-tab…
And next to “Select Element,” click on “1,” and make sure it’s enabled.
A little further down, click on the “A” next to “Appearance” (most likely selected by default).
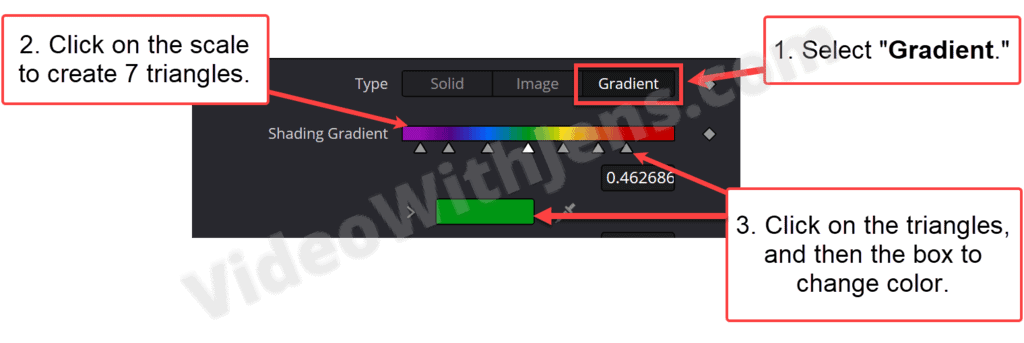
A little further down, next to “Type,” click on “Gradient.”
Then you should be able to see the “Shading Gradient” option; click on the scale six times as you have seven triangles in total (to create rainbow-colored text).
Next, click on the triangles to select them, and then set the color by clicking on the box below (refer to the image below).
The rainbow consists of seven colors: Red, orange, yellow, green, blue, indigo, and violet.
- So these are the colors you want to choose.
Once you have selected the colors, position the triangles as it looks like a gradient rainbow.
Next, set the “Mapping Level” against “Word,” and then rotate the “Mapping Angle” to make the text look better!

That’s it!
Next, up:
How to Animate Text Color in Resolve (make it change over time)
Now, you’ll learn how to make the text color change from one color to another over time, as the titles said…
To do this, you want to be on the “Edit” page:

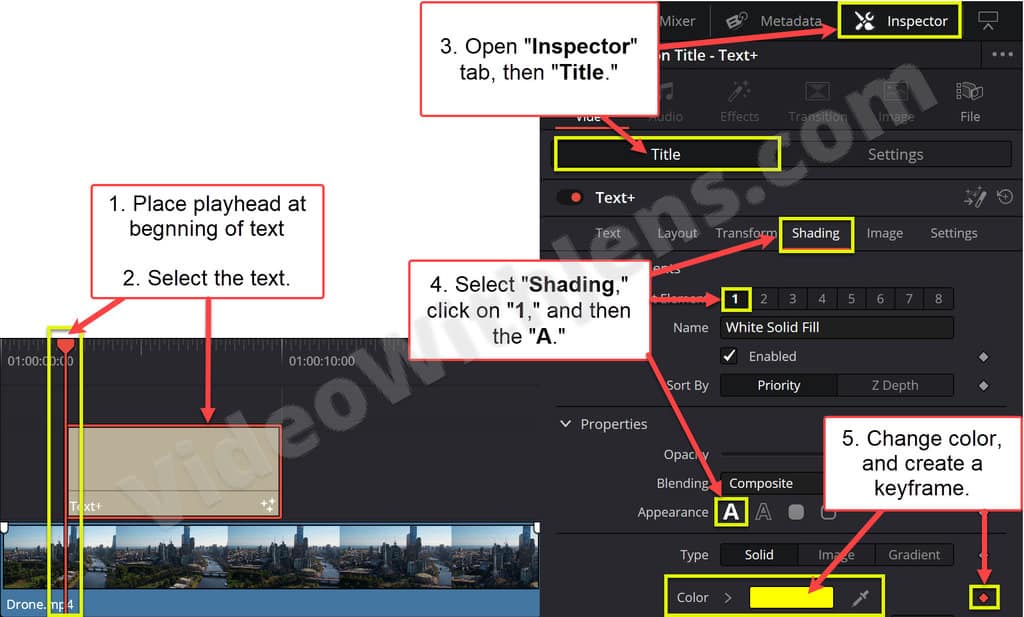
Then, add a “Text+” title to the timeline, as I showed you here, and place the timeline playhead (red time marker) at the beginning of the text layer (see the image below).
Select the text in the timeline, and open the “Inspector” tab > “Title” > “Shading.”
Now, you should look at a bunch of numbers from 1-8; click on 1, and make sure the box next to «Enabled» is checked off.
A little further down under “Properties,” when choosing “Appearance,” click on the “A” icon to the left.
Then click on the box next to “Color,” set the color you want the text to be in the beginning, and click on “OK.”
Lastly, click on the diamond icon next to the color box to create a keyframe (the diamond should turn red).
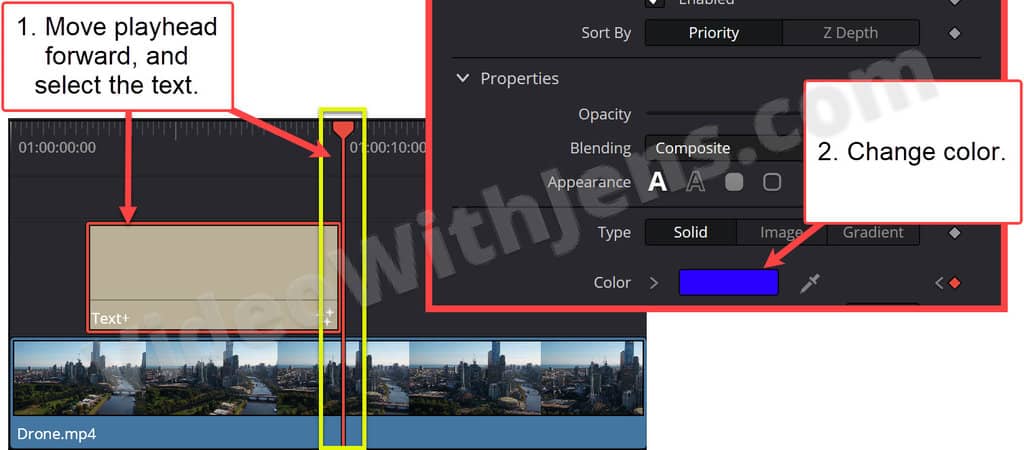
Now, move the playhead in the timeline to where you want the text color to be entirely changed.
Then, select the text in the timeline, and change the “Color” in the inspector. A keyframe will automatically be generated on the second adjustment.
Check out this article on how to customize and add animation to the text… and much more!

