3 Cinematic Ways to Fade Audio in Davinci Resolve
In this article, I’m going to show you 3 different ways to fade audio in/out in Davinci Resolve!
You’re here because you understand how important it is to have smooth audio for the video to be good. Just suddenly bumping down the volume on the music or audio is something that can ruin the overall greatness of a video. Therefore it’s important that we know how to properly create audio fades!
Here are 3 incredible way to do it for the best results:
1. Fastest Audio Fade (The Audio Handles)
To be honest I’m not totally sure what they call these but this is by far the quickest way to fade in or out audio in DaVinci Resolve. This is the method described above in detail.
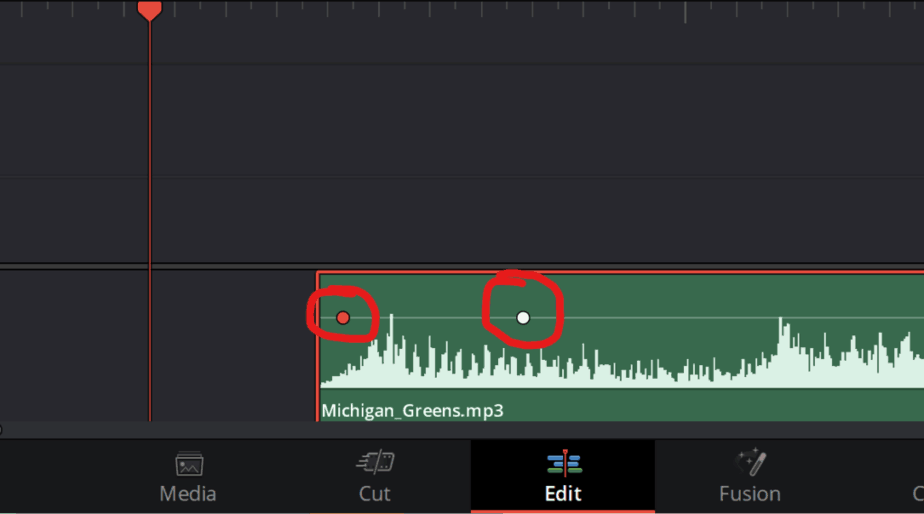
So what I mean by “Audio Handles” is this gray handle I’ve circled around in the picture below. To make this appear hover your mouse over the audio track.
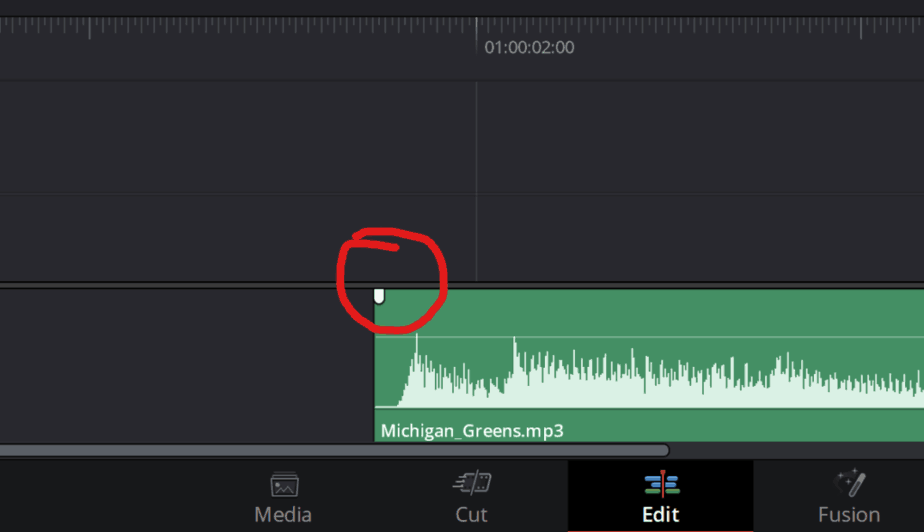
Now grab the handle and drag it to the right. (To the left if it the end of and audio clip.)
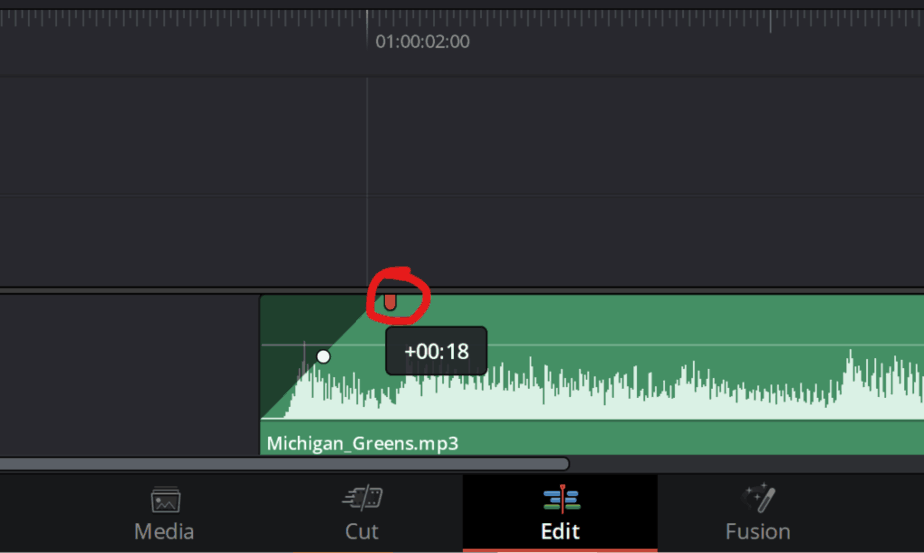
Notice that when you are dragging the handle this timer appears. This is telling you the length of the fade. So in the picture above it will last for 180 milliseconds. So in that time it will go from zero to full.
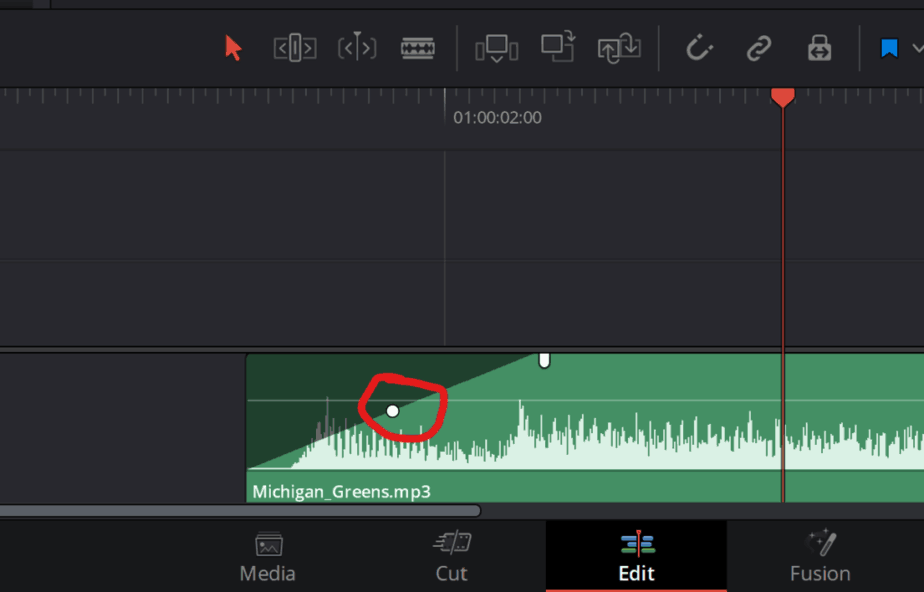
When you’re happy with the length of the fade also have the opportunity to curve the fade. You do this by grabbing that white circle in the middle of the fade.
By pulling this you can adjust how you want the audio to fade in. In the picture above the audio will first turn fast up then gradually go to full volume.
This way of fading is the easiest and quickest way to do it. But I want to show you two more ways that are better depending on what situation you are facing!
By applying these audio fades your video will sound much more cinematic! You’re one of the few that gets that audio is crucial for a good video. It’s actually the most underestimated factor in video editing. A video can be edited by a professional, but if the audio quality is lacking, people won’t notice anything other than the bad audio…
Important: Normal headphones, earbuds, and laptop speakers actually manipulate the audio before it’s sent to your ears. Even in the editing program, there is actually no way to avoid it, except using studio headphones, these won’t change the audio and send the original audio sound to you. Then you can detect the bad parts of the audio without your headset preventing you…
This is the reason, soo many YouTubers’ audio are awful. The audio will sound good in their headphones because the sound is manipulated. Anyway, this article is not about that, but it has quite a bit of traffic… So wanted to inform people about this. If you want to know more about studio headphones, here is an article I’ve written about a couple of ones.
2. Using Keyframes to Fade Audio
This method of fading is really nice. It’s also very versatile for what you can use it for. You can use this method for fading in and out the audio clips, but you can also for example do it in the middle of an audio clip.
The way audio keyframes work is that we are simply changing the shape of the line that determines the audio volume of a clip. If you’re not familiar with this line it’s the one I’ve circled around in the picture below.
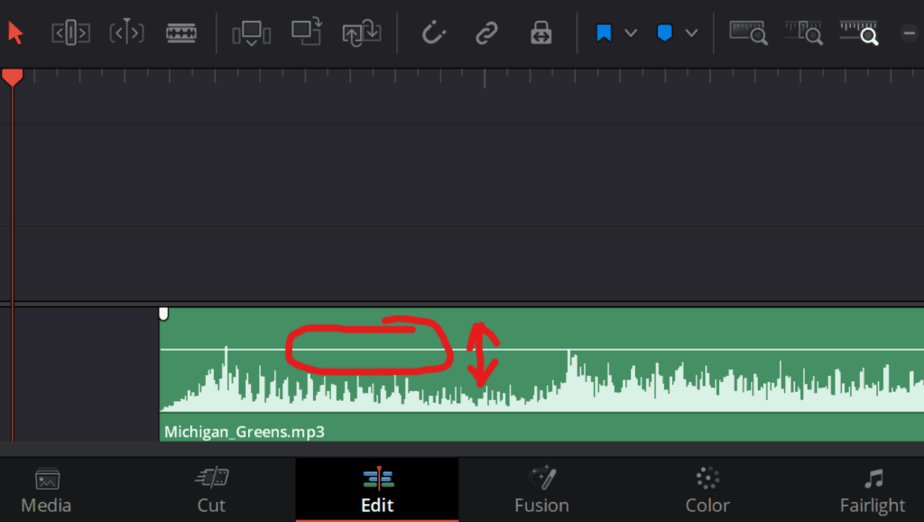
If you not have touched this line it’s by default set to 0 dB. You can grab this line and pull it up and down. By doing this you are turning the clip’s volume up and down. In doing so you’ll see a black box on the side of your cursor showing you how many dB you’ve changed the volume!
Now with that out of the way let me show you have keyframes work. So instead of moving the whole length of the line or changing the volume of the whole clip. We can set keyframes that make it possible to bend the line exactly at the place (keyframe) you want.
Here are two keyframes I’ve applied to the audio clip. The easiest way to apply them is simply to hove your mouse over that volume line where you want to bend it. Then hold down Alt+left-click the line.
Now you’ve made one keyframe, but you always have to make two to make them work. So go ahead and make another one. Now in the picture, I’ve set the second one to the place I want the fade to end and the first one which is red (means it’s selected) doesn’t matter where you place it.
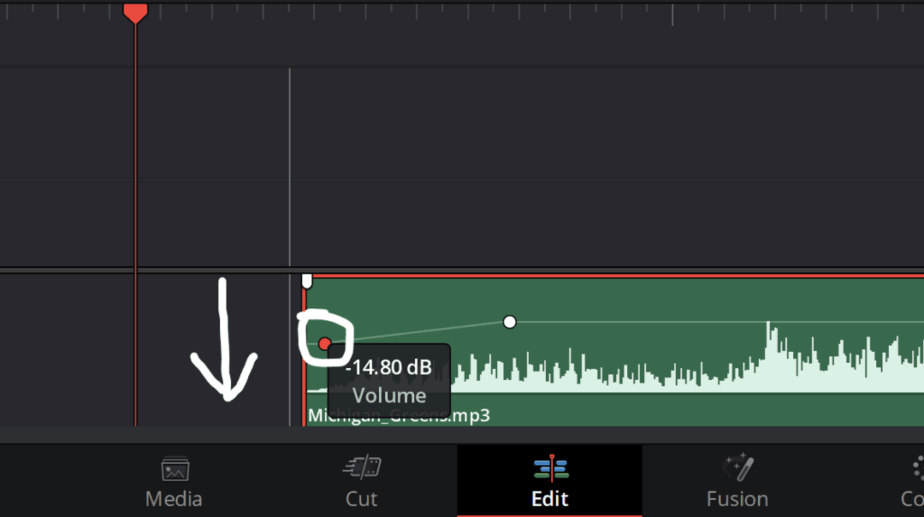
To create a fade grab the first keyframe and pull it down life in the picture.
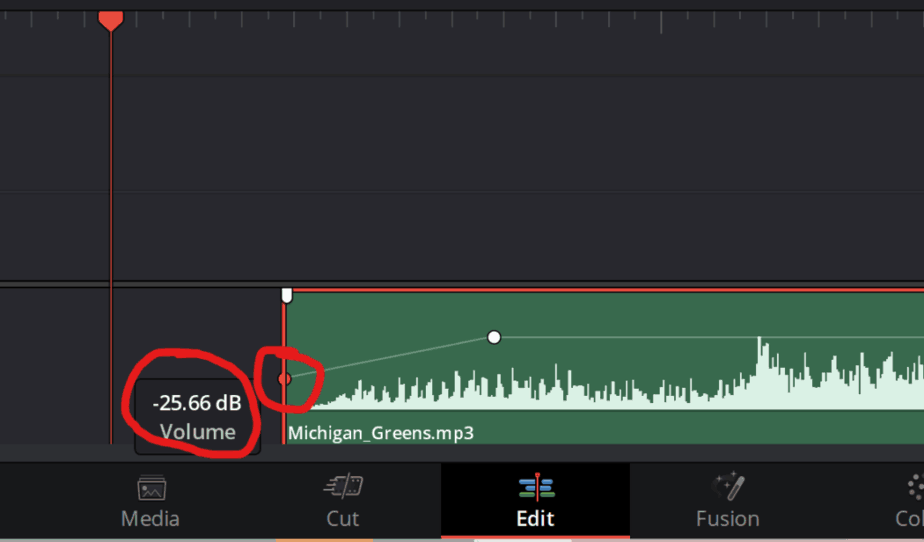
You can also pull it to the sides or where ever you want. To create the fade I’ve pulled it to the start of the clip at -25.66 dB which is the volume I want it to start at. And then it will play to the second keyframe which is unchanged (0 dB). You can change on that one too if you want to change the volume of the entire clip.
If you’re satisfied with that way of adding keyframes you can jump forward to the next head headline. This is just another way of adding keyframes.
Here’s another way to add the keyframes:
If you would like to add the keyframes “manually” or do the whole process instead of just pressing Alt-key there is another way of course.
To do this you place your timeline cursor where you would like to add a keyframe. Like in the picture below, here I’ve placed it where I want my fade to end.
Now once you have placed where you want your keyframe, and have the clip selected head over to the inspector on the right side. If it’s not already open you may have to click on instector. Use the arrow if you want to expand the inspector window.
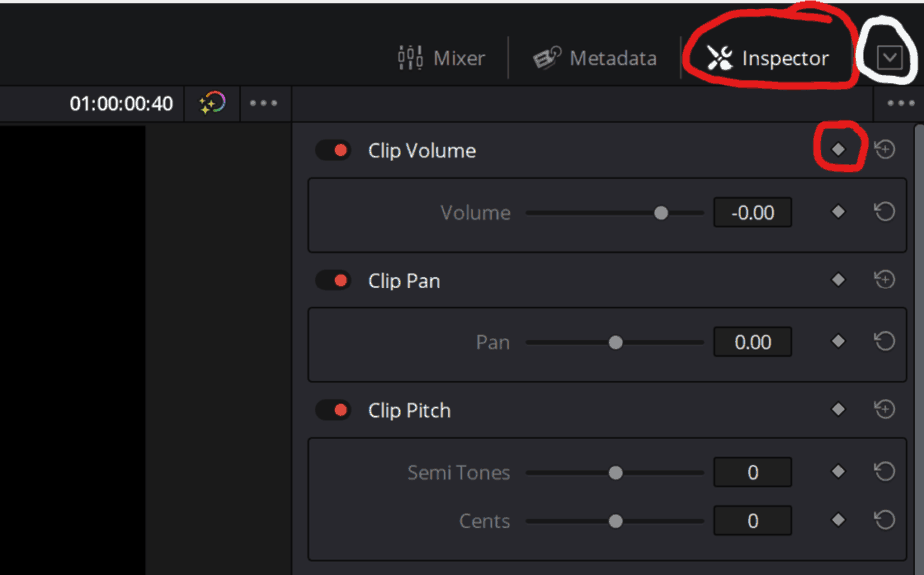
In inspector on the top you can see “Clip Volume” and on the right side the keyframe button which I’ve circled around. To add a keyframe just click on it and it will add a key frame where you placed the timeline cursor. To add another one you have to move the cursor alittle to one side.
Now you can select once of the keyframes and use the “Volume” in the Inspector tab. Just drag it to where you want, and by doing this you’re changing the position of your selected keyframe!
That’s the manual way of doing it for those who like that. What nice doing it this way is that you can type in what dB you’d like, and instead of aiming for it. Which is some cases is really nice as well.
3. Using Crossfade (Gives you more options)
The last method of fading audio is by using crossfades which you’ll find in the Effects Library!
You’ll find the Crossfades by going to “Effects Library>Toolbox>Audio Transitions”.
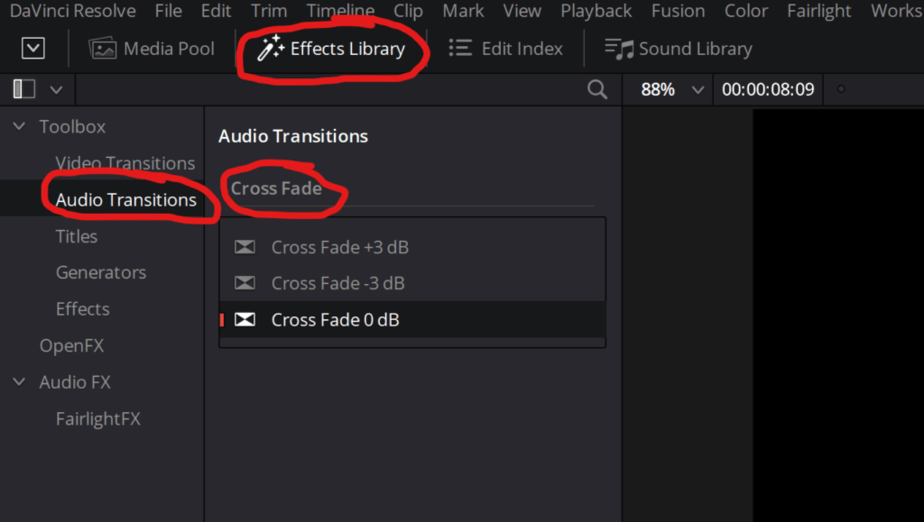
Now once you have it open you have few options to choose from. The default one is 0 dB and is the one I’m using. Now all you have to do is to drag it onto the audio clip you want the fade on.
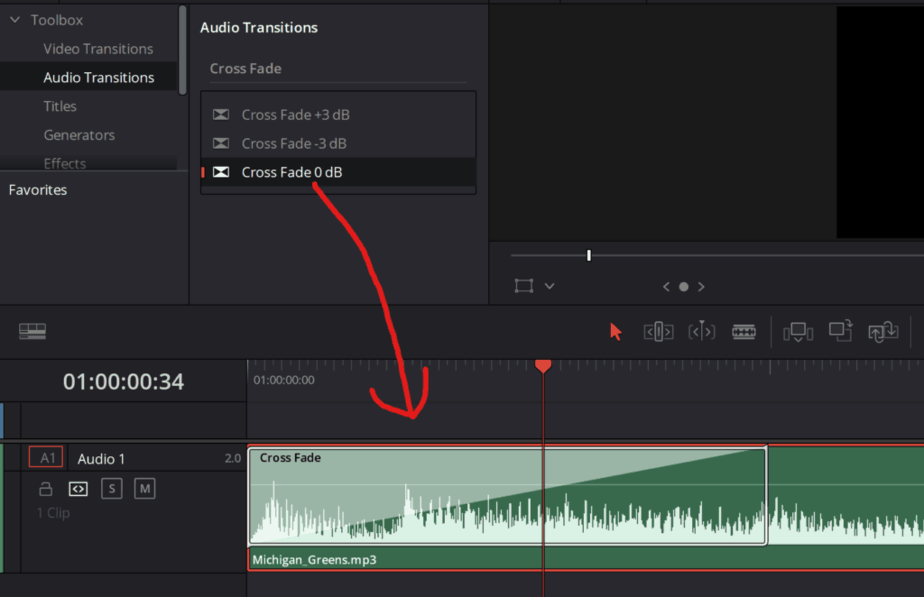
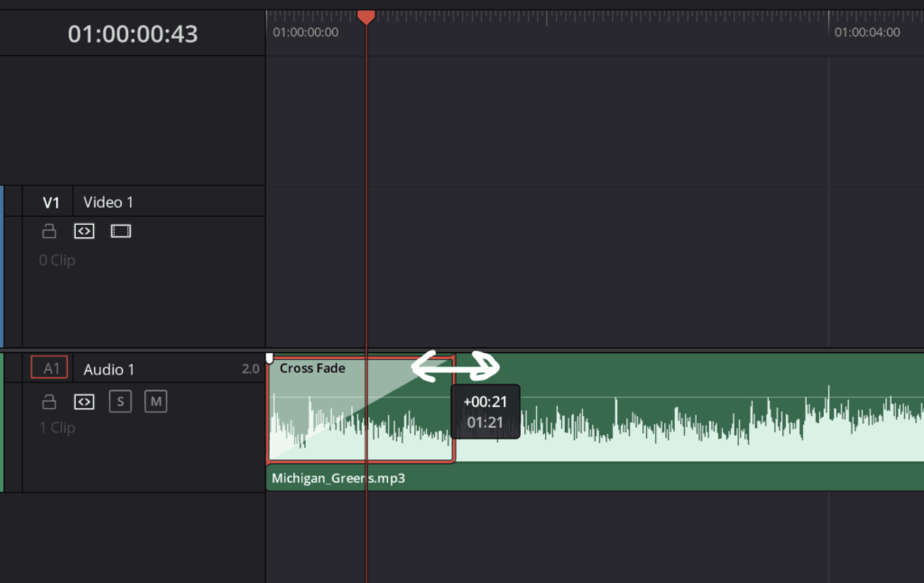
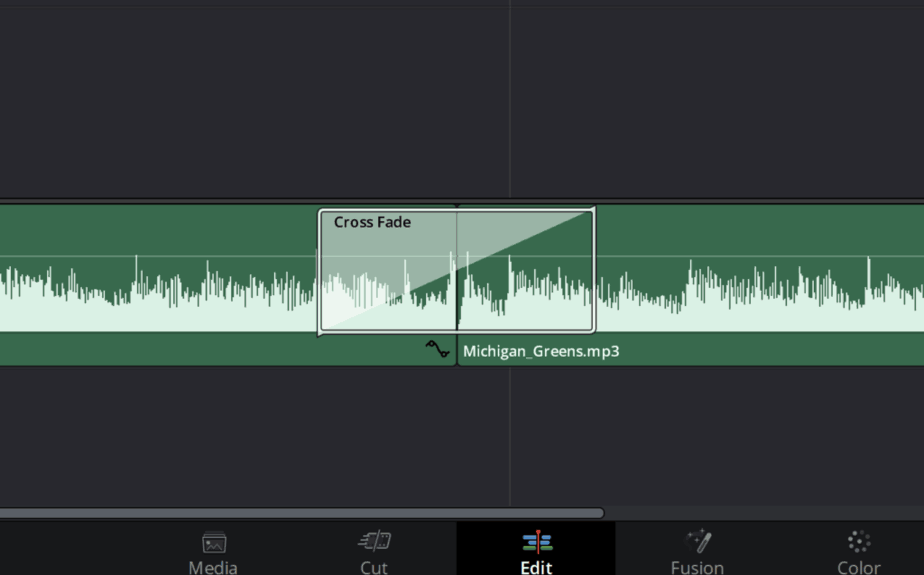
Now it’ll look something like this, you can see im pretty zoomed in on it. Now you already have applied a face to it. But you can adjust it to make it sound how you like. If you want to increase the length of it just grab the edge of it and expand it.
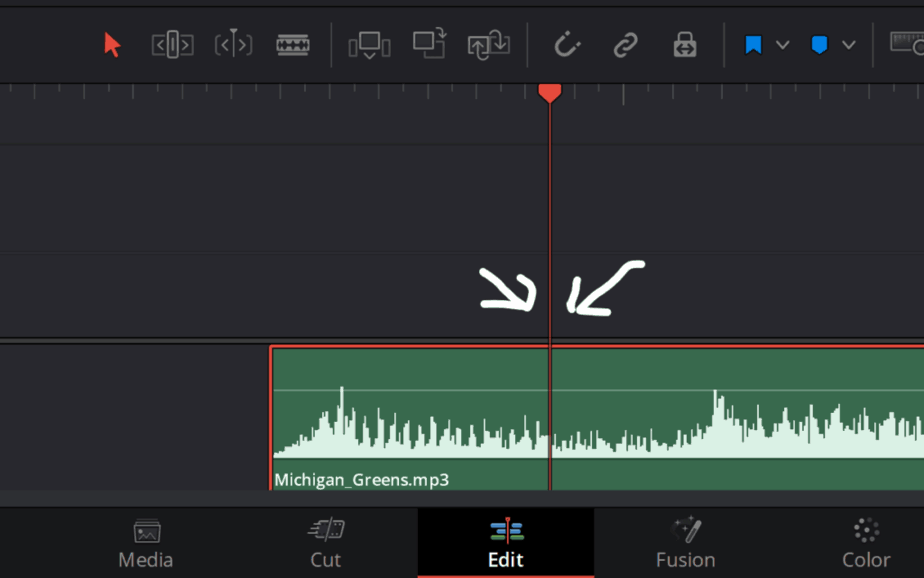
You can also add crossfades between two audio clips and make a more smooth transition. Then all you have to do is instead of dragging it to the beginning or end of a clip. You simply drag it between two clips! It will then look like the picture below.
Also if you like more controll over what you’re doing you have the Inspector as mentioned earlier.

From here you can do all the stuff mentioned over. I recommend playing around with it a bit, just to get a feeling of how it’s working.
Here’s the article I wrote about studio headphones. If you skipped past that part of the article, I recommended everyone serious about getting good audio to read it. Because normal headphones and such manipulates the audio to sound good, so you are not editing genuine audio if you are not using studio headphones. Not so many people know about this, hence the reason why quite a lot of YouTubers have terrible audio… Since the audio may sound good in their speakers… Anyways, it’s a good read if you’re interested.
So there you go! Three ways to fade in or out audio in DaVinci Resolve!
I hope you found what you were looking for and this article to be helpful!
Cheers,
Jens