6 Ways to Import Media in DaVinci Resolve
Knowing how to import media to DaVinci Resolve is probably the most important thing to know when you are going to edit videos.
However, there are so many ways to do this in Resolve that it can become quite confusing.
Therefore, I will give you a quick overview of the different ways to import media, and then you can choose the one you like the most.
If you are here because you are unable to import your media, check out this article instead.
Here’s a quick answer for those in a hurry:
To import media to DaVinci Resolve, click on “File” > “Import” > “Media,” select the media in your file system, and click on “Open.” Alternatively, press the keyboard shortcut “Ctrl + I” (Windows) or “Command + I” (Mac), and import your media.
Method 1
This is the method I prefer, as it’s quick and straightforward.
First, go to the “Edit” page inside DaVinci Resolve:
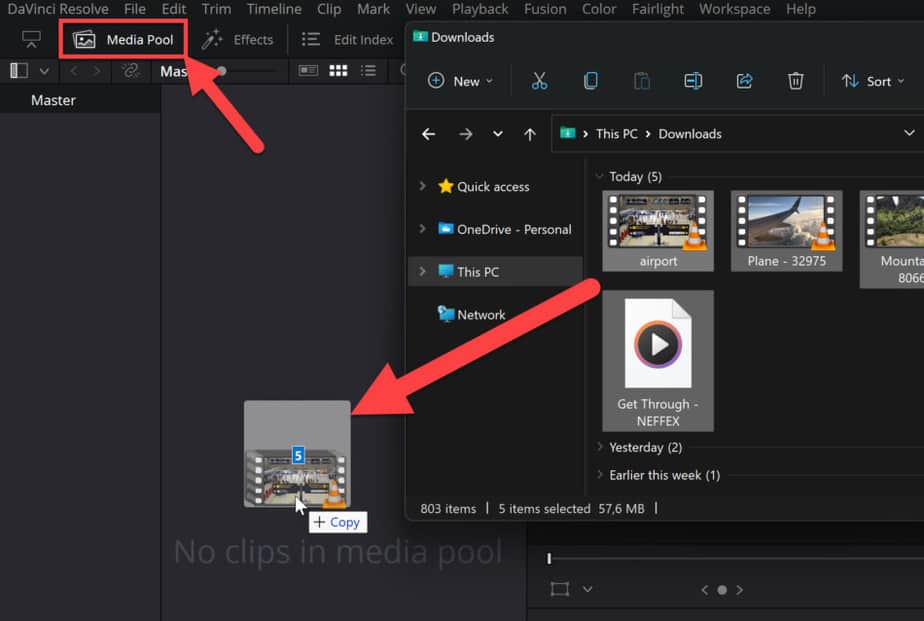
Next, open the “Media Pool” in the top left-hand corner and locate the media you want to import on your storage device.
Now all you have to do is select the files you want to import, then drag and drop them into the gray area inside the “Media Pool” in DaVinci Resolve (Watch the image illustration below).
TIPS: to select the clips you want to import, hold down “Ctrl” or “Command” while left-clicking on them. Then you can drag all of them into the “Media Pool” at once.
If you cannot drop the clips in DaVinci Resolve, check out this article on how to fix it.
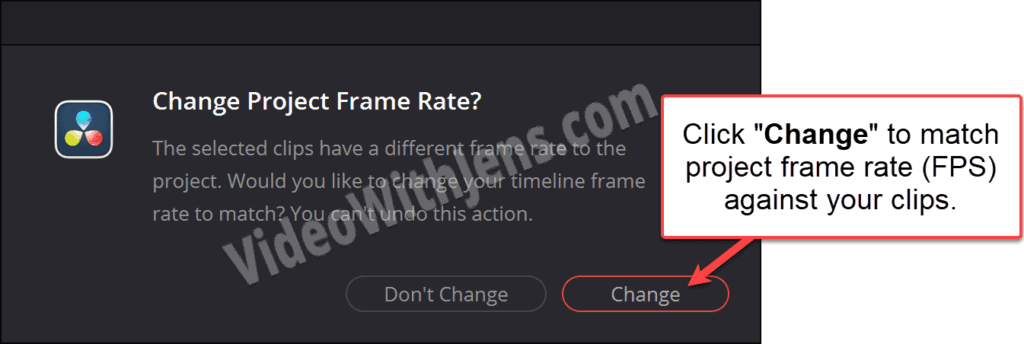
If you are importing video clips, and it’s the first one, you will get a popup message asking, “Change Project Frame Rate?”
Clicking “Change” will match the project settings’ frame rate to one of your videos. Usually, this is what you want. However, if your videos have different frame rates, it might be better to set the project frame rate manually.
Method 2
Here’s an importing hack that not many people know.
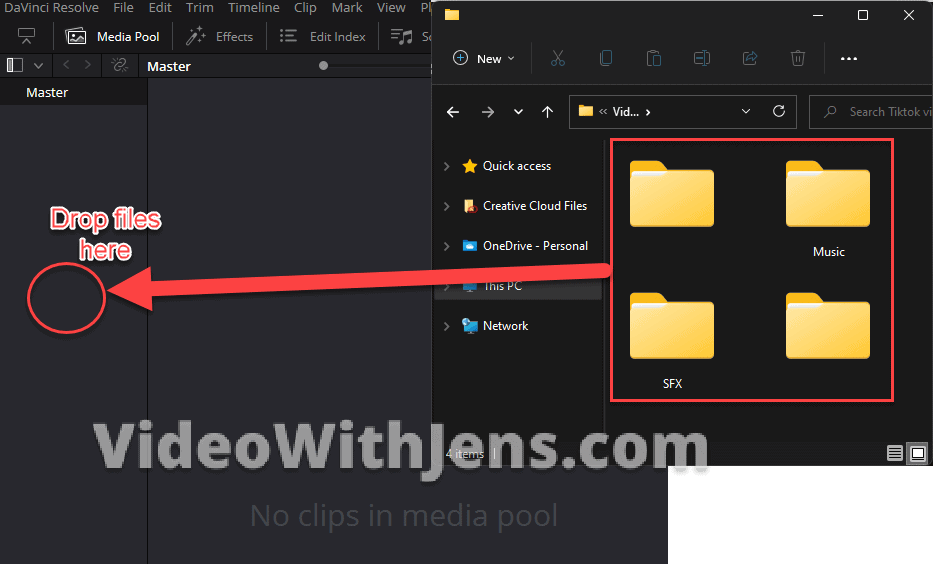
If you have organized the media in folders and sub-folders in your file system (if not, you definitely will after reading this), you can also import the structure into Resolve!
Drag and drop the folders (or main folder) in the “Media Pool,” however, this time, all the way on the left (the column beneath “Master“).
Watch the image illustration below:
Method 3
This method is quite excellent as well.
The best part about importing this way is that you can do it from all the pages inside Resolve except for the “Deliver” page.
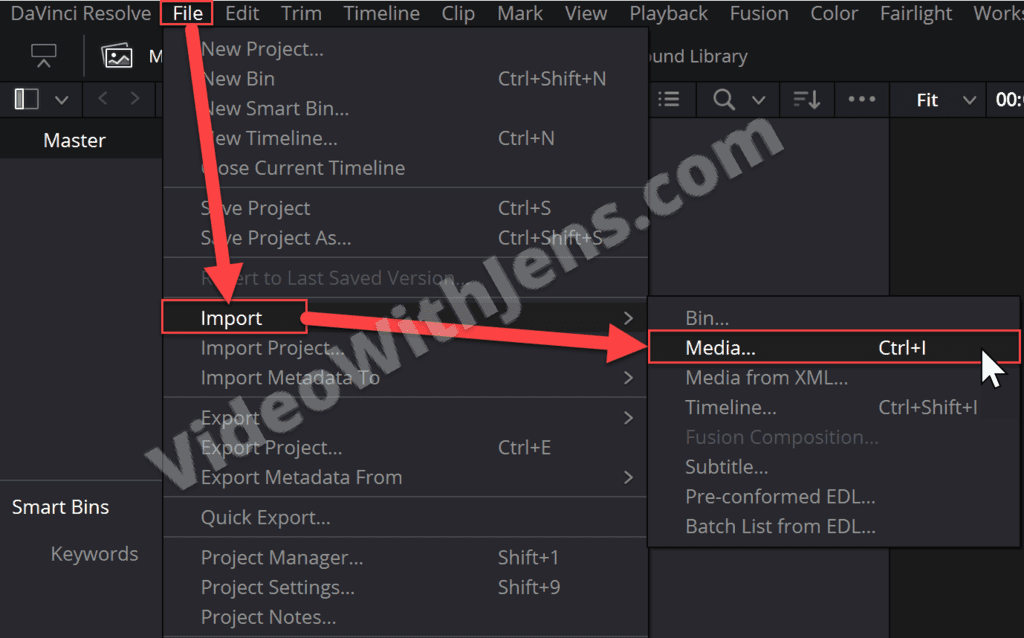
Locate and click on “File” in the left-hand corner of Resolve, then click on “Import” > “Media,” and select the files you want to import into your file system.
Alternatively, use the shortcut “Ctrl + I” or “Command + I” (Mac), and then import your media.
- I recommend using the keyboard shortcuts whenever it’s possible!
Those are the methods I usually utilize when importing clips.
However, since DaVinci Resolve has a dedicated page for this “sole” purpose, I will show you how to use the “Media” page as well:
Method 4
Open the “Media” page by clicking here:

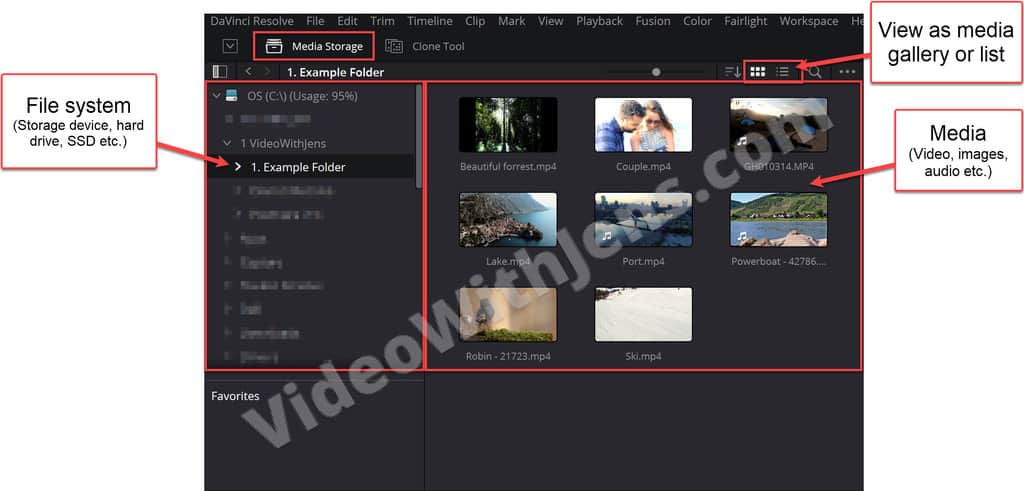
Then, open the “Media Storage” tab in the top left-hand corner.
What’s incredible about this page is that you can view your file system from within DaVinci Resolve!
This is the only page where you can do that, so it’s pretty special :’)
You should be able to see your storage units in the column on the right side of the “Media Storage” tab.
Once you’ve opened the folder with the media inside, you should see it on the right side of the column, like in the image below.
If you want to change the way the media are presented (thumbnails or list format), click on the icons in the top right-hand corner of the “Media Storage” unit:
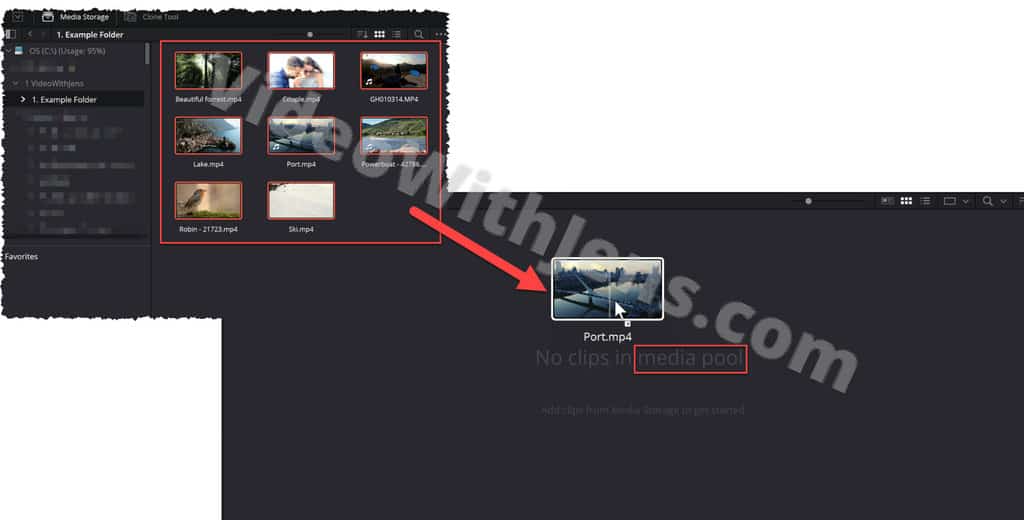
But the media in the “Media Storage” tab is not imported to DaVinci Resolve yet…
You can import them a couple of ways; the easiest one is to select them, and then drag and drop the media in the “Media Pool” located at the bottom of the “Media” page.
Watch the image illustration below:
Method 5
Another way you can do it is by selecting the clips you want to import, right-clicking one of them, and clicking on “Add into Media Pool.”
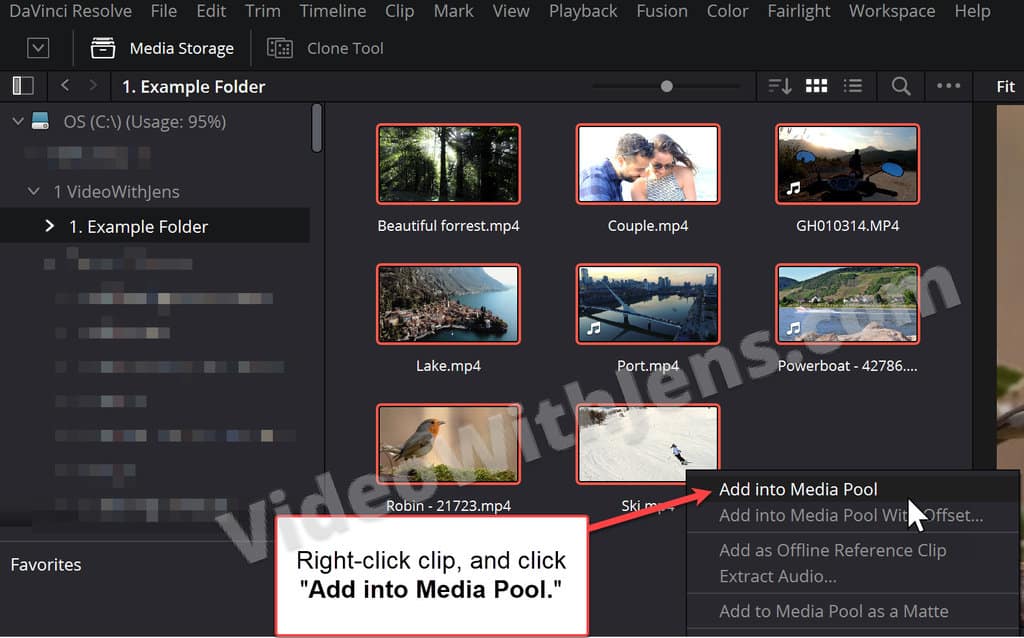
Your clips should now appear in the “Media Pool.”
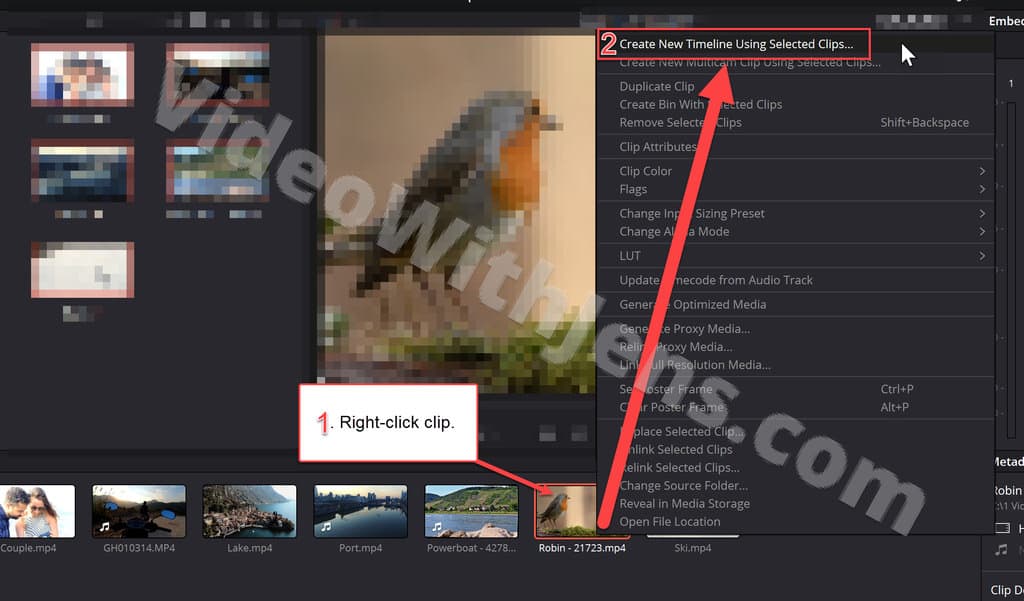
If you want to add them to the timeline, you can right-click them and then click on “Create New Timeline Using Selected Clips.”
Then you can open the “Edit” page, and they should be in the timeline.
- You can only use this option once; if not, you will create multiple timelines…
Method 6
There is one more method I want to cover. This one is nice if you have organized the media in your file system, as you can import the folders to Resolve as we did in method 2.
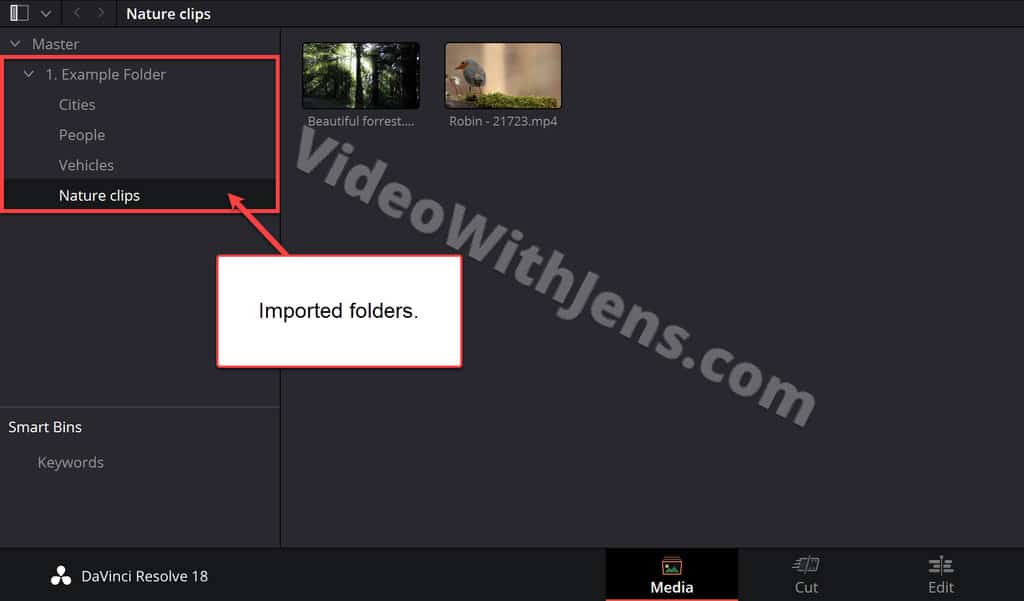
As you can see in the image below, my “1. Example Folder” has a bunch of sub-folders, which I wish to import.
Therefore, I right-click the main folder (1. Example Folder) and then select “Add Folder and SubFolders into Media Pool (Create Bins).”
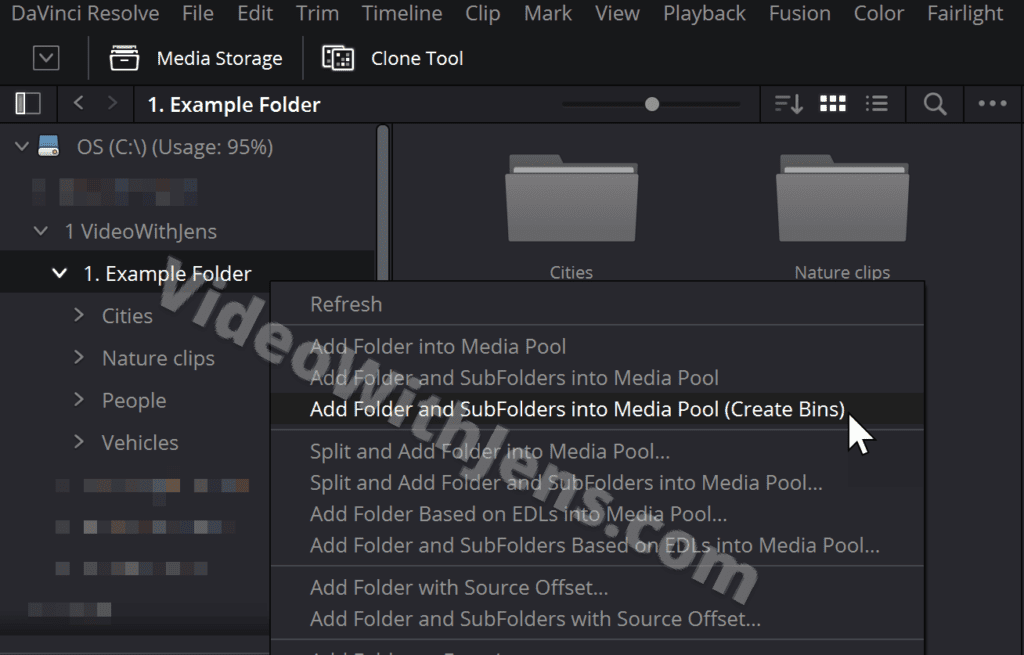
You’ll find the folders in the column on the left of the “Media Pool.”
Remember that the “Media Pool” is the same on all the pages inside Resolve. So if you import using the “Media” page, you’ll still find the media in the “Media Pool” on the “Edit” page.