How to Outline Text in DaVinci Resolve (& Subtitles)
In this quick tutorial, I’ll show you how to outline text in DaVinci Resolve.
You’ll also learn how to outline subtitles and text on the “Fusion” page.
Click on the links to jump to a specific part:
- How to Quickly Outline Text. (Standard method)
- How to Outline Text on the Fusion page.
- How to Outline Subtitles.
Let’s get to it!
How to Outline Text in DaVinci Resolve
Here’s a short summary for those in a hurry:
- Go to the “Edit” page.
- Open “Effects” > “Titles,” and add the “Text+” to the timeline.
- Select the text generator and open the “Inspector” tab.
- Open the “Title” > “Shading” sub-tab.
- Click on “2” against “Select Element.”
- Check off the box next to “Enabled.”
- Select the hollow “A” against “Appearance.”
- Increase the “Thickness” to make the outline more visible.
Detailed Answer
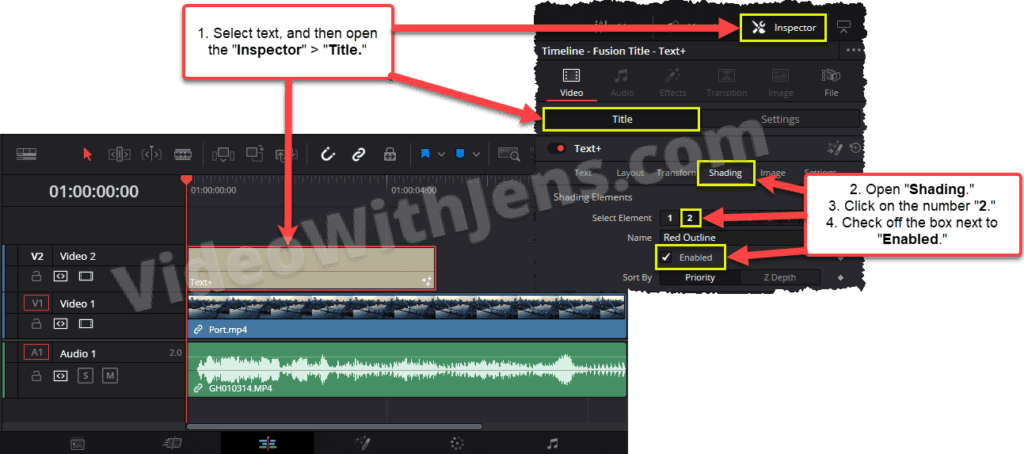
Select the text generator in the timeline, and open the “Inspector” tab > “Title” > “Shading.”
Then you’ll see a row of numbers asking you to “Select Element“; click on the “2,” and check off the box next to “Enabled.”
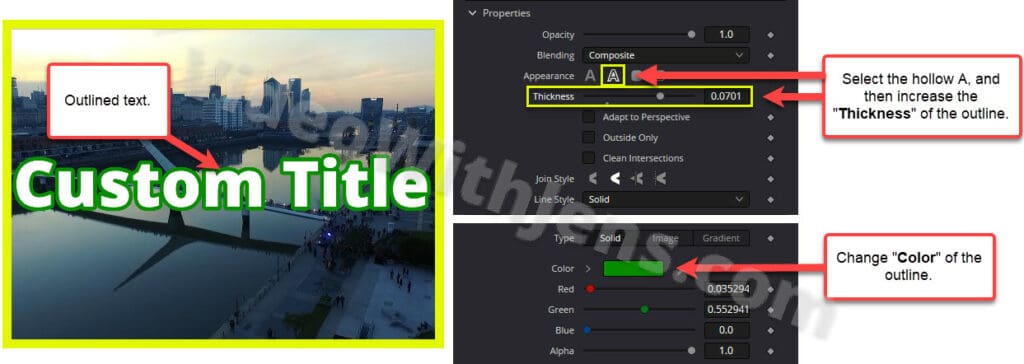
A little further down in the “Inspector” under “Properties,” click on the hollow “A” next to “Appearance.”
Then use the slider next to “Thickness” to adjust the outline size.
If you want to change the outline color, click on the box next to “Color,” change the color, and click on “OK.”
That’s it!
Next, I’ll show you how you can customize the outline.
How to Edit the Outline (Style it)
You have some additional settings in the “Inspector” to adjust how the outline looks.
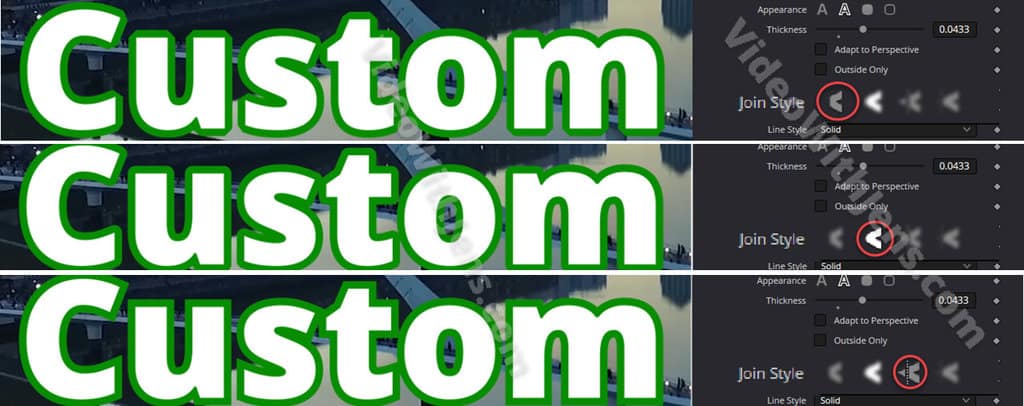
One is the “Join Style,” where you can choose between 4 different styles.
These control how the edges of the outline are going to appear.
Since an image says more than a thousand words, I’ve made an illustration below showing you how the different styles affect the outline!
- I did not include the fourth style as it did not differ from the third style.
The next option is the “Line Style,” where you can make the outline appear as dots, dashes, or a mix instead of a solid continuous line.
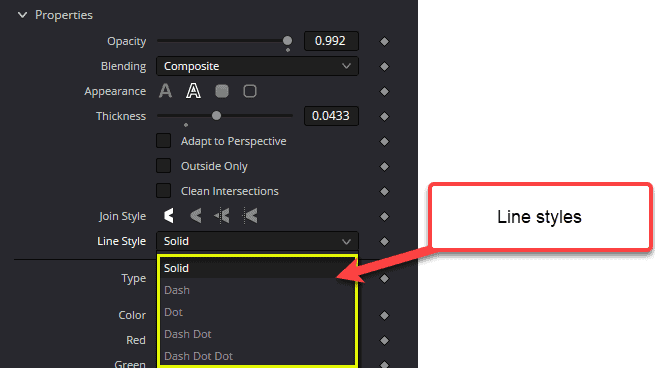
In the image below, you get an idea of what the “Dash” and “Dot” style looks like.
Also, try adjusting the “Thickness” when using these types of outlines, as they will change A LOT!
- With a green outline, you could, for example, make it look slim using a “Dash Dot” outline while increasing the “Thickness.”

It’s also possible to make the outline color gradient!
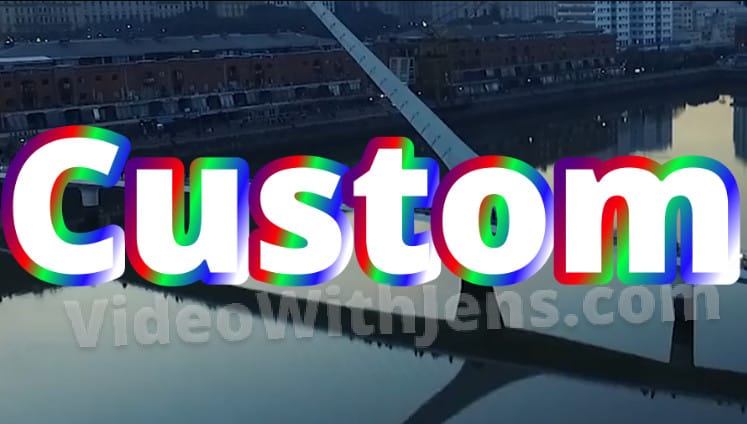
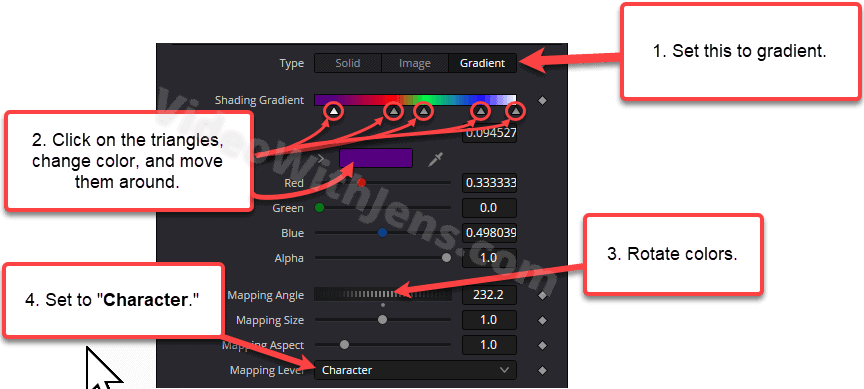
To do this, change the “Type” from “Solid” to “Gradient.”
Then click on the color scale next to “Shading Gradient” to create the triangles you can see in the image below; these will represent a color.
If you want to make a colorful gradient like the one in the image above, you have to create many triangles, as it’s many different colors.
Next, click on the triangles and the color box below to change the color.
Then, adjust the position of the triangles to make the gradient look smooth.
Adjust the “Mapping Angle” to change the color scale’s angle.
Lastly, set the “Mapping Level” against “Character.”
You can also make the outline more alive by adding some animation!
How to Animate Outline (Add movement to it)
To do this, we will make the “Mapping Angle” change over time, making the colors glow.
- If you didn’t read the “Mapping Angle” part, watch the image above.
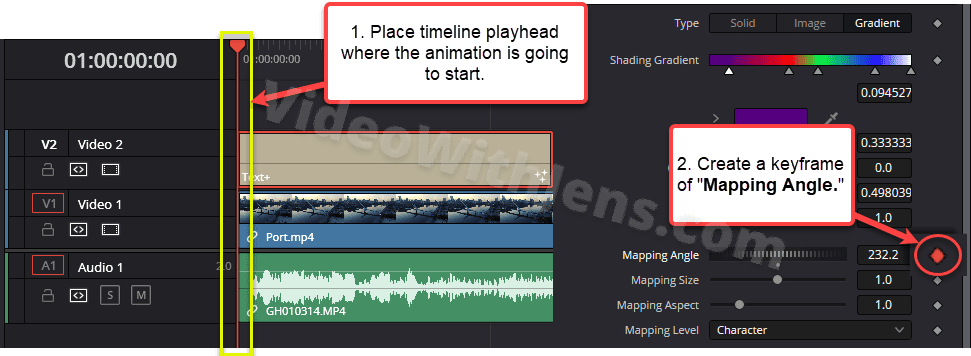
Start by placing the timeline playhead at the beginning of the text generator in the timeline, select the generator, and go to the “Mapping Angle” in the “Inspector” tab.
Now, click on the diamond icon on the right side of it, as it turns red, then you have created a keyframe.
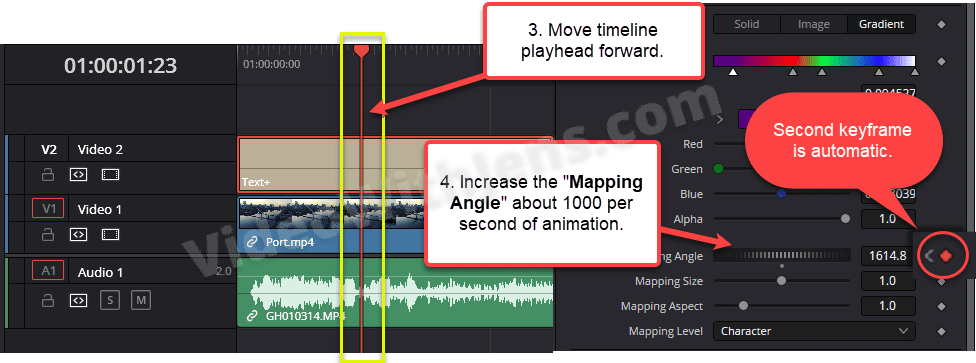
Next, move the timeline playhead forward to where you want the animation to stop.
- The playhead must be placed over/on top of the text generator!
Then, increase the “Mapping Angle” by rotating the wheel. I recommend increasing the «Mapping Angle» value by 1000 per second of the animation.
- So if you moved the timeline playhead 3 seconds forward, then set the “Mapping Angle” to 3000.
- A keyframe will be automatically generated the second time.
This number is what I found to look good; it’s based upon the assumption that the “Mapping Level” is set against “Character.”
Check out this article on how to customize the text itself, and add animation to it!
It’s also possible to outline text using the “Fusion” page:
Outline Text on DaVinci Resolve’s Fusion Page
- Add a “Text+” node to the node tree.
- Select the text node, and open “Inspector” > “Shading.”
- Select the element number “2” and enable it.
- Click on the hollow “A” next to “Appearance.”
- Increase the “Thickness” to make the outline more visible.
Detailed Explanation:
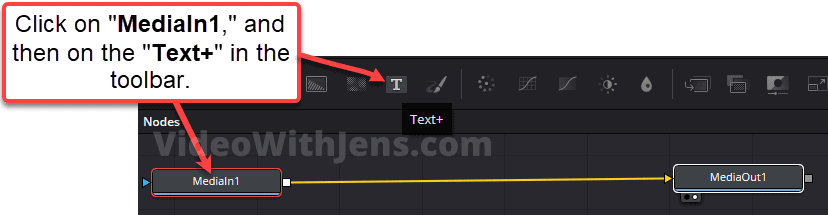
You need to add a “Text+” node to the node tree if you haven’t already.
To do this, click on the “MediaIn1” node and then click on the “Text+” in the toolbar above the node graph.
Then it should be connected to the “pipeline” through a merge node.
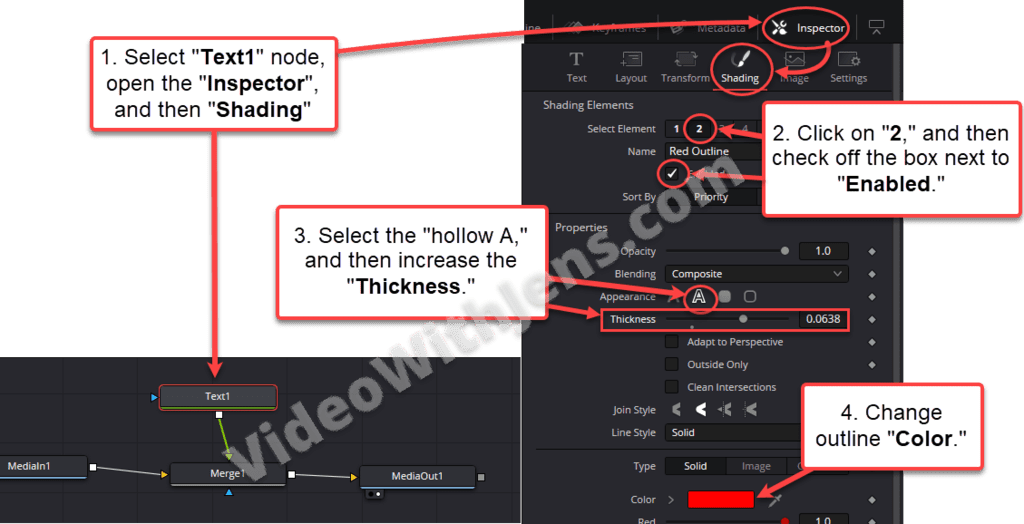
Next, click on the text node to select it, open the “Inspector” tab, and then the “Shading” sub-tab.
Here you’ll first be presented with a row of numbers; click on the number “2,” and then check the box next to “Enabled.”
A little further down, where it says “Appearance,” click on the hollow “A” icon, and then increase the “Thickness” by using the slider (see the image below).
Lastly, click on the box next to “Color,” if you want another color…
To make more adjustments to how the outline looks, I wrote about that above.
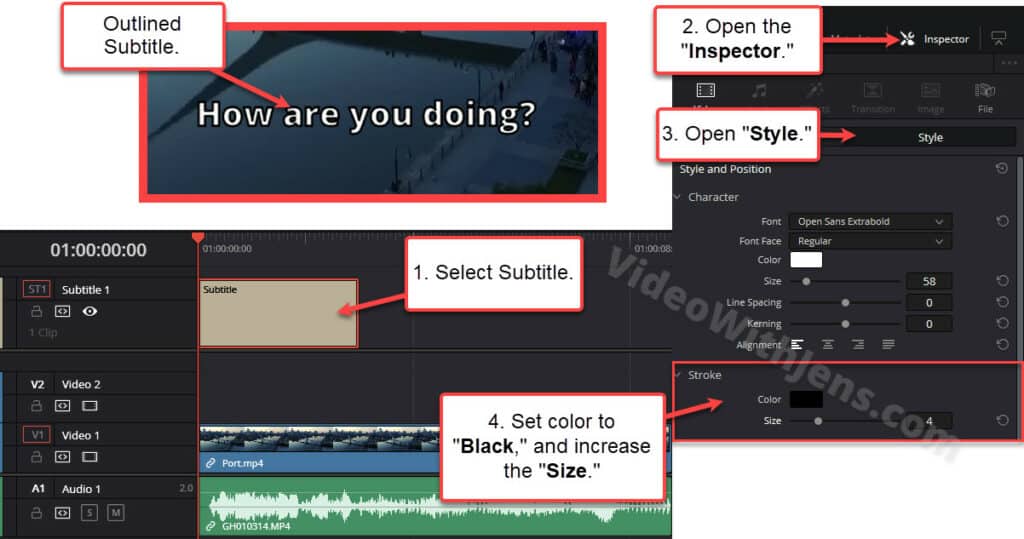
How to Outline Subtitles
To outline subtitles in DaVinci Resolve, select the subtitle generator in the timeline and open the “Inspector.” Next, open the “Style” sub-tab, and then under “Stroke,” increase the “Size.”
Watch the image below for more details:
Check out this article on how to add subtitles effectively.