3 Best Ways to Fix Laggy Playback in Davinci Resolve
Are you experiencing choppy playback while editing your videos? Then optimizing media (also known as proxy files) in DaVinci Resolve will most likely be your best bet. As long as your PC isn’t from the 90s or something. Let’s get to it.
1. Optimize Media in DaVinci Resolve (Updated for 2021)
Creating optimized media is definitely the most powerful way to get rid of lag. However, I would actually try some of the other methods first before trying this one! Scroll down for them, and come back and try this one if none of those works!
- Project Settings>Master Settings>Optimized Media and Render Cache.
- Set “Optimized Media Format” to DNxHR SQ. (For Mac: ProRes 422).
- Go to Playback and Enable “Use Optimized Media if Available”.
- Right-click clip and select “Generate Optimized Media”.
Let’s dive a bit deeper into what I briefly explained above. I may change between using the word proxy and optimized media, but these mean the same thing. If you’re coming from Premiere Pro you may be more used to the proxy files.
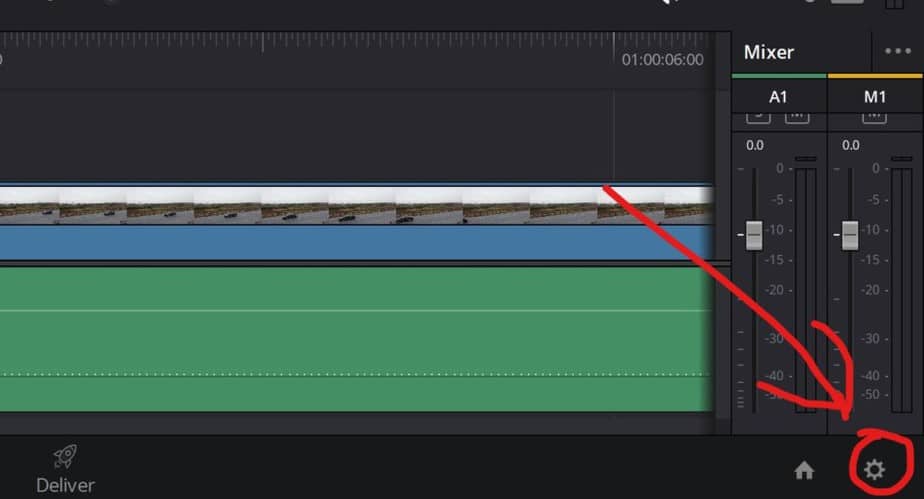
The first thing you have to do is to open Project Settings, which you can do by clicking on that gear icon. Or you can open it by doing like the picture below.
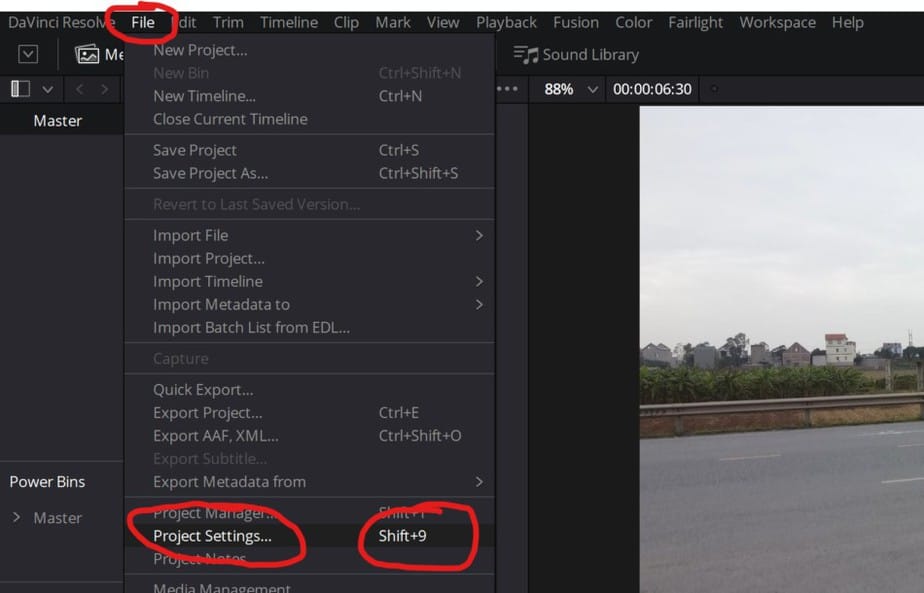
This is another way of doing it, if you want to be superfast just press “Shift+9”.

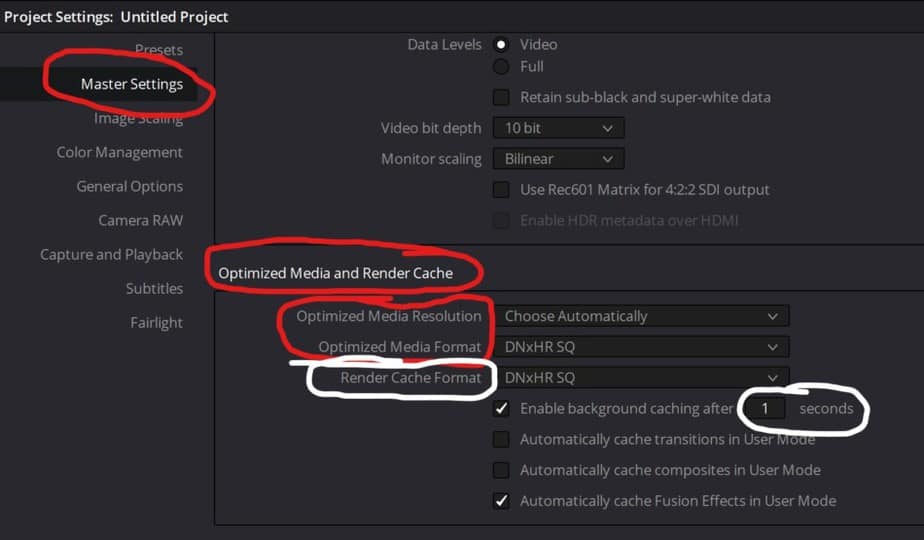
Now go to “Master Settings” and scroll down to “Optimized Media and Render Cache”.
Here you have a few options to choose from.:
Optimized Media Resolution: This is what resolution you want your proxy files to be in. This is your decision as it varies from computer to computer how much it can handle. But remember the higher you set it the bigger the files will and the more memory it will require. Also if you’re going to add a lot of effects and color grading to it, it may prevent you from choppy playback. Test the different out and see which of them suits you the best.
Optimized Media Format: This is what format you want to transcode your video to. DNxHR SQ I’ve found to work very well, but this depends on your needs of course. Everyone of them have their advantage.
If you’re on a MacBook, I don’t believe you have this option. Instead you have something the Windows users don’t have! You have the ProRes formats. After doing some research you can safely choose the “ProRes 422”, which a lot of Mac people seem to prefer.
Additional options: I also recommend changing the “Render Cache Format” to the same as the one above. Like I’ve done in the picture. Also set the “Enable Background Caching after” to 1 second. These settings are not for proxies but something we can use later on, if you get choppy playback when you are using your proxy files.

Now go ahead and press “Save”.
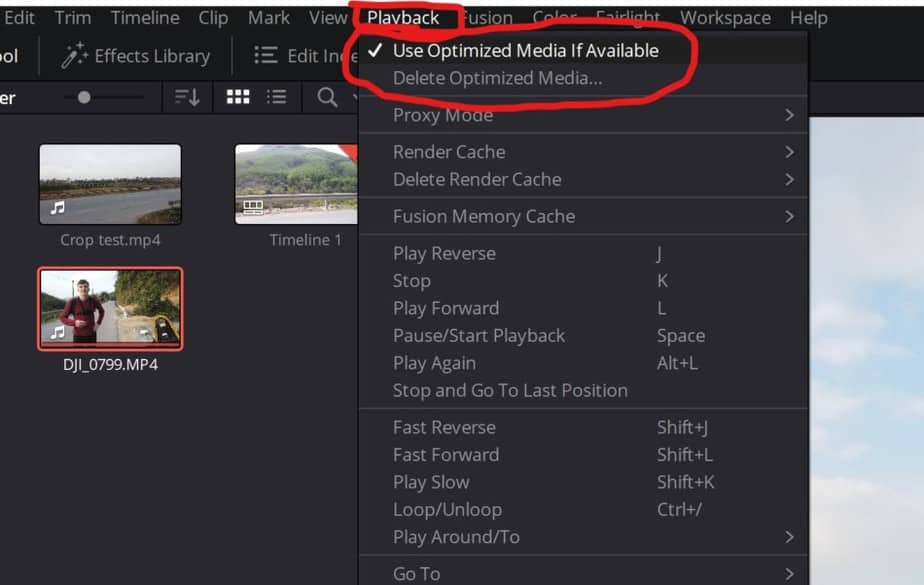
Open the Playback tab in the menubar. Here you must enable “Use Optimized Media If Available”. Also notice the “Delete Optimized Media” which is nice if your PC memory is getting full.
If you want to see your original footage once in a while, all you have to do is to disable the “Use Optimized Media if Available.
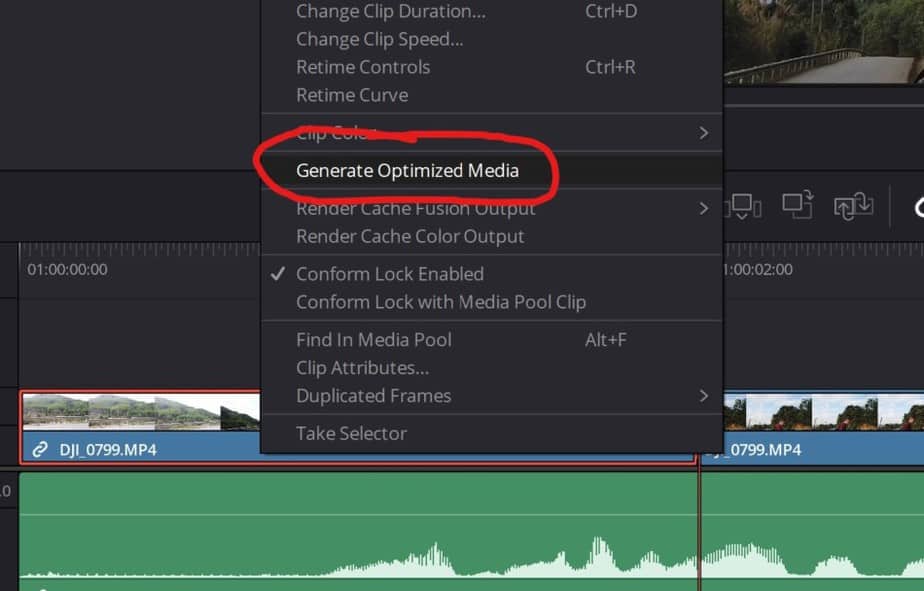
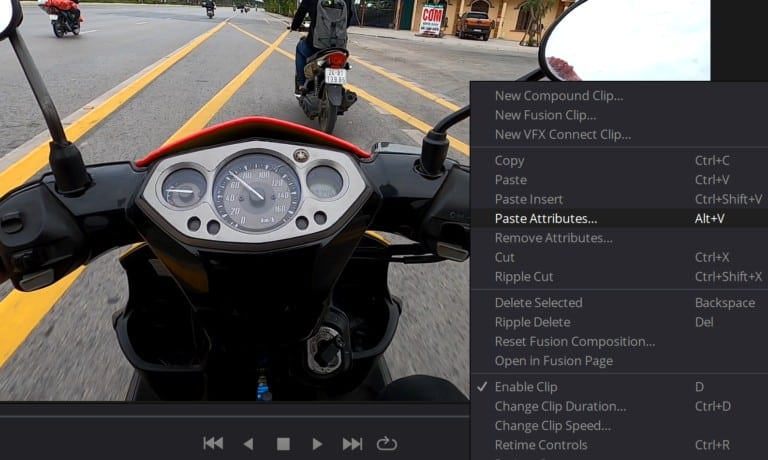
Now right-click the clip you want to create proxy file for and click on “Generate Optimized Media”.
It’s also possible to create multiple proxy files at once too. You can do this by either selecting which one you want in the timeline, then right-click on one of them. Or you can select your clips in the Media Pool and “Generate Optimized Media” from here!
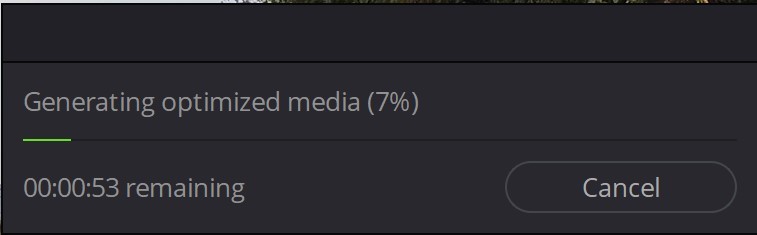
To create them may take some time, but this varies, depending on your hardware and the size of your files. You can expect it to take many hours if you have hours of footage, but once they’re done you are able to edit them without wanting to punch your monitor all the time.
Delete Optimized Media and Cache in DaVinci Resolve
After a couple of projects with optimized media and cache your drive gets full pretty quickly if you don’t delete the files after you’re done with them!
Doing this after every project or at least regularly is therefore not stupid. To delete them when you have your project open is really easy!
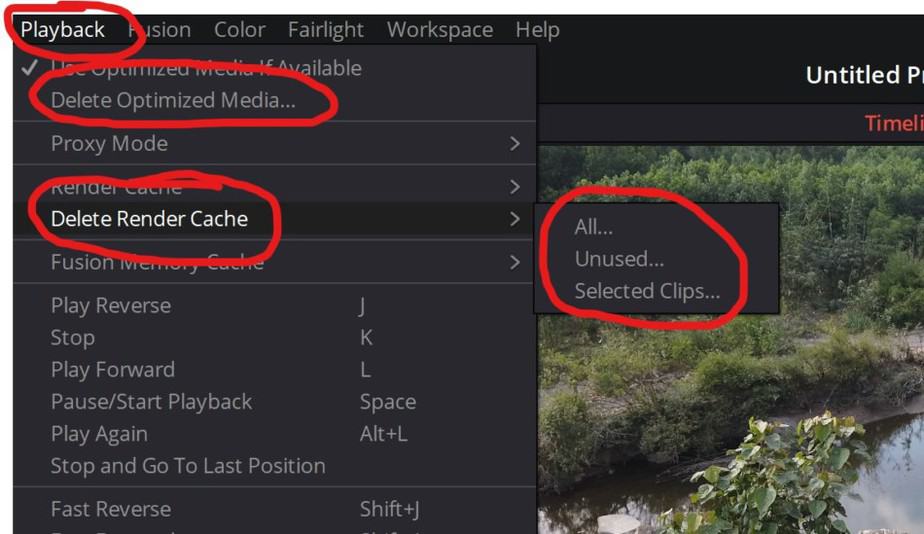
Go to playback in the menu bar. (which the people who have read the whole article is pretty familiar with by now). Then click on “Delete Optimized Media” then you have to accept.
To delete cache go to “Delete Render Cache” and then select “All” if you want to get rid of all caches from the project.
If you don’t have deleted them for awhile it’s easier to delete the files from the folder they are saved. Both optimized media and rendered cache files.
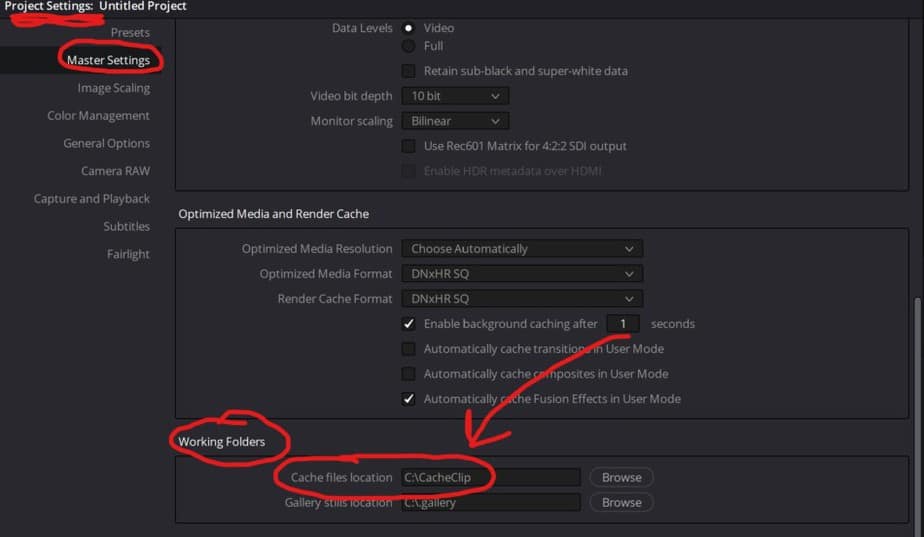
Go to “Project Settings > Master Settings” and locate “Working Folders”. On the right side of “Cache files Location” you can see where its located on your computer. Remember this, and find it on your computer. Or you can simply copy it.

And paste it in here, to go directly to the folder. But if you have it located like me you should be able to find it fairly easy without doing that.
Anyways each of the folders you are looking at now is representing a project you’ve been working on. Inside these the render caches and optimized media will be saved. If you are done with all the projects you can just delete everything that’s in the “CacheClip” folder.
2. View Playback in Proxy Mode (Easiest method)
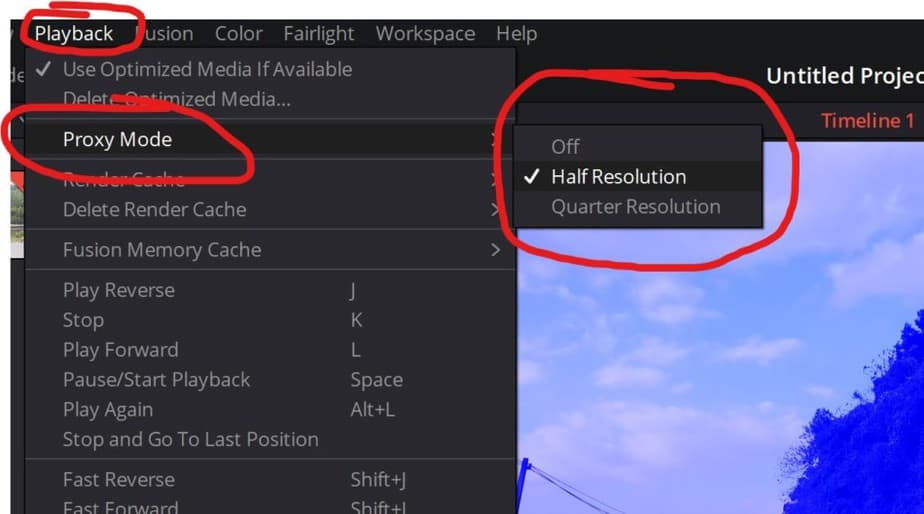
This is a neat little trick to prevent lag, that doesn’t require you to do anything except turn it on… This makes the resolution of the playback (video you see while editing) lower resolution. However, it will not affect the final product!
To enable proxy mode go to “Playback > Proxy Mode > Choose one of the alternatives”.
3. Render Cache
Sometimes you may experience choppy playback in DaVinci even with optimized media. Often when adding a lot of additional effects and color grading to your video it will start lagging again. This is when rendering cache comes in handy! However, you can test this before using optimized media aswell!
Just a few more click and you got silky-smooth playback once again! This is perfect in combination with optimized media! But it’s best to first make try proxies and if that’s not enough use this in addition to them. Since proxies are something you do once then it’s all good. Here you have to render after every change made to the clip.
But it’s totally worth it when you are experiencing choppy playback.
Let’s get to it!
This is why I earlier in the article wanted you to change the additional settings too (in the white circles). If you haven’t already changed it, go ahead and do that now.
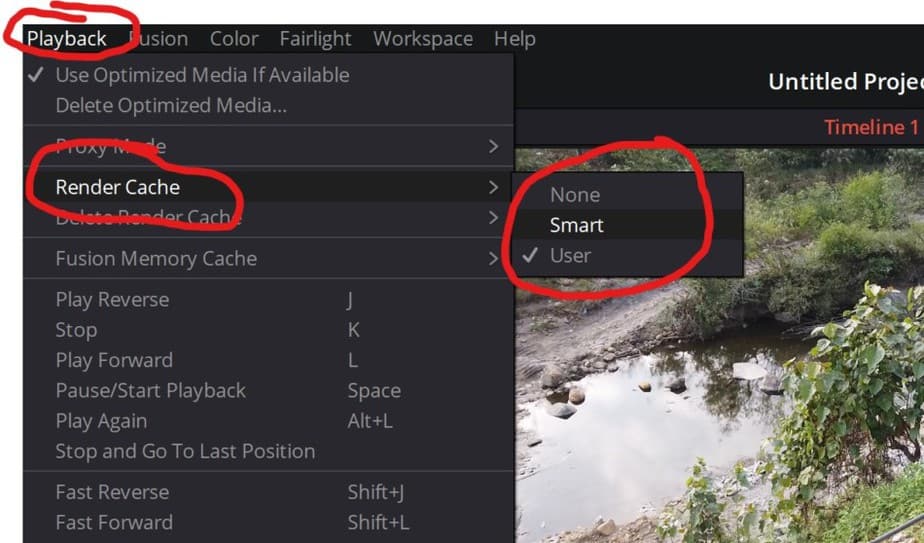
Next go to Playback in the menu bar, then Render Cache. Here you are met with three alternatives
None: If you’re not experiencing any problems, turning it off or set it to user is a good idea.
Smart: This is a clever solution. Here Resolve is analyzing your project and rendering what’s necessary for smooth playback. This can save you alittle bit of time.
User: Here you are manually choosing which clips to render. But you only have to do it once to the clips you want to render. Then everytime you make an adjustment to one of those clips it will start to render it.
It will start to render immediately after an adjustment has been made since we set the timer to 1 second earlier. If you want to delay it simply increase the timer.
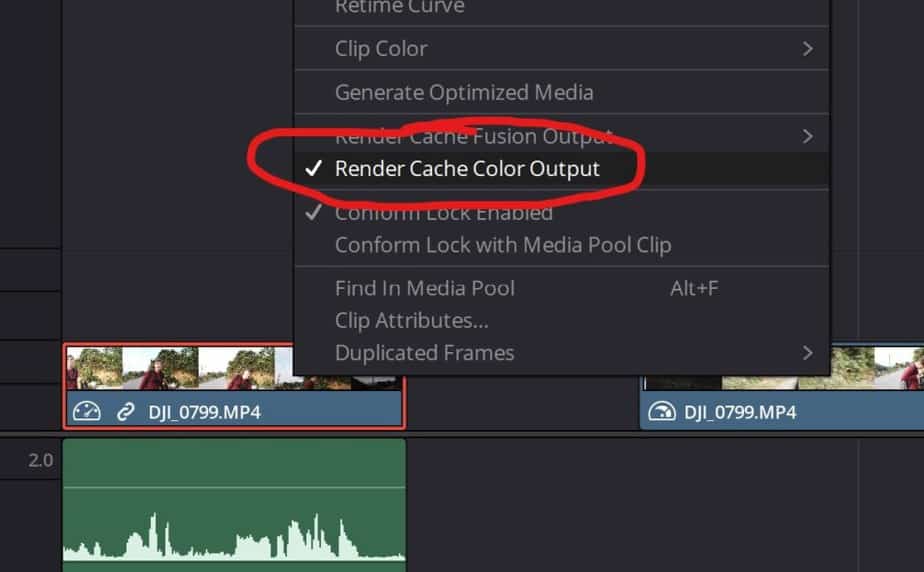
To choose which clip to render with the “User” option, right-click on a clip and Enable “Render Cache Color Output”.
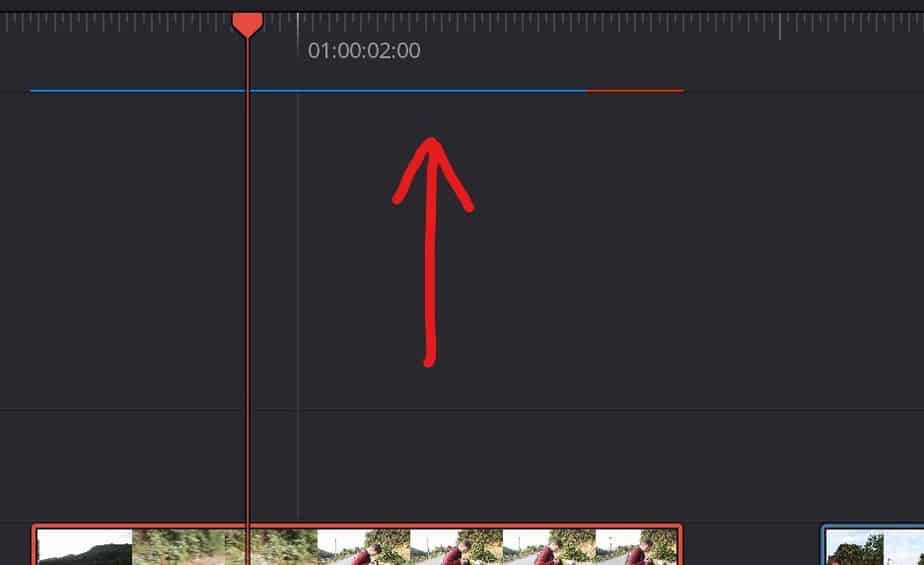
When a clip is rendered you can see this blue line over it in the timeline (edit page). When it’s not rendered the line is red, so you will see when it’s rendering as well as the red line is disappearing.
I hope you found this article helpful!
Cheers,
Jens