Does DaVinci Resolve Have Watermark? (& How to avoid it)
There is a bunch of free editing software out there, but you’ll often get a watermark on top of your video without paying a subscription.
The question for this article is: Does DaVinci Resolve have a watermark?
DaVinci Resolve does not put a watermark on your videos unless you use effects only available to the studio version. Applying the premium effects will trigger a warning message, asking if you wish to get the paid version of Resolve.
This is really good news if you are looking for an editing software without the watermark issue.
The reason is that the number of premium effects triggering the watermark is close to 0. Of course, that may be an underestimation, but what I’m trying to convey is that this isn’t really a problem you are going to worry about using DaVinci Resolve.
After reading the next section of the article, you’ll never even have to think about it!

The Studio Features to Avoid Using
There aren’t that many studio features that will put a watermark on your video.
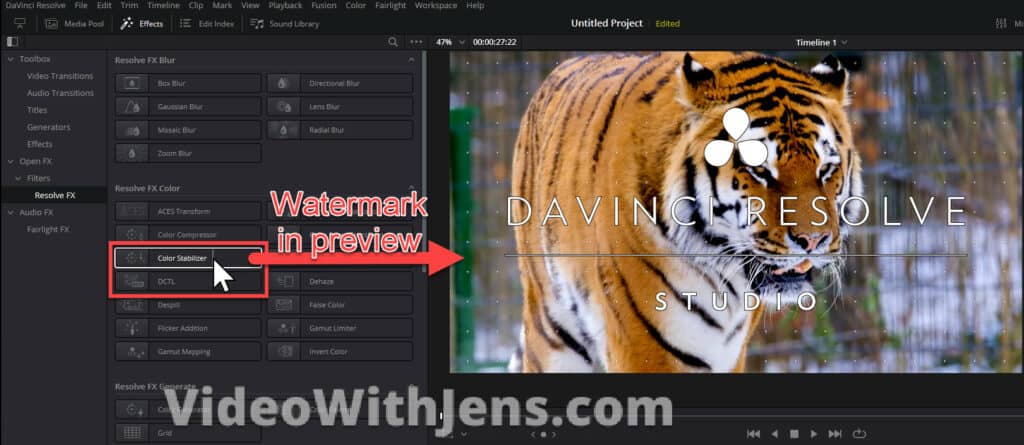
The features that cause watermarks will be found in the “Effects” tab, where you see a bunch of presets and only a few which require the studio version of Resolve.
To prove what a great guy I am, I’ve tested all the different effects in Resolve to figure out which is part of the studio version.
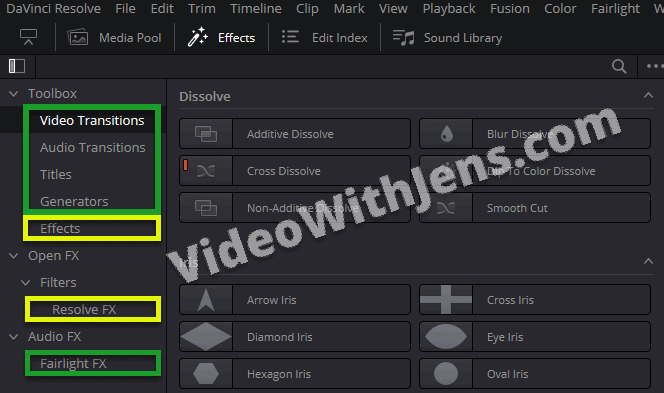
In the image below, I’ve made four rectangles:
- Green rectangle=Inside these tabs, there are no effects with watermarks.
- Yellow rectangle=Inside these tabs, you’ll find a couple of effects with watermarks.
A great way to ensure the effects do not have a watermark is to select a clip in the timeline (on the “Edit” page) and then hover over the effect in the menu.
By doing this, you’ll get a preview of what the effect will look like on your video, and it will also include the watermark if it’s one of the studio effects.
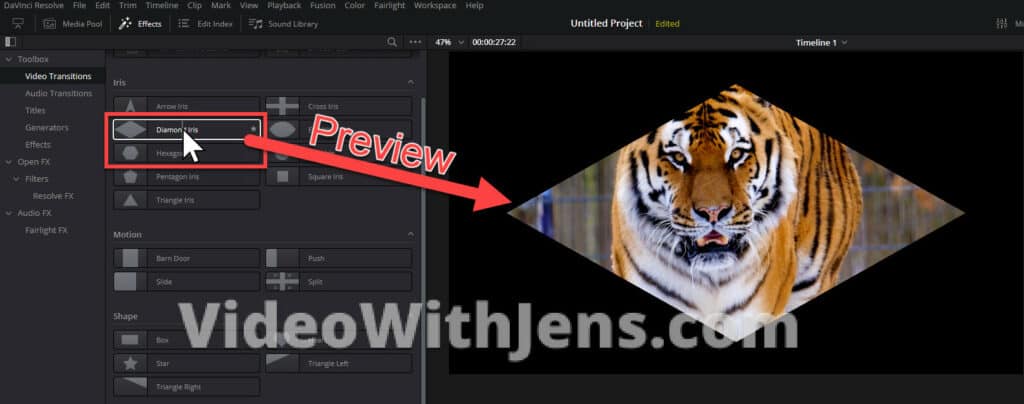
Here is what it looks like when previewing an effect with a watermark:
If you try to add the effect to your video, you are going to get an error saying, “You have reached a limitation with DaVinci Resolve“.
NB: Some effects are impossible to preview and will instantly trigger the error when hovering over it.
- All you have to do then is to click on “Not Yet“, and not hover over it again.
- Or click on “Buy Now” haha.

Check out this complete DaVinci Resolve beginner tutorial to get started.
Resolve is also incredible at removing watermarks:
How to Remove Watermarks in DaVinci Resolve
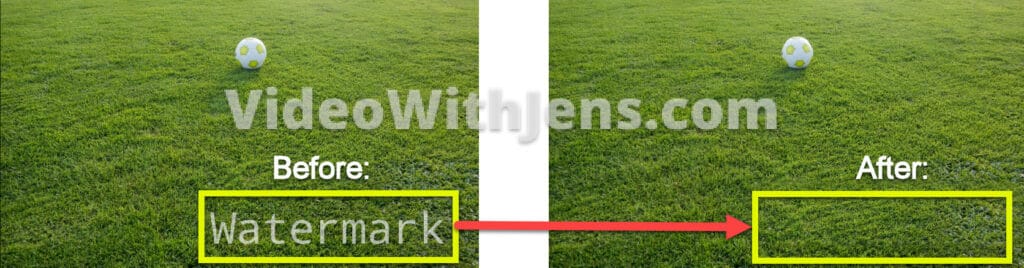
Not only does Resolve not put watermarks on your videos, but you can also even remove watermarks from your videos!
Quick Guide:
- Go to the “Color” page inside Resolve.
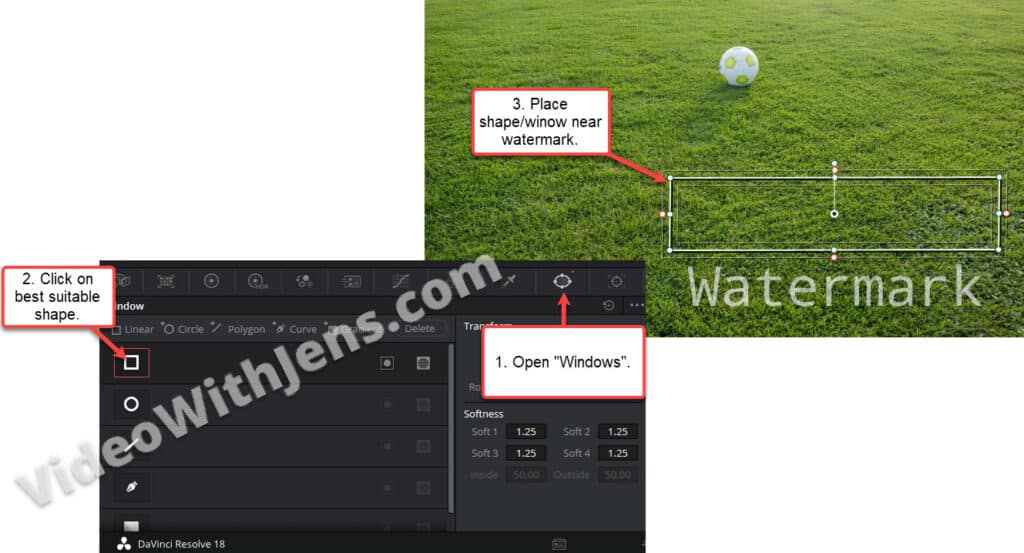
- Open the “Windows” tab, and select a shape to mask the watermark.
- Position the window on a surface that resembles what’s behind the watermark.
- Open the “Sizing” tab, and adjust the “Pan” and “Tilt” to cover the watermark.
- Open the “Windows” tab again, and adjust the “Softness” to make the edges more smooth.
Detailed Guide:
Head over to the “Color” page inside Resolve:

Then among the tabs on the bottom half of the “Color” page, open the one called “Windows“, and click on the icon of one of the shapes. Choose the shape that will cover the watermark the easiest.
You should then see the window appearing on top of the video in the video preview.
Adjust the window to the same size as the watermark, and then place it on a surface that resembles the surface behind the watermark. Watch the image below for reference:
Next, head over to the “Sizing” tab, and then click on the icon called “Node Sizing” (watch the image below).
Then, adjust the “Pan” and “Tilt” values to cover up the watermark. I’ve made a GIF below this image to illustrate how to do it.
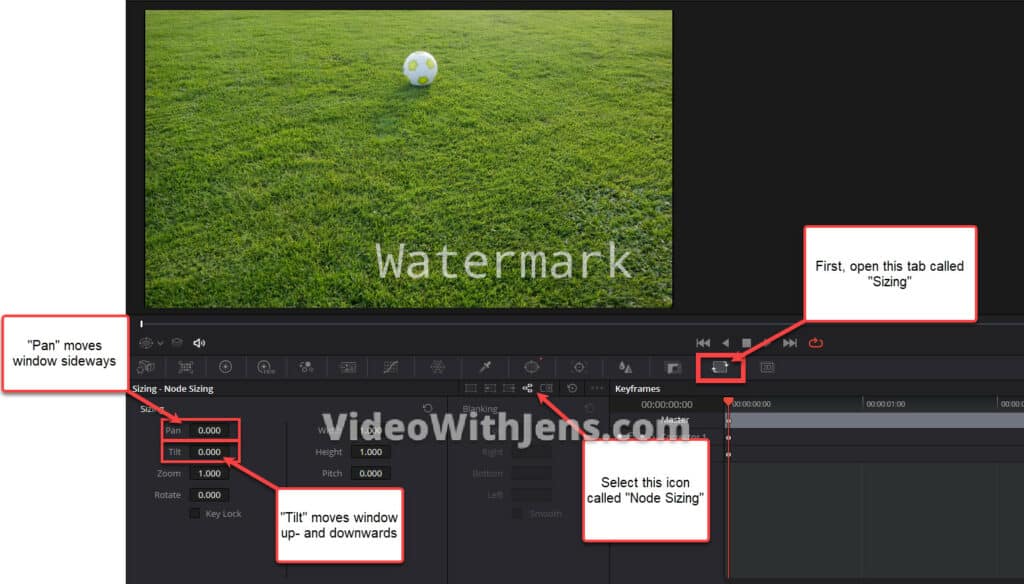
Here’s how to cover the watermark using the “Pan” and “Tilt”:
If the edges/transition from the cover area to the surface around it is too rough, you can soften it out by heading over to the “Windows” tab and adjusting the “Softness” values:

If there is a lot of movement in your video, it’s harder to make it look perfect.
In that case, head over to the “Tracker” tab and then go to the beginning of the video.
Next, we are going to start tracking. First, track forward and then track backward.
If the tracking didn’t turn out great, I’ve written a more detailed guide on how to use the tracker here. In that tutorial I’m tracking a face; however, the principles are the same. The only difference is that you are going to track the surface.
Did you know DaVinci Resolve has a built-in watermark function? So if you want to add watermarks to your videos, you don’t have to add them to the timeline like a regular video.
Here’s how to use this feature:
How to Add Watermark in DaVinci Resolve
Quick Guide:
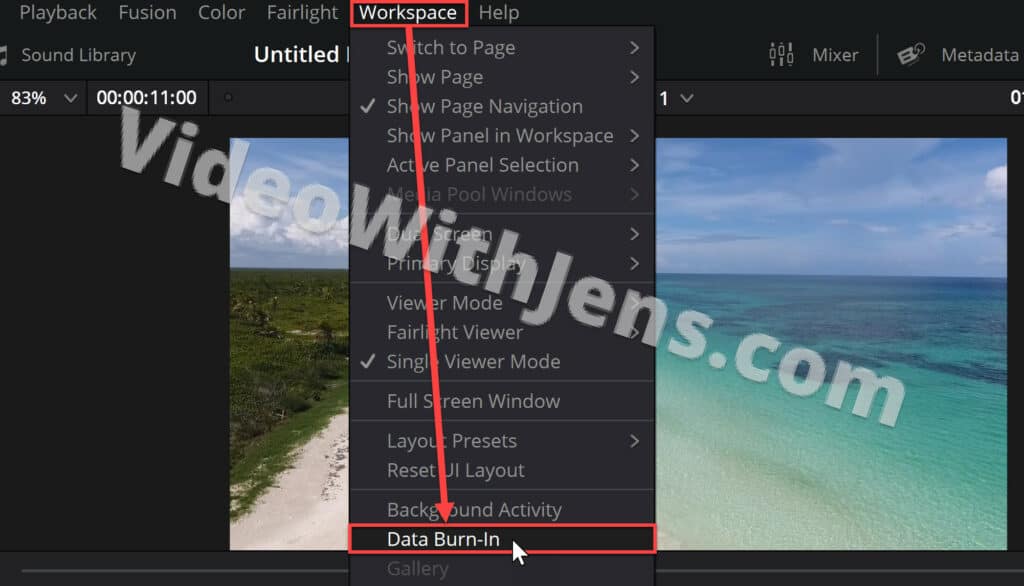
To add a watermark to your video in DaVinci Resolve, open the “Edit” page, and click on “Workspace” > “Data Burn-In“. Inside the window that pops up, check off the box next to “Custom Text1“, and on the right side type in the text of the watermark. Use the transform tools to adjust how it looks.
Detailed Guide:
This function works on all the pages except the “Media” and “Cut” pages.
In the menubar, click on “Workspace” > “Data Burn-In“:
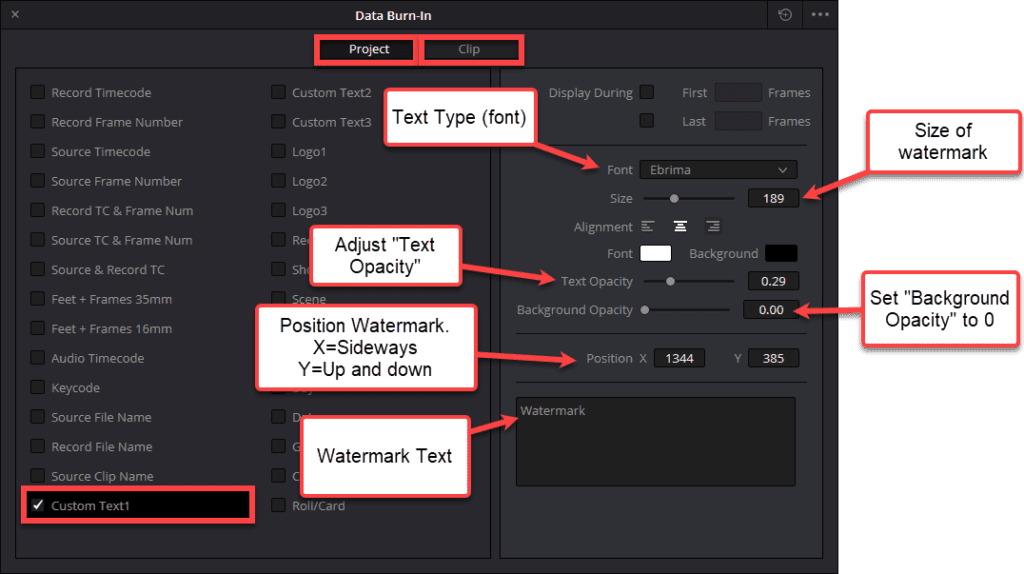
Then the “Data Burn-In” window will open.
Inside it, you are first presented with two options:
- Project
- Choosing this option the watermark will be applied to the whole project (all the clips in the timeline).
- Clip
- To choose this option, you must first select a clip in the timeline. Then the watermark will only be applied to that specific clip.
I’m going to choose the “Project” and then check off the box next to “Custom Text1“.
Then on the right side, you should see a control panel where you can create your watermark.
Here’s how I would go about it:
- Type the watermark’s text into the black box at the bottom of the panel.
- Remove the background if you want by setting the “Background Opacity” to 0.00.
- Adjust the “Text Opacity” slightly to make it look more like a watermark.
- Adjust the “Size.”
- Adjust “Position” by changing the X- and Y-axis values.
- Change the “Font” if you want the text to look a bit different.
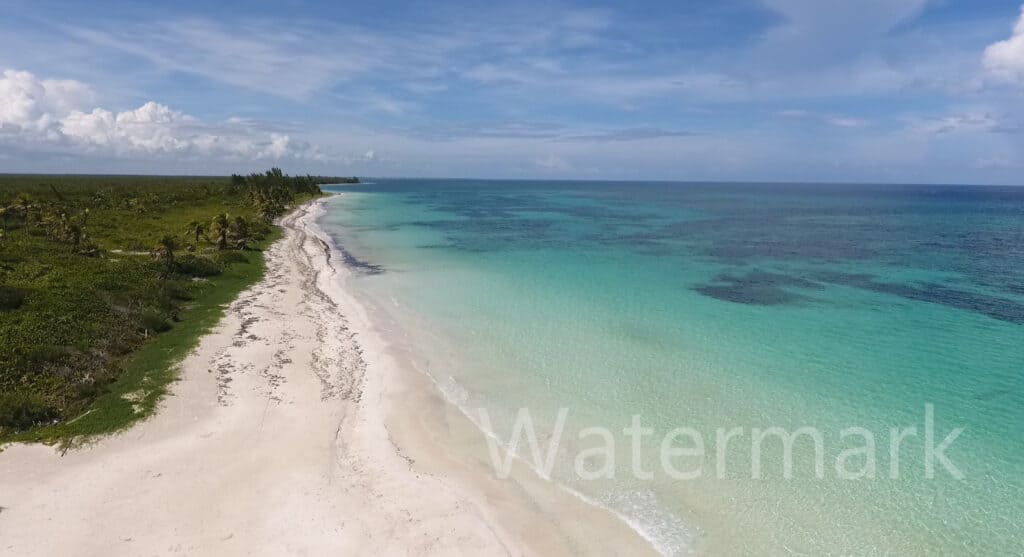
Here’s how my watermark turned out:
If you want a more advanced watermark, you can also import a logo and adjust it in Resolve afterward to size and position it.
In that case, check off the box next to “Logo1” and click on “Import File” in the control panel on the right side.
Next, locate the logo in your system folder.
Sometimes you have to adjust the position to see it. For example, it may be imported and positioned below the frame. In that case, adjust the Y-axis next to the “Position.”
What’s nice about this method is that the logo will be there until the next time you need it. Then you click on “Logo1” and position it where you want.
I recommend importing a logo with a transparent background.
You must save the project where you imported the logo if you want to use it later.
If you want to learn how to use DaVinci Resolve, I’ve written a complete beginner tutorial here!