Can DaVinci Resolve Export MKV? Nope, here’s the solution
By reading the title, you already know that you can’t directly export to MKV in DaVinci Resolve.
However, as promised, here is a workaround that will give you the same results.
The MKV container is highly flexible and supports almost all video and audio codecs!
Meaning it can contain videos of very high quality.
Thus, we need to find an alternative container with the same qualities, and then if you want, you can transcode the file to an MKV afterward.
The other thing you can do is simply export the video as an MP4 if it’s the final product.
So let’s get to it:
Can DaVinci Resolve Export MKV?
DaVinci Resolve 18 cannot export files in the MKV file format. Thus, if you want the video to be in the MKV format, you have to render the video in another file format and convert the file to MKV with a third-party application.
Below is an image of the manual “Supported Formats and Codecs” by Black Magic Design:
As you can see, Resolve does not encode MKV files, meaning there is no way to export them.

However, they do decode MKV!
Meaning you can import them and then export them in another format such as Quicktime or MP4.
So how are you then supposed to export your MKV file?
Exporting MKV files: Best Solutions
So as we now know, you can’t directly export your project as an MKV file in DaVinci Resolve.
But, there are a couple of “workarounds,” depending on what you wish to accomplish.
These “workarounds” depends on:
- If this is the final product (no more editing).
- If you are going to edit the video in another program after exporting.
You can, for example, simply export your project (although the files are MKV) as an MP4. However, if you want to do it this way, your video should be finished… Meaning you are not going to edit it further in some different software!
The reason is that in Resolve, you can only encode MP4 with codecs such as H.264, H.265, and AV1, which makes the video highly compressed. Thus they will lose some quality, which you would need if you were going to edit them further.
For those who are going to do more post-production work with the video, I suggest exporting the project using another format/codec in order to maintain the quality.
There are many formats to choose from, but let’s not get too high-tech… I suggest you simply export the file in a Quicktime format, using, for example, a DNxHD codec.
Don’t worry! I’ve explained both of these approaches in detail below:
This first one is for those who are finished with the project and don’t need that extra quality for further processing:
How to Convert MKV to MP4 in DaVinci Resolve
You can convert an MKV file to an MP4 file in DaVinci Resolve by simply exporting the file as an MP4. To do this, simply add your MKV file to the timeline inside Resolve and head over to the “Deliver” page. Then in the “Render Settings,” set “Format” against “MP4“, and start the render process.
Detailed guide:
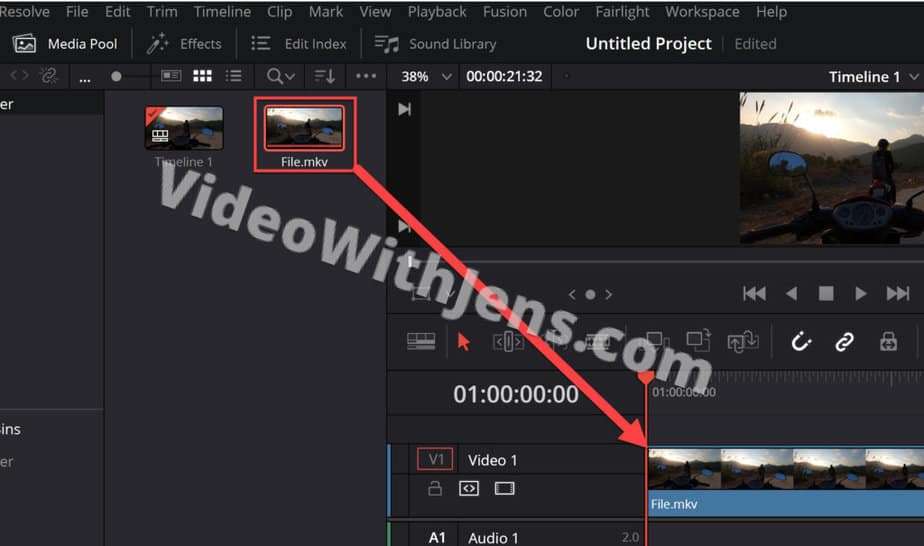
Ok, so first of all, add the MKV file to the timeline inside Resolve. If you are facing any problems with importing or MKV-related issues, check out this guide.
To do this, you want to be on the “Edit” page:

Then head over to the “Deliver” page:

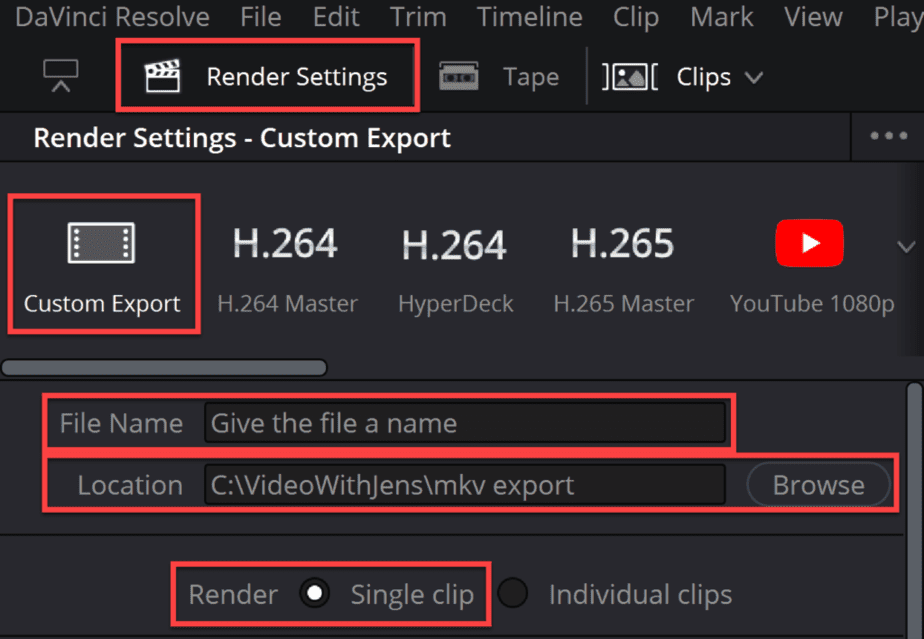
Here you want to click on “Custom Export” under “Render Settings. “
Also, give the file a name and set the location by clicking on “Browse“:
Make sure that it’s set to “Single Clip” as well. However, it should be so by default.
Then, it’s the time!
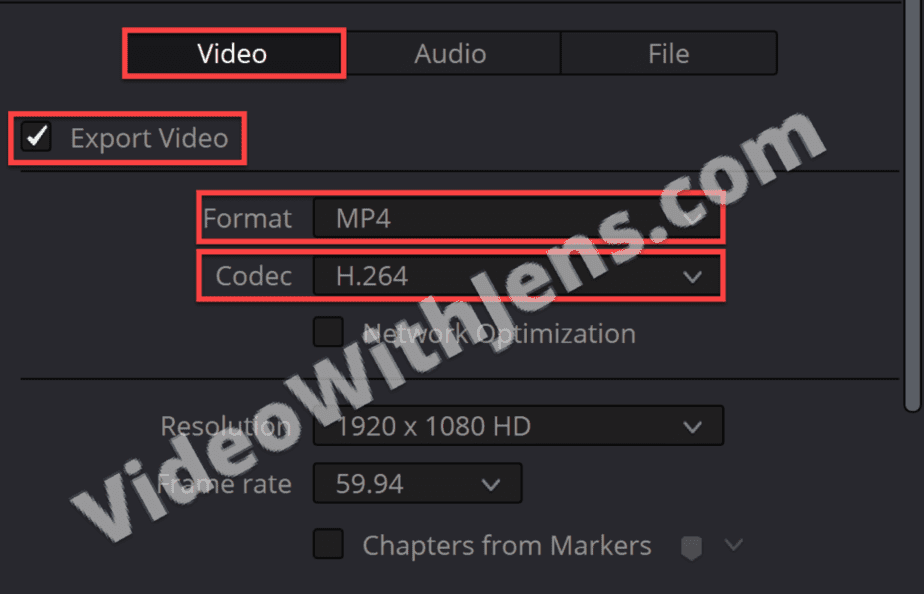
Make sure that the “Format” is set against “MP4“! Meaning: that we are going to render/transcode the MKV to an MP4 file.
The “Framerate” is probably already correct. Check out this guide if you want a better understanding of these settings.
Set the “Resolution” and “Frame rate” to match your timeline settings, if not any special preferences!
Then it’s time to export our project:
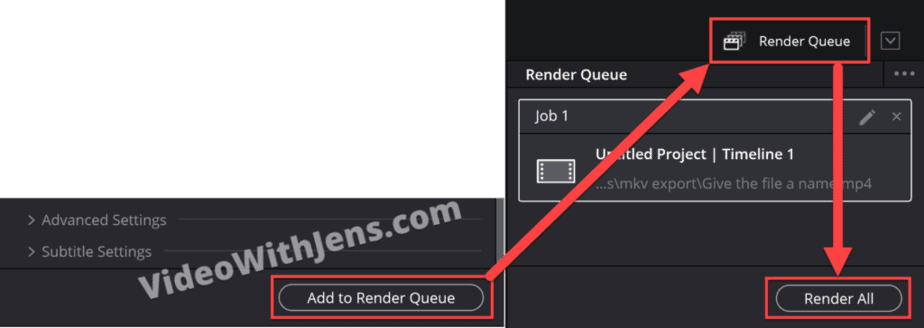
Click on “Add to Render Queue, “and then “Render All” in the “Render Queue” tab:
Now you should find your project saved as an MP4 file where you set its location.
If you want to transcode it back to an MKV, I will show you how to do that here.
Next up, how to export your project in a less compressed format:
Do it like this if you are going to do further processing to the video in another software or something:
How to Export a Project in an MKV Container: DaVinci Resolve (QuickTime)
You can’t directly export a project in the MKV container format. Instead, export the file to a QuickTime container and choose the codec and audio codec used for the MKV file. Then you can transcode the QuickTime file to an MKV using a third-party application afterward (if needed).
What’s really nice about this is that you can choose less compressed video codecs AND audio codecs!
Perfect for further post-production-related stuff.
+ you also get more choices for video and audio codecs like you would with an MKV file!
So let’s get to it:
First, make sure to add the MKV file(s) to the timeline inside Resolve. Here’s an article showing you all the different ways you can add clips to the timeline!
Once that is done, head over to the “Deliver” page:
Here you want to select “Custom Export” in the “Render Settings” tab:
Also, give it a “File Name” and click on “Browse” to set the location:
(Make sure it’s set to “Single clip” as well)
Alright, here’s where the magic happens!
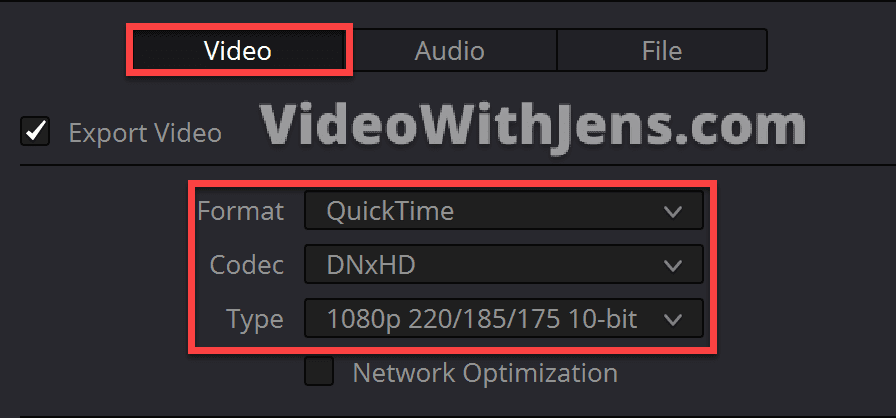
Under “Video” set “Format” against “QuickTime“.
And for the codec it depends on two factors:
- Are you going to edit the video further?
- If so choose “DNxHD” for 1080 (Full HD).
- Choose “DNxHR” for a higher resolution than 1080.
- Are you going to edit the audio but NOT the video?
- Then you can choose “H.264“.
If you choose “DNx…” then simply leave the “Type” as default.
Match the “Resolution” and “Framerate” to your project settings, here‘s a detailed guide on how to do this (and what to do if the framerate is wrong).

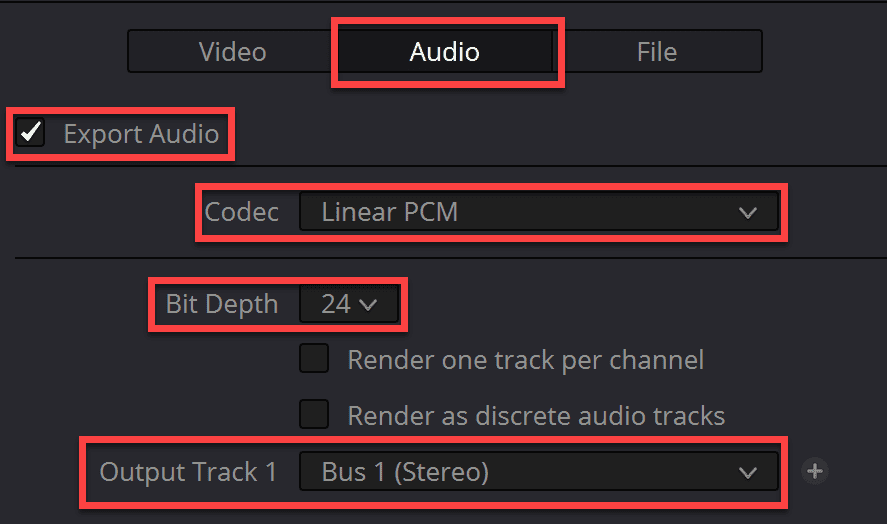
Next, head over to the “Audio” tab (refer to the image below).
Make sure that the box next to the “Export Audio” is enabled.
Then if you want to export in a high-quality codec, “Linear PCM” is a good choice.
Set “Bit Depth” against 24 or above if you are going to do some more post-production work:
Then make sure that the “Output Track 1” is set against “Bus 1” to export the main audio channel (not just a specific track):
Leave the rest of the settings as they are if there are not any special preferences and click on “Add to Render Queue“and then “Render All” in the “Render Queue” window:
Here’s the workaround if you want your video in the MKV container:
Transcode File to MKV Using Third-Party Application:
So, now that we have rendered our video out of Resolve, we can use another software to transcode the video into an MKV file if that’s what you want.
You can do this using different software, however, since I can’t show you all of them.
I’m going to show you two good ones:
- HandBrake
- The one most people will recommend.
- Free to download and use.
- FreeConvert.com
- Cloud-based alternative if you don’t want to download.
- Offers a bunch of settings.
Alright, so if you want to make sure your video is of the highest possible quality, I would go with HandBrake since it’s approved by thousands (maybe millions) of people.
I have used freeconvert.com as well and have been pretty satisfied; however, mostly for highly compressed files. So you could give it a go? Or simply download HandBrake.
Anyways I’m going to show you how to use both:
Transcode Using HandBrake
Here’s a link to where you download it.
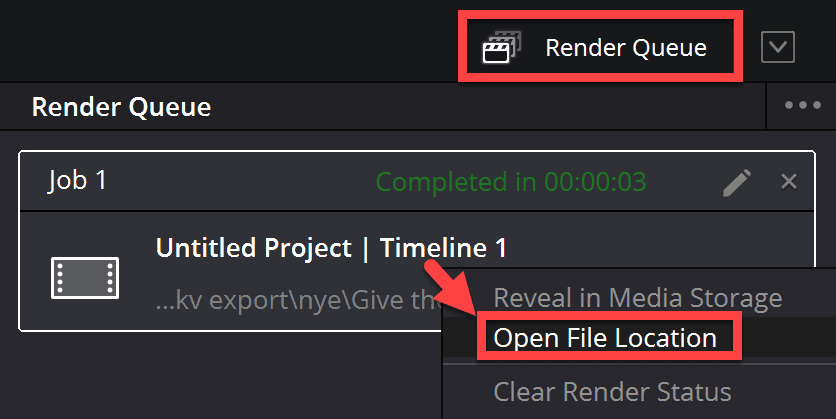
Once installed, locate the file you exported from Resolve.
A quick way to locate files is by right-clicking it in the “Render Queue” tab and then clicking on “Open File Location“:
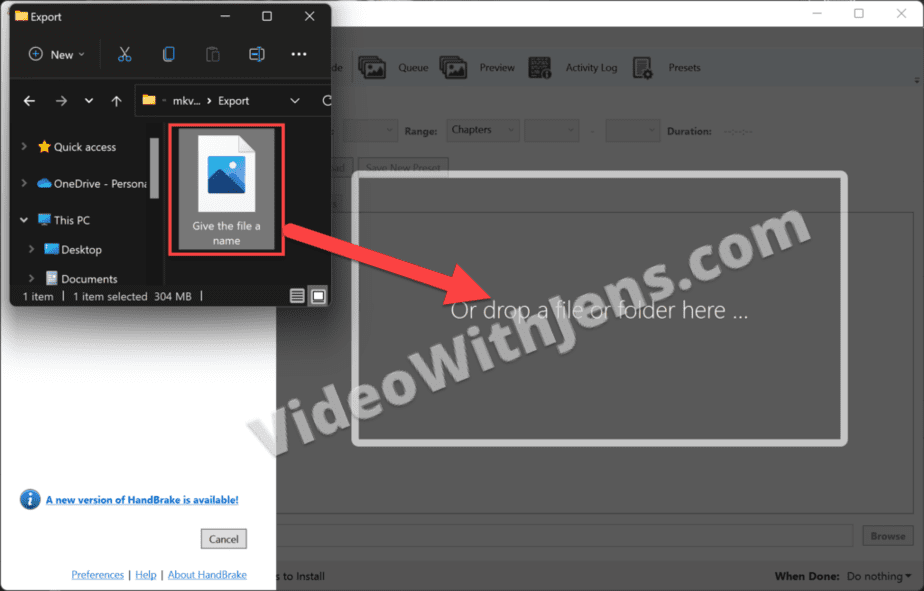
Drag the video file from the folder and drop it on top of HandBrake like this:
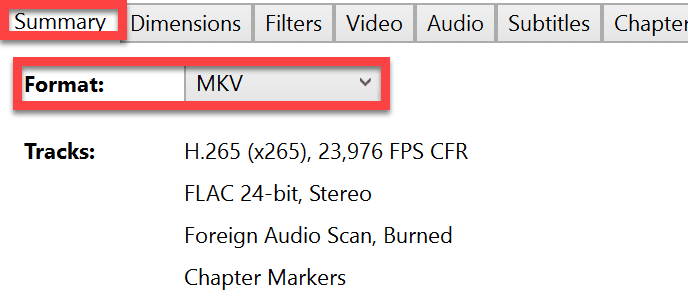
Inside HandBrake, open the “Summary” tab.
Here you want to set the “Format” against MKV:
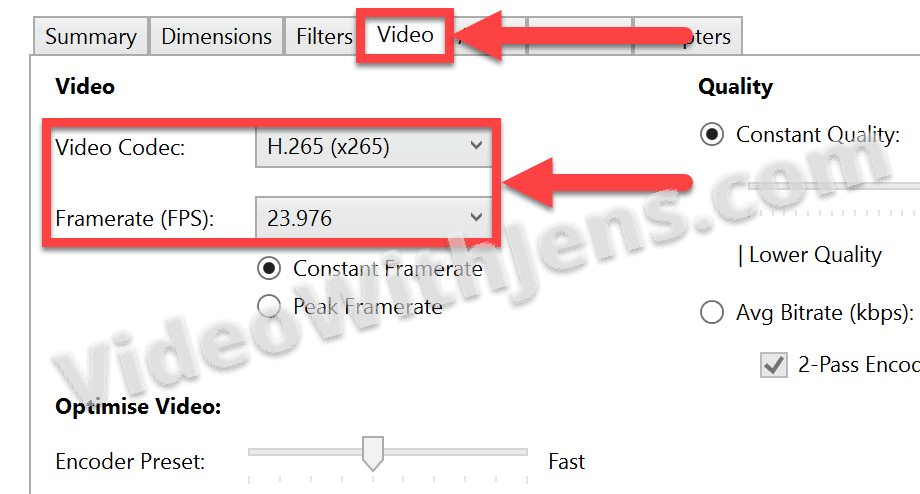
Head over to the “Video” tab.
Now you have a bunch of codecs to choose from depending on your goal.
If you’re going to upload it to social media or something like that, you will go with H.264 or H.265.
So set “Video Codec” against what you wish. What’s important here is that you set the “Framerate (FPS)” to the same as your source clip:
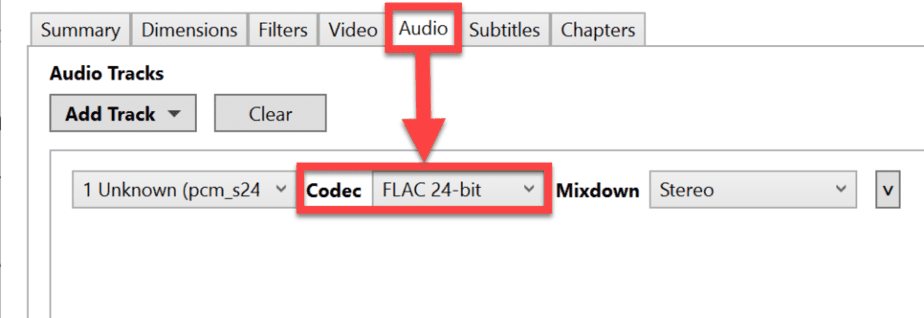
Then open the “Audio” tab, and set the “Codec” against the one you want.
I’m going with the “FLAC 24-bit,” which encodes lossless, high-quality audio.
A quick tip to remember the “FLAC” codec in the future is that it is short for “Free Lossless Audio Codec“!
NEXT UP:
It’s time to encode!
So first, set the location on where the rendered file is going to be stored on your computer. To do this, simply click on “Browse. “
Then click on “Start Encode“:
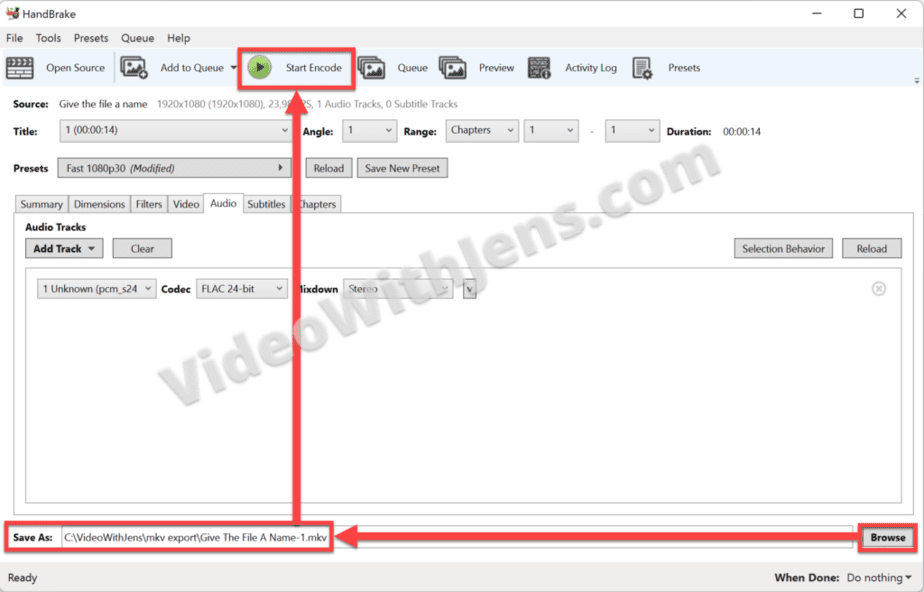
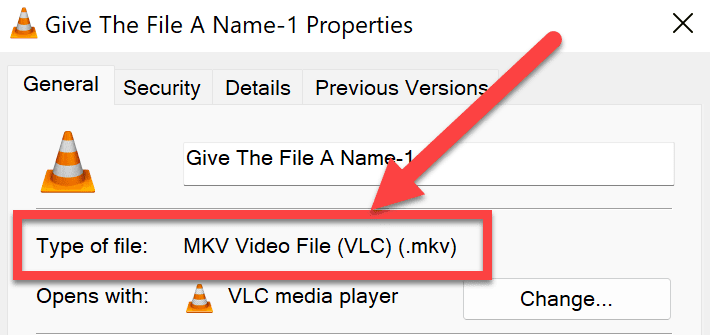
If you right-click your rendered file and click on “Properties,” you can see that it’s now an MKV file!
Next, I’ll show you how to transcode your video into an MKV container using the free cloud-based software:
Transcoding Using FreeConvert.com
Alright, so head over to the name of this title! ( https://www.freeconvert.com/ )
Locate the file that you exported from Resolve, then drag and drop it on top of the converter like this:

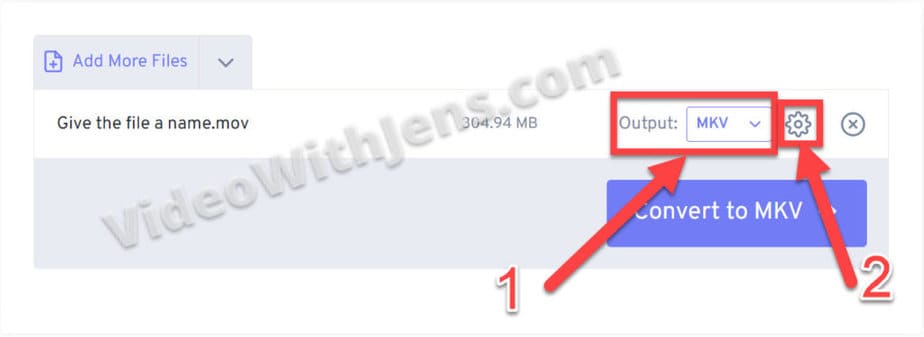
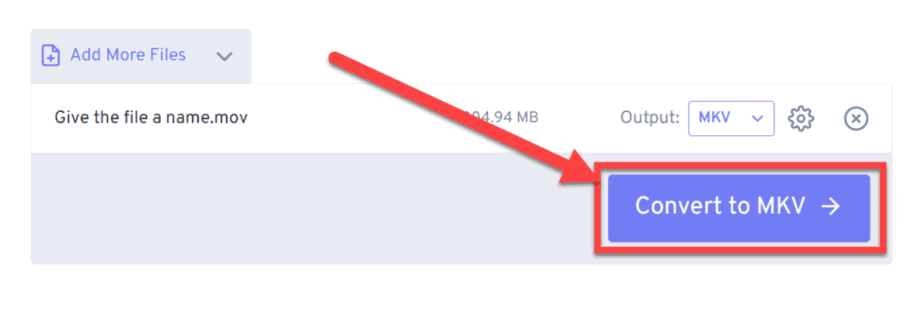
Once you’ve imported the file, set “Output” against “MKV,” and then click on the gear icon to open “Settings“:
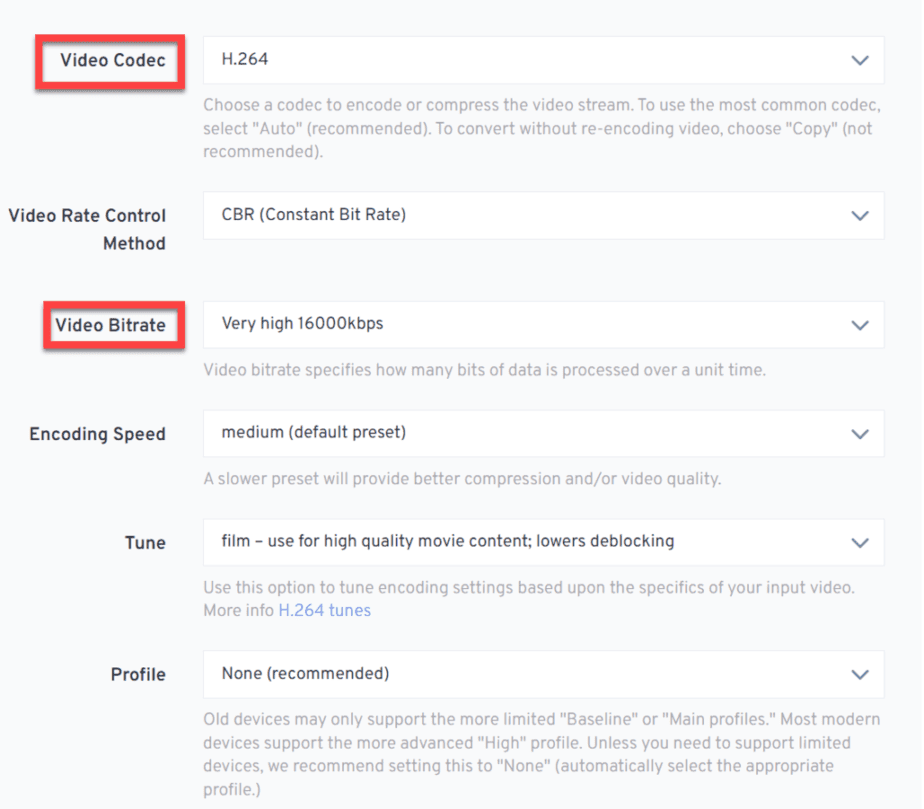
Inside the settings, there is a bunch to choose from inside the “Video Codec” drop-down menu.
So depending on your goal, choose the one that suits your needs the most.
If you are going to upload the video to any social media, you probably want to go for either H.264 or H.265.
Change the “Video Rate Control Method” to “CBR (Constant Bit Rate)” if you are going to edit the file afterward. This is because files with varying bitrates may cause problems inside different NLE software like Resolve.
Then if you’re going with H.264, I recommend setting the “Video Bitrate” either manually or to “Very high. “
If you are uploading to YouTube, you can set the “Profile” to “High” for the best possible result, as that’s what they recommend: “YouTube recommended upload encoding settings. “
Otherwise, it’s probably best to set “Profile” to “None“:
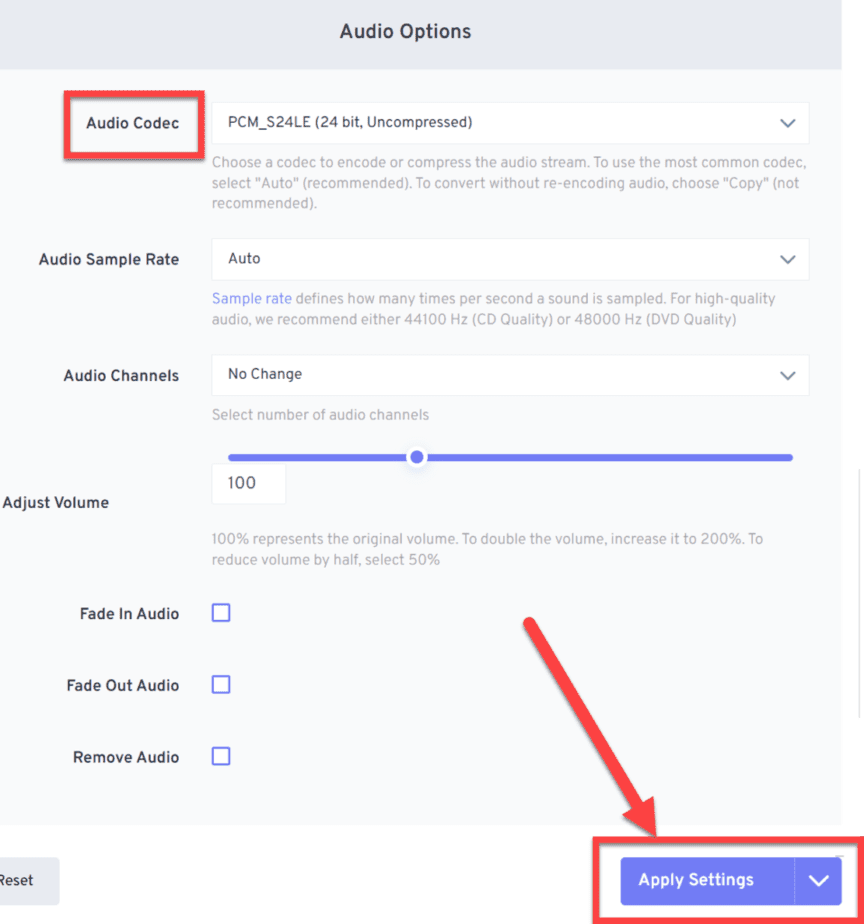
Once the above settings are set, you can scroll a little further down and find the “Audio Options. “
Here you can set the “Audio Codec” to the one you prefer. I’m setting it to the same one I used when rendering out of Resolve (Linear PCM 24 bit).
Once all of that is done, click on “Apply Settings“:
Next, click on “Convert to MKV,” and once it’s finished, you simply download your newly crafted MKV file! (Careful, it’s probably still hot).
Check out the definitive guide on exporting videos in DaVinci Resolve here!