5 Ways to Fix “Unable to Initialize GPU” in DaVinci Resolve
Today we are going to solve the “Unable to Initialize GPU” error in DaVinci Resolve.
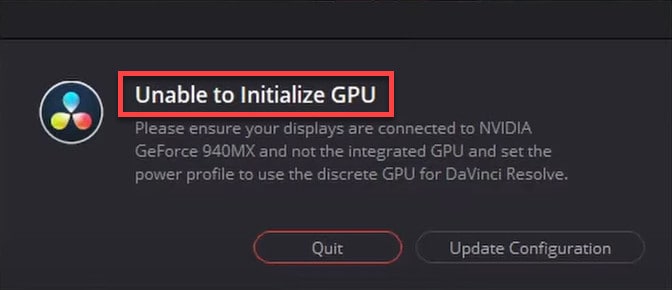
The “Unable to Initialize GPU” error in DaVinci Resolve, put in simple words, means; Resolve is unable to connect to your graphics card. To fix this you need to find a way of restoring the connection or removing the factor causing the disconnection.
Luckily for you, we have found the solutions that seem to fix the problem for most people!
Click the link to go directly to a specific solution:
- Change DaVinci Resolve’s Graphic Preferences
- Is the Monitor Connected to the Correct Port?
- Turn Off Battery Saving on Laptop
- Update Graphic Cards’ Drivers
- Install an Older Version of Resolve
I’ve also made a video explaining the solutions below:
1. Change DaVinci Resolve’s Graphic Preferences
- Right-click on the “Start” button in the taskbar, and search for “Settings.”

- Open “Settings” from the results. Select “Display” under the “System” sub-menu and then select “Graphics” after scrolling down a bit.
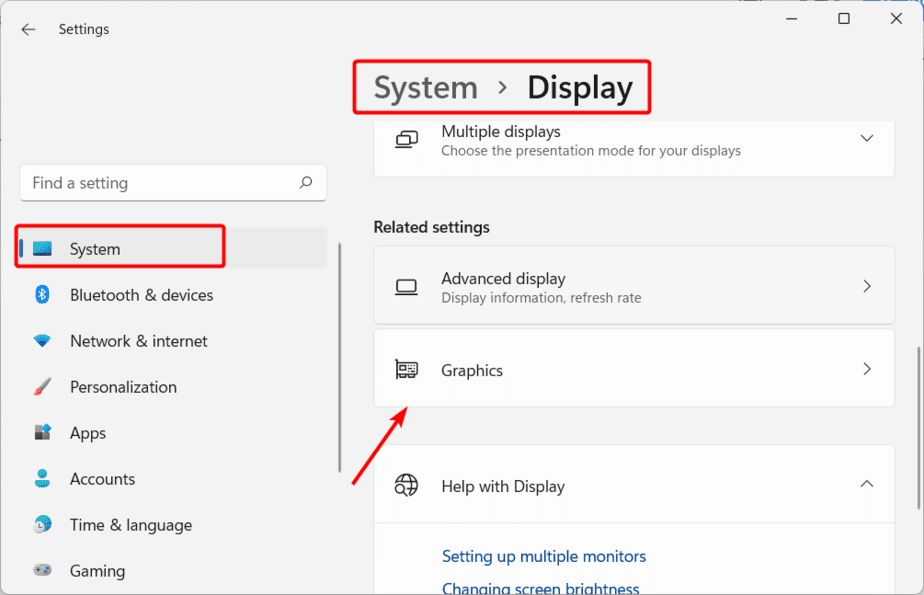
- Now on this page, you can decide what apps can use your graphics card or not and set how much power they can use on your graphics card.
- In the app list, check if DaVinci Resolve is already added. If not, select “Browse,” and then go to your OS drive (on most PCs, it is Local Disk (C:)).
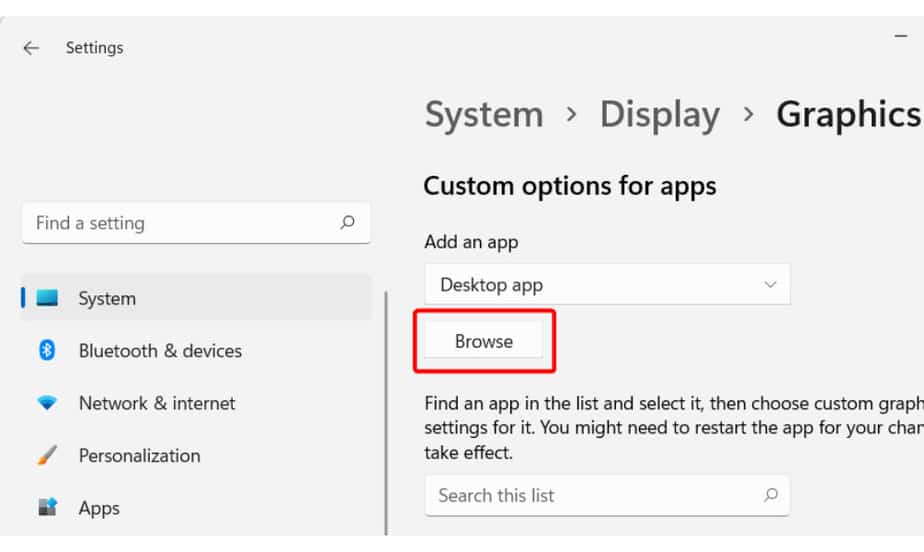
- After opening the Local Disk (C:), double-click on “Program Files” to open it, go to Blackmagic Design > DaVinci Resolve, select “Resolve,” and click on “Add”:

- Click on “Options,” then select “High Performance,” and click on “Save.”
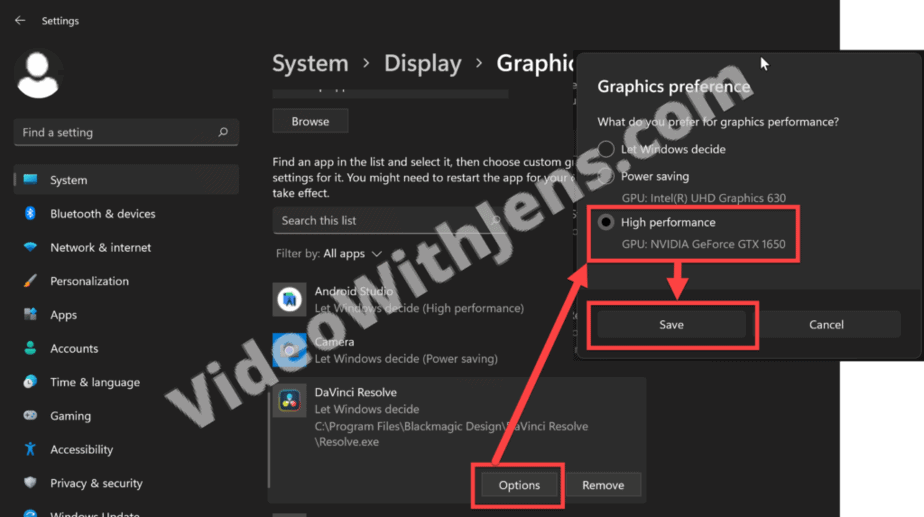
Next, try launching DaVinci Resolve, and hopefully, the “Unable to Initialize GPU” error doesn’t appear.
If this method didn’t help, no worries; we’ve got a few more that should resolve the issue for you in no time. Continue reading this article for the next solution.
1.1. Quick Way to Make Resolve Use Discrete GPU
This is one of the simplest tricks to make Resolve work if it shows the error “Unable to Initialize GPU.”
(Not everyone has this option, as it seems to have been removed in newer versions of Windows).
Here’s what you need to do:
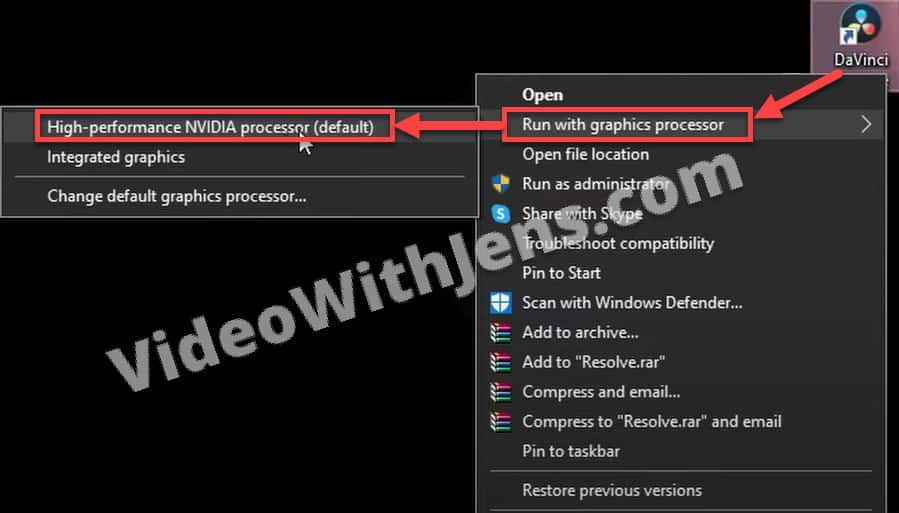
- Right-click the DaVinci Resolve’s program icon on your desktop and hover your mouse over the option “Run with graphics processor.”
- In the sub-menu, select “High-performance NVIDIA processor (Default).” For AMD users, you will find a similar option to select. Make sure you select that and not “Integrated graphics.”
Continue reading for the next solution if this doesn’t help.
2. Is the Monitor Connected to the Correct Port?
Do you have your computer monitor connected to the motherboard or the GPU? Okay, now that you’ve checked which port your monitor is connected to, here’s what you need to do.
Assuming your monitor is plugged into the motherboard using an HDMI cable, unplug your monitor and connect it to the GPU’s HDMI port. If it is connected to the GPU’s HDMI port, disconnect and reconnect it to the motherboard port.
Now, check if the DaVinci Resolve is working properly. If it is still showing “Unable to Initialize GPU,” check our next step.
3. Turn Off Battery Saving on Laptop
Are you using a laptop? Have you enabled battery savings to keep your computer from running at full power and draining your battery? Or maybe you have a powerful computer that you turned on because you are using it to do basic tasks.
If that’s the case, you should turn off battery saving mode and select the option “Balanced” or “High Performance.”
Here’s how to do that:
- Open the “Start” menu, and search for the “Control Panel.”

- Now, open the “Control Panel” from the results, and then open “Hardware and sound.”

- Click on “Choose a power plan” and then select “Balanced” or “High performance.”

When you change your power settings from high-performance, your PC starts using fewer resources and also limits your PC’s performance.
By changing the power settings, your GPU and other components are likely working using limited resources. So, when you launch DaVinci Resolve with the battery settings in saver mode enabled, the program struggles to read GPU memory, resulting in the error.
4. Update Graphic Cards’ Drivers
Drivers are essential for making that component, in this case, the graphics card, communicate with the motherboard and the OS. Without the drivers, the graphics cards won’t function at all.
The drivers can get corrupted or removed automatically, or you may be using outdated drivers, and DaVinci Resolve cannot identify them.
Here’s how to update your graphics card drivers:
- Click on the magnifying glass icon in the taskbar and type in “Device manager.” Alternatively, you can right-click the “Start” button and open it by selecting “Device Manager.”

- Now, expand ”Display Drivers” and update every graphics card driver available inside. Right-click on the drivers and select “Update drivers.”

- Now, click “Search automatically for updated driver software,” and it should locate the latest drivers to install on your PC.

If you didn’t find any new drivers, awesome!
However, doing it this way will not grant you the latest update published by your GPU manufacturer but rather what’s perceived as the newest stable version by Windows.
So, if you don’t have a software set to automatically update your drivers, such as GeForce Experience, you are probably not running the newest version.
In that case, it’s worth trying to update it to solve the error!
How to Manually Update GPU Drivers
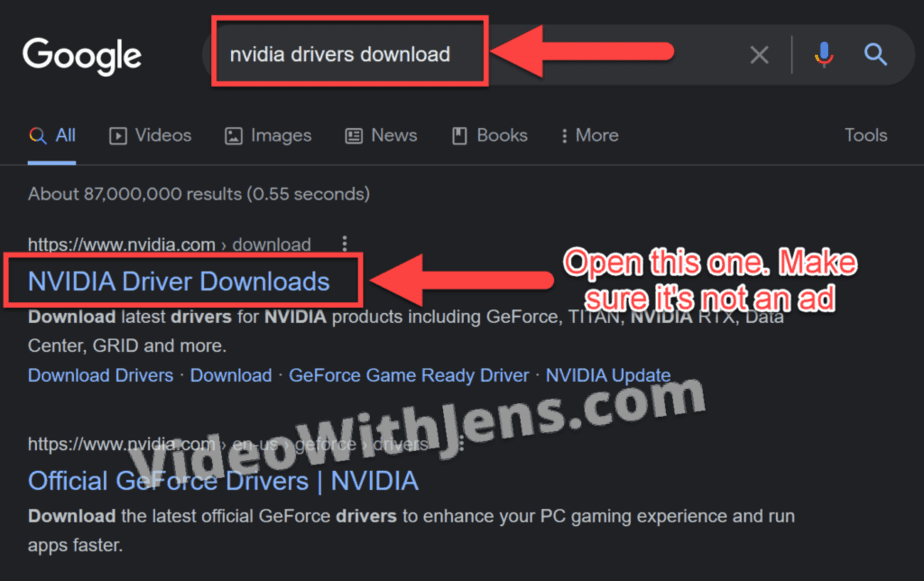
Go to google, and search for your GPUs name, followed by “driver download,” like in the image below:
Then the first result is probably your manufacturer’s official website; however, make sure of it before downloading anything!
(This is how you would do it with an Nvidia driver)
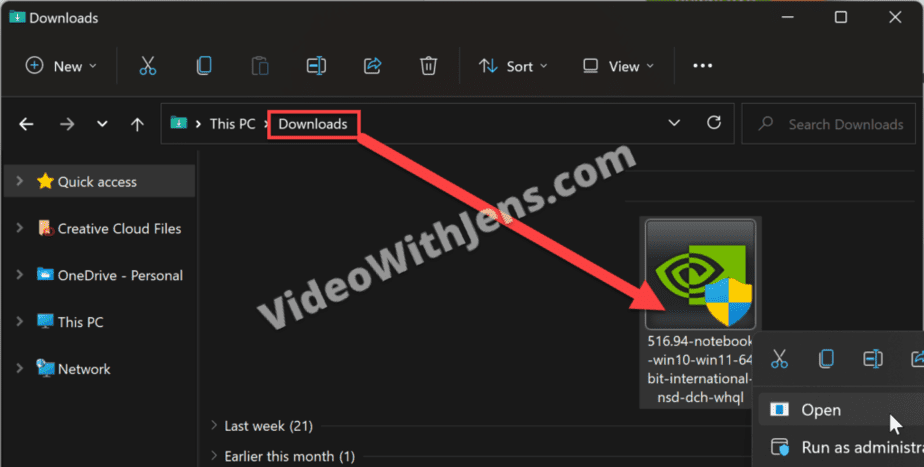
Once you’ve downloaded the driver, it’s by default located in the “Downloads” folder on your computer.
Double-click it and install the driver.
Once the installation process is complete, restart your computer and launch DaVinci Resolve.
If you’re still met with “Unable to Initialize GPU,” we have one more solution for you to try:
5. Install an Older Version of Resolve
In our research, we discovered that users experiencing this issue with DaVinci Resolve 18 and 17 were able to resolve it by downgrading and installing DaVinci Resolve 16.
If you started getting the error after updating Resolve, you could try downgrading it to the previously working version.
Here’s how to do it:
5.1 How to Uninstall DaVinci Resolve
Firstly, we need to uninstall the current version of Resolve. So, make sure to back up your projects if you need them in the future.
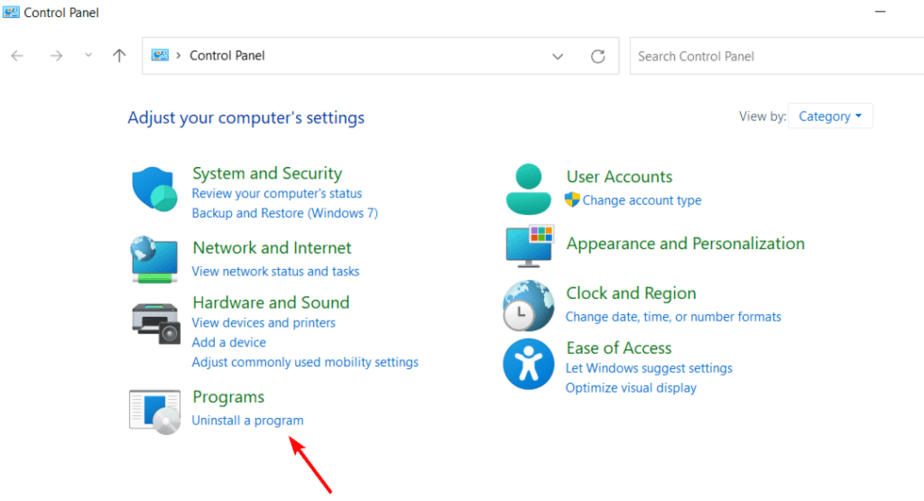
Then open “Start” on your computer, search for “Control Panel,” and open it:

Under “Programs,” click on “Uninstall a program”:
Locate DaVinci Resolve, right-click it, and select “Uninstall.”

Click on “Yes” if you are sure you want to do it:

Next:
5.2 How to Install Older Version of DaVinci Resolve
Visit Black Magic’s official website and head to the support section (or click the link).
Scroll down in the “Latest Downloads” and find the previous working version or DaVinci Resolve 16, which some people have found to be working. Download one of them.
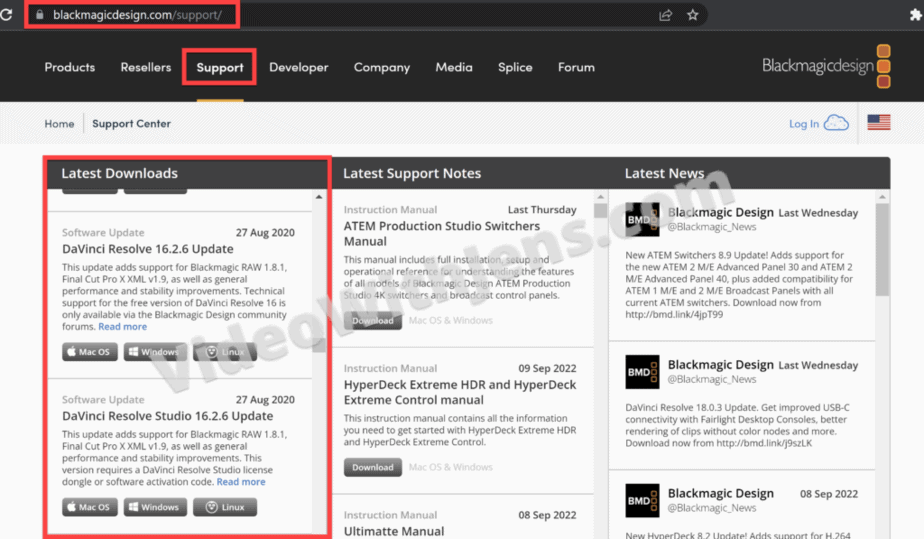
You’ll now find the file in your “Downloads” folder, by default
Open the setup file by double-clicking on it, and then click the “Next” button in the DaVinci Resolve’s installation window.
Accept the terms and license agreement, and proceed ahead by clicking on “Next” and pressing the “Install” button in the next window.
Now, allow a few minutes for the installation to complete. Once the installation is completed, click the “Finish” button to close the installation wizard.
Then, it’s time.
Try starting DaVinci Resolve again!
If you didn’t find your solution, here’s another GPU issue-related article, that might help you.

