How to Blur Background in Davinci Resolve
In this article, you’ll learn how to blur your background using Davinci Resolve. There are a couple of different ways of doing this, and I will show you the best one in this article!
If you want a quick answer, here’s the main method to blur the background in Davinci Resolve:
- Go to the “Color” page.
- Open the “Window” tab, located in the lower part of the page.
- Click on the icon of one of the shapes to activate it.
- Click on the button on the right-hand side of the shape.
- Drag and adjust the shape in the video preview.
- Open the “Blur” tab.
- Increase the “Radius” RBG.
That’s the straightforward answer on how to blur the background.
However, doing that is often not enough as the video object that’s not blurred tends to move in videos… Making it a bit more difficult.
Therefore let’s solve that problem, and also do a bit more detailed explanation on how to blur the background!
How to Blur Background in Davinci Resolve (detailed version)
Alright, so the first thing we need to do is open the “Color” page in Davinci Resolve. The one I’ve made a red box on in the picture below:

Then, we’ll go ahead and create a new node!
This is not a critical thing to do in order to make this work. However, it’s always nice to make the effects on a secondary node!
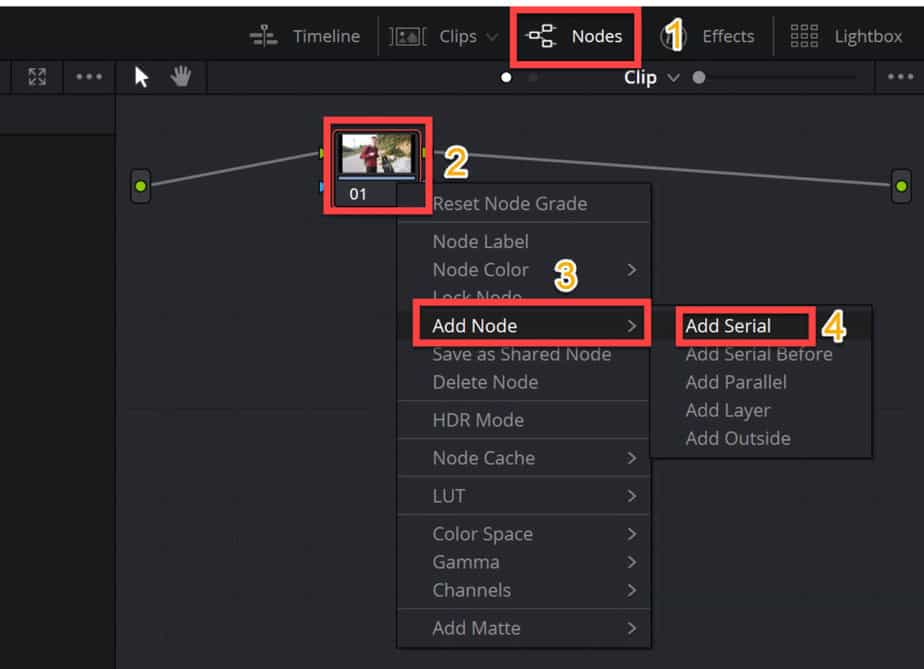
To do this, make sure the “Nodes” tab is open (located in the top right-hand corner.
Then right-click the node > Add Node > Add serial, as shown in the picture below:
Once you have created a new node, make sure to click on it as it turns red. This way we will only affect that particular node.
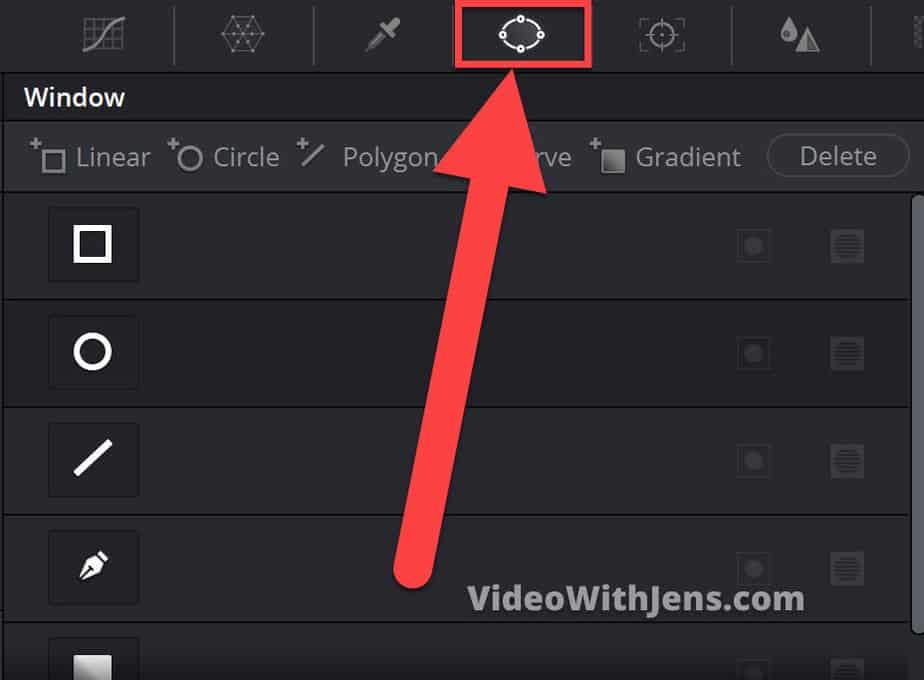
The next step is to open the “Window” window! Or maybe the tab is the more appropriate word to use in this setting. Click on the icon shown in the image:
Here you have some different shapes to pick from.
Choose the one that suits your object best (the part that’s not in the background). Your object has to fit inside the shape, isolating it from the background we are going to blur.
In this article, I’m going to use myself as the object, a human being, which for many people will be the case. Therefore, I’m going to choose the circle shape first! That’s the one that fits the head best…
So go ahead and click on the shape’s icon.
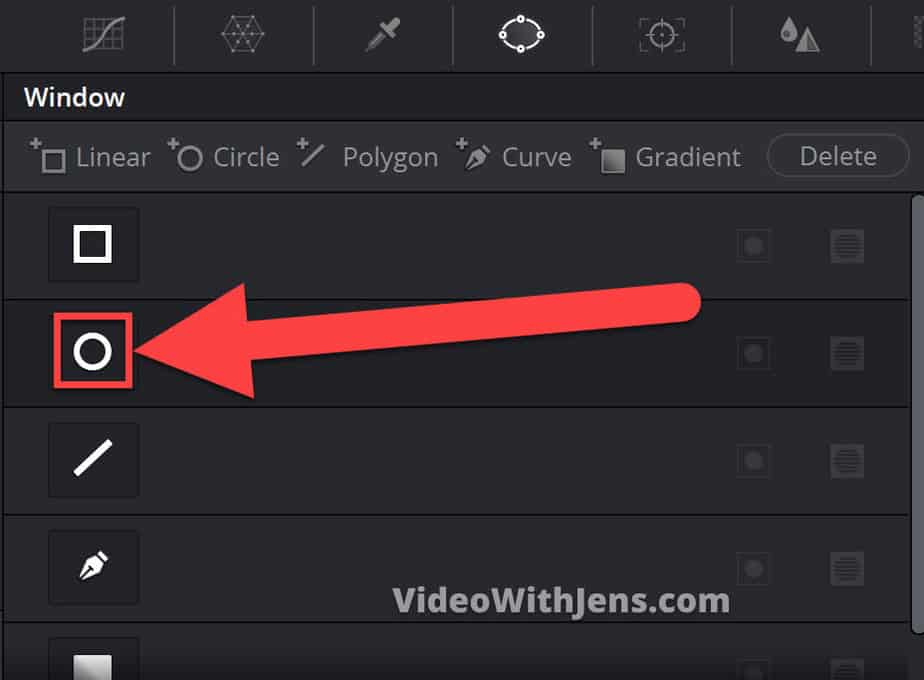
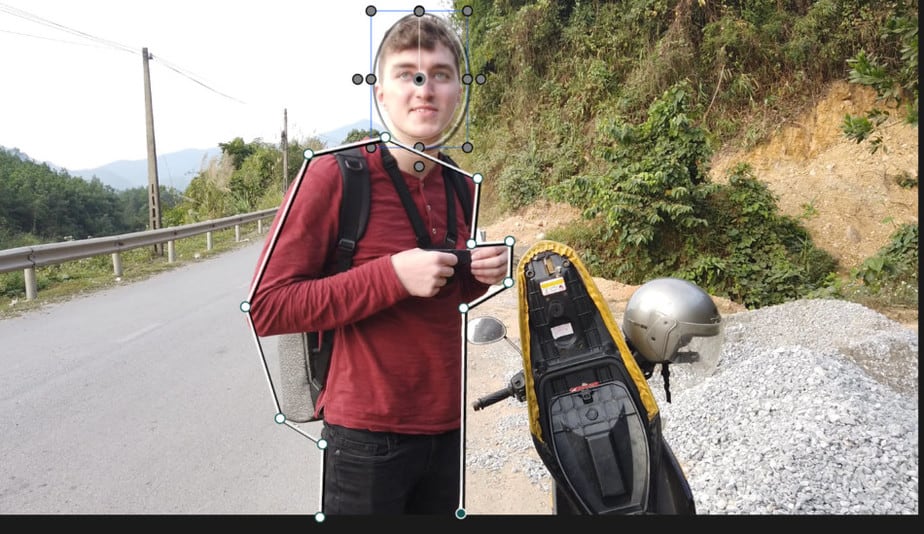
Once that is done the shape will appear in the video preview. And if you chose the circle it will look like in the picture below. If you chose the square shape, it will look pretty similar as well.
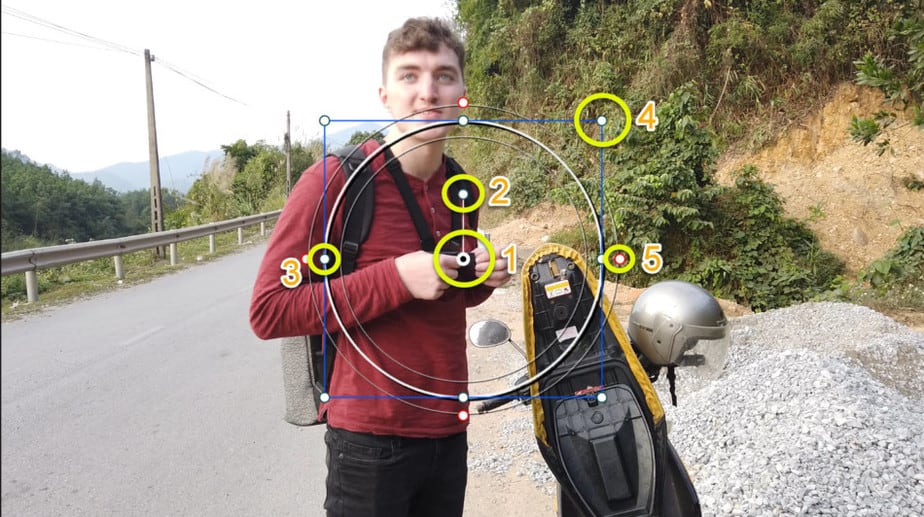
Alright, so as you can see in the picture above I’ve made a bunch of yellow circles and numbers. This is because I wanted to make a list for you to explain what every one of these dots does!
All of the dots are “activated” the same way: Hover your mouse over one, right-click and hold it down while moving your mouse!
Refer to the numbers on the picture while reading each of the numbers in the list:
- This one is for moving the whole shape around. You actually have to use that dot, as you can move the shape by clicking anywhere inside the shape!
- Rotation.
- Change the form of the shape. For example, if you want an oval circle.
- Change the size. For circle shape, it keeps all proportions the same. However, for the rectangular shape, the proportions change.
- Feather controls. Changes feathering if you want a more smooth transition.
Woah! I hope that list was useful because it was a lot of work making it.
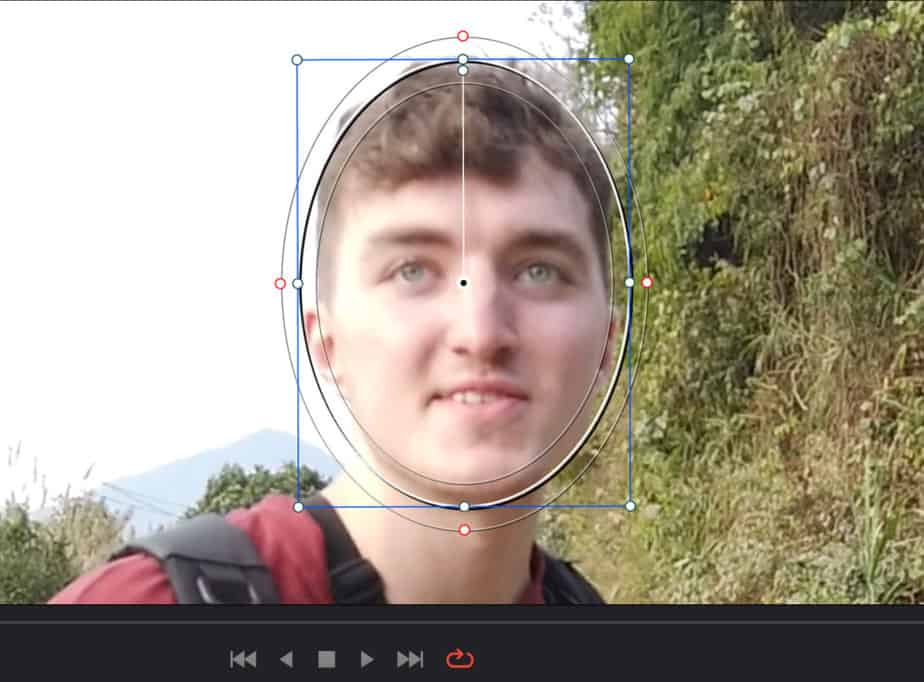
Now place the shape around your object and adjust it to your liking.
I recommend zooming in if it’s a small object. You do this by simply scrolling with your mouse, or you can hold down CTRL (CMD on Mac) and click on the “+” & “-” to zoom in & out.
Once that is done, we are going to solve the first problem I mentioned earlier:
A moving object!
To do this, we are going to use Davinci Resolve’s tracking tool, which is really cool. It basically makes the shape follow the object. It also adjusts the shape size, rotation, etc.
Now, open the “Tracker” tab:
Next thing, make sure that the “Clip” is selected:
Using the tracker is fairly straightforward.
All you have to do is click on the “Play” button to make it start tracking, I’ve made a red square around it in the image below.
To stop/pause it from tracking hit the “Pause” button, which I’ve made a yellow square around.
You also have the option to prevent the tracker from moving the shape by unabling the “Pan”.
It’s also possible to prevent it from zooming and a bunch of other stuff as you can see. However, for this tutorial, we are going to just leave them all on. Which is what I usually do.
Anyways, the auto-tracking process on footage with little movement is usually very smooth. However, if the object moves a lot it’s suddenly a whole lot more tricky. Because of this, I choose a video where it can be a little tricky for the sake of this tutorial.
Ok, now you are ready! It’s time to hit the “Play” button:
Congratulations! If it worked out perfectly! And my condolences if not…
Ok, it’s not that bad. It’s a pretty straightforward way of fixing it if the window (which we’ll now refer to as the mask) didn’t track your object how it was supposed to.
In order to fix this, I’ve invented a GENIOUS way of fixing this. Not that I’m a genius, so maybe it’s just an intermediate way of fixing it… (Joking) It’s a very nice way of doing it:
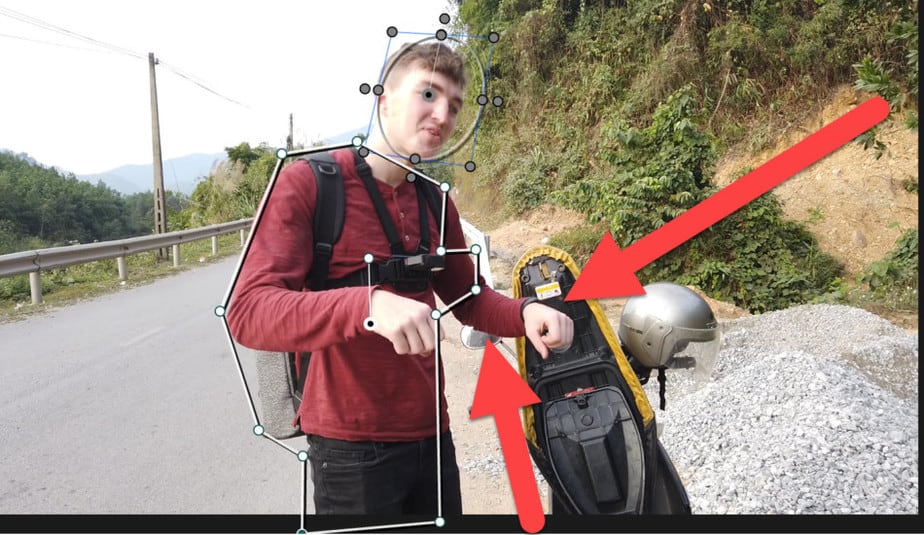
If you just go to the point of the clip right before the tracker started messing up. Then note where that is.
For me, it’s when I turn my face away from the camera. As you can see in the picture below the mask does not fit perfectly at that point.

The next thing you’re going to do is to click on the clear/redo button, which will clear everything done in the tracker. See image:
Now enable the one called “Frame” in the tracker. This is because we are going to make keyframes, frame by frame on the tricky part:
Ok, once the “Frame” is enabled. You are going to start the tracker BUT this time we’re going to pause it just before it starts messing up. This is the reason you wanted to note that down.
If you didn’t stop at the right place just press CTRL+Z or for a mac Cmd+Z to undo one time! The reason you have to stop at the right place is that it’s created a keyframe every time you stop the tracker.
Once you’ve stopped the tracker at the right place use your arrow keys, and jump one frame to the left/backward! Then created a new keyframe here by clicking on the diamond I’m showing you in the picture below:
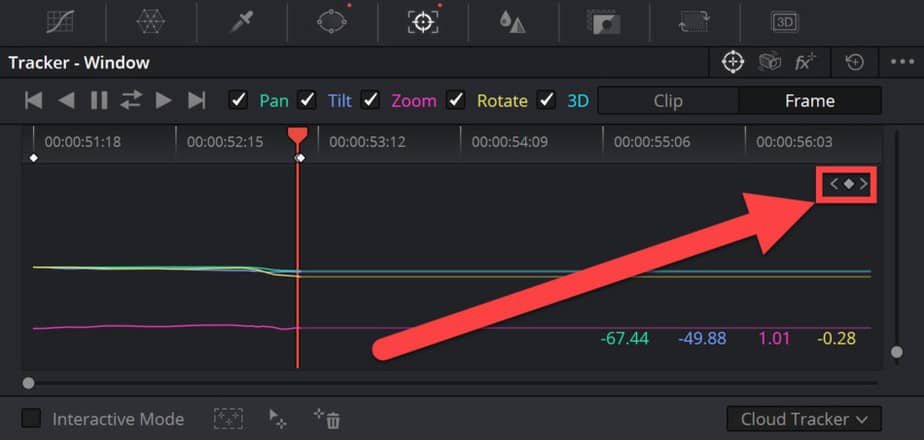
Once that is done you’ll have to keyframes right next to each other like in the picture above.
Now go ahead and use your arrow keys again, this time tap one frame forward (to the right) at a time. While you do this watch the video in the preview and re-adjust the mask every time it starts to mess up. Every time you adjust the position or size of the mask, it creates a new keyframe in the tracker.
Don’t worry if your video has a lot of re-adjusting, as now comes the genius part!
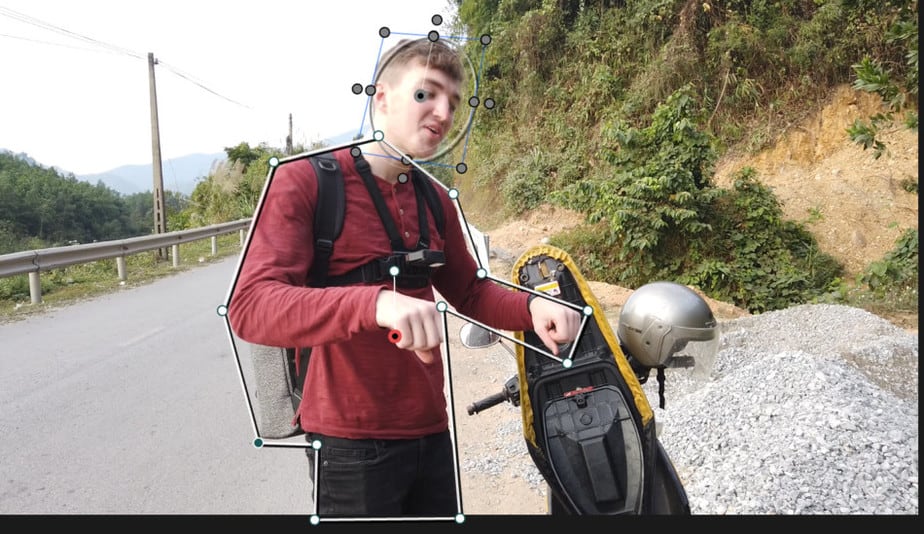
Below is a picture where I have re-adjusted the mask at the part is started messing up:
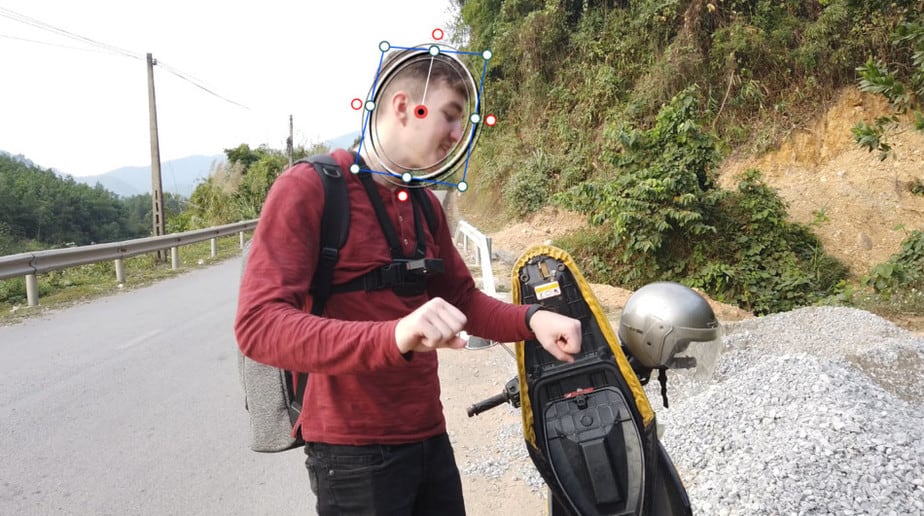
The tracker started messing up as soon as I turned my face away from the camera. Therefore, I had to re-adjust it and tell the tracker that I want it to follow the side of my head instead!
As you can see I have created 4 new keyframes in the picture:
Since I’m watching the bike and not facing the camera for a while, the position of my head will be pretty much the same for a few seconds.
Therefore instead of watching 120 frames (if filmed at 60fps like this video), I’ll give the tracker another chance! Go ahead and hit the “Play” button, and auto-track until it starts messing up again.
You’ll probably have to track and undo it once just to get a clear picture of where this happens in the video. Make sure to hit the “Pause” in the tracker before hitting undo (CTRL+Z or Cmd+Z) as you don’t undo the keyframes you just created!
When you’ve stopped at the right place, repeat the process described above (One frame back > keyframe > re-adjust messed up frames)
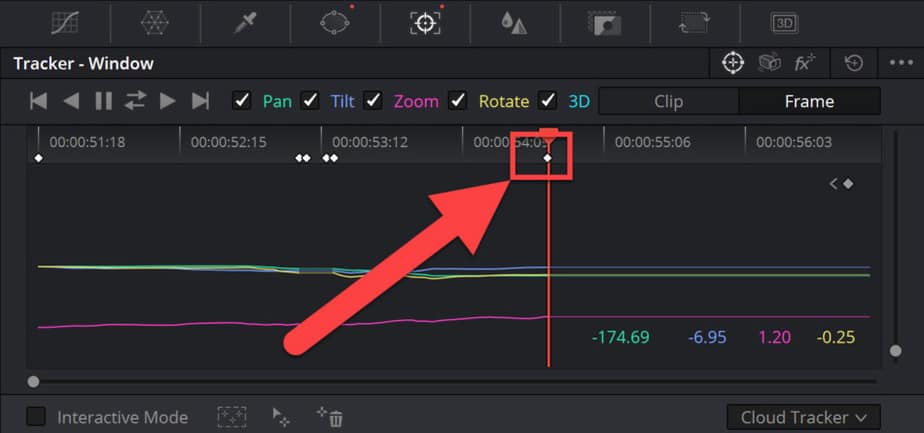
In the picture below, you can see I tracked 2 seconds before it started messing up again! This spares a lot of time instead of keyframing frame by frame as a lot of people do.
Alright, that’s how you track moving objects/people…
Since I’ve only tracked the head, we are next going to track the body!
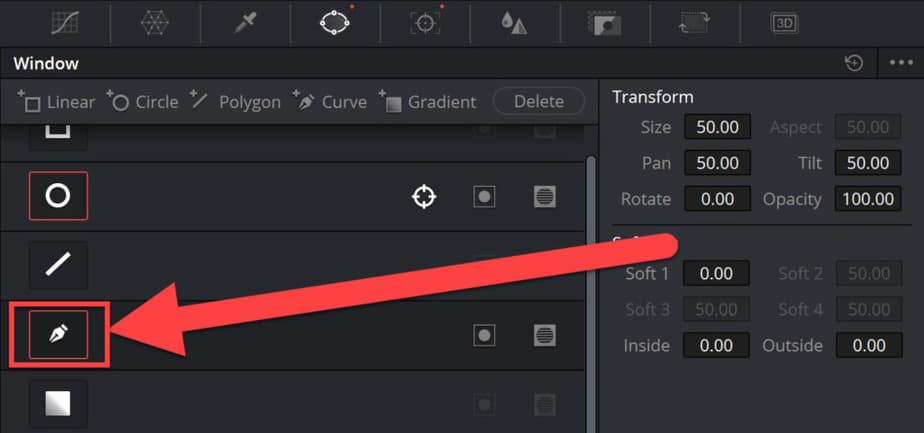
This time we are going to use the “Pen” in the “Window” tab, which has an ink pen as its icon:
Once you have selected the pen by clicking on the icon, go ahead and draw around your object.
You do this by just clicking around it.
TIP: Don’t make too many dots around the object, especially if it’s a lot of movement.
You’ll soon get to see why this is.
Ok, so once you have drawn around it, you’ll have to close it if you haven’t already. This is done by simply clicking on the first dot you made:

Once you have closed the drawing, you can go ahead and start the tracker!
If you tracked your object/human/whatever perfectly, I once again just have to congratulate you… Because for a lot of us this will not be the case…
The picture below is a good example of how the mask will “break” while tracking. This is especially true when using the ink pen, as these masks are often much more complex than the circles etc.
To fix this, you are going to use the same GENIUS method we used for the circle while tracking!
The only difference when dealing with the ink pen is that you have to adjust all of the dots one by one as soon as they don’t fit…
This is why I said you didn’t want too many of those dots around your object. It’s ALOT more hassle to keyframe.
What I recommend is being creative with how you place the dots and try to avoid making new ones whenever possible. The reason is that you at some point have to create new ones, and then it will just become too many.
To make new dots, just click on the white line in between the other dots.
APPLYING BLUR TO THE BACKGROUND!
Once you have created a mask, the next thing is to apply blur!
Let’s get to it.
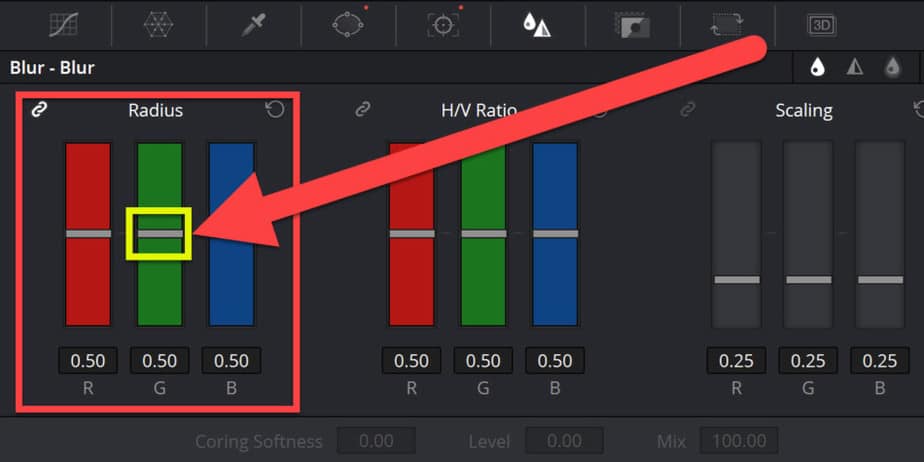
Open the “Blur” tab, on the right-hand side of the “Tracker”. Watch the picture below:
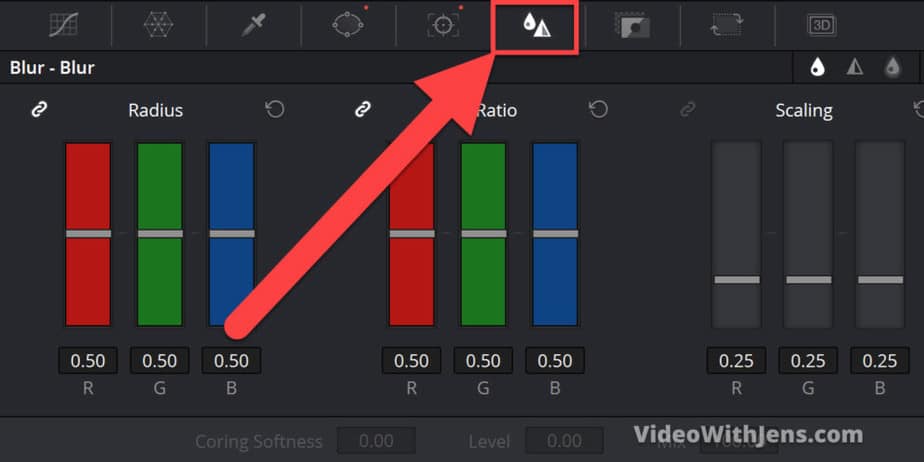
Inside the “Blur” tab, there are a couple of different things you can do.
We are only going to use the one called “Radius”.
Before we apply the blur, make sure that the chain icon in the top right corner of the red box I’ve made is enabled.
Then go ahead and increase one of the colors of the radius, if the chain is on, this will affect them all. (Pull upwards to apply blur).
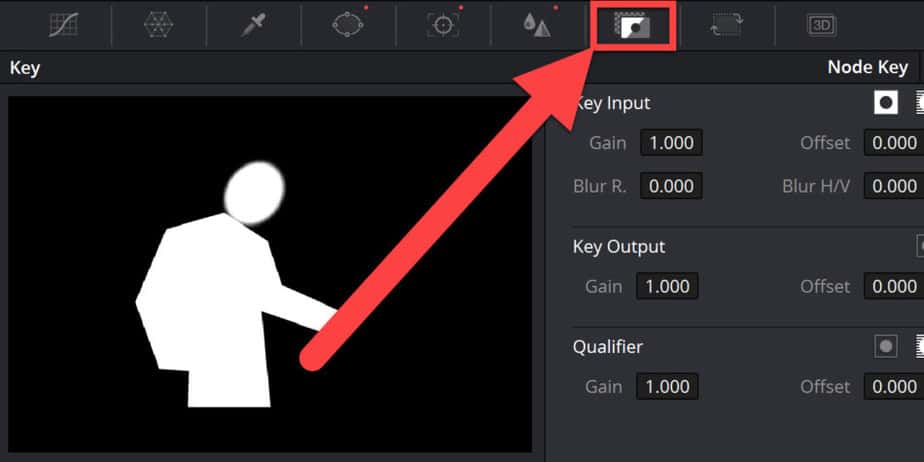
You may notice that this affects the wrong part of your video… That’s great, as this is really easy to switch.
Ok, so to switch the blur from inside the mask/window you have created to the outside (background), open the tab called “Key” on the right-hand side of the “Blur” tab:
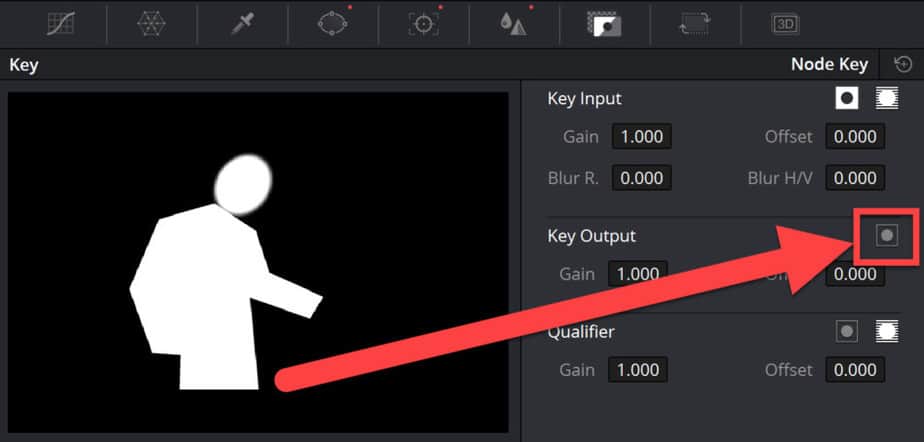
Once you are in the “Key” tab, navigate to the “Key Output” Section and click on the button shown in the picture below:
Perfect!!
Now you have successfully blurred the background of the video. Now you’re allowed to call yourself a pro, I would argue!
However! There are a couple of small tweaks which can make your blurred background look a lot better.
The picture below shows a common problem, which is easily fixed:
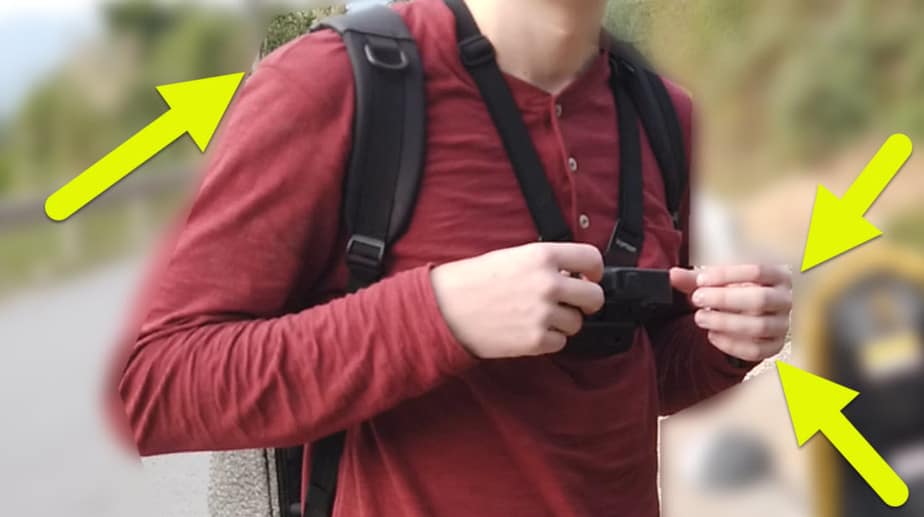
This problem is usually caused when using the ink pen to make the mask.
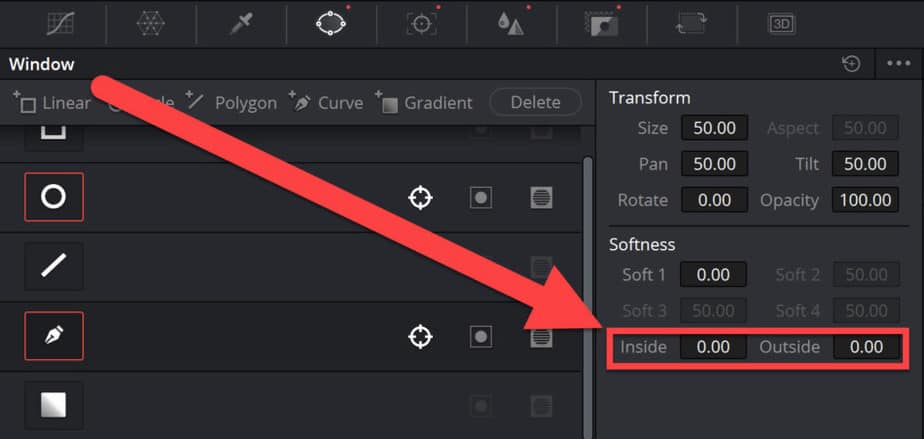
To fix this, simply go to the “Window” tab again, select the pen tool, and on the right side of the shapes, you can see the “Softness” section.
What you want to do here is simply play around with the two values that say “Inside” and “Outside”. These control the feathering, so just tweak those a little and you’ll see that your blur suddenly looks WAY better! Watch the picture below for reference.
If you have this problem with the circle or square shape you fix this in the video preview by increasing the feathering, explained earlier in the article.
Here is how my video looks after tweaking a little bit on the feathering “Inside” and “Outside”.

Looks pretty good right?
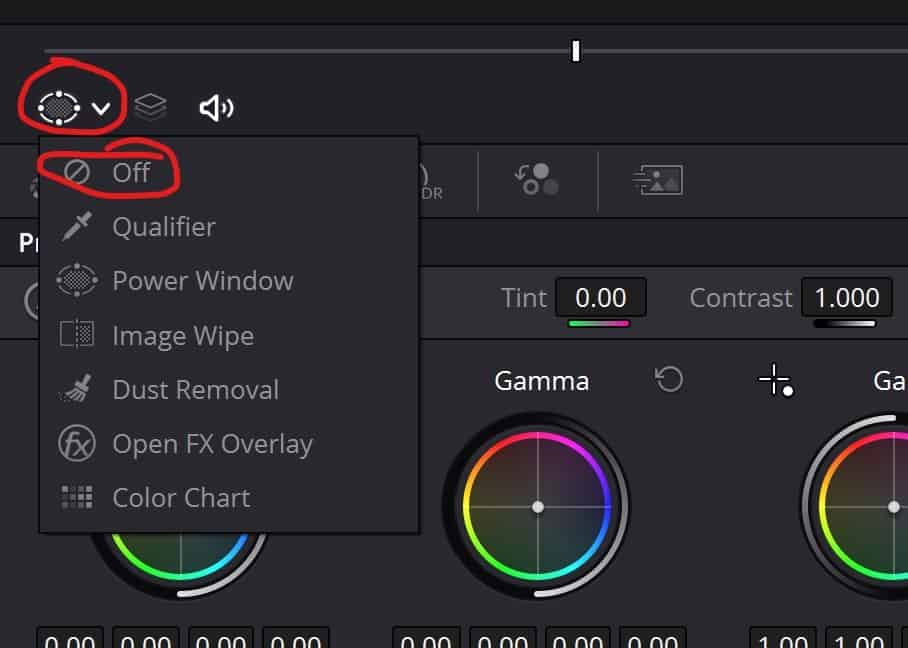
If you have a hard time tweaking the feathering because the mask/window is in the way. You can simply hide it by turning them off like this:
(Located beneath the video preview on the left side by default).
Alright, folks!
That’s it for this tutorial!
Best regards,
Jens.