How to ENABLE Auto Save in DaVinci Resolve (Remove Stress)
Losing a lot of your editing work due to DaVinci Resolve crashes may be one of the most frustrating things. Therefore having auto-save enabled (now live save) is the best way to end this frustration! Here’s how you enable it:
- Click on “DaVinci Resolve” in the top left-hand corner.
- Select “Preferences” in the drop-down menu.
- Change “System” to “User” and open “Project Save and Load“.
- Check off the box next to “Live Save“.
- Click on “Save“.
That’s how you enable live save! This saving method has now fully replaced the good old time-based auto save. But there is also another auto save method I recommend you use. Which is project backups, if for some reason the live save should fail you, its good to have another way of retrieving your project! or if you want a previous version of your timeline, it can also help you with that.
The Perfect Auto Save Combination!
Now you know how to enable the live save and that it saves your project after every adjustment you make to the project. That’s great and I love this feature. But what if it fails?
That’s when you want a backup solution also called backup projects. What this does is that it saves a copy of your current project every once in a while. Depending on the time which you set it to. I will show you how I’ve set mine but first let’s clear up how it works.
So what it does is that it makes an exact copy of your project and saves it to a folder on your pc (you access this from resolve). Don’t worry that it will fill up your hard drive as it deletes the oldest one when a certain number of copies have been saved.
You know want to know how many projects it saves and how often. This depends on your settings. As you can see in the picture below under “Project Backups”, there are three boxes you can change the time.
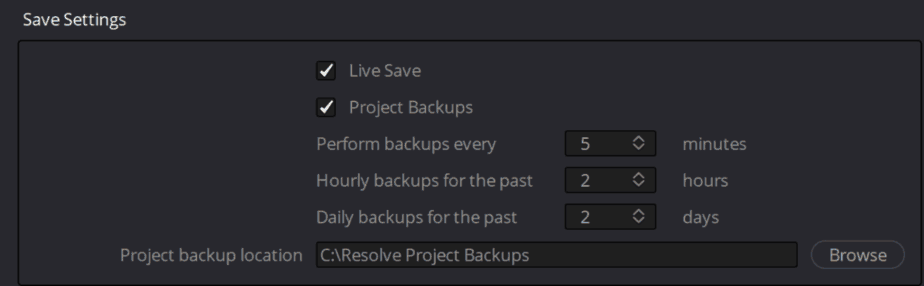
The first option is how often it’s going to save a copy of your project. If you set it to 5 minutes, it’s going to make a copy every 5 minutes. These will be saved for an hour, so if you set it to 5 minutes you’ll save 12 copies.
Then we have the hourly backups. Let me first explain how it works, then I’ll explain the number which you can change.

The reason it’s called the hourly backups is that it saves a copy of the project every single hour, this cannot be changed. What it does not is make a new copy of the current project and saves it. It takes the last copy of the ones saved every 5 minutes.
So the first option makes copies frequently for an hour and then the newest copy of those, when it’s a new hour is saved as hourly.
Now you have the option to choose how long you want the hourly copy to be saved. So if you set it to 2 hours, you have 2 versions of the project. Where the oldest file will go back 2 hours.
Lastly it’s the daily backups. These are saved for, wait for it, 24 hours! A daily backup is created at the end of a session. Basically every time you close down the software. How long each day is saved is what you decide by adjusting the number.

The numbers you’ve seen on the pictures are how I’ve adjusted my project backups. It’s entirely up to you how you want to set the numbers, as everyone has different needs.
Where Do I Find Project Backup Settings?
Just follow the steps I gave you at the beginning of the article. It’s located just beneath “Live Save”
Where are Project Backups Saved?
Now that you know how the project backups work and to apply the right settings. It’s just as important to know where the files are located!
If you have DaVinci Resolve open, go to File > Project Manager or shortcut Shift+1.
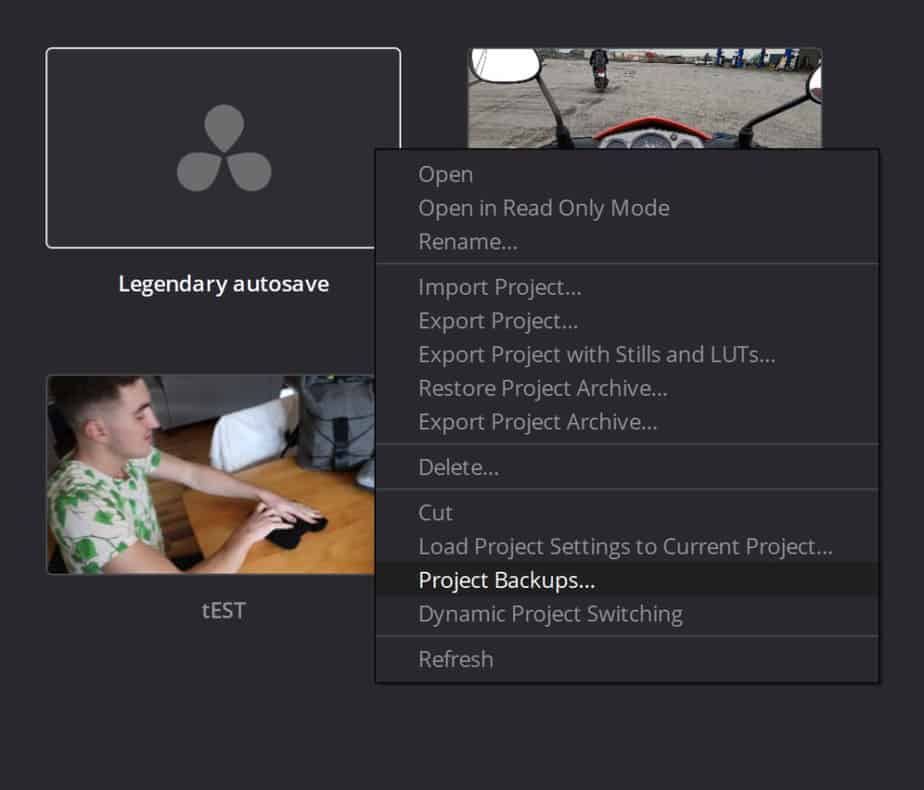
From here right-click the project you’ve been saving project backups from and click on “Project Backups”
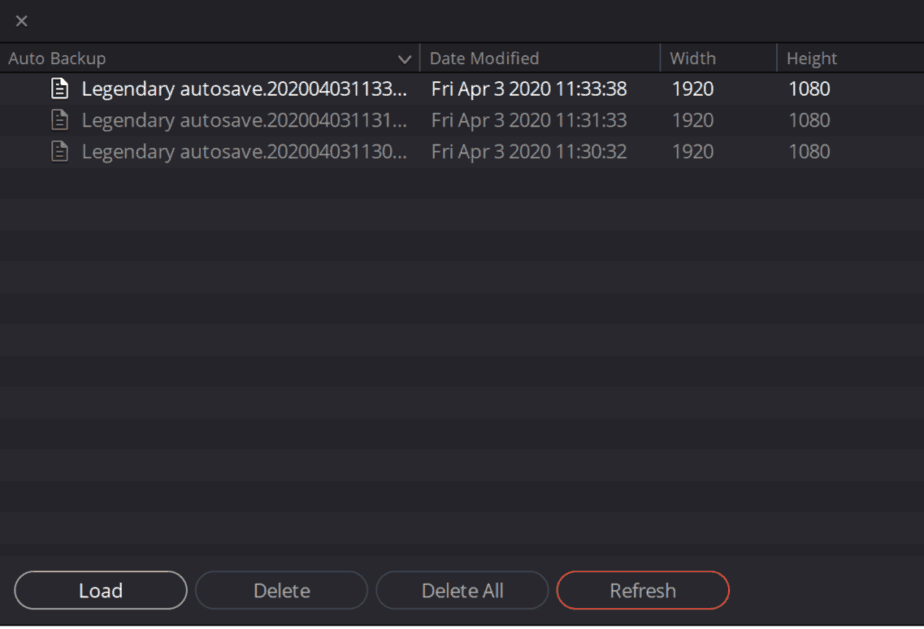
Here are your backups. I just created this project as you can see, so forgive me for not giving a full example. But you get the point.
Choose which version you want to open and click on “Load”.
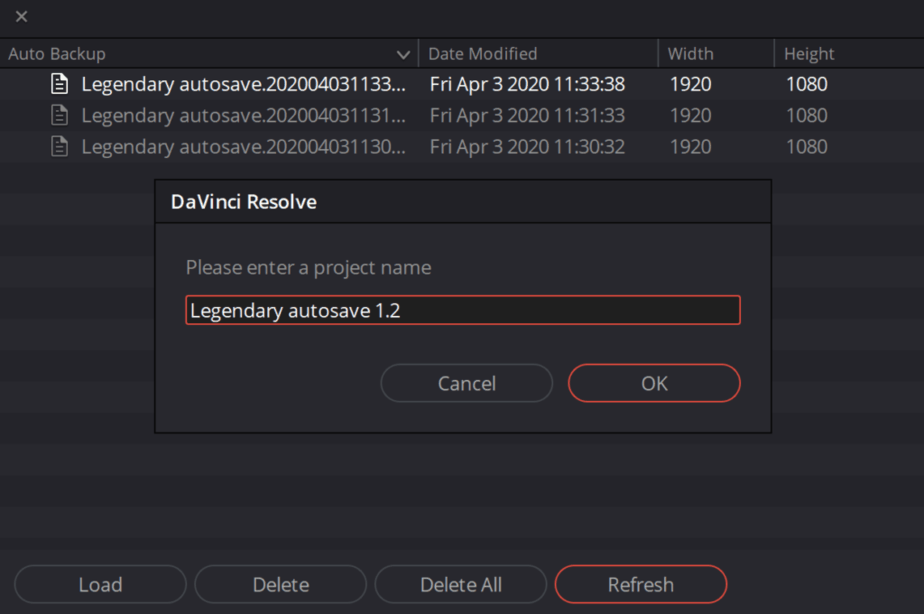
Then you get the option to change the name of it. It may be a good idea to give it another name than the original file in case it’s not the version you wish for. But it’s up to you, I warned you at least.
Press ok and close the backup window. Then you’ll find your file with the other projects you got going on.
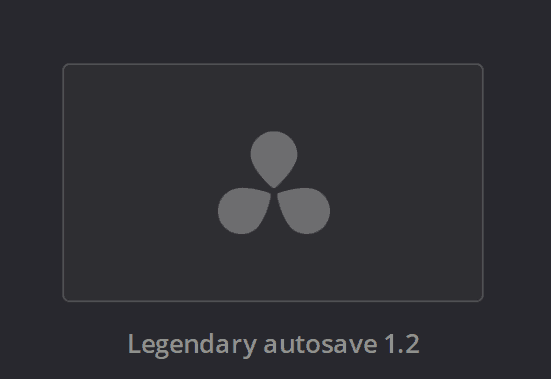
Like this, with the new cool name you gave it.
If DaVinci Resolve or your PC crashes or something, you don’t have to open the program to get to the backup files. Then it’s just to start the program again and before entering the project just right-clicking and open the “Project Backups” folder like above.
Do I still Need to Manually Save?
The short answer is: No, you don’t have to manually save anymore. BUT it can actually still save you from disaster. Did you see what I did there? “Save”.
If you just did a really complicated change to your project and maybe you spent hours figuring out how to do it. It’s at this moment you absolutely don’t want to get that “Error, the program has been outsmarted” and shut down.
Of course the Live Save would normally save here, but if it decides to fail for some reason at this moment, your awesome change is lost. It’s highly unlikely that a project backup is created in exactly the second you made that change.
It’s at these moments, that manually saving is gold and may be able to save you if you’re fast enough. Then using the shortcut is your smartest action. It’s as simple as pressing CTRL+S or Command+S for mac.
If Live Save does not fail you, it’s saved long before you get the chance of thinking about performing it manually. Which is awesome. But either the two of them work perfectly well together!
Helpful Tool When Manually Saving
If you are manually saving your project it’s sometimes hard to remember how long it’s been since the last time you saved.
DaVinci Resolve has a great solution for this you may not be aware of. Whenever you are editing above your working area where you can see your project name. You can also see when roughly last time you manually saved!
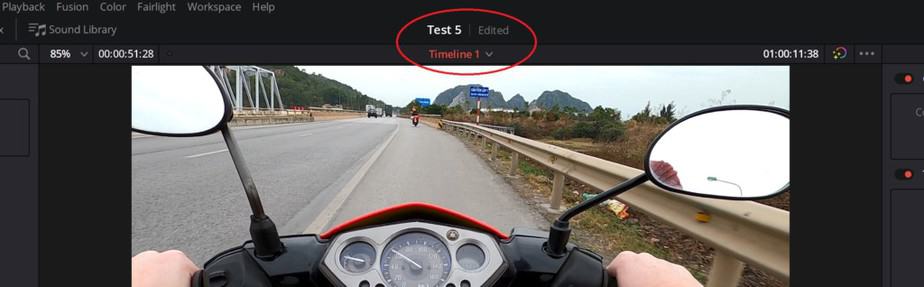
The “Edited” means that you’ve made a change to your project and not manually saved it! After 15 min without saving this text will actually change colour to yellow! Like in the picture below.

After 30 minutes it will turn red! Then it may be time to save. But that’s also up to you. Just don’t blame me if you were to lose your project due to alien error.

Now if you apply everything we have discussed in this article to your workflow, you will remove a lot of frustration and stress. Every editor’s nightmare is losing hours of editing to software or hardware crash. So stay safe fellow editors!
Cheers,
Jens