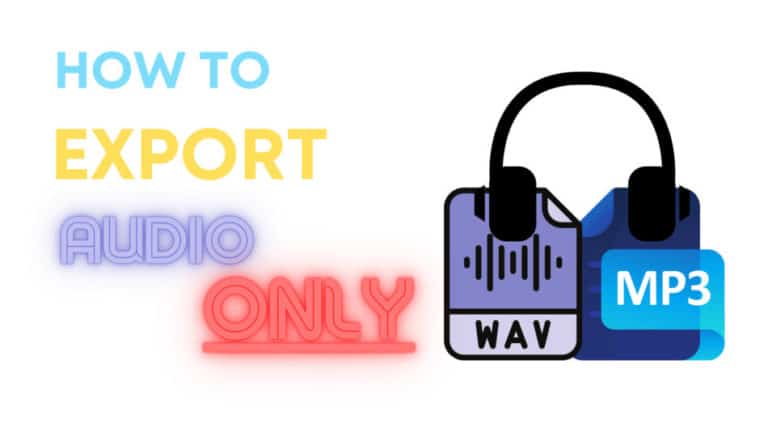
How to Export MP3 in Davinci Resolve (Render Audio Only)
In this article, you’ll learn how to export your project as an MP3 file in Davinci Resolve!
- Go to the “Deliver” page inside Resolve.
- Open the “Render Settings” tab.
- Change “Custom Export” to “Audio Only“.
- Click on the “Audio” tab, and change “Format” to “MP3“.
- Click on “Add to Render Queue“.
- Go to the “Render Queue” tab, and click on “Render All“.
That’s how you export MP3 files with Resolve. You have a more detailed explanation of how to do it below:
Also if you wish to export multiple tracks as their own file, I will show you that too.
How to Export MP3 in Davinci Resolve
And now the more detailed version with pictures!
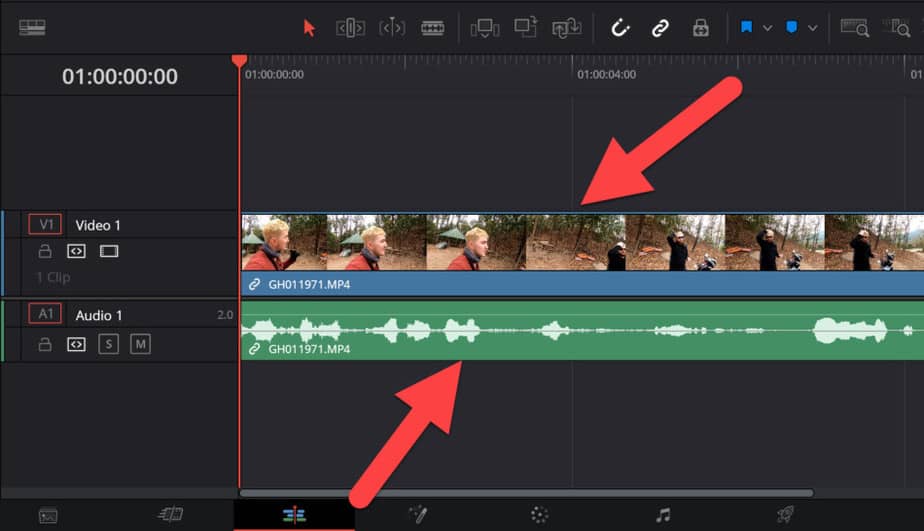
Here you can see I have a normal video added to my timeline:
(We are only going to export the audio)
Go to the “Deliver” page inside Davinci Resolve:

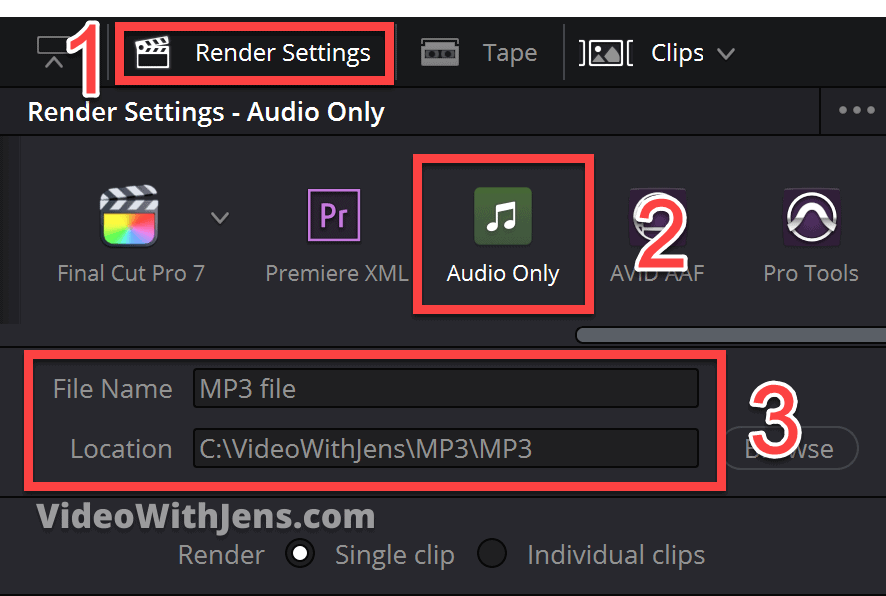
Then on the left-hand side of the “Deliver” page open the “Render Settings“.
The first thing you need to change is the render “preset”. Change this from “Custom Export” to “Audio Only“. You will have to scroll a little bit to the right to see it.
Also, set the “File Name” and “Location” on where the MP3 file is going to be saved on your computer:
Once that is done, a little further down the “Render Settings” tab open the tab called “Audio“.
Here you want to make sure that the “Export Audio” is enabled. Then change the “Format” to MP3, and the “Codec” will automatically be set to MP3 as well:

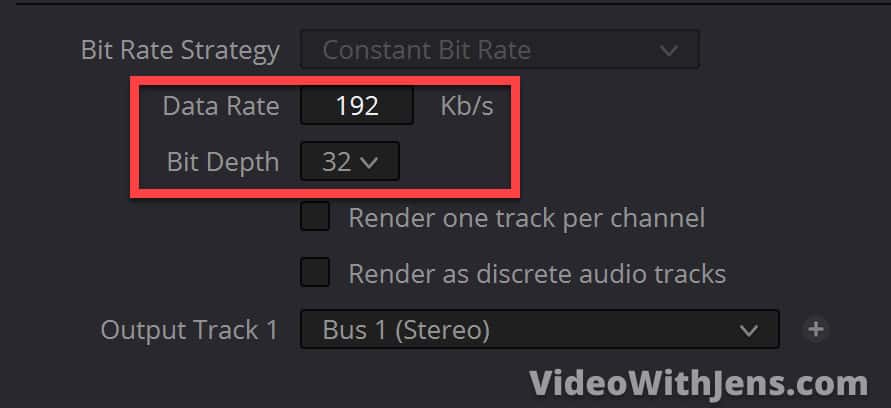
The next thing you’ll see is the “Data Rate“, this one is maximum of 192 Kb/s as long as you set “Output Track 1” to “Bus 1” (which we are going to discuss later).
Then for “Bit Depth” you can only set this to 32 for MP3 files:
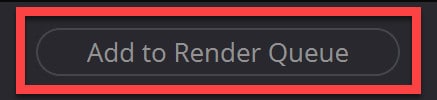
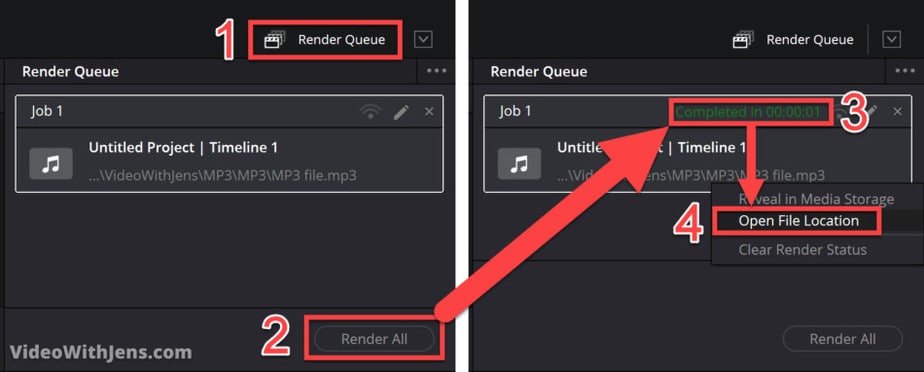
Next, go ahead and click on “Add to Render Queue“:
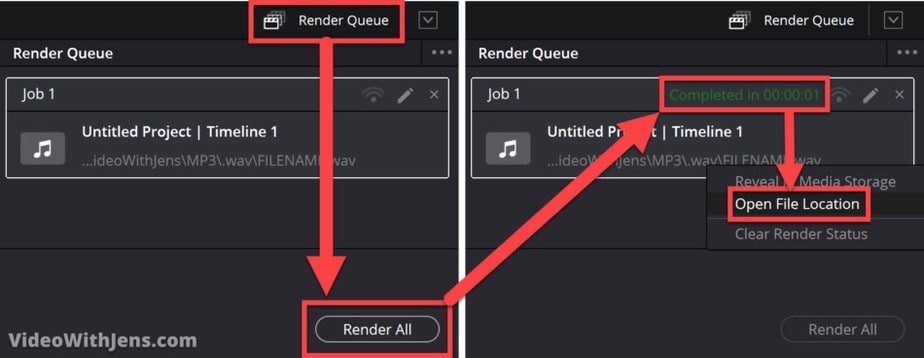
Go to the “Render Queue” tab and click on “Render All” to start the rendering.
Once it’s done, you can right-click it and select “Open File Location” to locate where it’s saved:
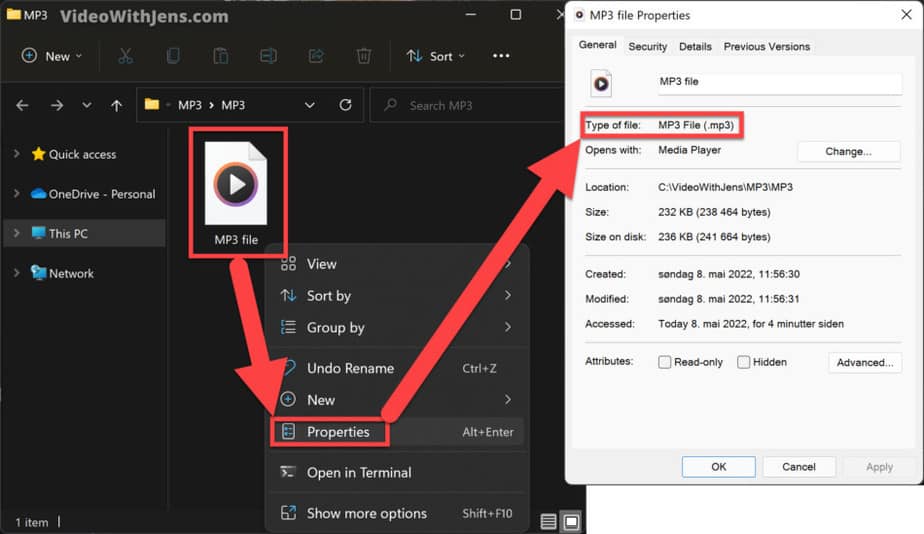
Next, the folder where it’s saved will open automatically.
If you go ahead and right-click the file, then click on “Properties” you can successfully see you have exported an MP3 file:
That’s it!
Next up, I will show you how to export multiple audio tracks as their own file:
How to Export Multiple Audio Tracks in Davinci Resolve
There can be a number of reasons why you want to export multiple audio tracks from Davinci Resolve. For example, if you’ve done a bunch of sound design and want to manipulate a specific track in another software.
Gladly it’s quite easy to do in Resolve!
- Go to the “Deliver” page, and open “Render Settings“.
- Change “Custom Export” to “Audio Only“.
- Click on the “Audio” tab.
- Change “Format” to “Wave“, and “Codec” to “Linear PCM“.
- Set “Bit Depth” to “24” or “32”.
- Set “Output Track 1” to “All Timeline Tracks“.
- Click on “Add to Render Queue”.
- Go to the “Render Queue” tab, and click on “Render All”.
Here’s a detailed version of how to do it:
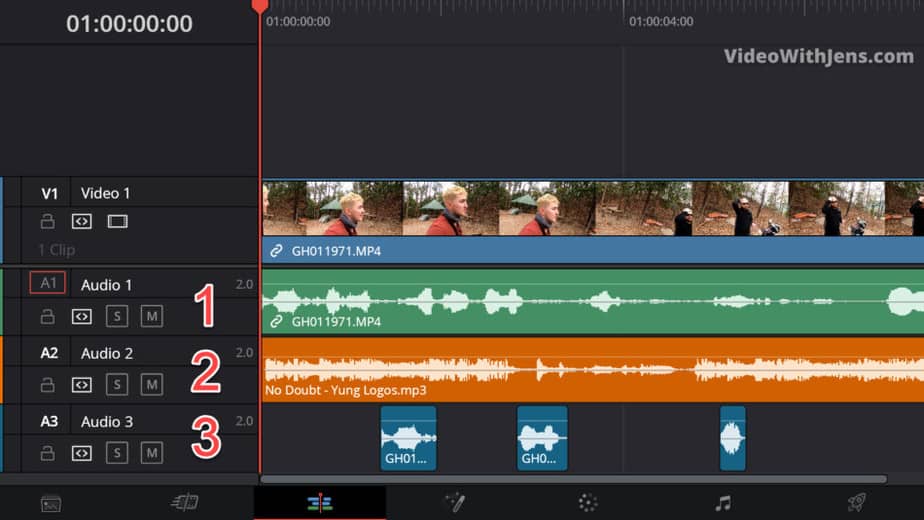
This is the timeline I’m going to export in this example.
You can see it’s a video with 3 audio tracks:
Go to the “Deliver” page inside Resolve:
Open the “Render Settings” in the left-hand top corner, and change “Custom Export” to “Audio Only“. You have to scroll a little to the right in order to see this option.
Then set the “File Name” and “Location” to whatever your prefer:
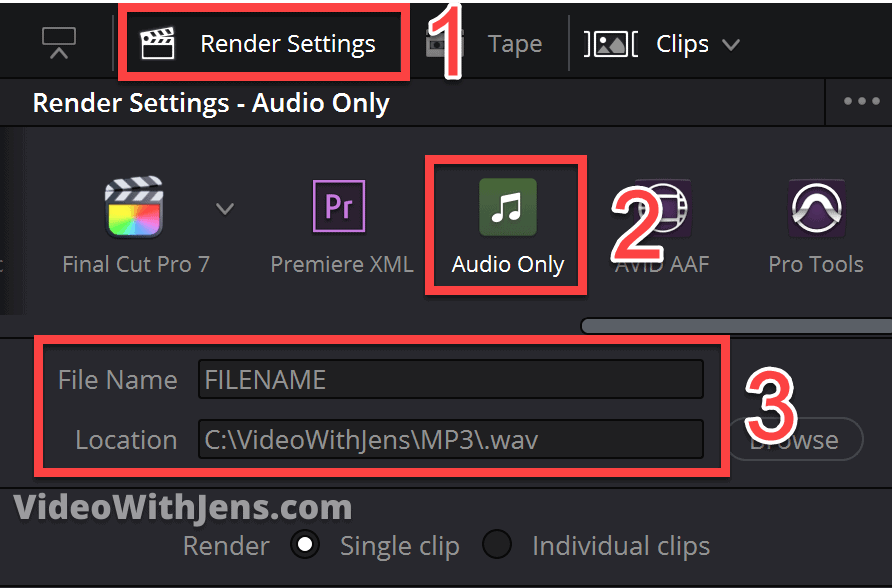
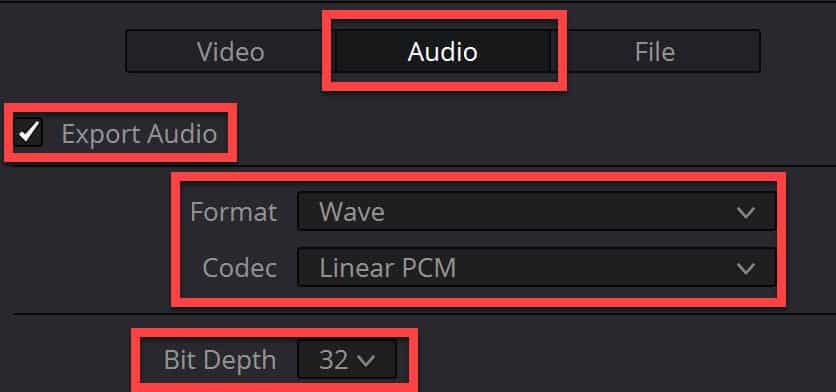
A little further down, click on the “Audio” tab.
Here you want to make sure the “Export Audio” is enabled.
Next, set the “Format” to either “Wave” or “MP3“.
I’m going with “Wave” in this example since you most likely are going to use these audio files for some production-related tasks.
Choose “Wave” if you are going to edit the audio afterward, and “MP3” if not.
Set “Bit Depth” to “24” or “32” for “Wave“. For “MP3” the only option is “32“:
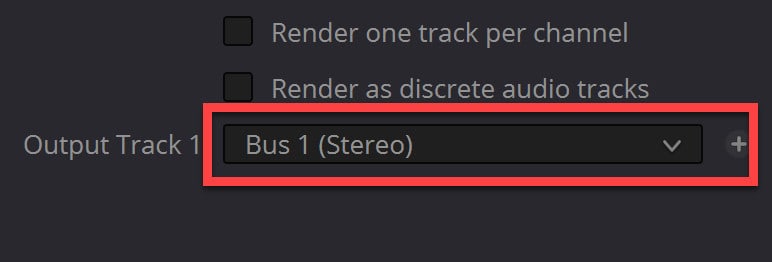
Here’s where the magic happens.
By default “Output Track 1” is set to “Bus 1 (Stereo)“. This option export all of the audio tracks in one file:
Therefore we are going to change that one to either “All Timeline Tracks” or “Timeline Track“.
If you choose “All Timeline Tracks“, all of your timeline tracks will be exported as their own audio file.
Watch the images below:

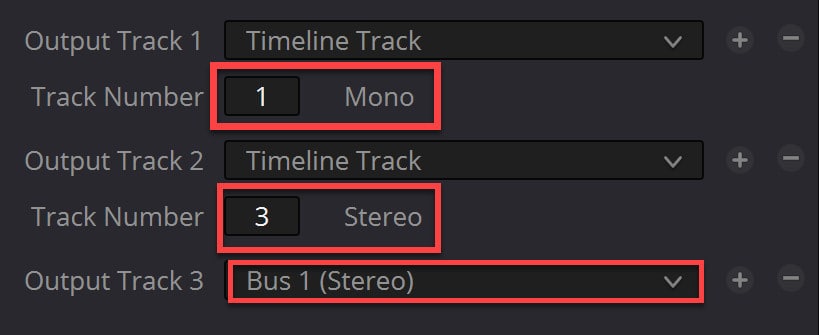
The next option is the “Timeline Track“.
By using this you can decide which audio tracks you want to export.
You’ll also notice the option “Track Number” appears. The number next to it represents which track to export.
If you want to export two audio tracks, click on the plus icon:

Notice that next to the “Track Number” which is set to 1, it says “Mono“. This is because the track is a mono track, and in that case, the file will also be exported as mono.
There is also an option to export individual tracks, but at the same time export the whole project’s audio.
You do this by creating a new “Output Track” and then set it to “Bus 1“.
In the example below I’m exporting track 1 & 2 as individual files, and also the whole project audio in the third file:
Once you have chosen which tracks to export, click on “Add to Render Queue“:
Then it will appear as a “Job” in the “Render Queue” tab on the right-hand side of the “Deliver” page.
Go ahead and click on “Render All” here.
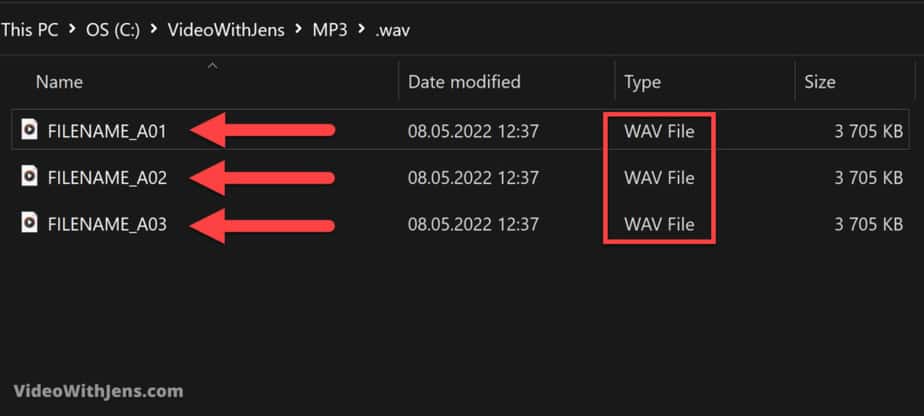
Once it’s completed you can right-click the “Job” and then click on “Open File Location” to find where it’s saved on the computer:
In my case the files will look like this:
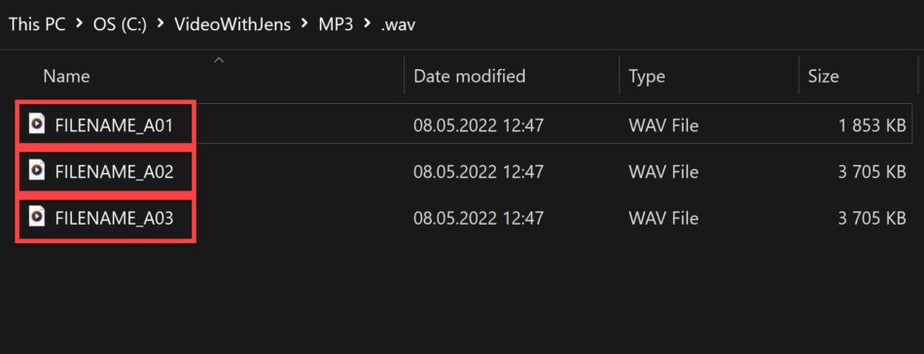
(Track 1 & 2 as their own file, and the third file is all the audio tracks combined)
If you want to learn different ways to fade audio, I’ve written an article on that here.
Best Regards,
Your friend, Jens.