8 Ways to Move Clips in DaVinci Resolve (+ Tips & Tricks)
Here are 8 ways to move clips in DaVinci Resolve:
1. How to Move Clips in DaVinci Resolve (Basic Method)
In DaVinci Resolve you can move clips by dragging them to where you want in the timeline. However, it’s also possible to use swapping as a way of moving them. You can do that by holding down “Ctrl + Shift” or “Command + Shift” while pressing period or comma to swap the clip to the left or right.
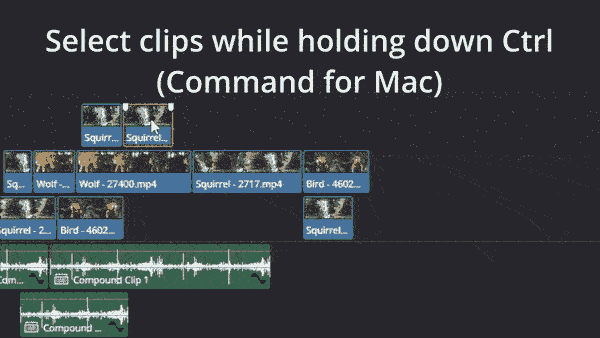
2. How to Move Multiple Clips at Once in DaVinci Resolve
To move multiple clips in DaVinci Resolve, simply press “Ctrl” or “Command” on your keyboard while selecting the clips you want to move.
Then, drag the selected clips to move them. You can also select all the clips on the right-hand side of the playhead by pressing shortcut “Alt + Y” or “Option + Y“.
Check out this video for 5 ways to move multiple clips at one:
For more information on how to move clips to the right, read on:
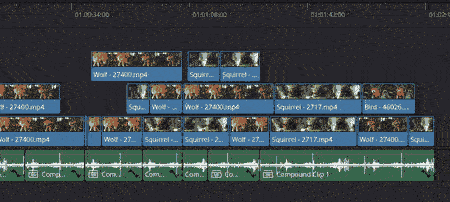
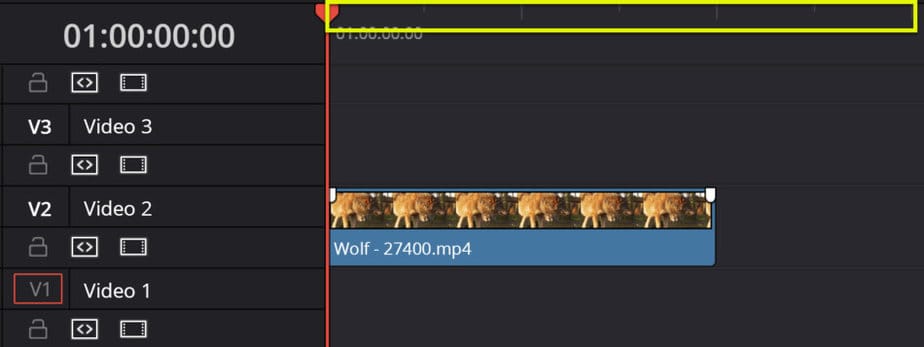
3. How to Move Clips to the Right in DaVinci Resolve
- Go to the “Edit” page inside DaVinci Resolve.
- Place the timeline playhead at the beginning of the first clip you want to select.
- Press keyboard shortcut “Alt + Y” or “Option + Y” on a Mac.
- Drag all the selected clips to the right.
Here’s an illustration of how it should look like:
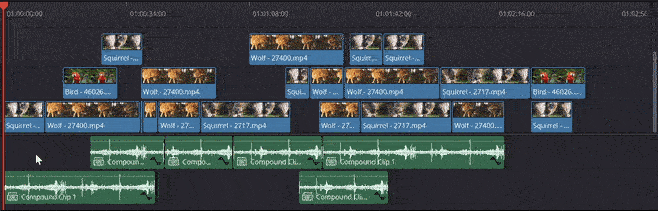
If you don’t where the playhead is, it’s that red time marker in the timeline.
Here you can see I’ve marked that it selects the clips on the right side of it when using this method:

Selecting clips to the left:
To select all the clips on the left side of the playhead, press the shortcut “Ctrl + Alt + Y“. For Mac users press “Ctrl + Option + Y“.
Select all clips to the right on only track 1:
You can also select the clips on the right-hand side of the timeline playhead on only track one as well. Then instead of pressing “Alt + Y” or “Option + Y“, simply press “Y“.
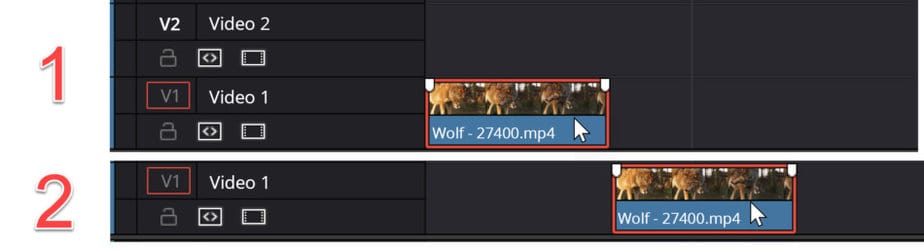
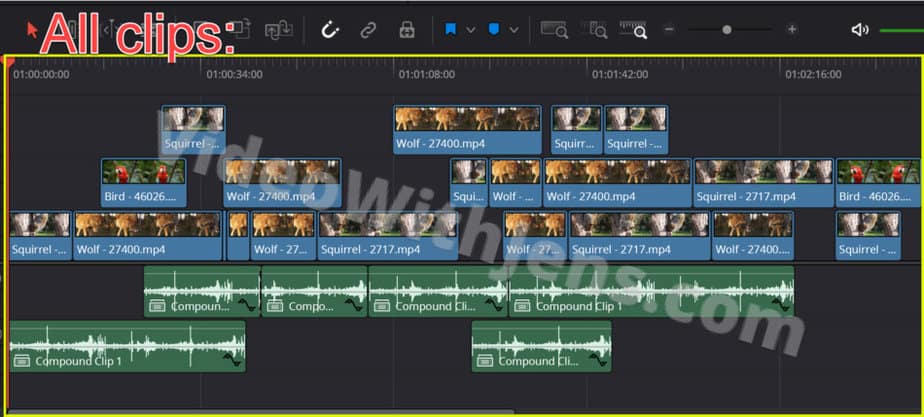
4. Move All Clips at Once in DaVinci Resolve (Move Whole Timeline)
In DaVinci Resolve you can move all the clips in the timeline at once in a few clicks. Simply, press the keyboard shortcut “Ctrl + A” or “Command + A” if you are on a Mac. This selects all the clips in the timeline, and you can now simply drag them to where you want.
Here’s an illustration of what it looks like:
You can see that all the clips get highlighted (the red border around them) when they are selected (Ctrl/Command + A).
Then you can simply drag one of them and all the others will follow.
To be able to see all the clips at once you can do that by pressing the shortcut “Shift + Z“. This will make it easier, however, not a must.
It’s also possible to move the clips frame by frame to make the final adjustment!
5. How to Move Clips Frame by Frame in DaVinci Resolve
To move a clip frame by frame in Resolve, simply press comma or period on your keyboard. Select the clip in the timeline and press comma to move the clip a frame to the left, and period to move the clip a frame to the right.

If you zoom all the way into the timeline you can see some white lines at the top of the timeline.
These are representing the frames.
One line= one frame. Which is how far you move the clip each time you’re pressing comma or period.
Check out this video of how to do it:
A video clip in DaVinci Resolve can minimum move 1 frame at a time. It’s not possible to move in smaller increments.
However, for audio it’s another story:
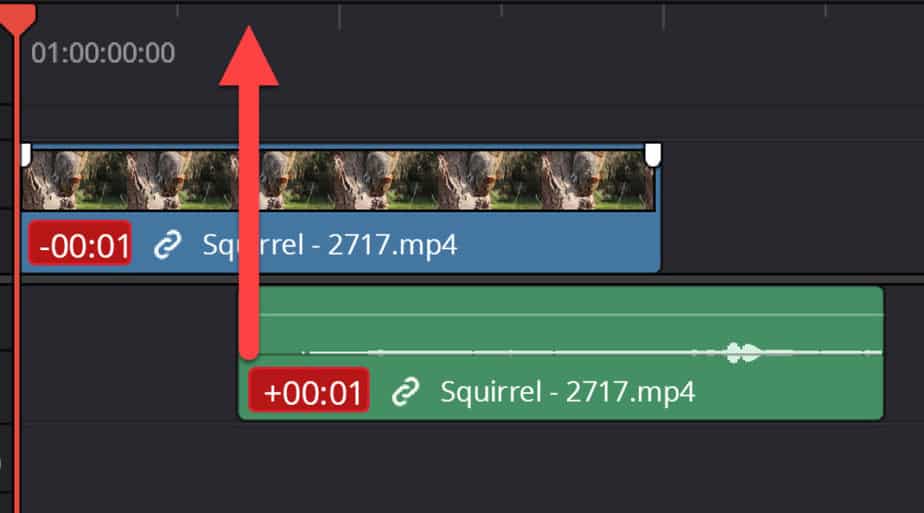
6. Move Clips Precisely and Not in Increments in DaVinci Resolve
By disabling “Snapping” (shortcut “N“) in DaVinci Resolve, you can move video clips in increments of one frame at a time. However, by only moving the audio part you can move the clip in subframe increments. Simply, hold down Alt-key and select the audio to isolate it from the video.
In the image below you can see I’ve placed the audio clip in between two frames:
A common issue people are complaining about is that the clips are overwriting each other in the timeline.
Here’s how to fix that:
7. Move/Insert Clips Without Overwriting in DaVinci Resolve
Moving clips without overwriting other clips in DaVinci Resolve is easy. Simply, press the shortcut “Ctrl + Shift” (“Command + Shift” for Mac), while dragging the clip to move it. This prevents the clip from overlapping other clips.
When using this method to insert, I recommend that you have the “Snapping” (shortcut “N“) enabled. If not, it’s easy to be a bit inaccurate and accidentally cut another clip in half.
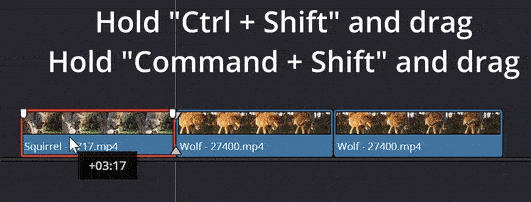
Here’s a video explanation:
The second way to prevent overwriting is by using “Paste Insert”:
7.1 How to Insert Clips Without Overwriting in DaVinci Resolve:
- Select the clip you want to insert in the timeline.
- Press the shortcut “Ctrl + X” (“Command + X” for Mac) to cut and copy the clip.
- Place the timeline playhead between the clips you want to insert.
- Press the shortcut “Ctrl/Command + Shift + V” to “Paste Insert” the clip.
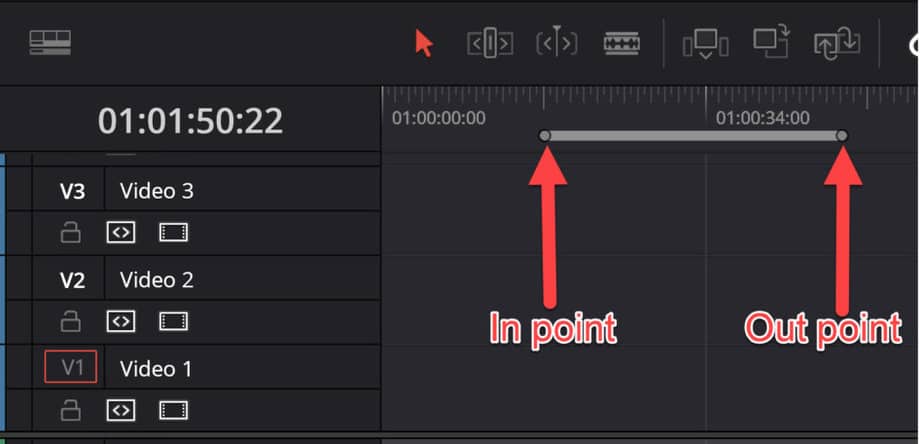
8. Inserted Clip Showing Up in Wrong Place: Issue in DaVinci Resolve
If you insert a clip in Resolve and it shows up in the wrong place, it’s probably due to some misplaced in- and out points. To clear these, simply press the shortcut “Alt + X” (“Option + X” for Mac users). If that does not work make sure the timeline playhead is correctly positioned.
Here’s what the in- and outpoint look like in the timeline:
Check out this complete DaVinci Resolve tutorial, if you are just getting started!