How to Overlay Video In Davinci Resolve (Video over video)
In this article, you’ll learn how to overlay a video, using Davinci Resolve.
This is done by placing one video on top of another one.
- Add the main clip to the track “Video 1” in the timeline.
- Add the overlay clip to the track “Video 2“.
- Select the overlay clip, and open the “Inspector” tab.
- Under “Transform“, adjust the “Zoom” value to size the clip.
- Adjust the “Position” value to position the overlay clip.
That’s a quick summary of how you can overlay your video!
Here’s a more detailed version, including some awesome effects you can apply as well:
First, make sure to be on the “Edit” page inside Resolve:

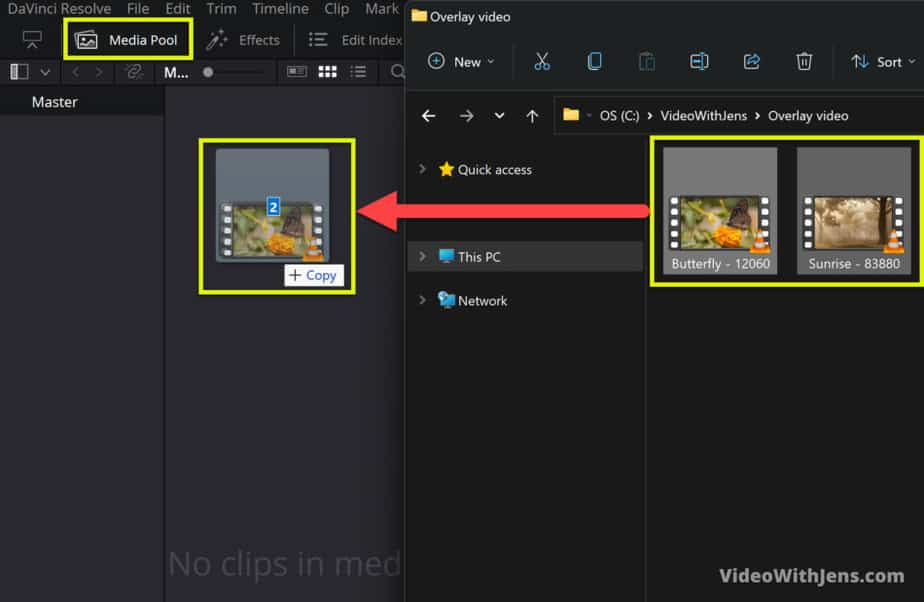
Then click on the “Media Pool” to open it, located in the top left-hand corner.
Locate the clips you are going to use for the project on your computer.
Then, just select them and drag them into the “Media Pool” as shown in the picture.
Then if these are the first videos you add to this project, you’ll get this pop-up message asking if you want the frame rate of the project to match the clips you are importing.
If the clips you are importing have the same frame rate (FPS), then you can just click “Change“. If they have a different frame rate, you’ll have to set the frame rate manually to get the correct one.

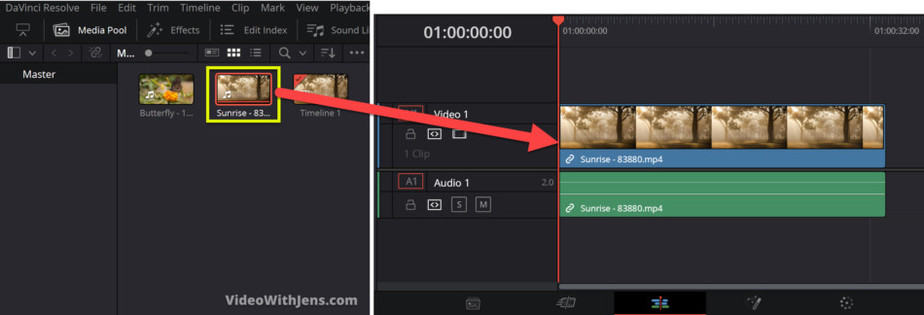
Next up, we are going to add the clips to the timeline.
You want to add the main clip to the timeline first (the one that’s going to be the “background”).
To add them to the timeline, simply drag them from the “Media Pool” and drop them into the timeline:
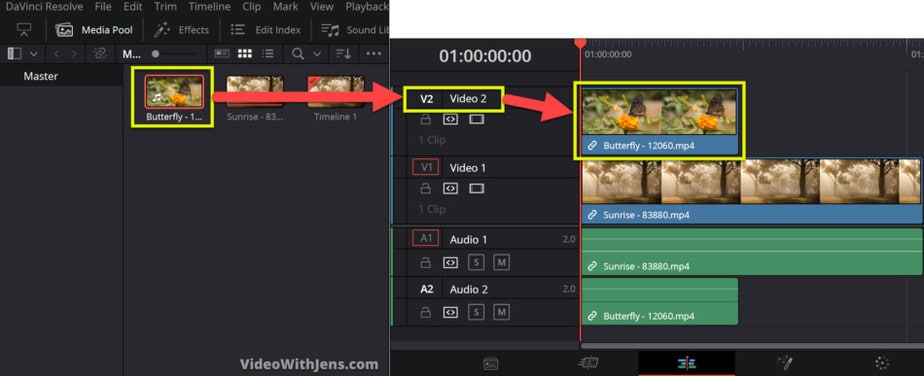
Next, we are going to add the overlay video to the timeline.
For this clip, you want to drop it one video track above the main clip. In my case, this was “Video 2” as you can see in the picture below. That’s the reason why we added the background-clip first.
If both of your clips include some sort of audio, you may want to delete one of them. However, if you want to keep them, just ignore this step!
To delete one, simply hold down the ALT key on your keyboard, while clicking on the audio you want to delete. This way you are only selecting the audio, and not the video and the audio as you would by default.
Once you’ve selected the audio, you can either right-click and click on “Delete Selected” or “Ripple Delete“. However, the fastest way is to just hit either the Backspace or the Delete button on your keyboard:

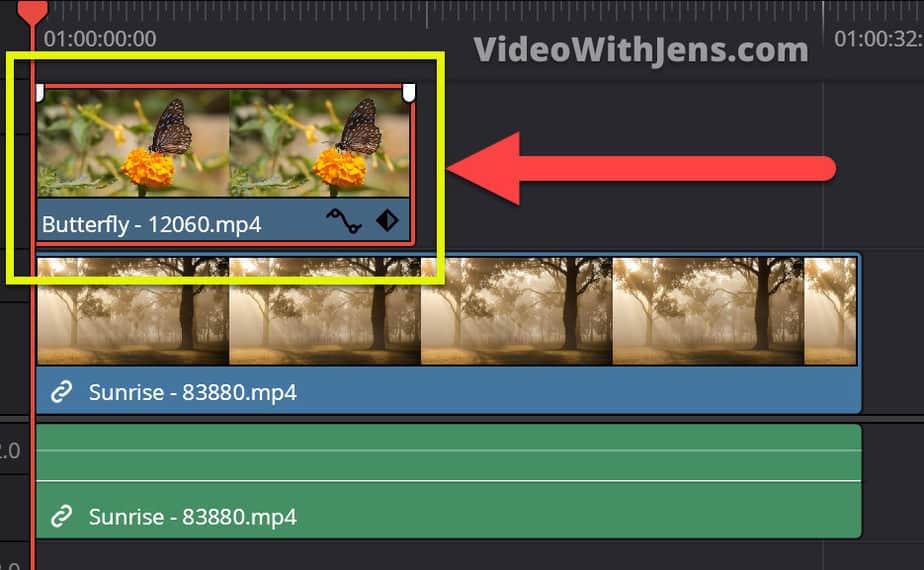
Next, click on the overlay clip to select it.
(it gets this red border around it when it’s selected).
Now we are going to change the size of the clip and position it where we want.
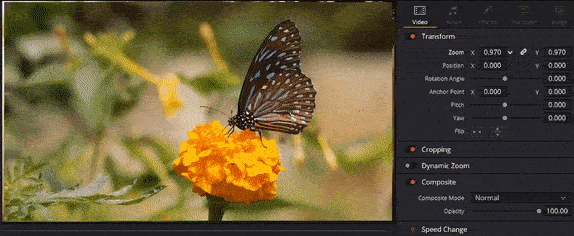
With your clip selected, click on the “Inspector” tab in the right-hand top corner to open it!
Then make sure to be in the “Video” section of the tab, and go to the “Transform” settings.
Here you first want to adjust the “Zoom” to change the size. To do this, hover your cursor over the number next to it, click, hold and drag to either side to zoom in or out! Make sure the link/chain icon is enabled, this way you are changing both zoom’s “X” and “Y” values.
Next, position the video where you want it:
Change the numbers next to “Position“, the “X” adjusts its position horizontally, while “Y” adjusts it vertically:
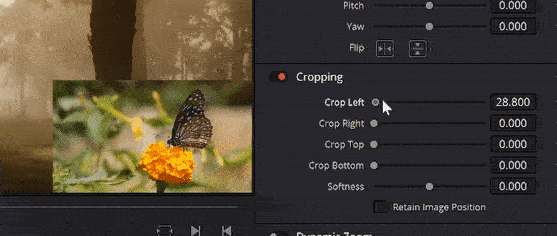
You also have the option to crop the video a little further down in the inspector. To open the “Cropping” just click on the name.
Then you have the option to crop the clip from all different sides. Just drag on those drag dots to increase and decrease the crop amount.
On the bottom of the “Cropping” there is one that’s called “Softness“, this one will make the sides/outlines around the clip more smooth:
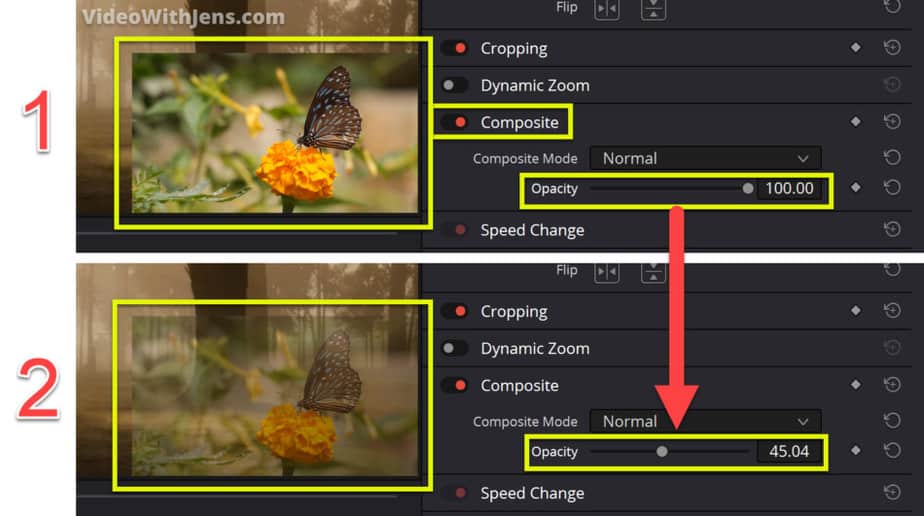
You also have the option to change the opacity, this one is located under “Composite” in the inspector:
Just pull that gray dot to increase or decrease the opacity:
Next, in this video I’ll show you how to animate movement to the video overlay:
How to Animate Movement to the Video Overlay:
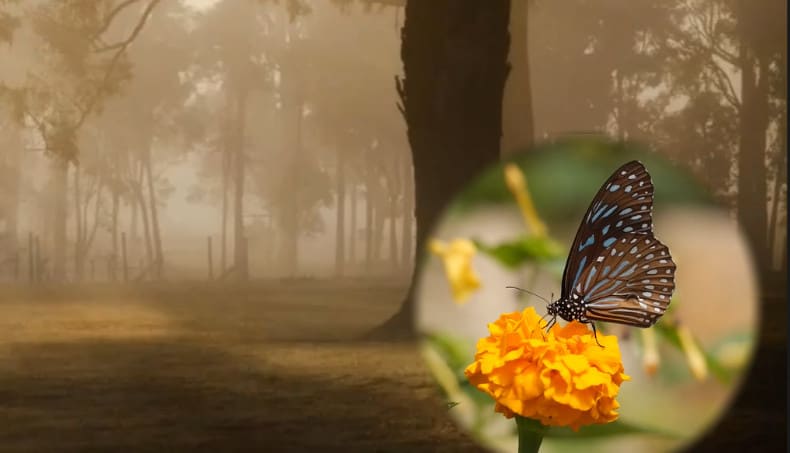
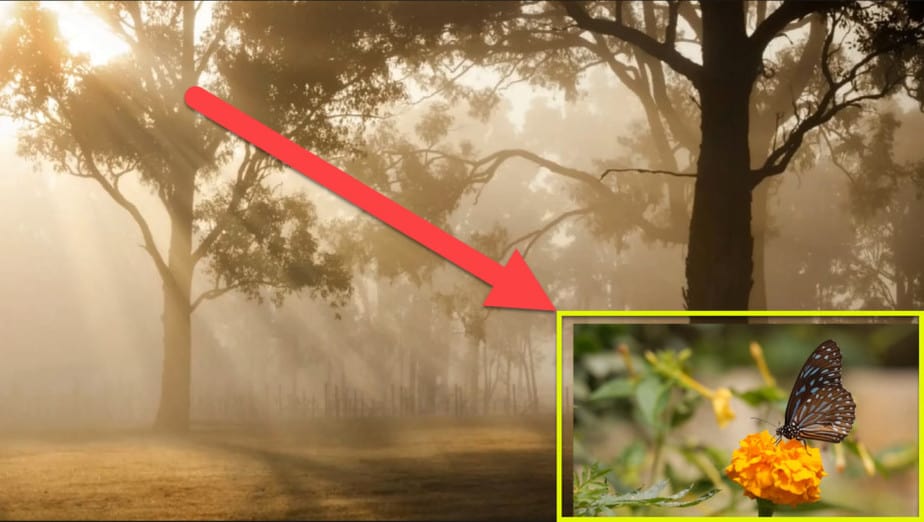
Another awesome thing you can do is to make your video overlay in different shapes. Like in this picture where I’ve made it circular!
That’s what you are going to learn next:
Make Overlay Video in Different Shapes
To do this we are going to continue from where we left off. As you can see I’ve placed the overlayed video down in the right-hand corner (watch the image below).
However, note that this is not a must by any means! It’s just what I’ll be using for the example when showing you how to do this!
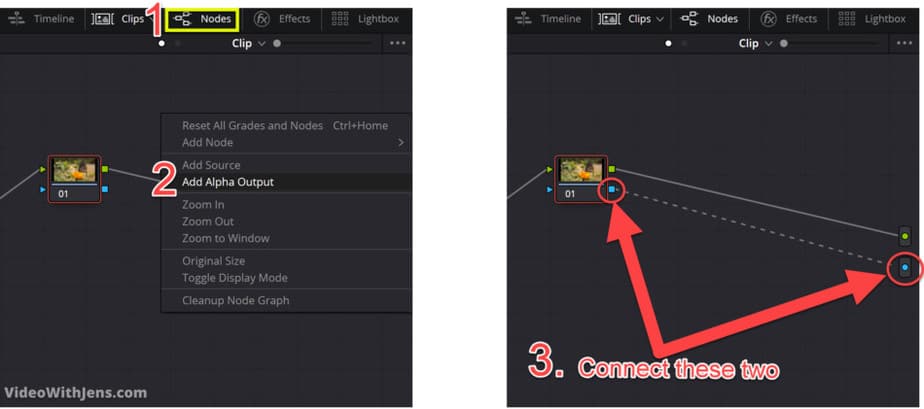
Now, head over to the “Color” page inside resolve:

In the right-hand top corner you can see the node graph, if you cannot see it, click on “Nodes” to open it!
Then right-click on the background of the node graph, and click on “Add Alpha Output“.
Next, we want to connect our node to the “Alpha Output“.
To do this, click and hold the blue square on the right side of the “01” node, then drag and drop it on the “Alpha Output” (that blue dot) on the right-hand side of the node graph:
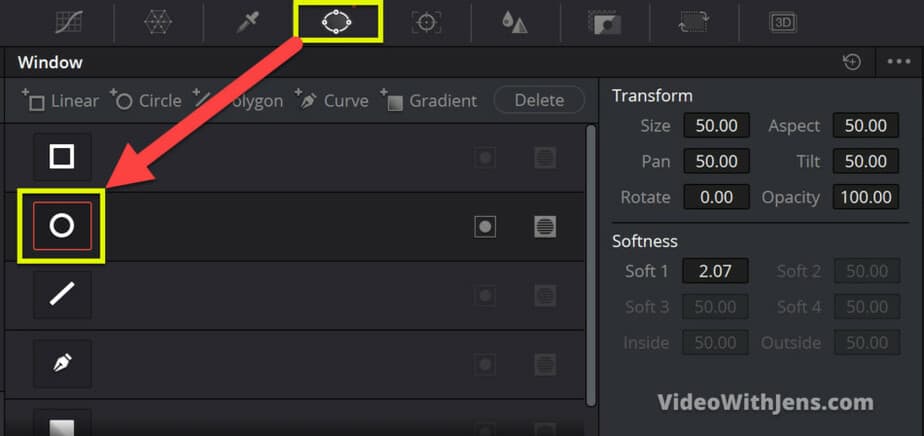
Next up, open the tab called “Window” located in the bar on the lower third of the page (Watch the picture below for reference).
Inside, the “Window” tab, you’ll see some different shapes and such. Here you want to click on the circle to select it:
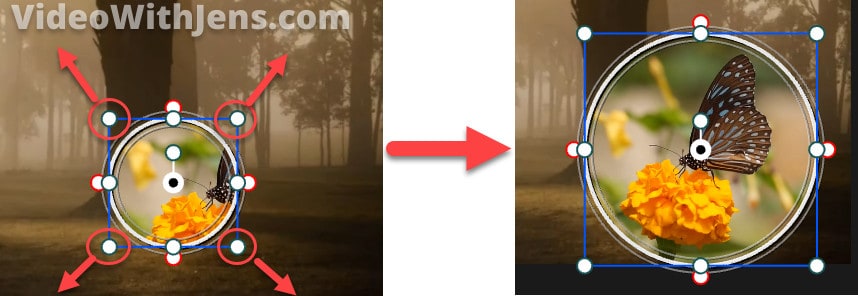
When you have selected the circle you should now see a circle appear on top of your video (like in the picture above).
This is your circular “Window” also called a mask.
What’s happening now is that the overlay video is only showing inside the circle. If you move the circle around you can see other parts of the overlay video.
Now, I’m going to increase the size of the circle by just dragging on one of those white dots in the “corners of the circle”. Then to position it, you do that by dragging on the dot in the middle of the circle.
That’s it!
Here is an article on how to add blur to objects or faces using these “Windows”/masks.
Best regards,
Your friend, Jens.