Import Image Sequence FIX: DaVinci Resolve 18 (+ Exporting)
To import an image sequence in DaVinci Resolve can be a bit confusing. As it’s possible to import a bunch of different ways, however, only a few ways will import the image sequence how you would like.
I will also show you how to make/export an image sequence.
So let’s look at how to do it the right way!
How to Import an Image Sequence to DaVinci Resolve:
Quick Guide:
- Go to the “Edit” page inside Resolve.
- Locate the image sequence in your system folders.
- Drag and drop the image sequence on the timeline inside Resolve.
Detailed Guide:
Here’s a more detailed explanation with images.
So the first thing you want to make sure of is to be on the “Edit” page inside Resolve.
Simply click on the icon shown in the image below. It’s located at the bottom of the Resolve:

Once you’ve opened the “Edit” page, go ahead and locate where the image sequence is saved on your computer.
Then select all the images, by either dragging over all of them or simply pressing shortcut: “CTRL + A” or “Command + A” on a MacBook.
Next, drag all of the images into Resolve, HOWEVER, make sure to drop them directly on the timeline!
Doing this should look like in the illustration below:
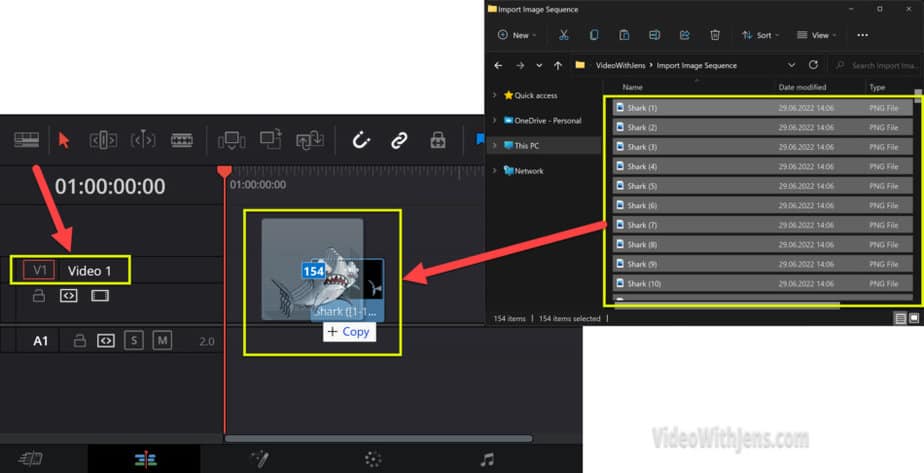
If you are having problems dropping them in the timeline: make sure that you are dropping them in a video track and NOT an audio track.
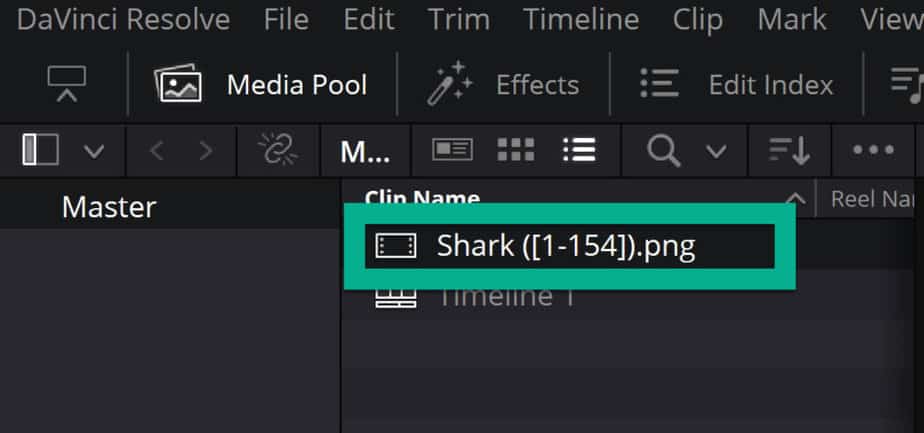
And if you now look in the “Media Pool” it should look like this:
Summary: How to an Import Image Sequence
To import an image sequence to DaVinci Resolve, open the “Edit” page inside Resolve. Then, locate the image sequence in your system folders, and select it. Next, drag and drop it directly on the timeline inside Resolve.
Import Image Sequence Issue in DaVinci Resolve
To prevent the image sequence from being imported as individual pictures. Drag it directly into the timeline on the “Edit” page inside Resolve. Importing through the “Media” page has caused problems after the release of DaVinci Resolve 17.4.
A few more details:
So firstly, make sure to be on the “Edit” page. If you don’t know how to open it, the icon looks like this:
(Located at the bottom of Resolve)

Then, personally, and a lot of people prefer importing files by simply dragging and dropping them in the “Media Pool“. However, this does not work when importing images sequences:
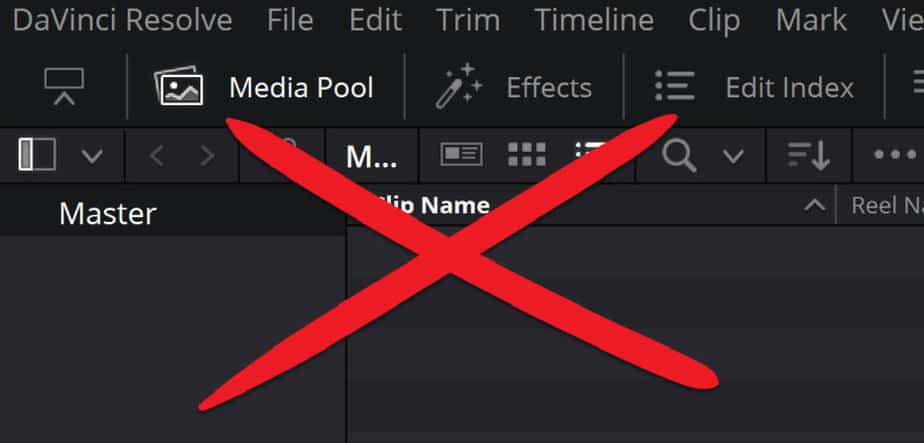
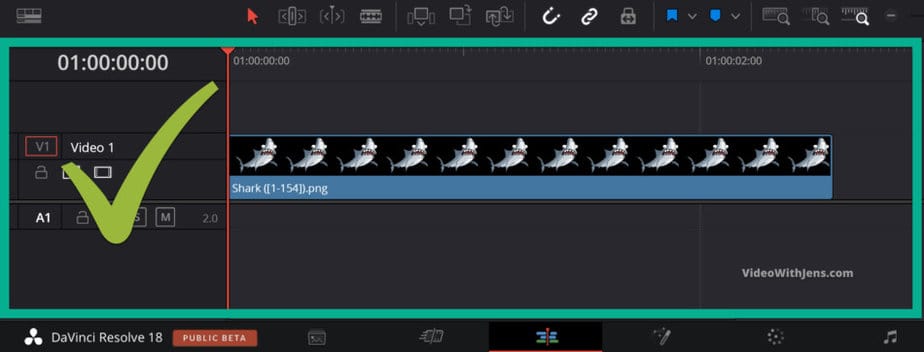
Instead, you want to drag the image sequence directly into the timeline on the “Edit” page.
It’s important that you drop it in a video track on the timeline, NOT an audio track, then it won’t work:
That’s it. I hope you found the answer to your problem.
Next up, we are going to discuss how you can export a video as an image sequence:
How to Make an Image Sequence in DaVinci Resolve
Quick Version
- Add a video clip to the timeline.
- Go to the “Fusion” page.
- Press shortcut: “Shift” + “Space key“.
- Search for “Saver” and click on “Add“.
- Connect the node, and open the “Inspector” tab.
- Click on “Browse” in the inspector.
- Create a new folder in your system and select it.
- Give the image sequence a file name.
- Type in “.png” at the end of the file name, and click on “Save”.
- In the menu at the top of Resolve, click on “Fusion” > “Render All Savers”.
That’s the quick version, down below I’ve added some images to make it easier to understand:
Detailed Version
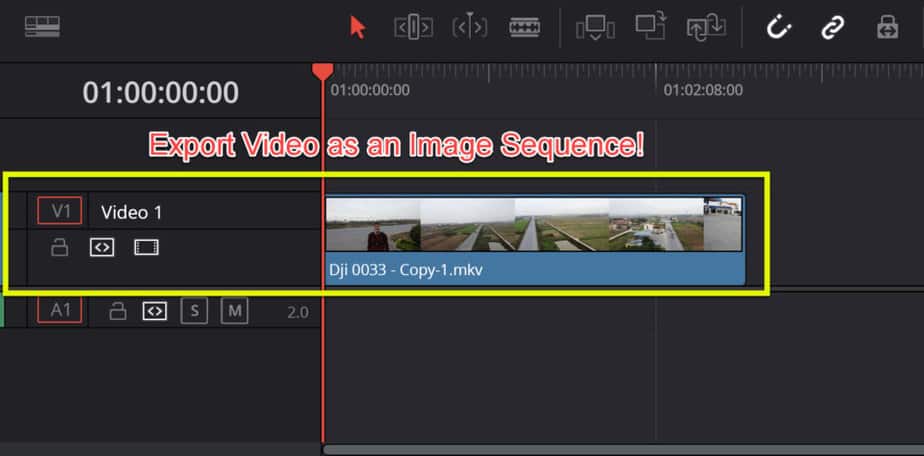
So we are going to make a video into an image sequence. Thus, it’s important that you’ve added a video clip to the timeline, like this:
Then, head over to the “Fusion” page:

On the “Fusion” page, go ahead and press shortcut: “Shift” and “Space key“. This will open a window where you are able to search for nodes.
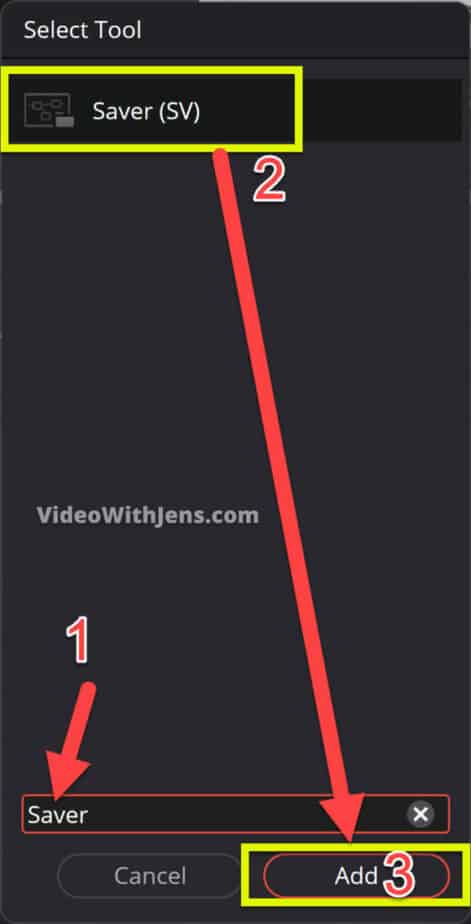
Search for “Saver“, then select it and click on “Add“.
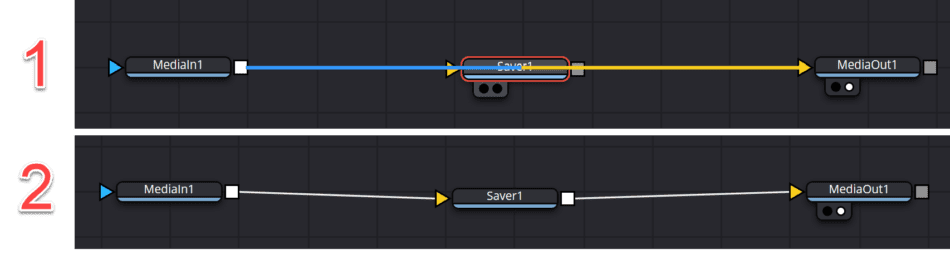
Connect the “Saver1” node in between the “MediaIn1” and the “MediaOut1” node.
You can do this by just dragging it between the nodes on top of the “string” that’s connecting them, while simultaneously holding down the “Shift key” on your keyboard.
Then before dropping the node, make sure that the string is colored blue and yellow.
It should look like this:
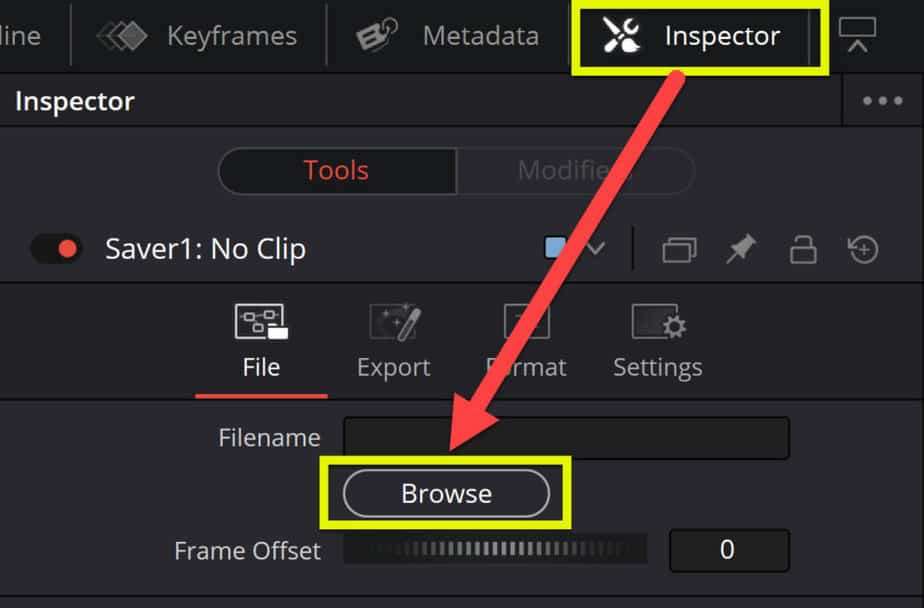
Next, go to the “Inspector” tab in the right-hand top corner of Resolve.
Here you should be able to see a button called “Browse“. Go ahead and click on this one:
This will open your system folders.
Go ahead and set the location where you want the image sequence to be saved.
I recommend making a new folder for the image sequence as there are quite a lot of images…
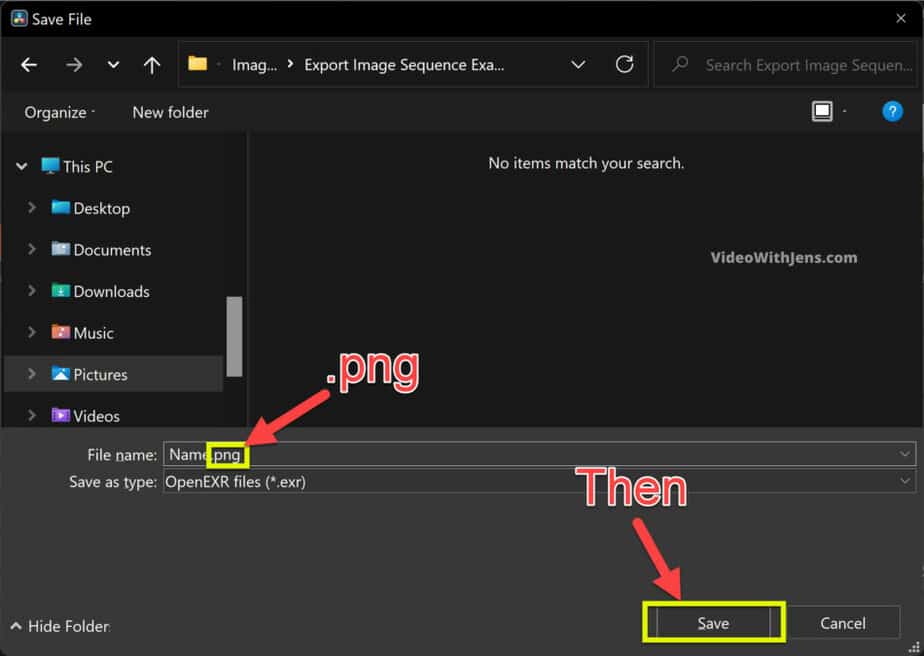
Set the location and give the image sequence a “File Name“, this is what all the images are going to be called and then followed up by a number separating them in the correct order.
IMPORTANT: at the end of the file name, you must type “.png” for them to be saved as images. Alternatively, some other image format if that’s desired.
Once all of this is done, click on “Save“.
Watch the image below:
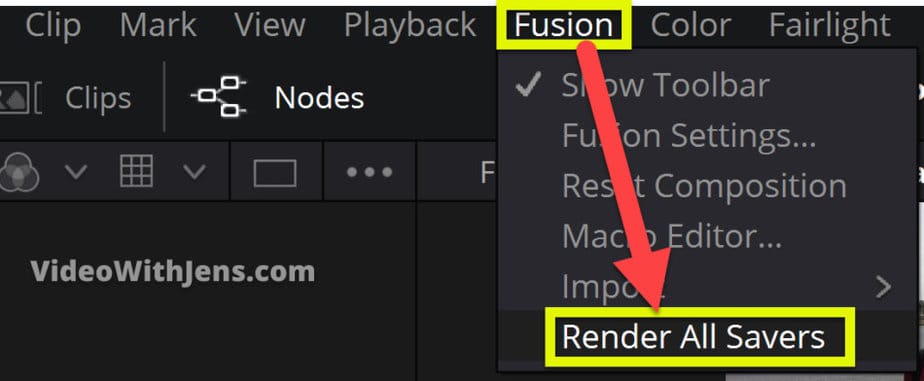
Now, head back over to the “Fusion” page inside Resolve.
In the menu at the top of the page, hover your cursor over “Fusion” and click on “Render All Savers“:
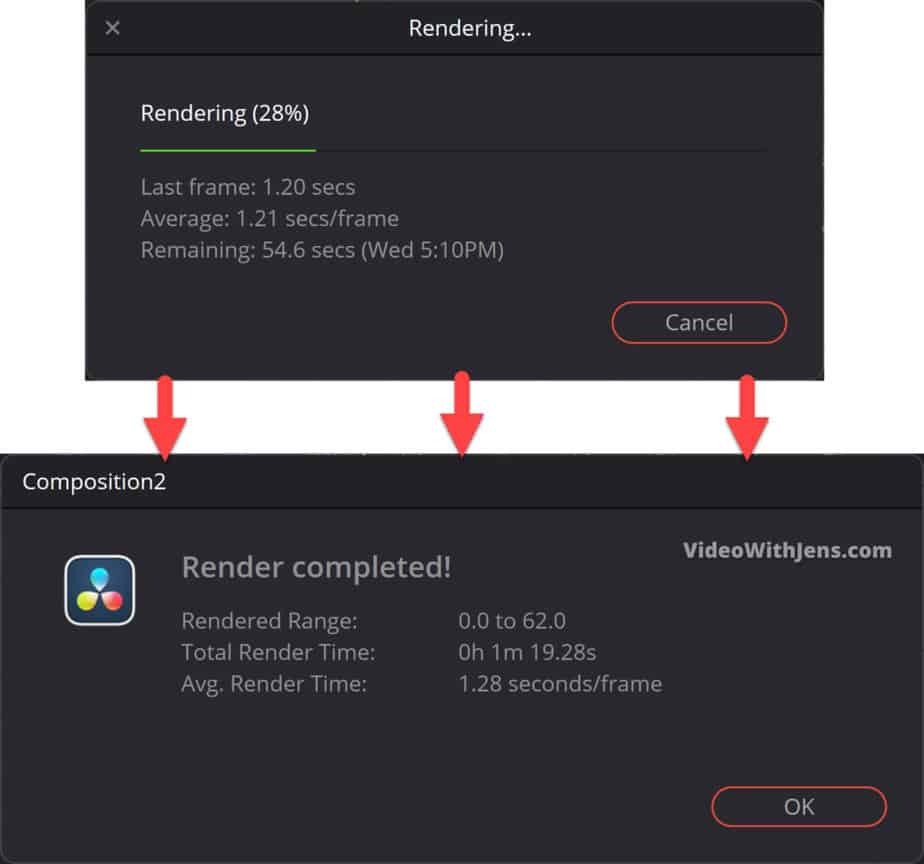
Wait for the rendering to complete:
Once it’s done rendering, you can locate the image sequence where your set its location earlier.
Here’s what mine looks like:
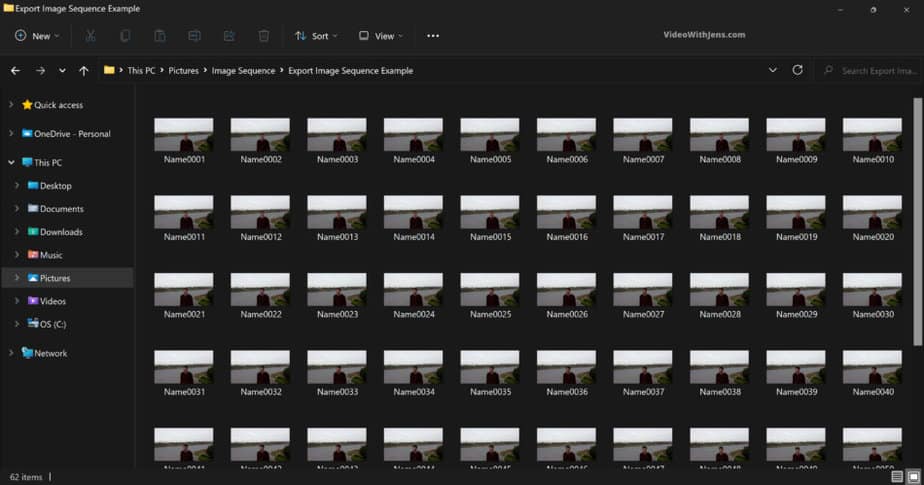
That’s it!
Did you know that you can import PowerPoint slides to DaVinci Resolve?
What’s awesome about this, is that you can make the presentation way more interesting than if you restrict yourself to the limited tools available in PowerPoint.
Check out this article on how to import PowerPoint slides & edit them.
FAQ:
Can DaVinci Resolve an Import Image Sequence?
DaVinci Resolve can import image sequences. However, it’s important that you drag the images from your system folder directly to the timeline inside the “Edit” page. Otherwise, they will be imported as individual clips.
Check out this article on how to make GIFs using DaVinci Resolve.