How to Export High Quality Videos in Premiere Pro (2023)
This is a complete guide on how to export a video from Premiere Pro.
Here’s a quick way to do it for those in a hurry:
To export a video from Premiere Pro, open the Export tab (top left-hand corner). Give the video a File Name and Location. Then, set the Preset against High Quality 1080p HD, and click on Match Source under Video. Lastly, click on Export.
How to Export a Video in Premiere Pro [Step-by-step]
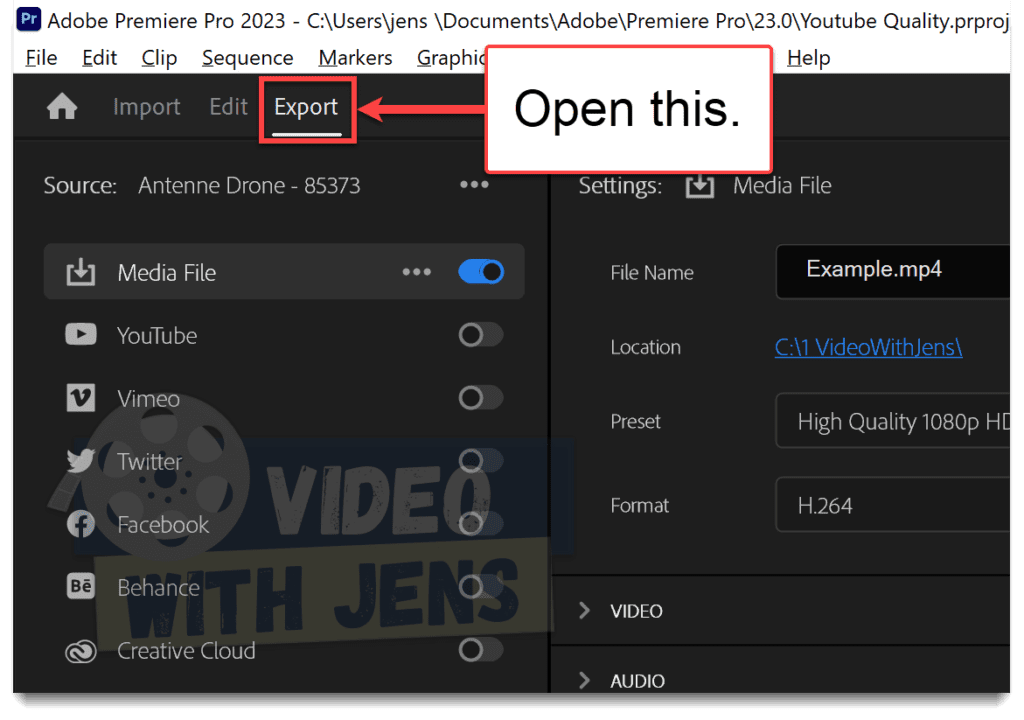
1. Open the Export tab
Inside Premiere Pro, there is an own tab dedicated to exporting videos.
You can open it by clicking Export in the upper-left corner or pressing the keyboard shortcut Ctrl + M (Windows) or Command + M (macOS).
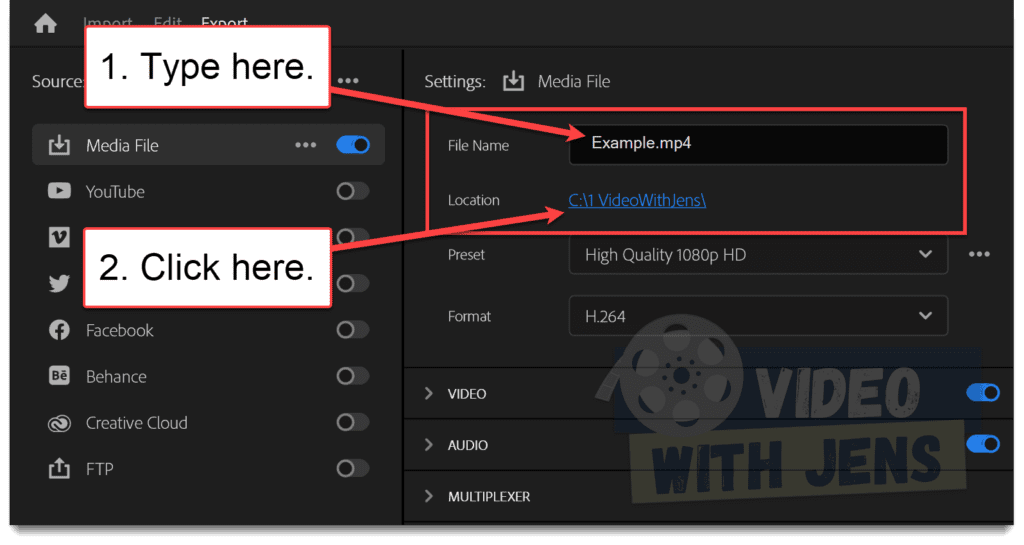
2. Give a File Name, and File Location
Before adjusting the video parameters, you must give your video a File Name; this is what the file will be called once exported.
Secondly, click on the blue link next to Location; this is where you’ll find the file on your computer once exported.
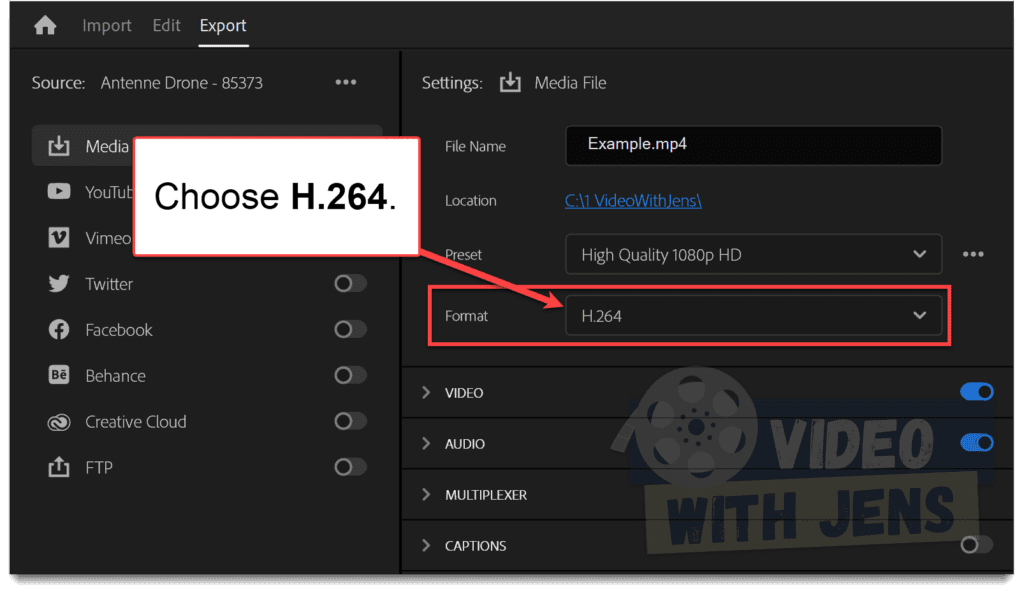
3. Choosing a Format
Now it’s time to choose a format!
If your video is finished (no more post-production work), the best choice will generally be H.264.
If not, DNxHD or DNxHR (4k) is a good choice.
4. Frame Size and Frame Rate
It’s essential that you get the Frame Size and Frame Rate correct; if not, your video will not look how you expected it to…
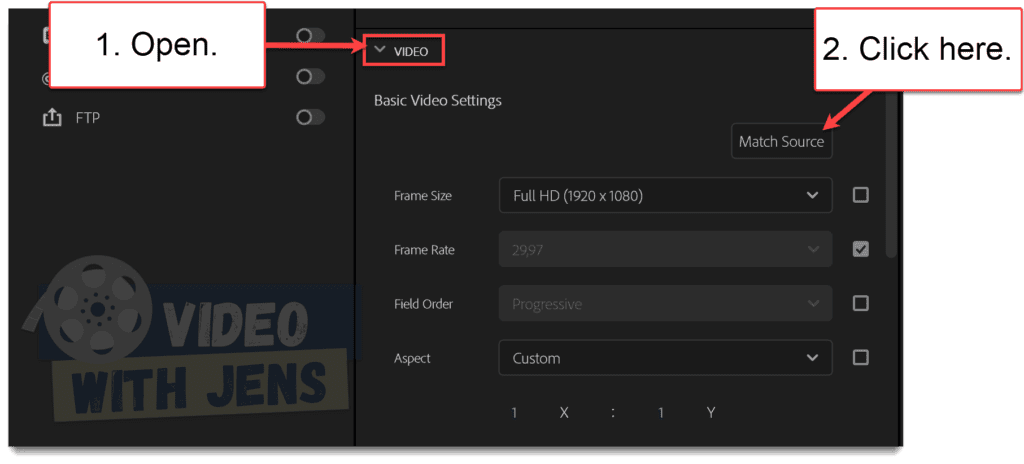
You find these parameters by expanding the VIDEO tab in the export settings.
From here, click on the Match Source button. By doing this, you will copy the settings from your sequence, meaning the video will look just like it did when you were editing it.
5. Adjusting the Bitrate
The bitrate is where the magic happens! This is the secret ingredient to a high-quality export.
You’ll find the Bitrate Settings by clicking the More button and scrolling further down in the export settings.
But… What amount of bitrate is best?
This varies depending on how you will use the video; for social media platforms, it varies a lot! Check out these tutorials if that’s the case for you:
If you will not upload to social media, here’s a quick way to decide what bitrate to use:
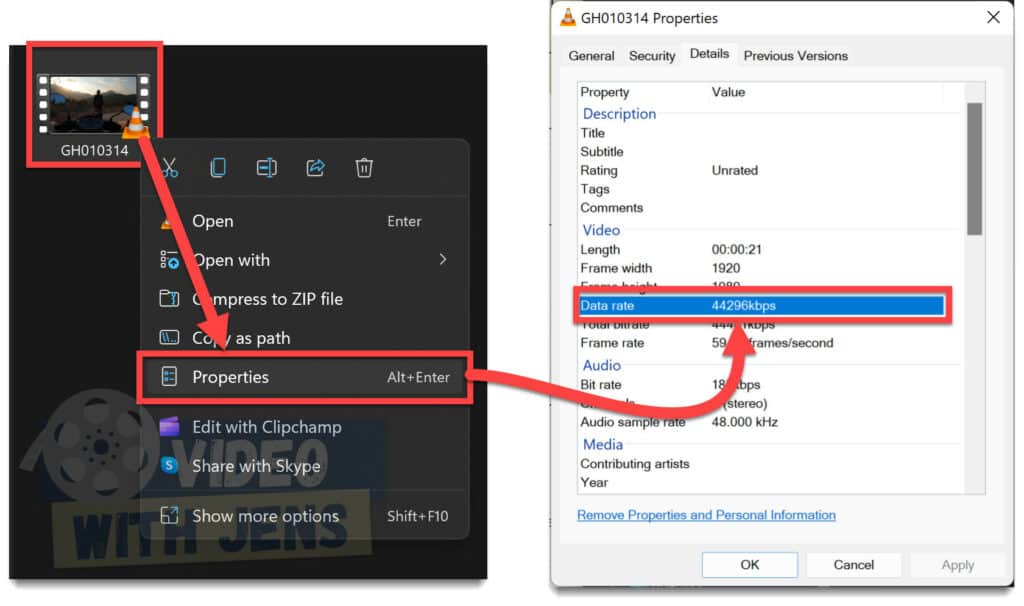
Please navigate to the folder containing your source clips, right-click it > Properties > Details, and take note of the Data rate; in my case, it’s 44296kbps.
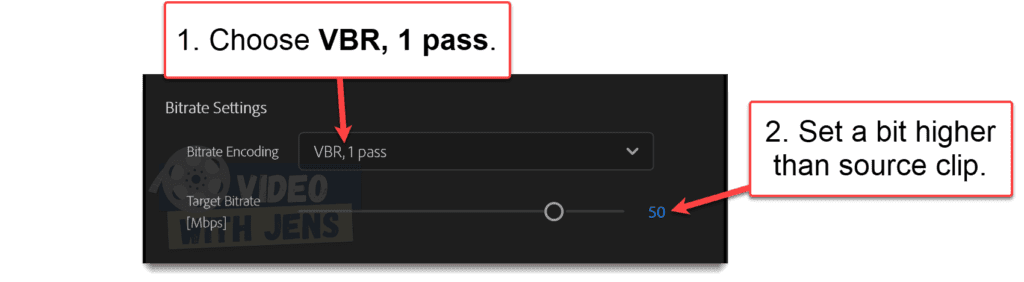
Next, in the export settings, set the Bitrate Encoding to VBR, 1 pass, and the Target Bitrate to the number you took note of from above.
In my case, it was 44296 kbps, which is 44,3 Mbps. But since I’ve also been adding some text and effects to it inside Premiere Pro, I’ll increase it to 50 Mbps:
Doing this will give us a relatively large file, which some people don’t like; check out this article on how to export a small file-sized video (in high quality).
6. Additional Settings for Higher Quality
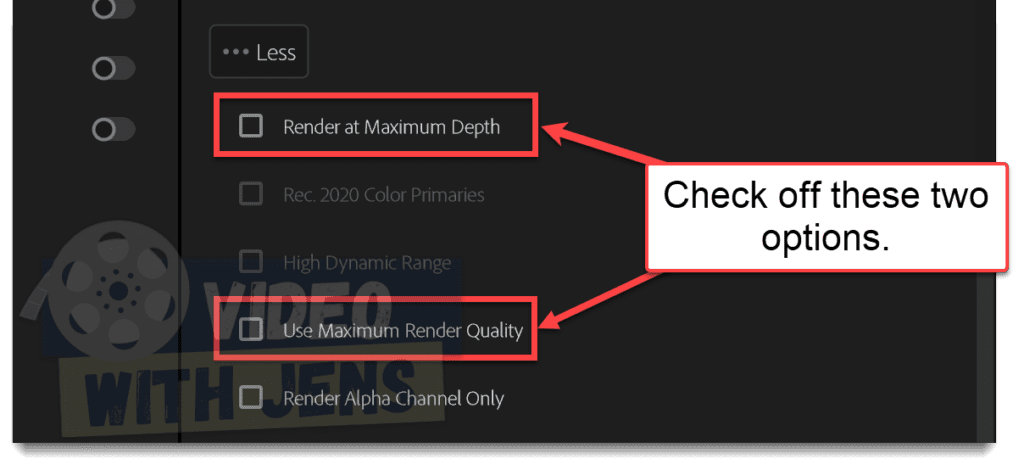
To ensure the highest quality possible, you should enable Render at Maximum Depth and Use Maximum Render Quality.
7. Click on Export
And just like that, your video is ready to export!
To start the encoding process, click on the blue Export button in the lower-right corner of Premiere.
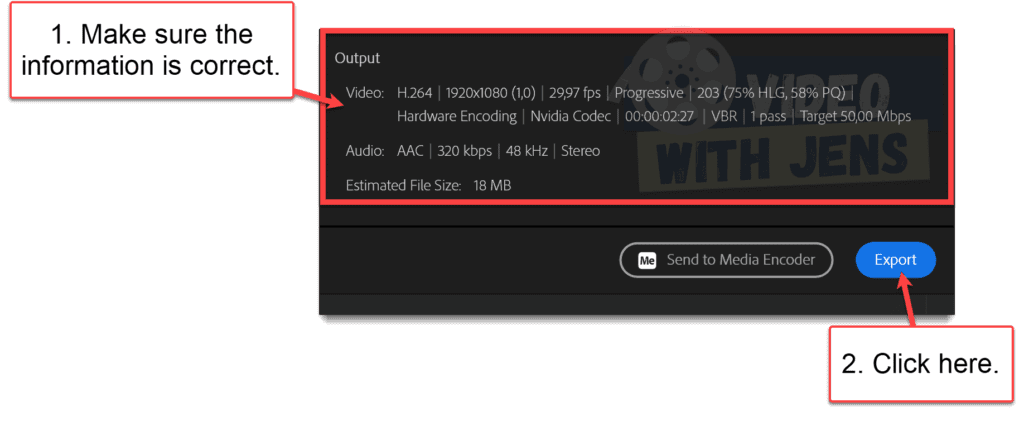
TIP: You can see all the specifications of your video under Output, illustrated in the image below:
- If the information is correct, you are good to go!
BONUS: Tips & Tricks for Exporting in Premiere Pro
Here are some quick tips that you might find helpful while exporting!
1. Save Export Settings as a Preset
I highly recommend saving the export settings we just created as a preset.
Doing this, you won’t have to adjust all the export settings the next time you are going to export! This will save you tons of time, especially in the long run.
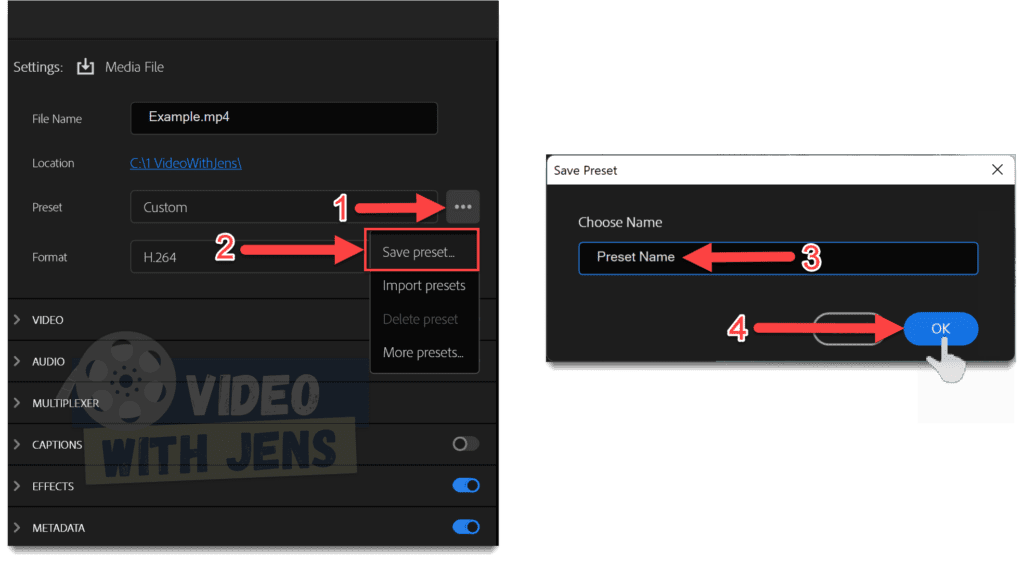
To create an export preset in Premiere Pro, click on the three dots next to Preset in the Export window, and select Save Preset. Next, give the preset a name, and click on OK.
2. Export Part of Video (or full video)
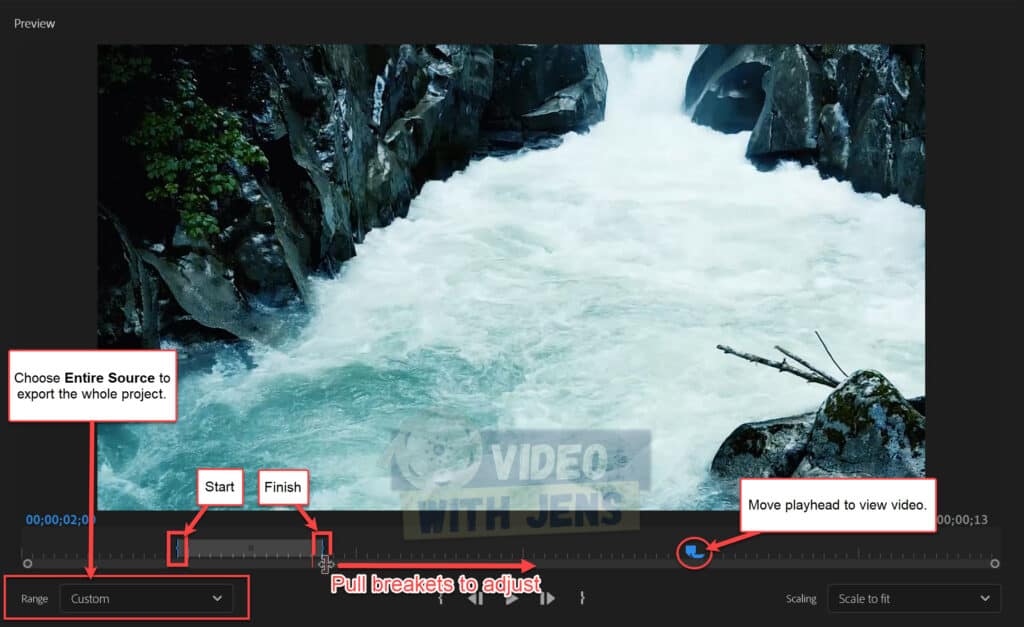
If you want to export only a part of your video, using the Range settings beneath the Program Monitor allows you to do this.
Here you have four alternatives:
- Entire Source.
- Exports everything in the timeline.
- Source In/Out.
- If you’ve marked your timeline in & out, it exports only this part of your project.
- Work Area.
- Exports only what’s in the work area if specified.
- Custom.
- This allows you to export only a part of your video. Pull on the blue «brackets,» as illustrated in the image below.
- Great for exporting a sample or troubleshooting!
- This allows you to export only a part of your video. Pull on the blue «brackets,» as illustrated in the image below.
3. Upload to Directly to Social Media from Premiere Pro
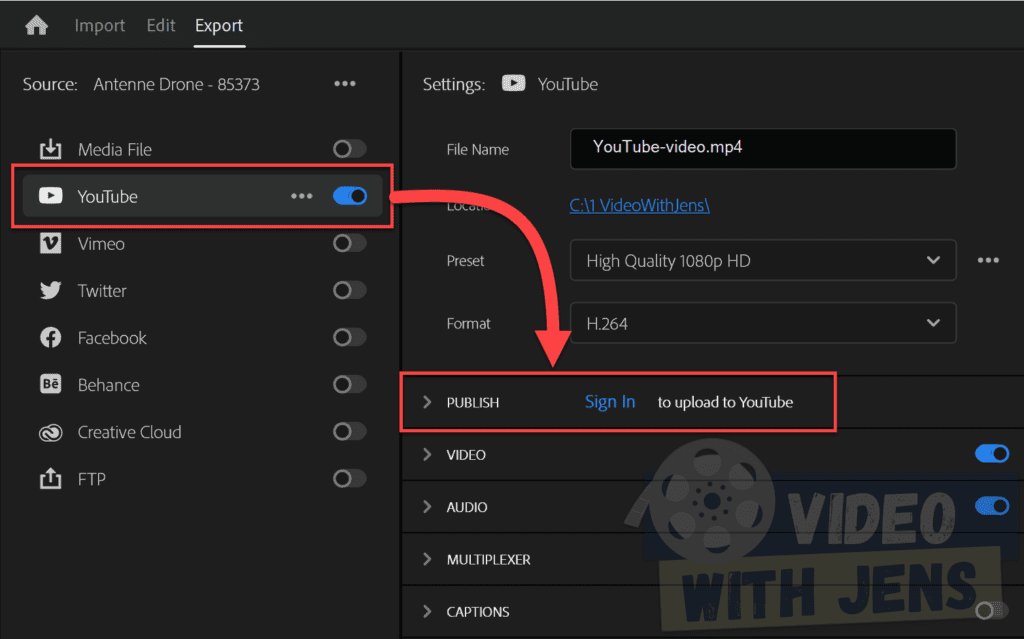
It’s possible to upload the video directly to YouTube from within the Export tab!
To do this, open the YouTube tab instead of the Media File tab, then click Sign In (to your YouTube account).
Check out this article for the best YouTube export settings!
What to Do if Premiere Pro Won’t Export
Sometimes, you may experience that no matter what you do, Premiere Pro won’t export your video.
This is a very frustrating thing to experience after spending hours upon hours editing a video!
If it’s happening to you, I’ve written a complete troubleshooting guide to fix it here.
The Export Settings in Premiere Pro Explained
What’s the Best Format in Premiere Pro? (Format explained)
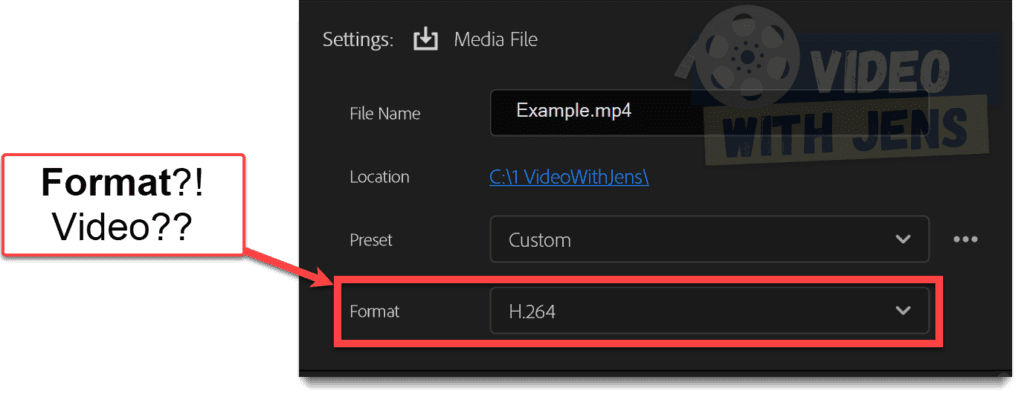
Premiere Pro has no best format; however, some formats perform better in certain situations. That is because all formats have their advantages.
If you can’t find the terms codec or container in export settings, it’s because both of these are controlled by the Format when exporting to MP4 or in the H.264 codec.
What does Frame Size in Premiere Pro Mean?
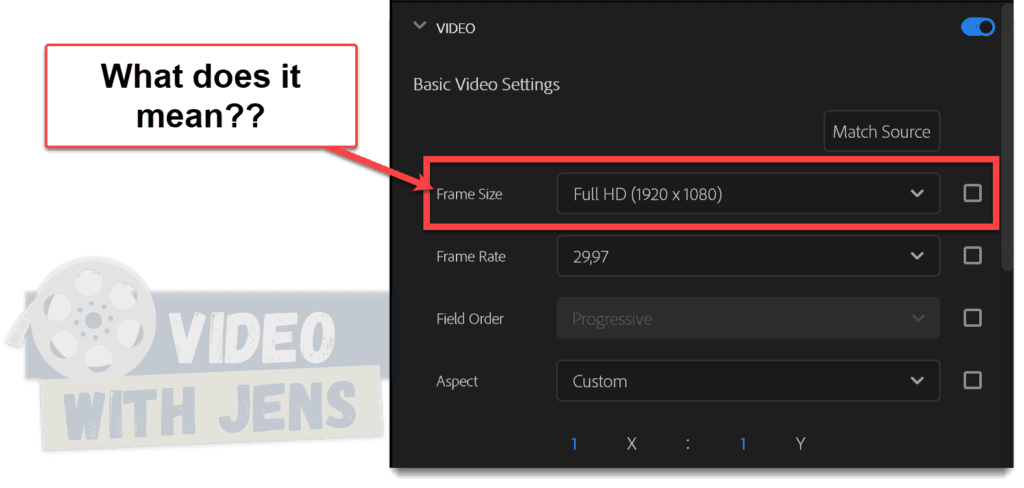
The Frame Size in Premiere Pro is the same as the resolution, which also describes the aspect ratio.
You may have seen numbers such as 1920×1080 or 3840×2160, the ratio between horizontal and vertical pixels in a video.
1920*1080=2 073 600 pixels and 3840*2160=8 294 400 pixels.
- More pixels=more details.
- More details=higher quality (usually).
What does Frame Rate in Premiere Pro Mean?
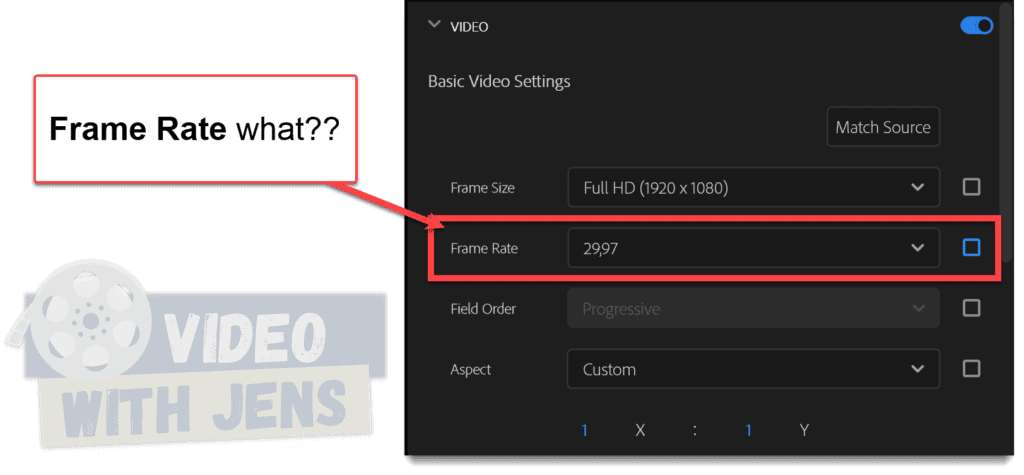
As many may know, a video simply explained consists of many images played after one another really fast.
These images are called frames, and the frame rate is the number of images played each second.
- Frame rate is also referred to as frames per second (FPS).
What’s described above is the basic principle, but since a regular movie consists of hundreds of thousands of frames, the files would be a bit too large for most people’s storage units if the frames were standard PNG files.
Therefore, codecs such as H.264 were invented, using advanced mathematical calculations to compress videos to more convenient sizes. However, these are often hard for computers to decode while editing, resulting in lag, choppiness, and less smooth playback.
I found this great article if you want to learn more about the topic.
What does Bitrate mean?

The bitrate describes the amount of data encoded into each second of your video.
More data=better quality until the video has reached its limit.
- More data than necessary=uneccessary large file.
Check out this article on how to set the perfect bitrate (without wasting space).