
How to Fix “The File Cannot Be Opened Because of a Header Error” in Premiere Pro
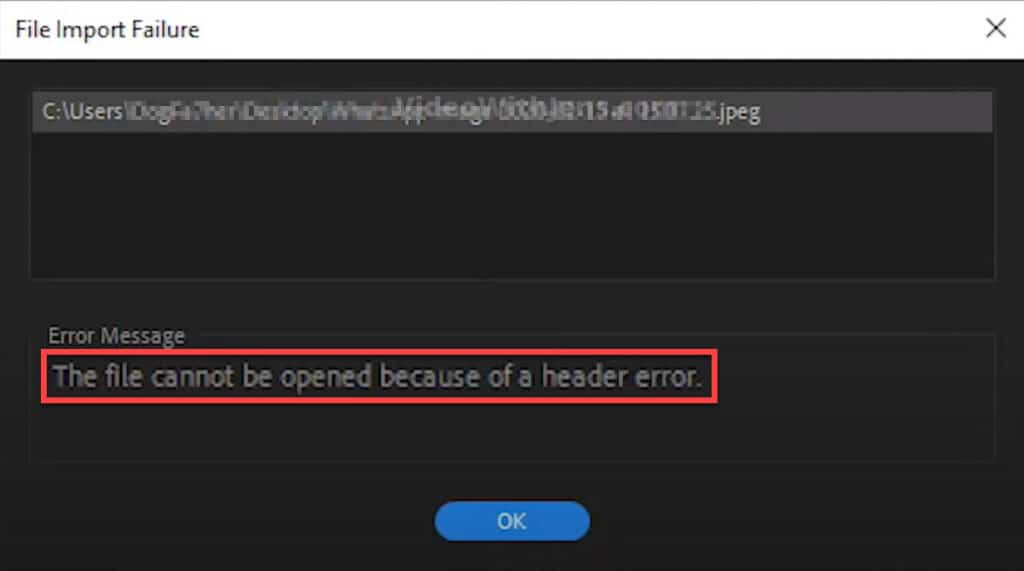
Unable to import your image(s) to Premiere Pro? Does “The File Cannot Be Opened Because of a Header Error” pop up?
After a bunch of research, I’ve finally found out what’s causing it (and how to solve it.)
Read on to find out!
What Causes “The File Cannot Be Opened Because of a Header Error” in Premiere Pro?
“The file cannot be opened because of a header error” in Premiere Pro occurs when you are trying to import an image that’s corrupt or has an unsupported color mode. Many people have reported fixing it by renaming the file name extension or transcoding into a supported color mode.
Now that you know what triggers this error, I’ll show you three ways to fix it depending on what’s causing the error:
1. Change the Image Filename Extension
Many people getting this error solved it by simply changing the filename extension of the image, causing problems.
Usually, JPEGs have caused the error; however, I would test renaming the filename extension if you have another file type.
Here’s how to do it on Windows: Check out this article if you are using macOS.
- Open the folder containing your image in your file system.
- Click on View > Show, and enable File name extensions.
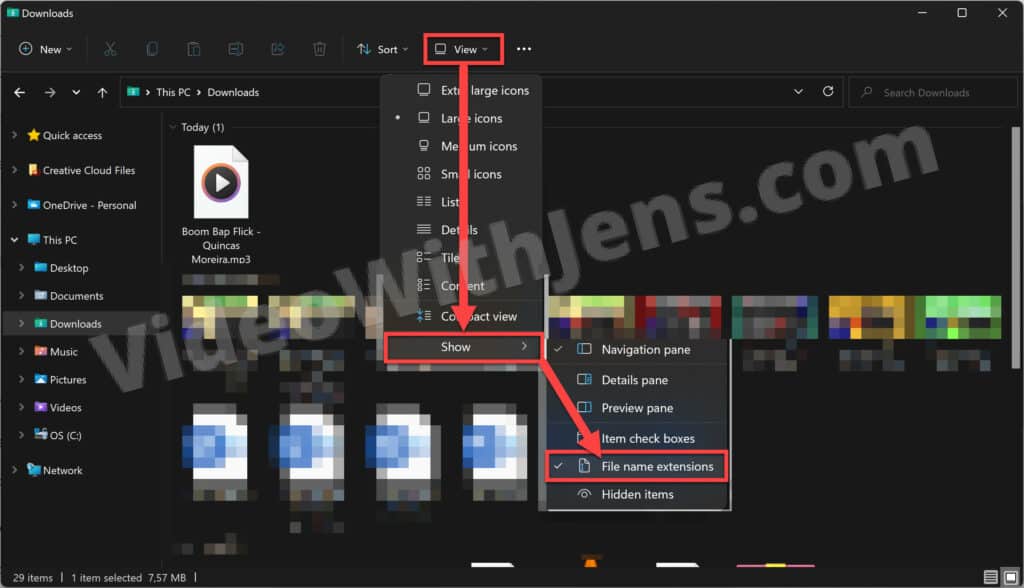
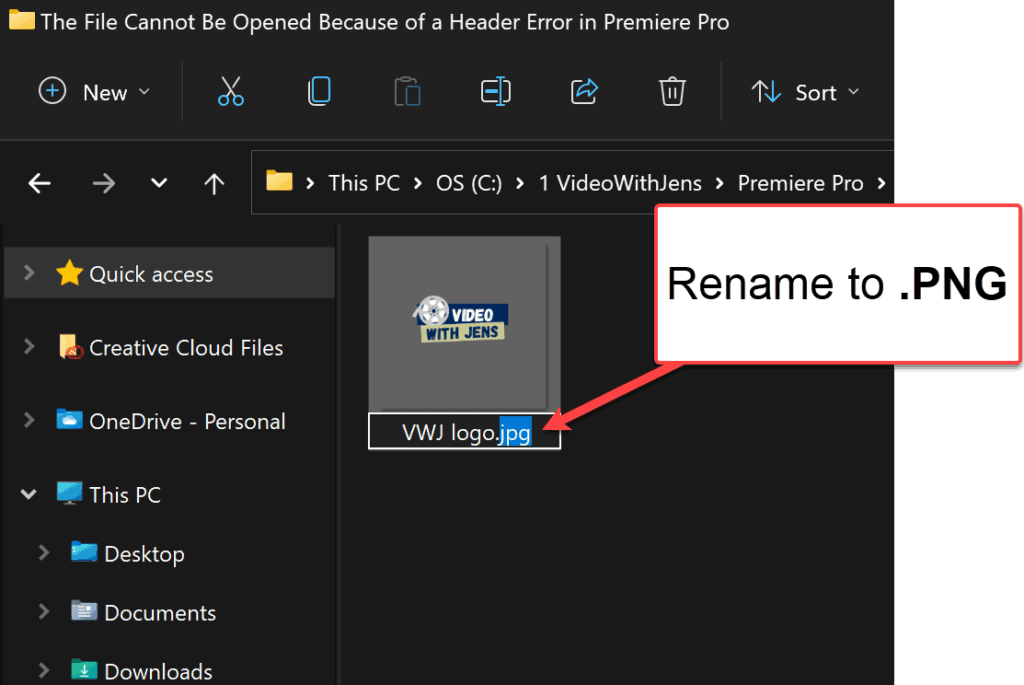
- Right-click the image file > Show > Show more options > Rename.
- Change the filename extension from .jpg to .png.
If changing to .png did not work, test .PSD also.
Check solution two if changing the filename extension did not fix the header error.
2. Re-Export Image in Another Program
The header error may also be triggered because the image is corrupt, making it unreadable to Premiere.
Luckily, this is easy to fix.
Open the image in an online converter (opens in a new tab) or simply a software like Paint, and convert/re-export the image to the same file format.
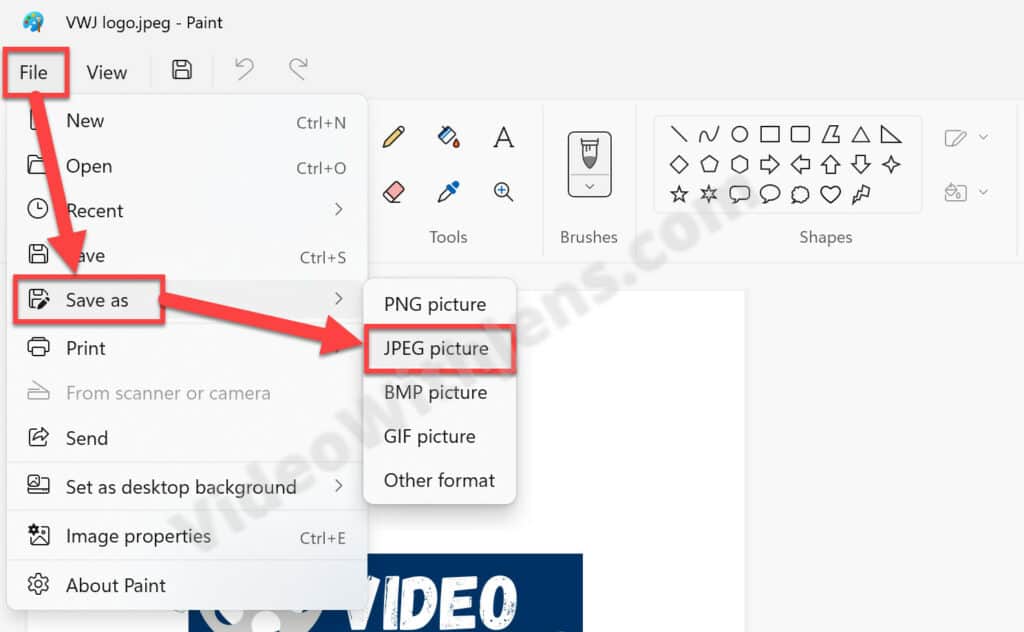
In Paint, you can do it like this:
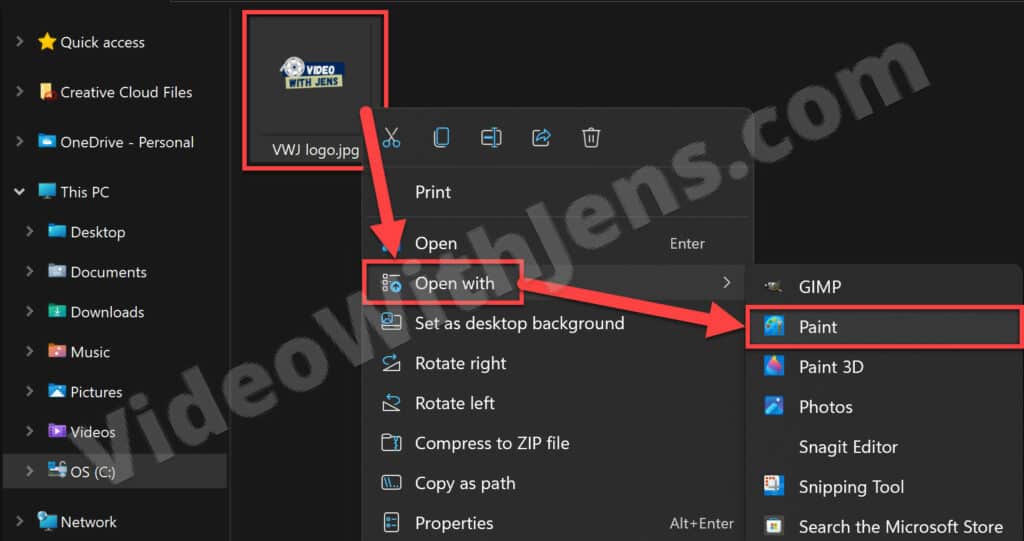
- Right-click the image in your file system.
- Select Open with > Paint.
(Continues below)
- Inside Paint, click on File > Save as > JPEG picture.
- Set a file location and import it to Premiere Pro.
Voilà!
3. Change Color Mode to RGB
According to the internet, Premiere Pro only supports the RGB color mode.
So, if your image has been inside a program like Photoshop at any point, it may have an unsupported color mode like CMYK or LAB.
To fix this:
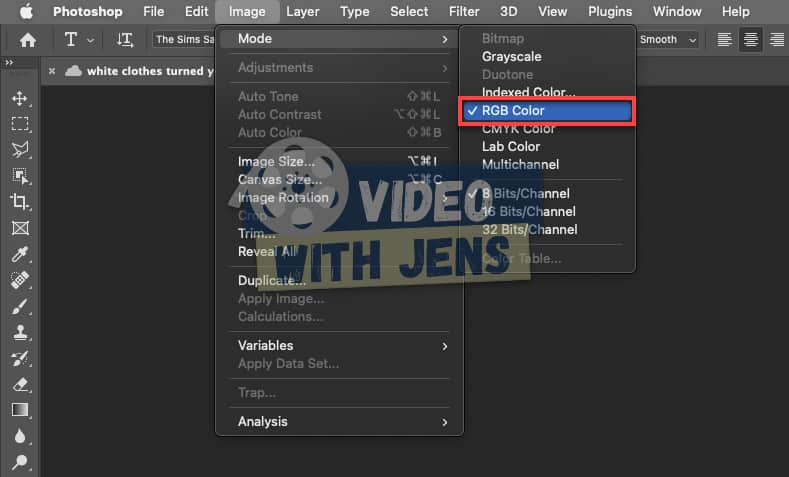
- Import the image to Photoshop.
- Click on Image > Mode > RBG Color.
- Export the image, and import it to Premiere Pro.
Check out this list of the most common errors in Premiere Pro and how to fix them; I recommend bookmarking it to solve errors quickly in the future.
That’s it! I hope you solved “The File Cannot Be Opened Because of a Header Error” using the solutions mentioned in this article!
![[Solved] “There Was An Error Decompressing Audio or Video” Premiere Pro](https://videowithjens.com/wp-content/uploads/2022/12/there-was-an-error-decompressing-audio-or-video-premiere-pro-7-solutions-768x432.jpg)