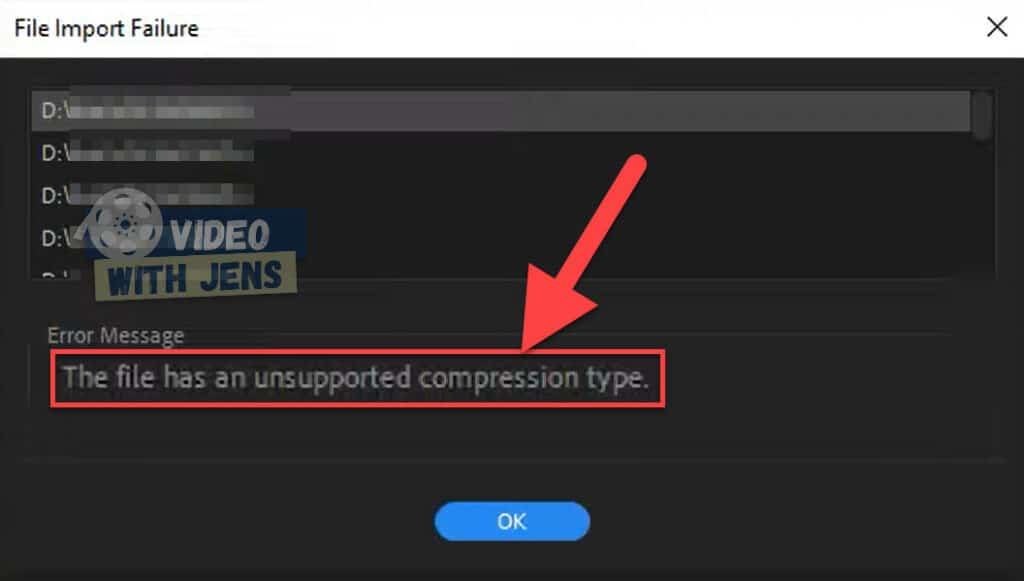
Fix: “The File Has an Unsupported Compression Type” Premiere Pro
Are you getting the error “The File Has an Unsupported Compression Type” in Premiere Pro?
If so, read on!
In this quick guide, you’ll learn how to fix it.
“The File Has an Unsupported Compression Type” error means that Premiere Pro cannot read the file you are trying to import. This is usually due to an unsupported video format but may also occur with corrupt files or file path issues.
Below, I’ve listed 8 solutions that have solved the error for thousands of users:
1. Delete Media Cache Files
The first solution to fix the error is deleting your media cache files, as they might be corrupt and trigger the error.
This is an easy thing to do, and thus the first solution I recommend trying.
- Click on File > Close Project, and save it if you are currently working on a project.
- Click on Edit > Preferences > Media Cache.
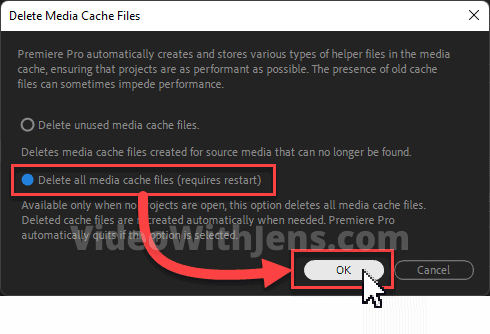
- Click on Delete under Media Cache Files.
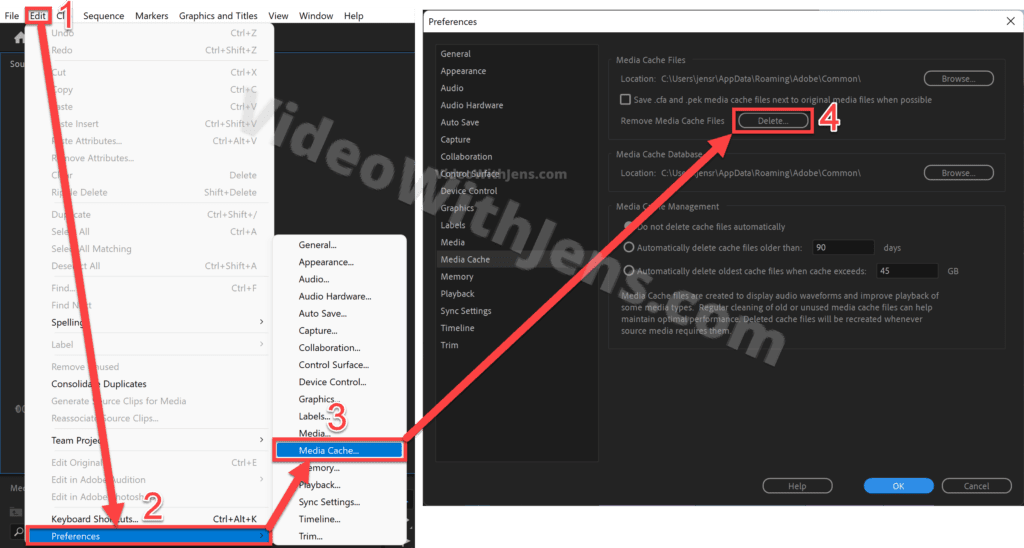
- In the window that pops up, select Delete all media cache files (requires restart).
- Click on OK, and Premiere will automatically restart.
Hopefully, you can import the files without seeing the error “The File Has an Unsupported Compression Type.”
- If you are opening a project containing clips, give Premiere time to generate new media cache files.
It’s also possible you are trying to import an unsupported format, which we’ll discuss next:
2. The File Format is Not Supported
If you are trying to import a file format that Premiere Pro does not support, that’s likely what’s triggering the error.
If that’s the case, you’ll need to transcode the file to a supported format (pretty easy!). I’ll show you that next.
- If you are using OBS studio to record your videos, skip to this part.
Check out this list of supported file formats in Premiere Pro.
- Make sure that both the codec and format are included in the list from Adobe.
2.1 Transcode
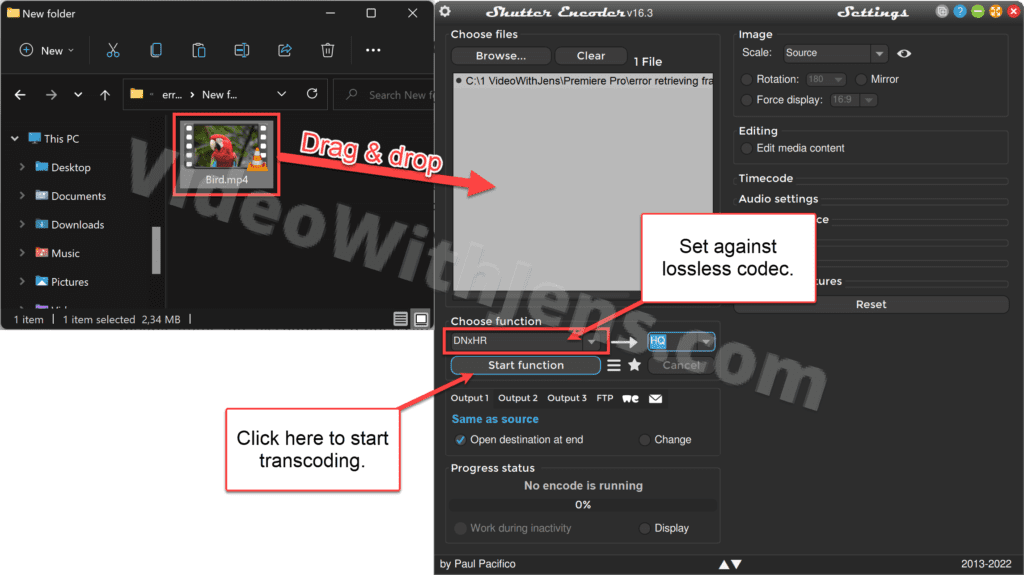
To transcode your file, I recommend downloading Shutter Encoder (opens in a new tab); this is one of the best free transcoders.
- Drag and drop your video on the white space area inside Shutter Encoder to import.
- Alternatively, click on Browse, and navigate to the clips in your file system.
- Under Choose function, pick a lossless codec.
- I often use DNxHD for 1080p, and DNxHR for 4K.
- Click on Start function to transcode.
- By default, the files will be located at the exact location as the original clips.
Now, import the transcoded clips to Premiere Pro.
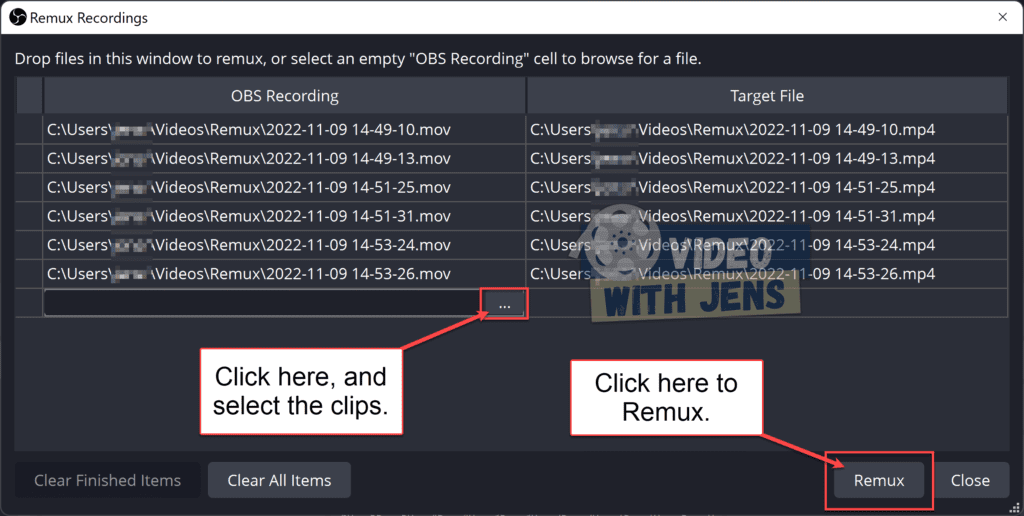
2.2 Remux Recordings in OBS Studio.
MKV files are the default recording format in OBS studio; however, MKV is not supported by Premiere Pro as v.13.1.3.
Luckily, the developers of OBS studio are aware of this and have created a solution.
- Inside OBS studio, click on File > Remux Recordings.
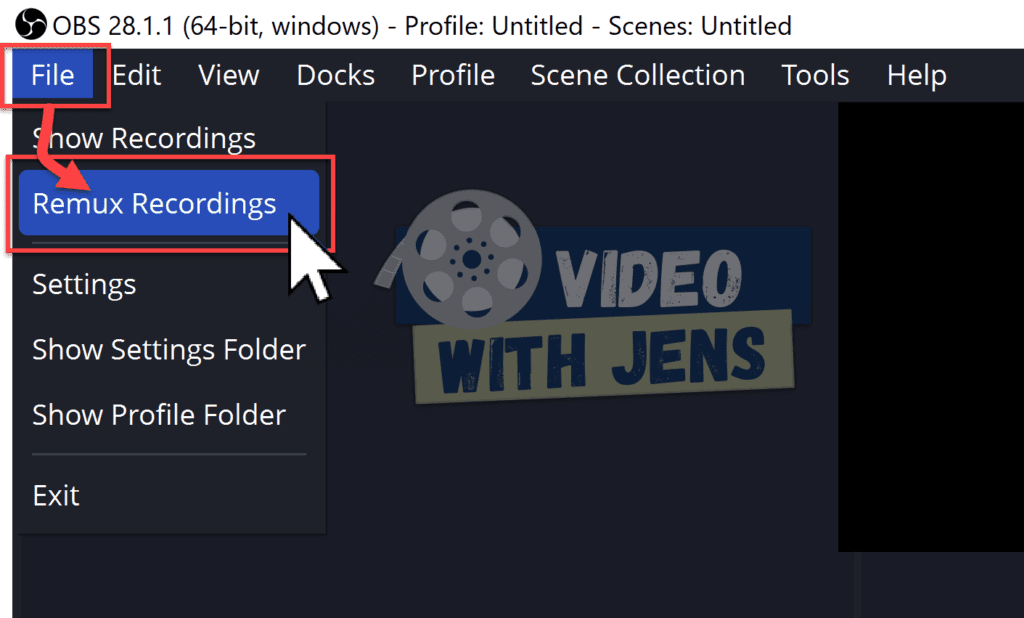
- Select the clips you cannot import to Premiere Pro, and click on Remux.
Now you’ll create an MP4 version of all the MKV files.
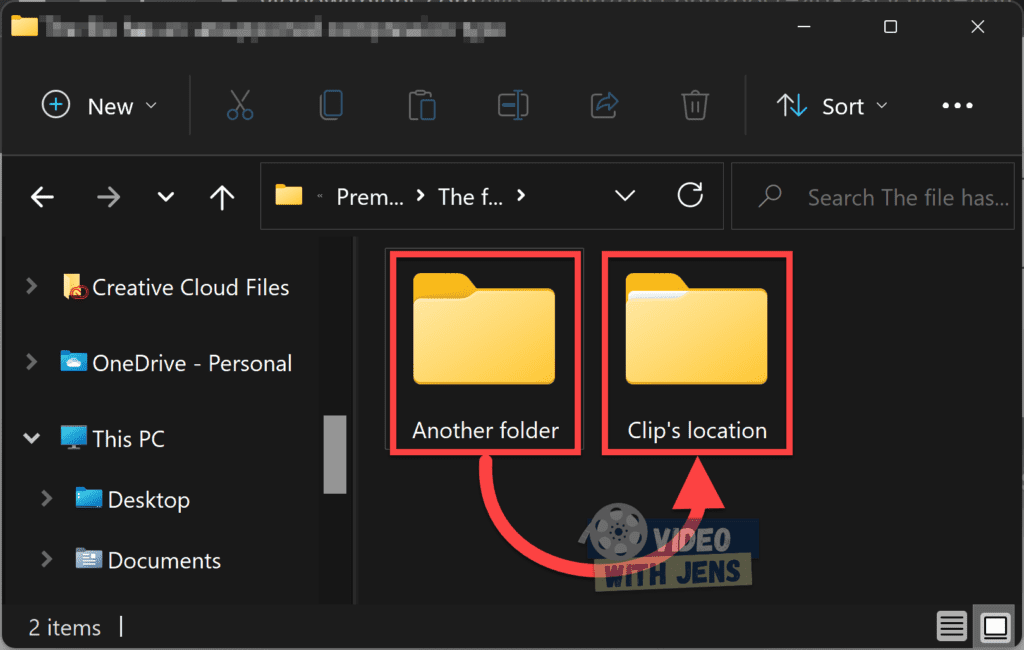
3. Change the File Location
Sometimes Premiere Pro has problems connecting to clips on your storage device due to a restricted area, weird file path, etc.
A quick way to fix this is by changing the location of the clips.
If you are multiple storage units, try changing to another one.
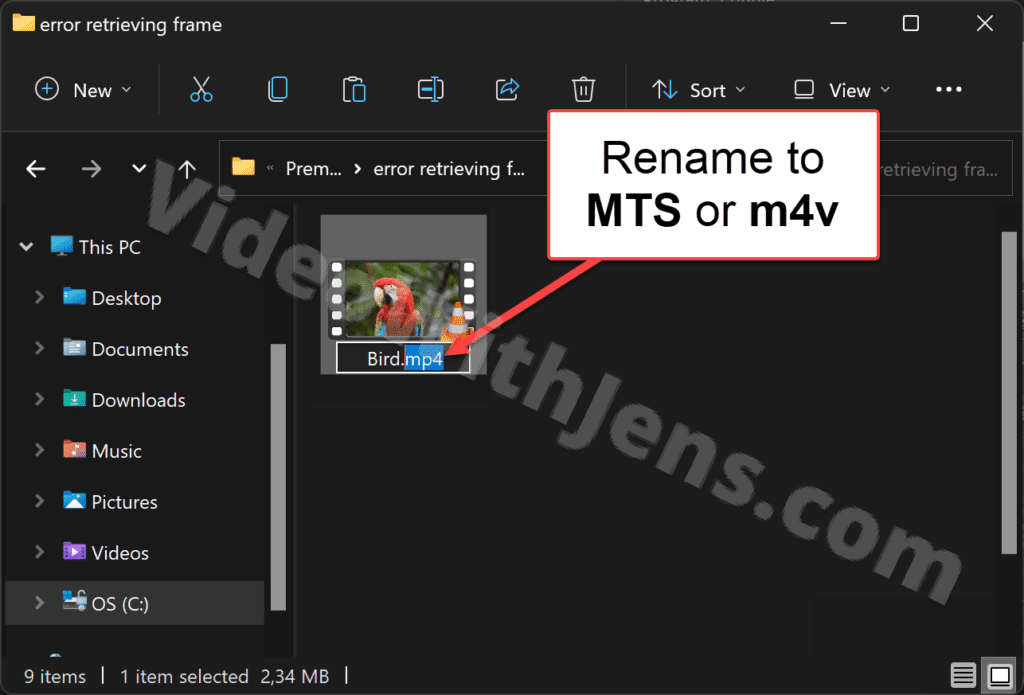
4. Change File Name Extension
Another fix that seems to work for many people facing the error “The File Has an Unsupported Compression Type” is changing the file name extension.
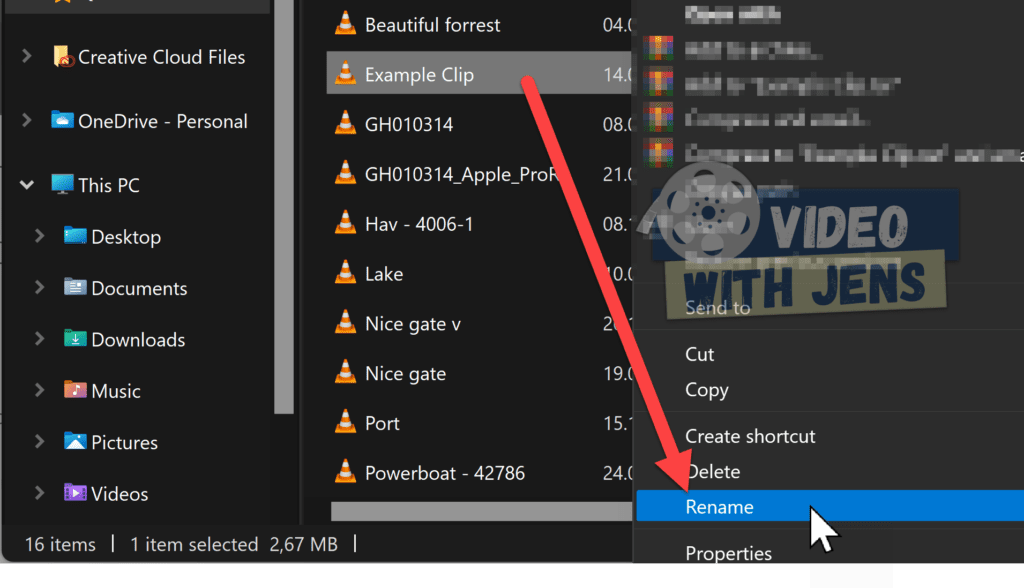
- Open the folder containing your clips.
- Windows: Click on View > Show > File name extensions.
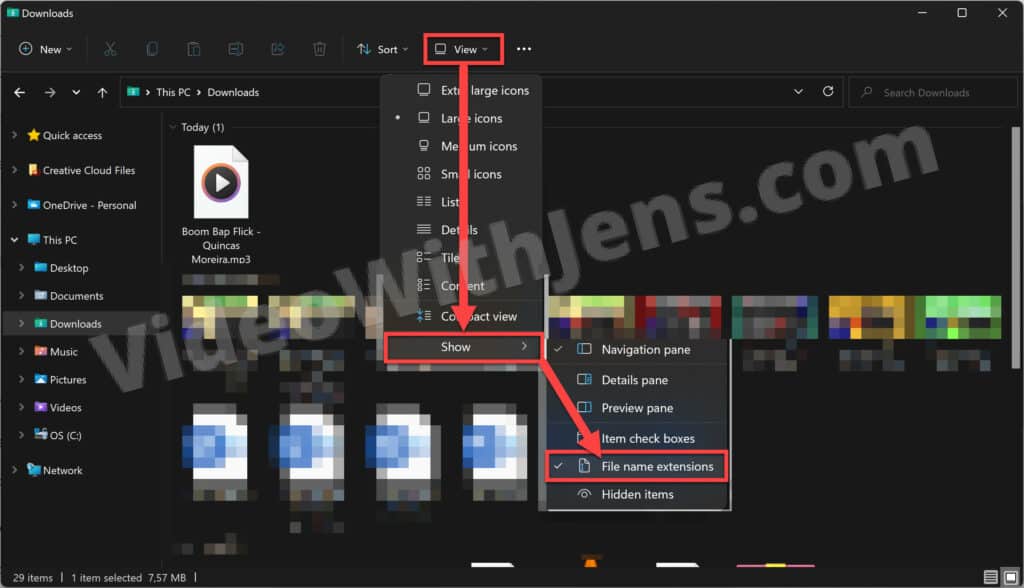
- Right-click the file > Show more options > Rename.
- Change the file name extension to .MTS or .MP4
Doing this can be a bit time-consuming if you have a lot of clips; in that case, check out the YouTube video below:
5. Rename Files
Many users have reported that renaming their files using only standard letters from the English alphabet has fixed the error.
Ensure that your files do not contain any symbols or uncommon letters.
6. Trial Version of Premiere Pro Does Not Support the Format
Users have reported the trial version of Premiere Pro might trigger the error; if you are trying to import MP4 or AVCHD files, they require the paid version of Premiere Pro (source).
7. Trim the Clip
It’s also been reported trimming a second off the clips you are trying to import solved the issue.
To do this, you must import your clips to another editing software…
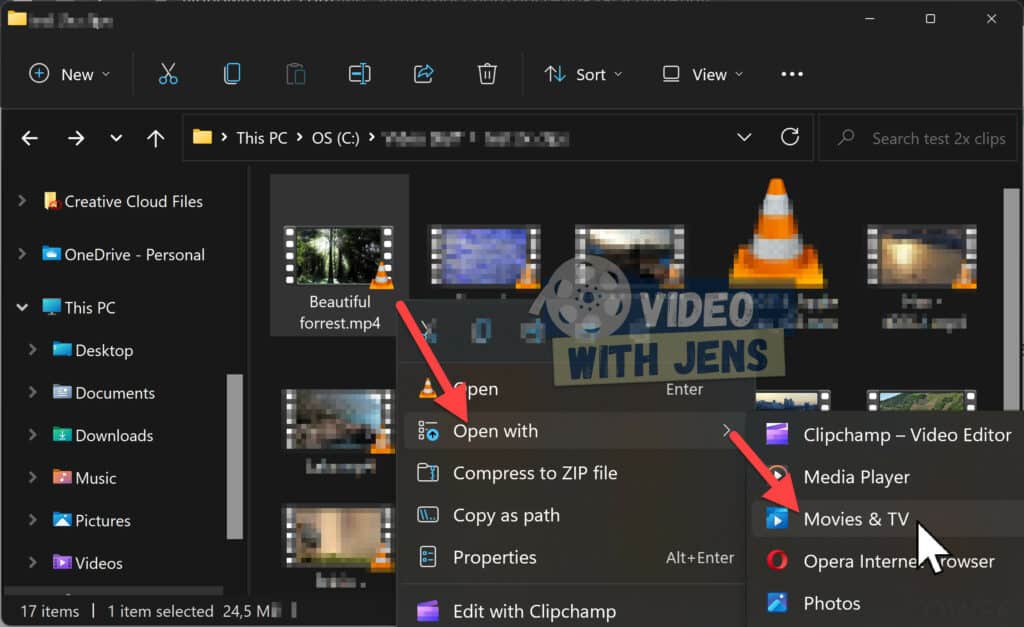
I’ve found using the pre-installed Movies & TV to be a quick alternative on Windows.
Right-click the clip > Open with > Movies & TV. Then, inside the software, trim the beginning of your clip by a second.
- Once you’ve trimmed the clip(s), try importing it to Premiere Pro.
8. Re-Install Premiere Pro
If none of the above solutions fixed the error, a quick re-installation of Premiere Pro might be your best bet. Doing this should get rid of any bugs in the software that might be causing problems.
Other resources:
Here’s a complete list of the most seen errors in Premiere Pro and how to fix them.
- TIP: Bookmark the list to solve errors in the future quickly!
![[Solved] “There Was An Error Decompressing Audio or Video” Premiere Pro](https://videowithjens.com/wp-content/uploads/2022/12/there-was-an-error-decompressing-audio-or-video-premiere-pro-7-solutions-768x432.jpg)