Fix “The Importer Reported a Generic Error” in Premiere Pro
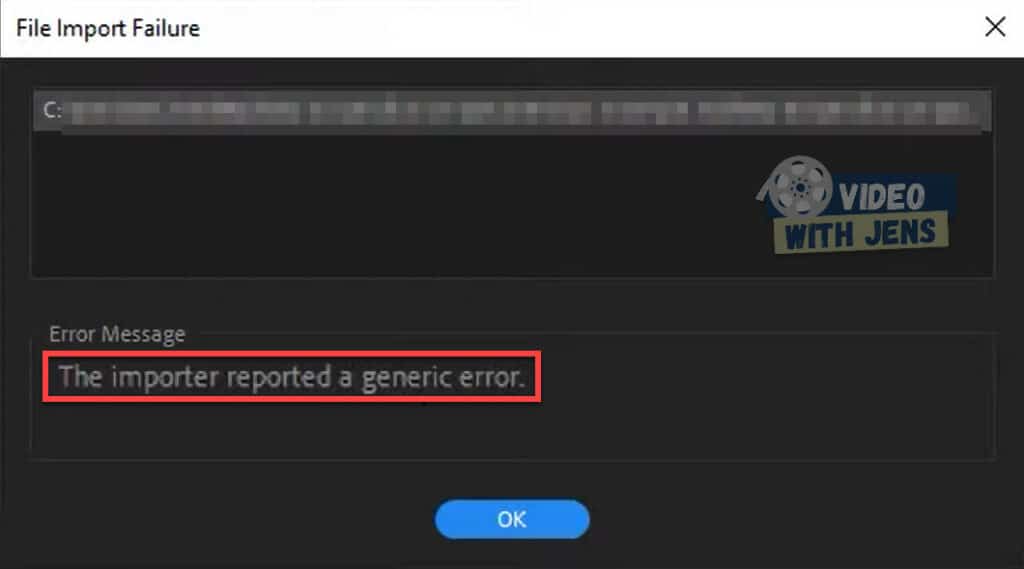
When importing media to Premiere Pro, are you seeing “The Importer Reported a Generic Error”?
If so, read on! This article will look at what causes the error and how to fix it.
Why Am I Getting the “The Importer Reported a Generic Error” in Premiere Pro?
If you are getting “The Importer Reported a Generic Error,” Premiere Pro cannot read the file you are trying to import. The error usually occurs due to an unsupported codec or a file location not accessible to Premiere Pro.
Here’s a video of how to fix the error:
1. Make Sure Your Video Codec is Supported
The most common reason people are getting the “The Importer Reported a Generic Error” is that their video is encoded by an codec which Premiere Pro does not support.
Look for your video’s format and codec in this list from Adobe; if you can’t find it, this is likely triggering the error.
Here’s how to check what codec your video is using:
I recommend using VLC media player to check this (free, super popular software); here’s a link to where you can download it.
Once you’ve downloaded and installed VLC, open your video using the software.
- On Windows: Right-click the file > Open with > VLC media player.
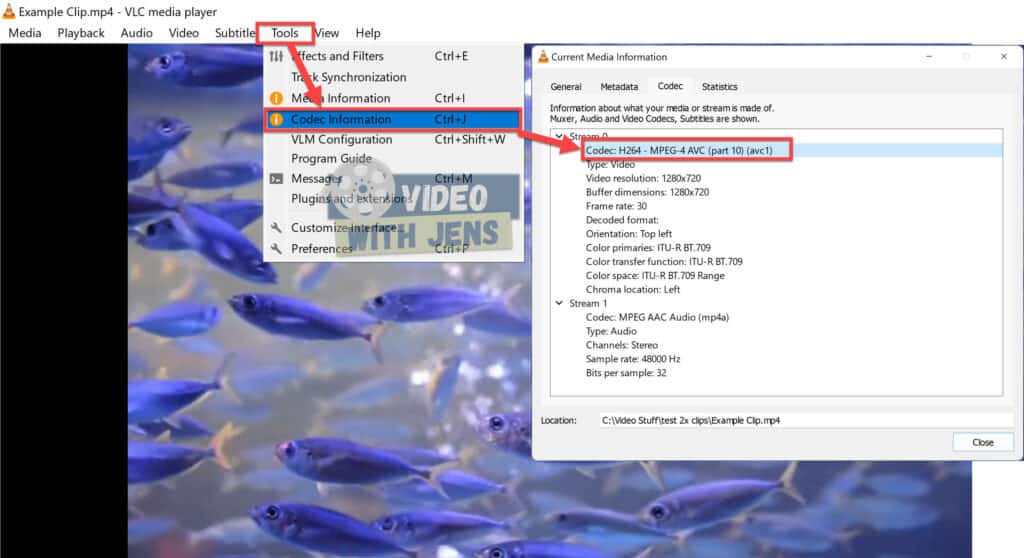
Inside VLC, click on Tools > Codec Information.
In the image below, you can see that next to Codec it says H.264, which is my codec. Since I can find the codec in the list at Adobe, this is not what’s causing the error for me.
1.1 How to Transcode
If your video has an unsupported codec, you can transcode the video using VLC as well! Here’s an article explaining how to do that.
However, I recommend downloading another free software called Shutter Encoder (open in a new tab), which is known to encode videos in high quality and offers better codecs.
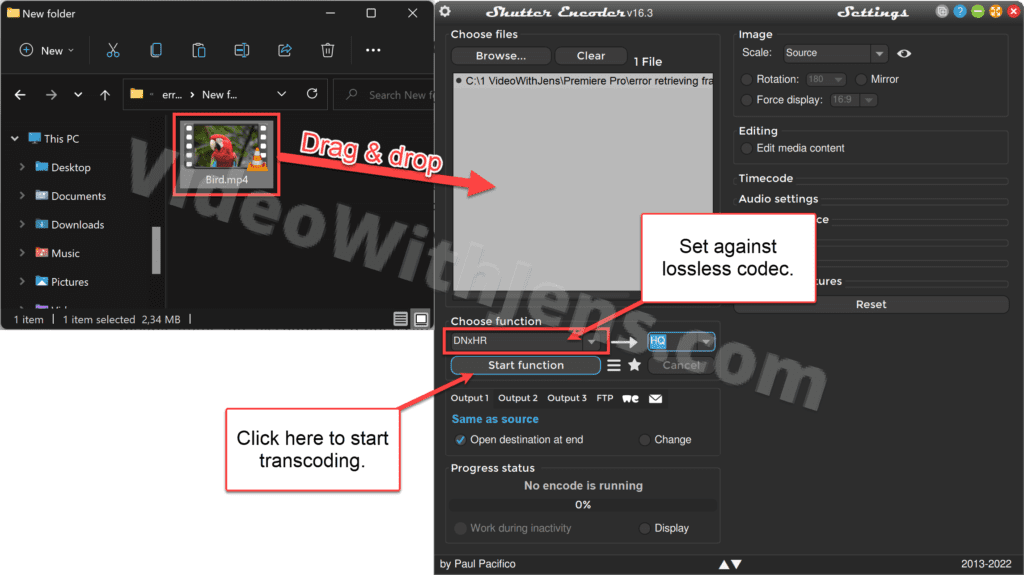
Here’s how to transcode the file using Shutter Encoder:
- Drag and drop the video on top of the white box inside Shutter Encoder.
- Under Choose function, select a lossless codec to prevent quality loss.
- I recommend DNxHR (4K) or DNxHD (1080p).
- Click on Start function to transcode.
- You’ll, by default, find the file in the same folder as the original video clip(s) once it’s finished.
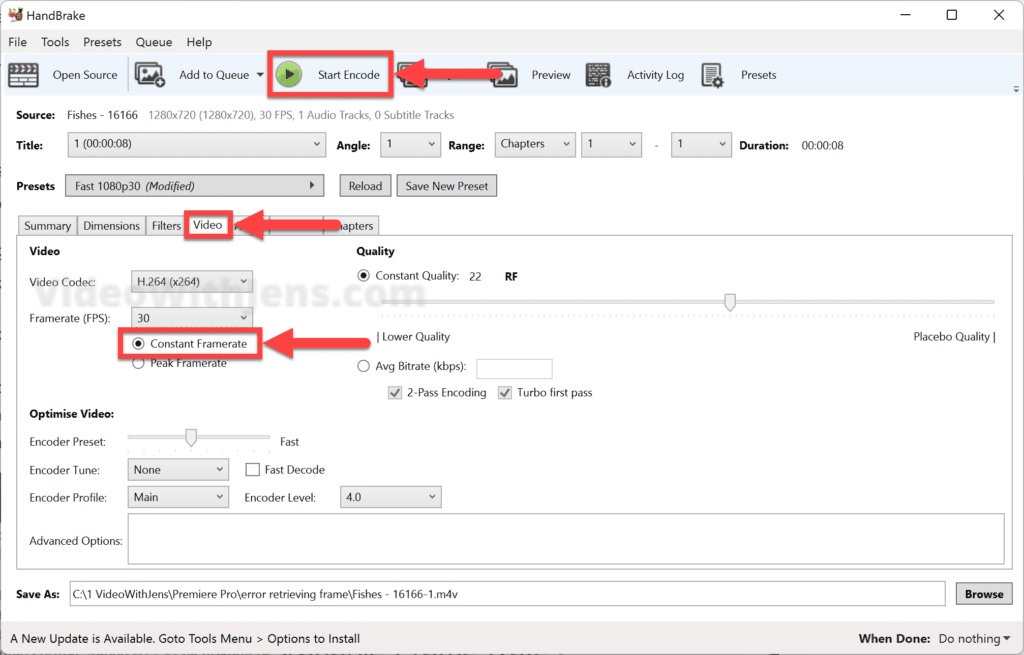
1.2 Convert Varible Frame Rate (VFR) to Constant Frame Rate (CFR)
Sometimes videos of variable frame rates have been found to trigger errors in Premiere Pro. Although supported, most NLE software has difficulties dealing with such frame rates.
This is primarily relevant if you have been screen-recording games using software like OBS, Fraps, etc.
A quick fix to this problem is using HandBrake (open in a new tab), yet another free, excellent software.
- Drag and drop the video on top of the software to import.
- Open the Video tab.
- Under Framerate (FPS), tick off the Constant Framerate option.
- Click on Browse (at the bottom) to set an export location.
- Click on Start Encode to convert the file.
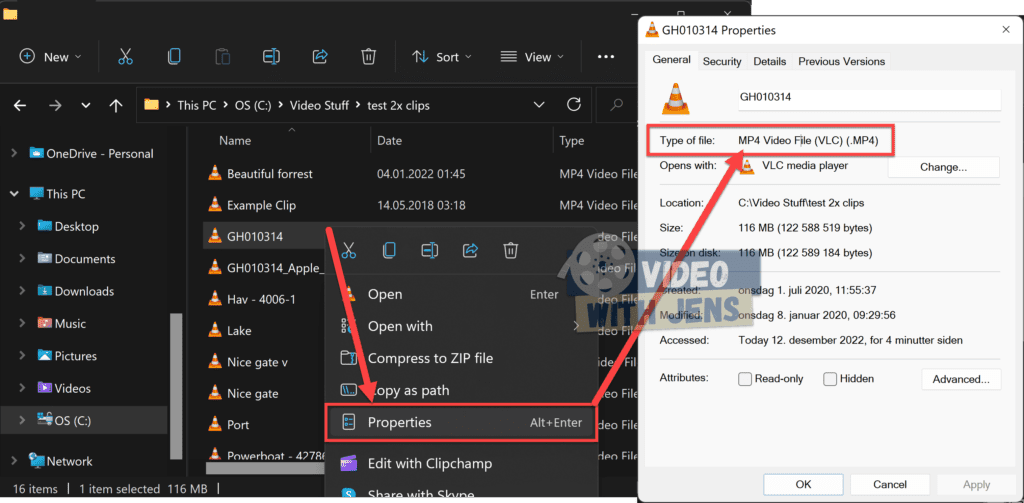
2. Make Sure the File Format is Supported
Another reason that might be triggering “The Importer Reported a Generic Error” is that it’s an unsupported format. Contrary to solution 1, this solution is also relevant to images.
- The format is not the same as the codec.
To ensure this is not causing the import error, check if your format is included in the list of supported file formats on adobe’s website. If you can’t find it, this is likely causing the error.
To check your video’s format:
- Right-click the file and select Properties.
- Next to Type of file you should be able to see the format:
To fix this, follow the steps explained above on how to transcode a file.
3. Delete Media Cache Files.
Sometimes the media cache files that are supposed to help you become corrupt and cause problems.
The media cache files are automatically generated when you import a new file to Premiere Pro. The cache file may have been created when you used it for another project, or it may have been right before you got the import error.
To delete the media cache files:
- Click on File > Close Project (remember to save).
- Only relevant if you have a project open.
- Click on Edit > Preferences > Media Cache.
- Under Media Cache Files, click on Delete.
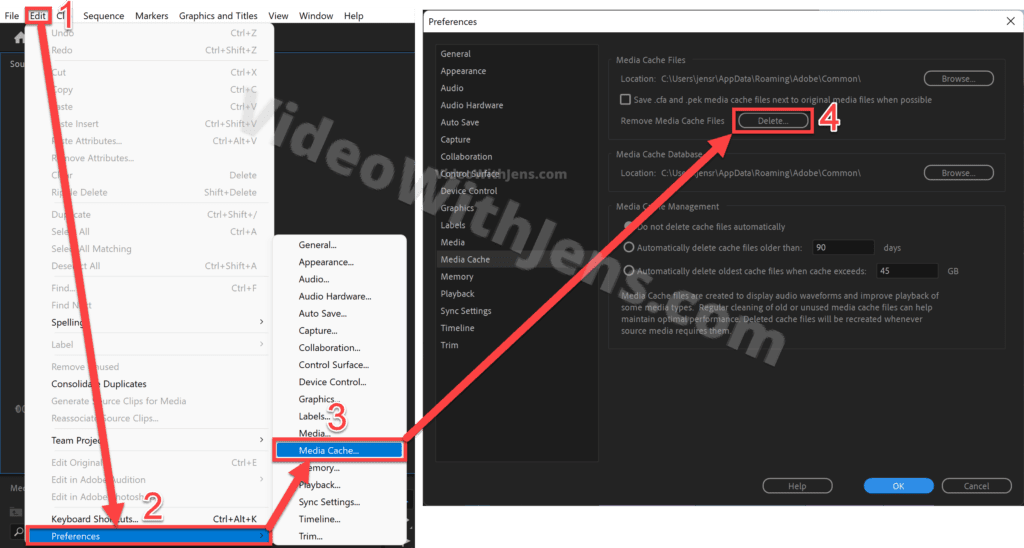
- Select Delete unused media cache files, and click OK.
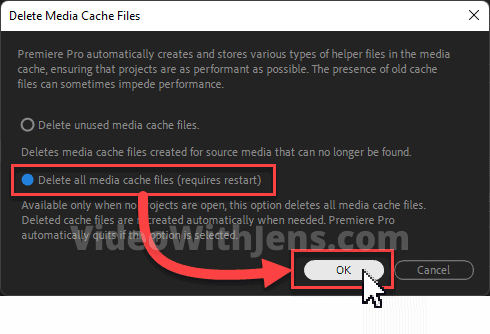
- If that doesn’t solve the error, try the second option to Delete all media cache files (requires restart).
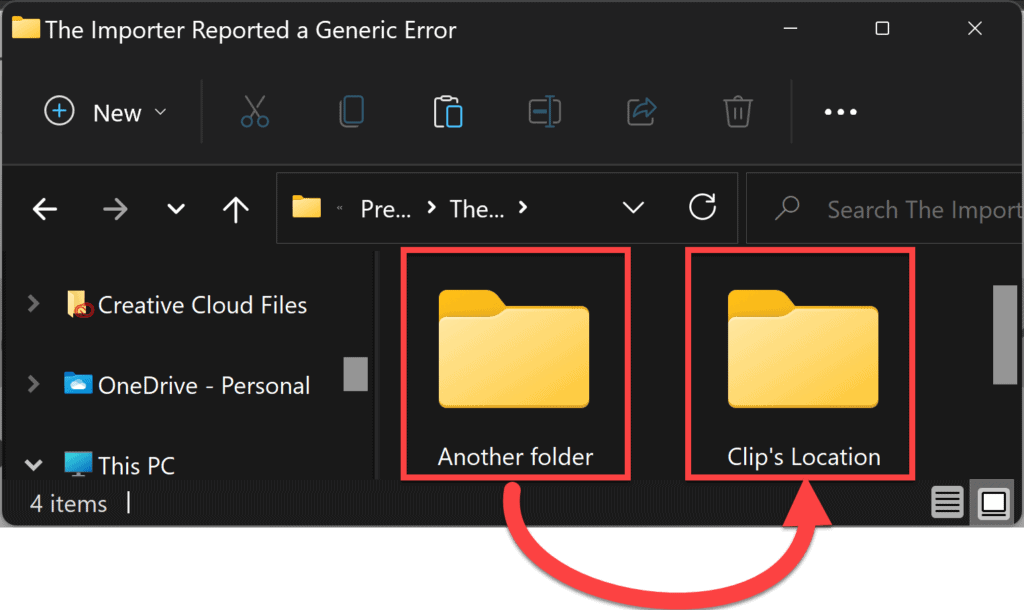
4. Move Files to a Different Location
Many users have successfully solved “The Importer Reported a Generic Error” by changing the location where their files are saved in their system.
One guy simply selected all his media, dragged it onto the desktop, and then dragged the files into Premiere Pro.
If you have multiple drives on your computer or are using an external storage device, try changing the location to another drive (preferably a dedicated fast drive).
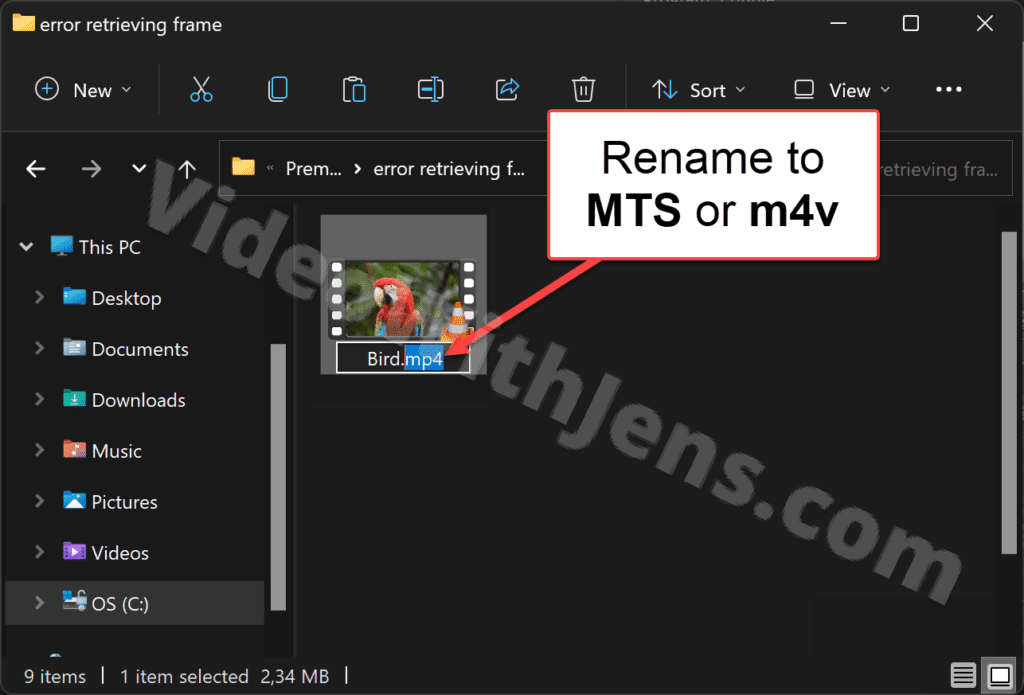
5. Change the File Extension Name
Another easy way to solve the import error is changing the file extension name.
I’ll show you how to do this on Windows if you use macOS; check out this article on how to show file extensions.
- Open the folder where your media is located.
- Click on View > Show > File name extensions.
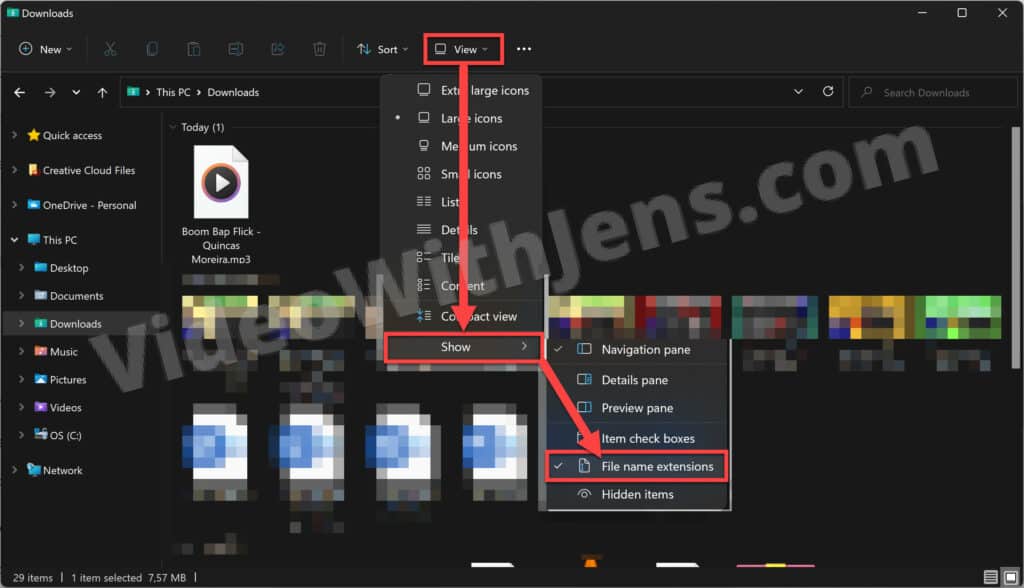
- Right-click the file causing the error > Show more options > Rename.
- Change the file name extension to “.MTS” and confirm the action.
- If you are having problems with an image, try changing it to “.PNG”.
- If you have problems with an audio file, try “.wav”.
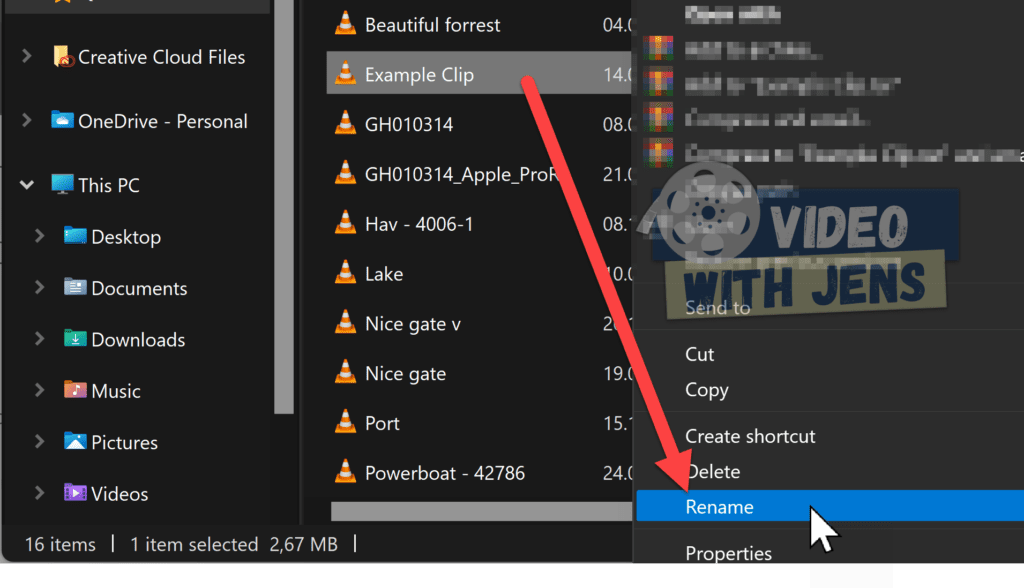
6. Change File Name
If your filename contains any special symbols or characters, try renaming the file using only characters from the English alphabet and standard numbers from 0-9.
To do this, right-click the file > Rename, and type in a new name.
7. Re-install Premiere Pro
Lastly, if none of the solutions above solved “The Importer Reported a Generic Error,” try re-installing Premiere Pro to ensure there are no software bugs causing the error.
You can do this in the Adobe Creative Cloud application on your computer.
- Go to Apps > All apps.
- Click on the three dots next to Premiere Pro, and select Uninstall.
- Once uninstalled, you should find Premiere Pro under Available in your plan on the same page.
Here’s a neat list of the most common errors in Premiere Pro and how to fix them; consider saving it for later!
![[Solved] “There Was An Error Decompressing Audio or Video” Premiere Pro](https://videowithjens.com/wp-content/uploads/2022/12/there-was-an-error-decompressing-audio-or-video-premiere-pro-7-solutions-768x432.jpg)