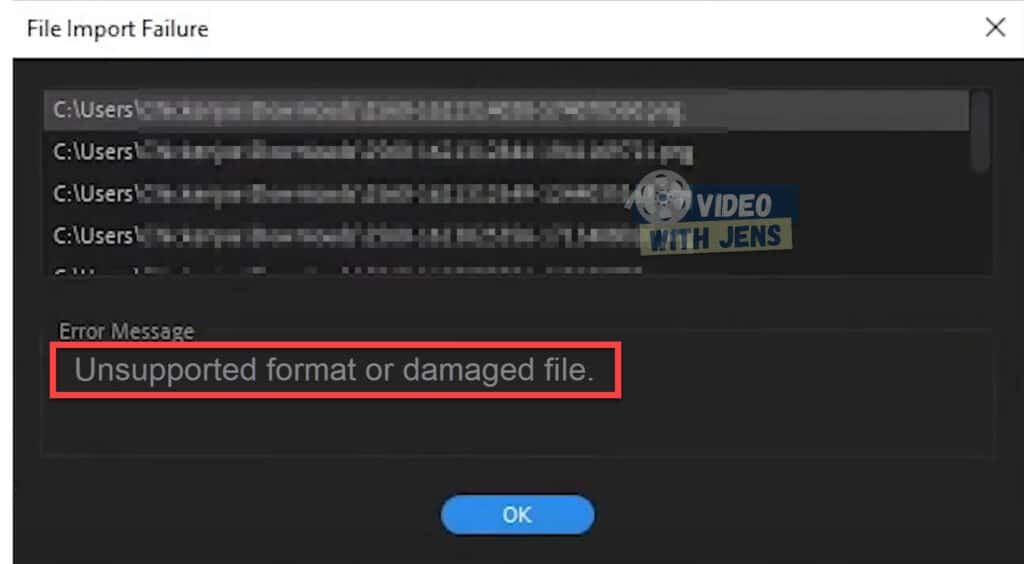
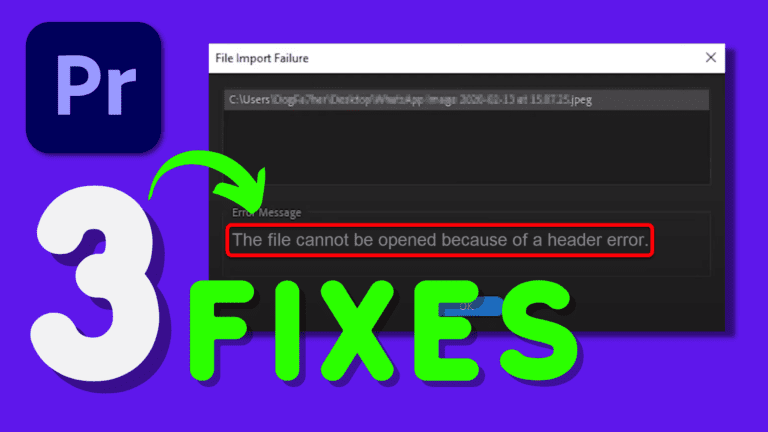
Fix “Unsupported Format or Damaged File” in Premiere Pro
Are you getting the “Unsupported Format or Damaged File” error when importing Premiere Pro?
If so, don’t worry, as this error is relatively easy to fix!
Here’s a video version of the article:
Why Am I getting the Error “Unsupported Format or Damaged File”?
The “Unsupported Format or Damaged File” error is triggered when you import a file format to Premiere Pro that is not supported or corrupt. In either case, converting the file to a supported format will usually fix the error.
However, before converting, I’ll show you a couple of quick fixes to try first. Click here to skip straight ahead to the converting solution.
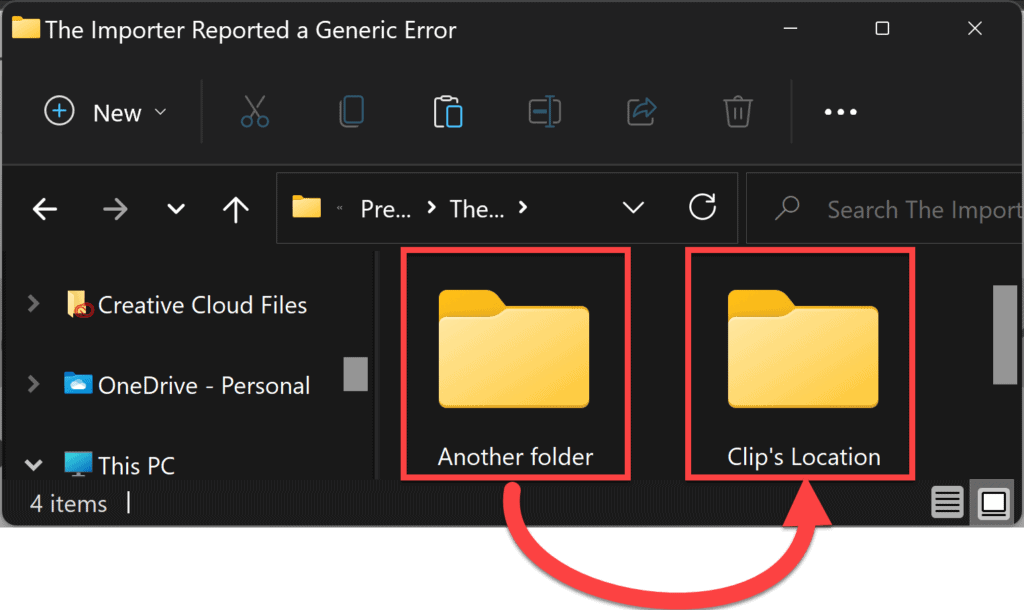
1. Change File Location
According to users in the Adobe community, changing the location of the file(s) you are trying to import solved the error.
To do this, create a new folder in your file system, and move all the files into this one.
If you have multiple drives/storage devices, try changing the location to another device. Or if the folder is located in “Documents,” change the location to “Desktop,” for example.
NB. the folder should not be inside the original folder.
Once you have changed the file(s) location and tried to view them in Premiere Pro, an error will appear saying, “Missing media files.” When this happens, click on Locate and show Premiere the new location.
- Check out this article for more information on how to re-link the clips. If the “Missing media” error does not pop up, I’ll also show you how to manually re-link offline media in the article as well.
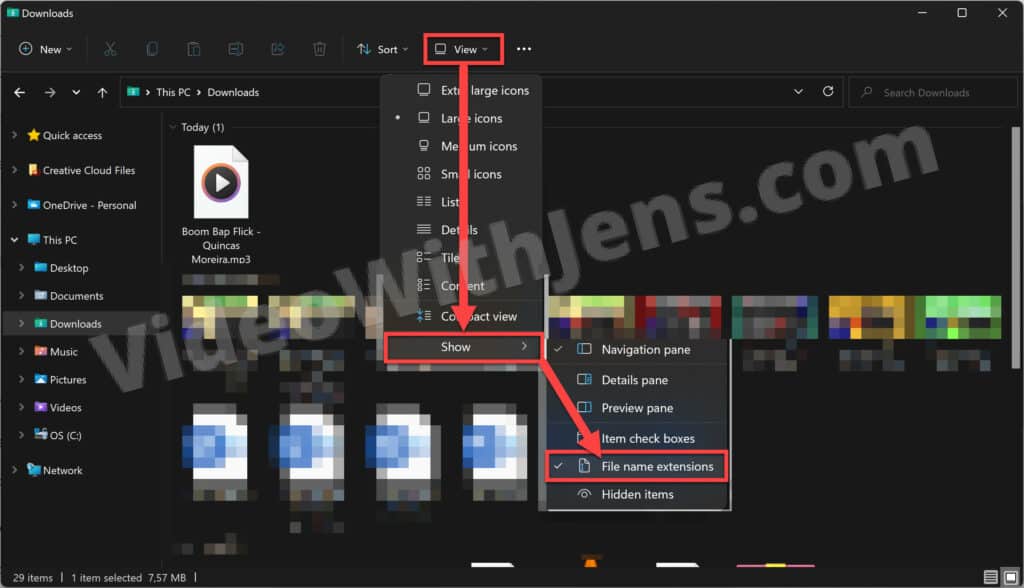
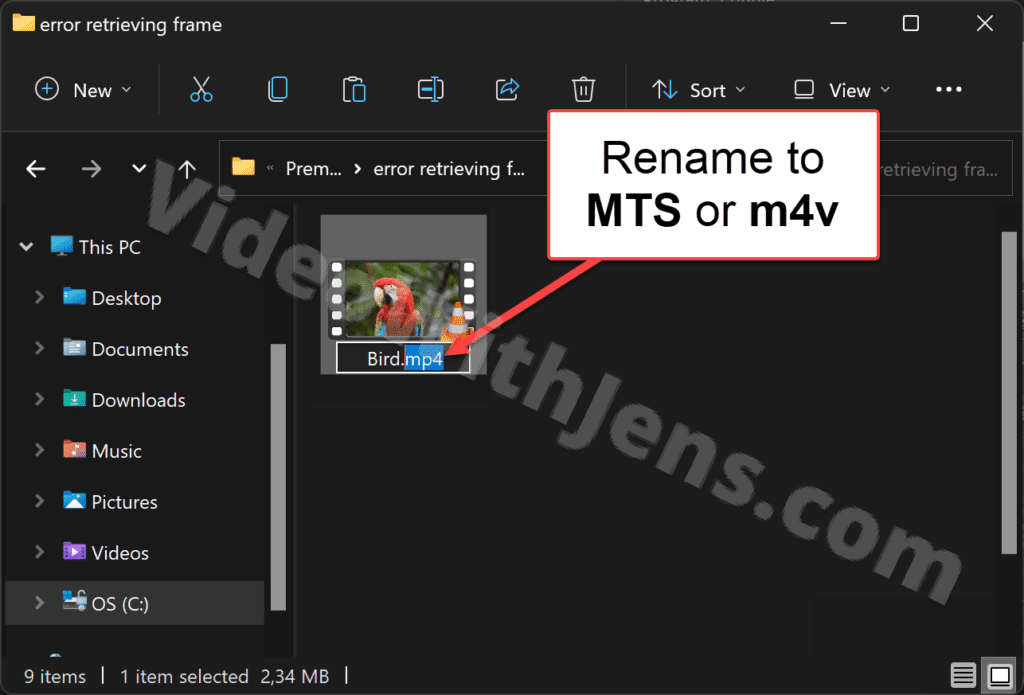
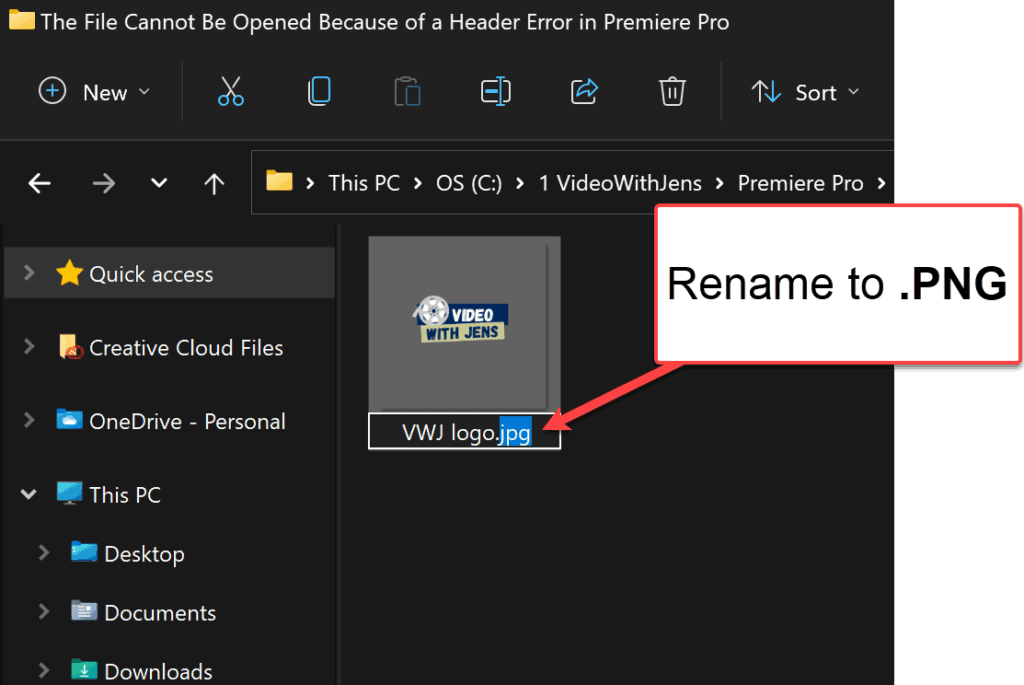
2. Change File Name Extension
Another quick fix to solve the error is changing the file name extension.
To do this, we’ll first have to make the file name extension visible; here’s how to do it on Windows: (check out this article if you’re a macOS user.)
- Open the folder where your trouble files are saved.
- Click on View > Show > File name extensions.
- Right-click the file > Show more options > Rename.
- Change the file name extension.
- For video files, try changing them to .MTS, .m4v, or .MP4
- For images, try changing .jpg to .png
3. Convert to a Supported Format
Converting your file(s) to a supported format is almost guaranteed to solve the “Unsupported Format or Damaged File.”
Converting the file using a good software will fix any damaged file(s), and at the same time, we will correct the file to a format that Premiere Pro supports!
Converting an image will not be done the same way as with a video. But, not to worry! I’ll show you how to convert both.
Let’s start with video files:
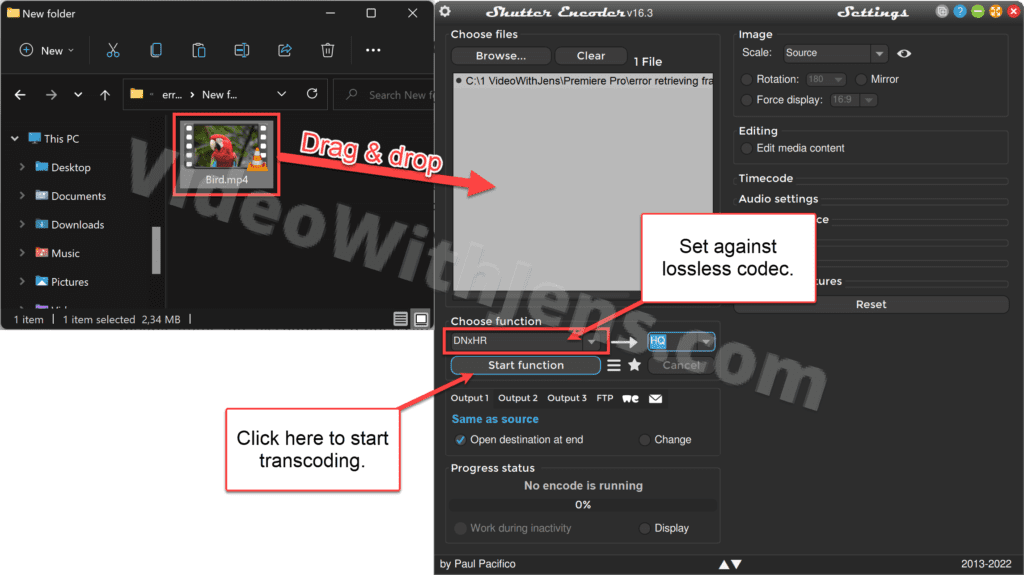
3.1 Convert Video to a Supported Format
When converting a video, I recommend using Shutter Encoder (opens in a new tab), a free high-quality software (you can also use HandBrake, for example).
Here’s how to transcode using Shutter Encoder:
- Drag & drop the file(s) on the white area inside the software to import.
- In the drop-down menu, under Choose function, set it to DNxHR (4k) or DNxHD (1080p).
- This is entirely optional. These files will be huge, so if you have a lot of files, consider choosing another codec. However, selecting a codec such as DNx… will not result in quality loss.
- Click on Start function to convert the file(s).
- Once it’s complete, you’ll, by default, find them in the exact location as the original files.
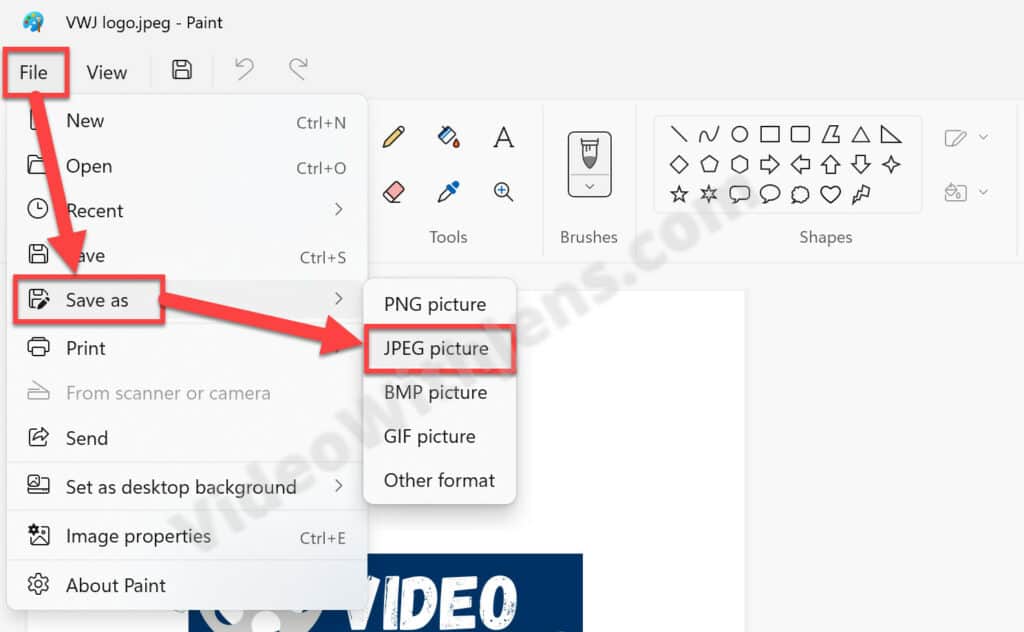
3.2 Convert Image to a Supported Format
If you are getting the error when importing an image(s), you can fix this by using software such as Paint or PowerPoint!
Open the image(s) in Paint and save it as a PNG or JPEG.
On Windows, you can do this by right-clicking the image file > Open with > Paint.
Then, inside Paint, click on File > Save as > JPEG picture or PNG picture (higher quality).
Once the image(s) are converted, you should be able to import without getting the error!
Check out this list of the most seen errors in Premiere Pro and how to fix them!
- Tip: bookmark the list to solve errors in the future quickly.
![[Solved] “There Was An Error Decompressing Audio or Video” Premiere Pro](https://videowithjens.com/wp-content/uploads/2022/12/there-was-an-error-decompressing-audio-or-video-premiere-pro-7-solutions-768x432.jpg)