Remove Audio from Video: DaVinci Resolve (+ Tips and tricks)
Removing unnecessary audio from the video is something we have to do all the time as video editors.
There are many ways you can do this in DaVinci Resolve.
In this article I will show you the most effective methods:
(Click on the links to jump to a specific part)
- The basic method of removing audio.
- Remove audio from part of the video.
- Add clip to timeline without audio.
How to Remove Audio From Video in DaVinci Resolve
Quick Guide
- Go to the “Edit” page inside DaVinci Resolve.
- Add the clip to the timeline.
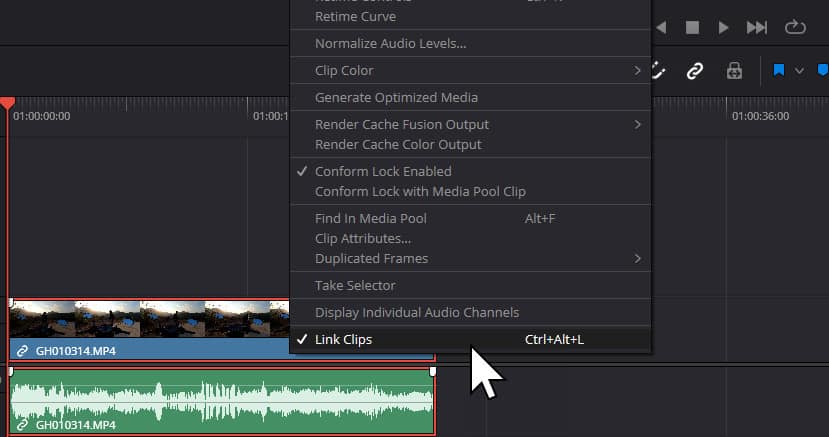
- Right-click the clip and uncheck “Link Clips.”
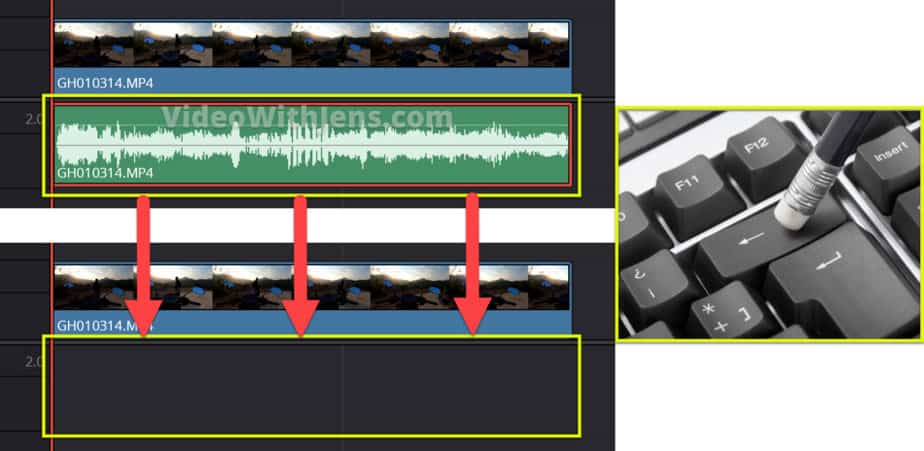
- Deselect the clip in the timeline, and click on the audio part only.
- Hit “Backspace” on your keyboard to remove the audio.
Detailed Guide
Make sure to be on the “Edit” page inside Resolve.

Then if you have not, add the clip to the timeline.
So to remove the audio, we are by using this first way of doing it unlink the audio and video. Doing this allows us to select only the audio by clicking on it!
Right-click the clip in the timeline, and uncheck the option called “Link Clips“:
Next, we want to deselect the clips, which you can do by clicking on the gray part of the timeline like this:
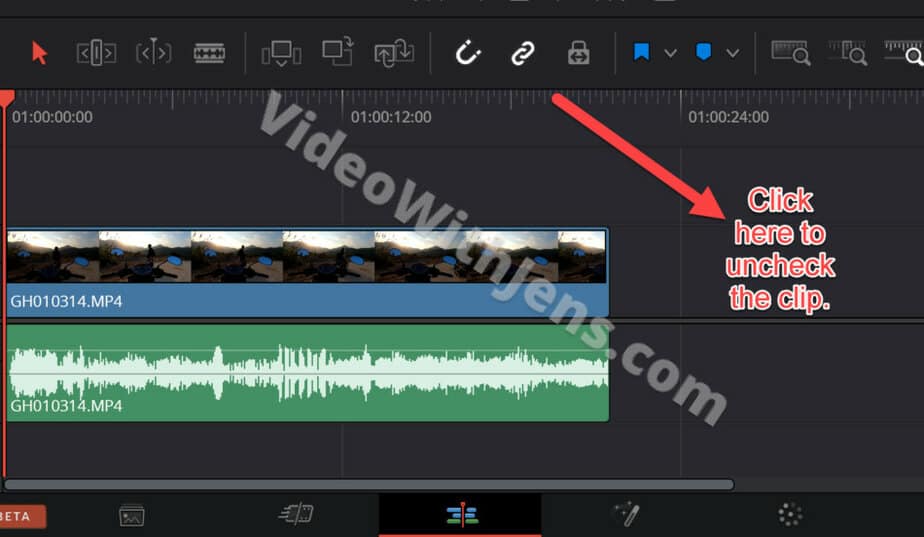
Now we can click on the audio clip, and it does not select the video part as it usually would since they are not linked anymore.
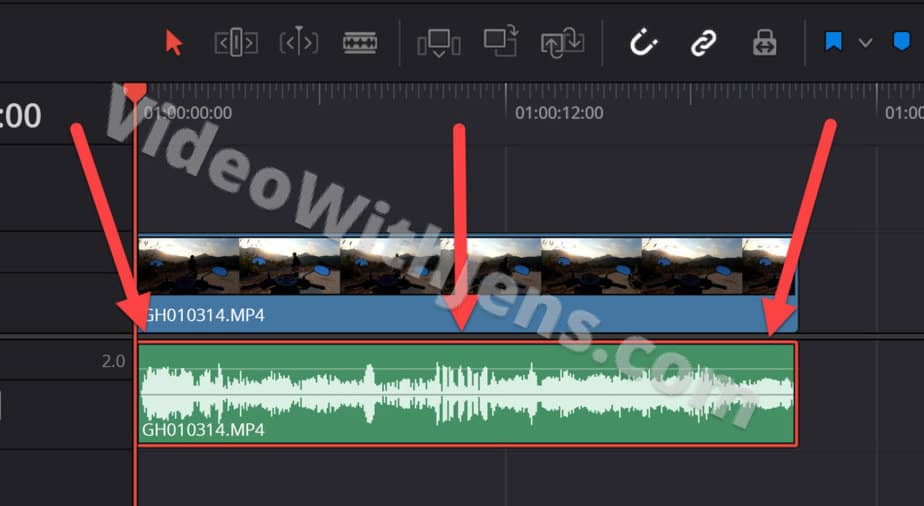
The next step is to remove the audio!
Press the “Backspace” on your keyboard to delete it.
Simple Method:
The method described above may be the most convenient in many instances. And the technique most people suggest using.
However, I’m going to give you an even better way in my opinion.
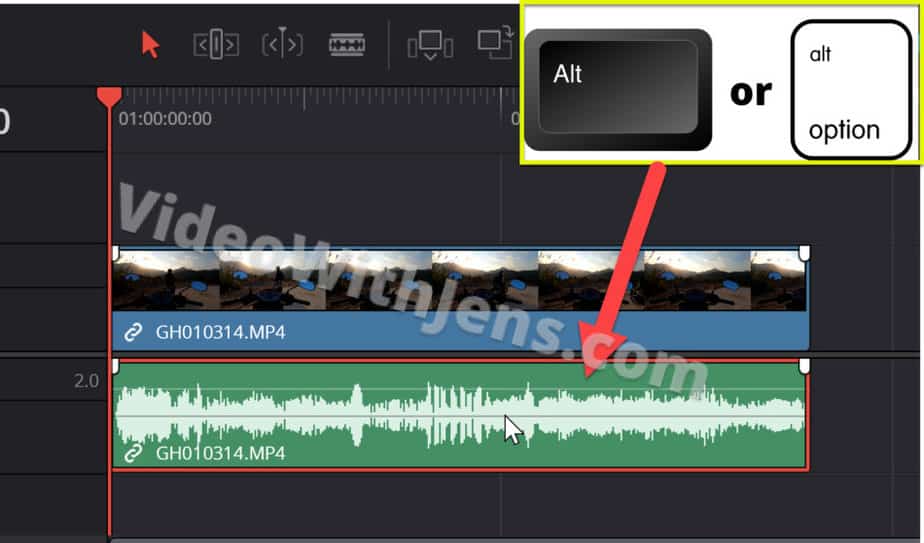
So instead of unlinking the clips, it’s possible to only select the audio by clicking on it while pressing down the ALT key or Option key for Mac users!
And with the audio selected, press Backspace to remove it.
It’s also possible to add the video clip to the timeline without the audio in the first place! This is the method I recommend using if you don’t need the audio at all. Here’s an article I wrote about how to do it.
How to Remove Audio from Part of a Video in DaVinci Resolve
Quick Guide
To remove audio from part of your video in DaVinci Resolve, the best way is to unlink them. First, right-click the clip in the timeline inside the “Edit” page, and uncheck the “Link Clips” option. Now you can cut out the part of the audio you wish to remove without affecting the video.
Instead of removing part of the audio, you can also mute it! Here’s an article on how to do that.
Detailed Guide
Make sure to be on the “Edit” page:

Next, go ahead and right-click the clip in the timeline and uncheck “Link Clips“:
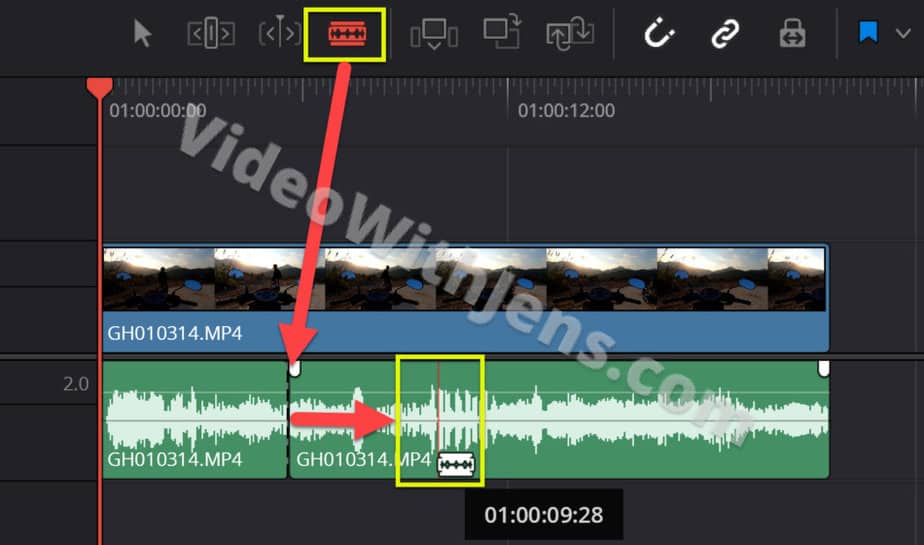
When the audio and video are unlinked, activate the “Blade Edit Mode” in the toolbar above the timeline.
Then click on the audio clip in the timeline to cut; cut out the part of the audio you want to remove:
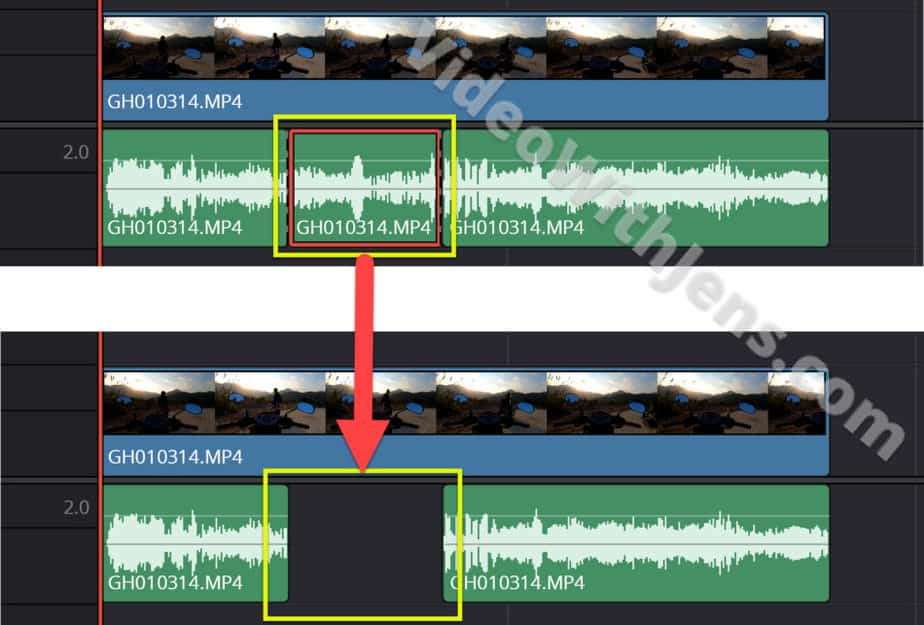
Next, click on the audio part you cut out to select it and hit “Backspace” to remove the audio part:
Bonus Tip:
It’s actually possible to remove the audio from the video even before adding it to the timeline.
Using this method, you simply add the clip to the timeline without the audio.
You can do this in two ways:
But first, you need to open the clip in the “Source Viewer.” Then, simply, double click the clip in the “Media Pool,” and it will show up in the source viewer like this:
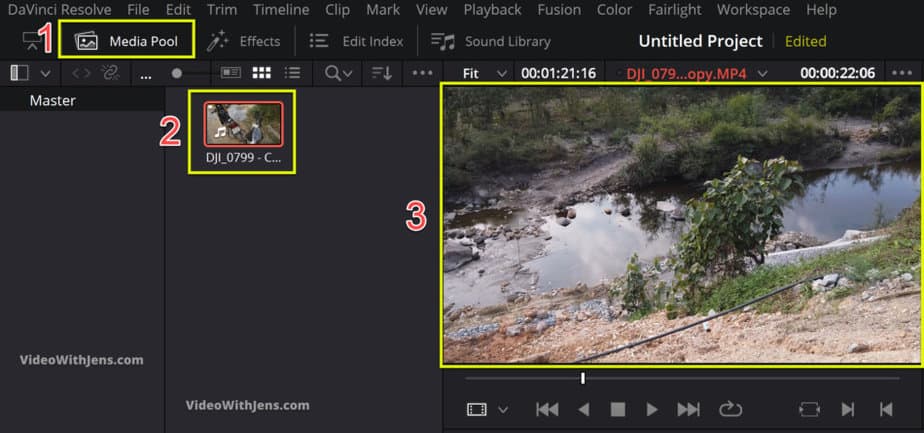
Then you can hover your mouse over the “Source Viewer,” and two icons should appear. One icon looks like a tape, and the other is like an audio wave.
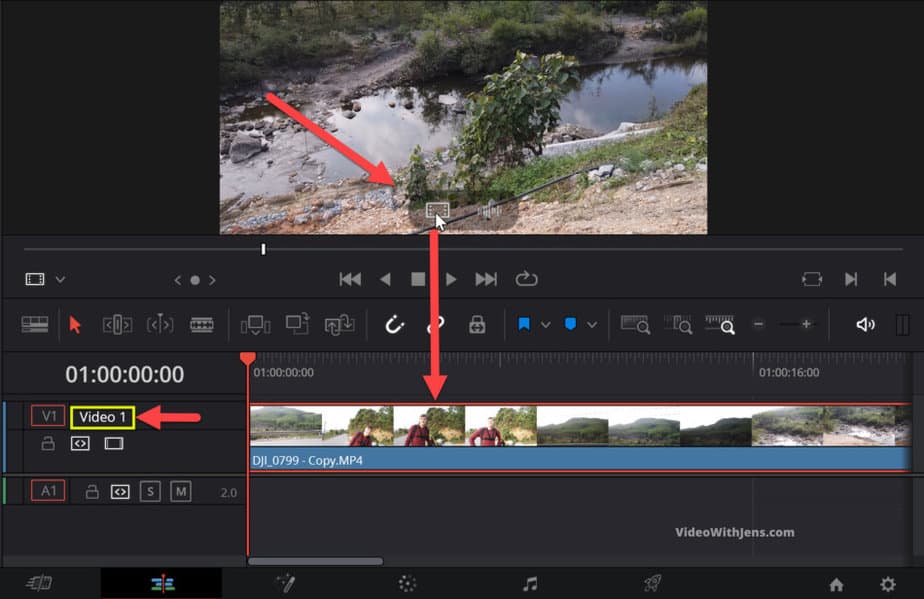
To add a video to the timeline without the audio, click and drag the video icon down to the timeline, like in the image below:
That’s one way to do it.
The other way to do it is by simply holding down the Alt key (Option for Mac users) and dragging the video down from the “Source Viewer” to the timeline. However, when doing it this way you can drag the video from anywhere in the source viewer (not only from the tape icon!).
There are a bunch of other useful ways to add clips to the timeline. I’ve written an entire article on the different ways here.