Split Clips in DaVinci Resolve 18 (Methods & Shortcuts)
Knowing how to split clips is an important skill for video editors to learn. Therefore, using DaVinci Resolve I will show you the best methods to do this.
Being a full-time video editor, I’ve discovered that knowing different ways to split clips (and trim) speeds up your workflow A LOT.
Thus, in this quick tutorial I’ll show you my favorites:
How to Split a Clip in DaVinci Resolve
To split a clip in DaVinci Resolve, place the timeline playhead where you want to split it. Then, simply press the shortcut “Ctrl or Command + B” or “Ctrl or Command + \“. Alternatively, you can click on “Timeline > Split Clip” located in the upper left-hand corner of Resolve.
This is the method you learn in the video above.
Next, up:
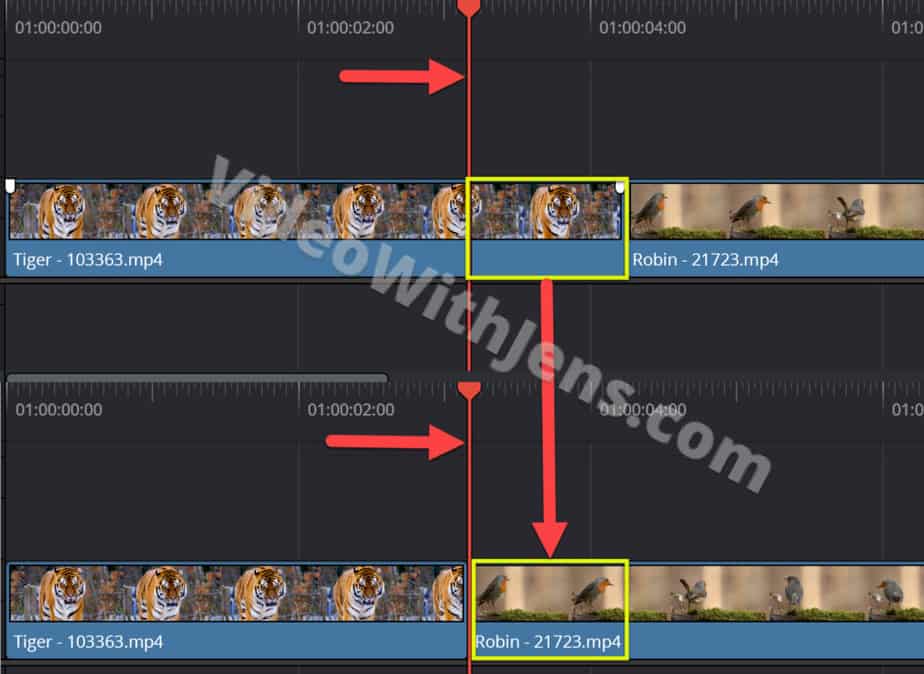
How to Split Multiple Clips in DaVinci Resolve
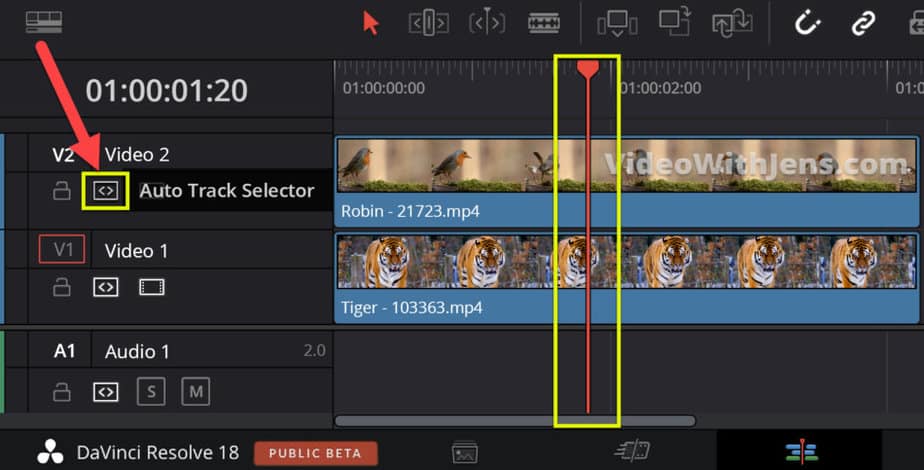
To split multiple clips in DaVinci Resolve that are stacked upon each other, simply press the shortcut “Ctrl or Command+B” or “Ctrl or Command+\“. The clip will split where the playhead is positioned. If that doesn’t work, make sure that the “Auto Track Selector” is enabled on each of the tracks.
You’ll find the “Auto Track Selector” next to the lock icon in the timeline.
Watch the image below:
Shortcuts to Split Clips in DaVinci Resolve
| Blade Edit Mode | B |
| Split Clip | Ctrl/Command + B or Ctrl/Command + \ |
| Trim Start / End | Q / W |
| Ripple Trim Start | Ctrl + Shift + [ or Command+ Shift + [ |
| Ripple Trim End | Ctrl + Shift + ] or Command+ Shift + ] |
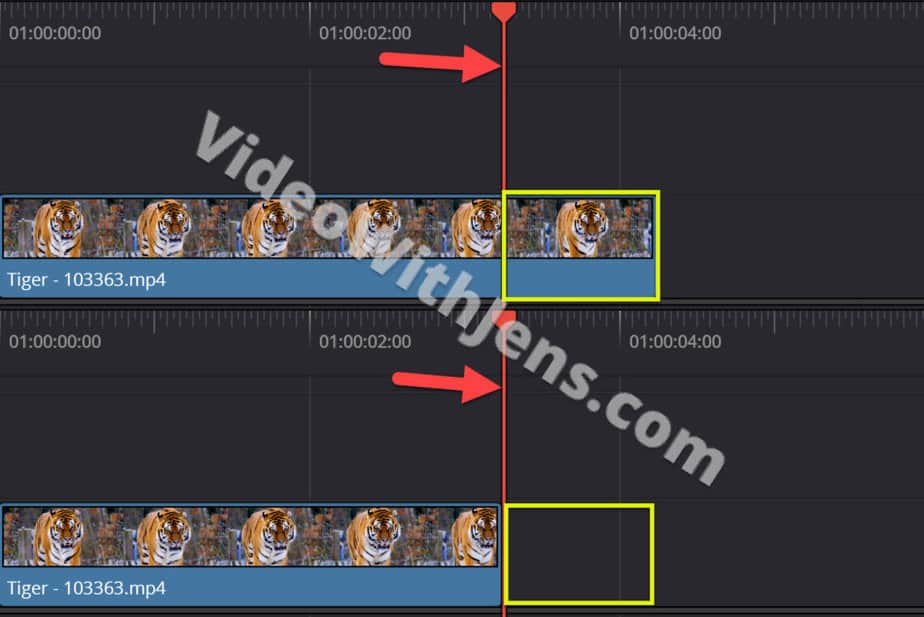
How to Ripple Trim Start/End of a Clip to Playhead in DaVinci Resolve
To ripple trim the start or end of a clip in Resolve, simply place the timeline playhead where you want the trimming to stop. Then, press the keyboard shortcut “Ctrl + Shift + [ or ]“. “Command” is the equivalent key to “Ctrl” for MacBook users.
As you can see in the image below, the part of the clip which is on the left side of the playhead are being removed.
What’s awesome about this method is that you don’t have to select the clip nor remove any gaps that are created when deleting part of a clip! This method is like rocket fuel for your workflow.
How to Trim Start/End of Clip to Playhead in DaVinci Resolve
To trim the ends of a clip, place the timeline playhead where you want to trim the clip. Then, click on “Trim > Trim Start (or end)” located in the upper left-hand corner of DaVinci Resolve. Alternatively, press the keyboard shortcut: “Q” or “W“.
This method is also very nice. However, for it to be as effective as the one mentioned above, I recommend that you are in “Trim Edit Mode” while using it. Otherwise, you’ll have to delete gaps when trimming, as the timeline won’t ripple delete automatically.
How to Trim Multiple Clips at Once
To trim multiple clips in DaVinci Resolve, firstly, lasso select the clips you want to trim, and press “U” on your keyboard. Then, with the clips selected, hold down “Ctrl” (Command for MacBook), hover your mouse over the edge of a clip, and drag to the left to trim them.
Check out this video for more information:
As mentioned in the video, you sometimes have to drag on the edge of the clip twice before it reacts.
If you have split your clip by accident, it’s actually possible to re-join them in a single click:
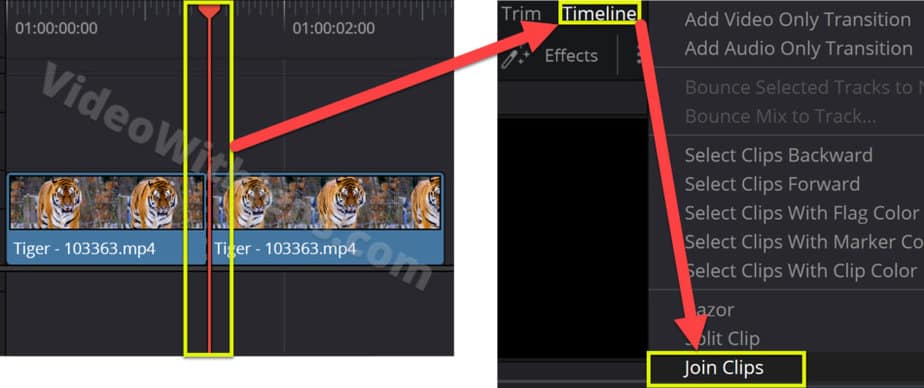
How to Re-join Split Clips in DaVinci Resolve
To re-join two clips in DaVinci Resolve, simply place the timeline playhead in between the two clips. Then, click on “Timeline > Join Clips” located in the upper left-hand corner of Resolve. It does not work if you have trimmed the ends.
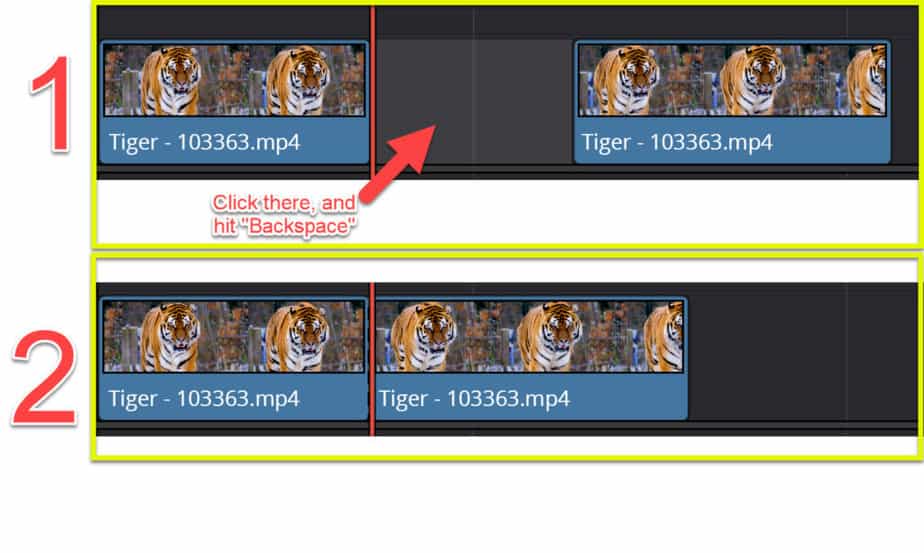
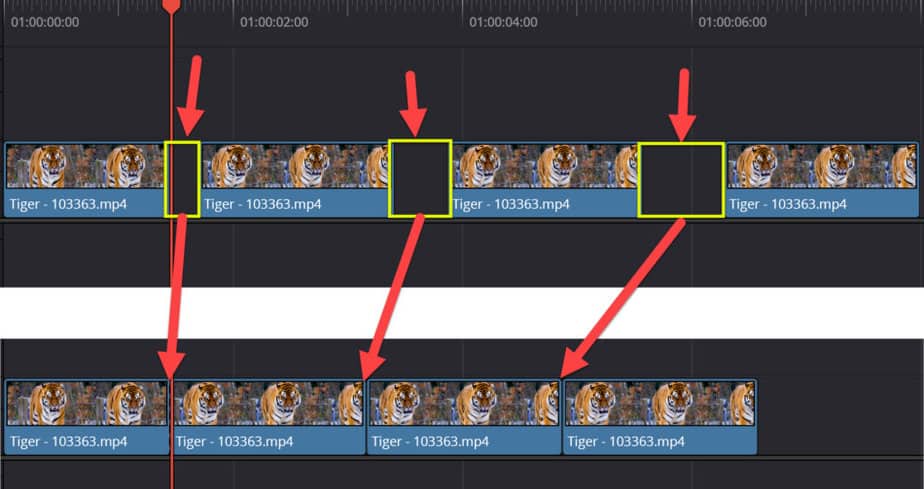
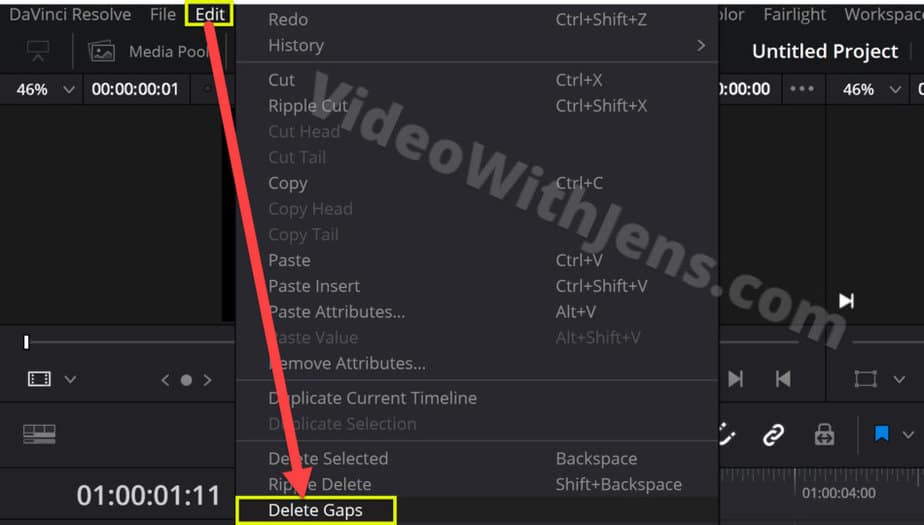
How to Remove Gaps Between Clips in DaVinci Resolve
To remove gaps in DaVinci Resolve, simply click on the gray area between the clips in the timeline, and hit “Backspace” on your keyboard. Alternatively, click on “Edit > Delete Gaps“, located in the upper left-hand corner of Resolve. This will delete all the gaps in your timeline.
As you can see in the image below, when you click on the gray area between the clips they get highlighted, meaning it’s selected. Then you can simply delete the space.
If you have multiple gaps, I recommend using method number two mentioned above.
Here are some images on how using method two looks like:
If you are new to DaVinci Resolve, I’ve written a full beginner’s guide, showing everything you need to get started editing on your own.