
How to Transcode or Rewrap Files Using Shutter Encoder
Here’s how to transcode & rewrap files using Shutter Encoder.
If you don’t know whether to rewrap or transcode your video file, or just want to learn more about the difference I’ve written more about his down below (click here to jump to that part).
Table of content:
- How to Transcode Files Using Shutter Encoder.
- How to Rewrap Files Using Shutter Encoder
- Transcoding vs. Rewraping: What’s the Difference?
How to Transcode files using shutter encoder
If you want to use another codec then Apple ProRes LT (as in the example below), make sure it’s supported by your editing software.
- Download Shutter Encoder (opens in a new tab).
- Open Shutter Encoder.
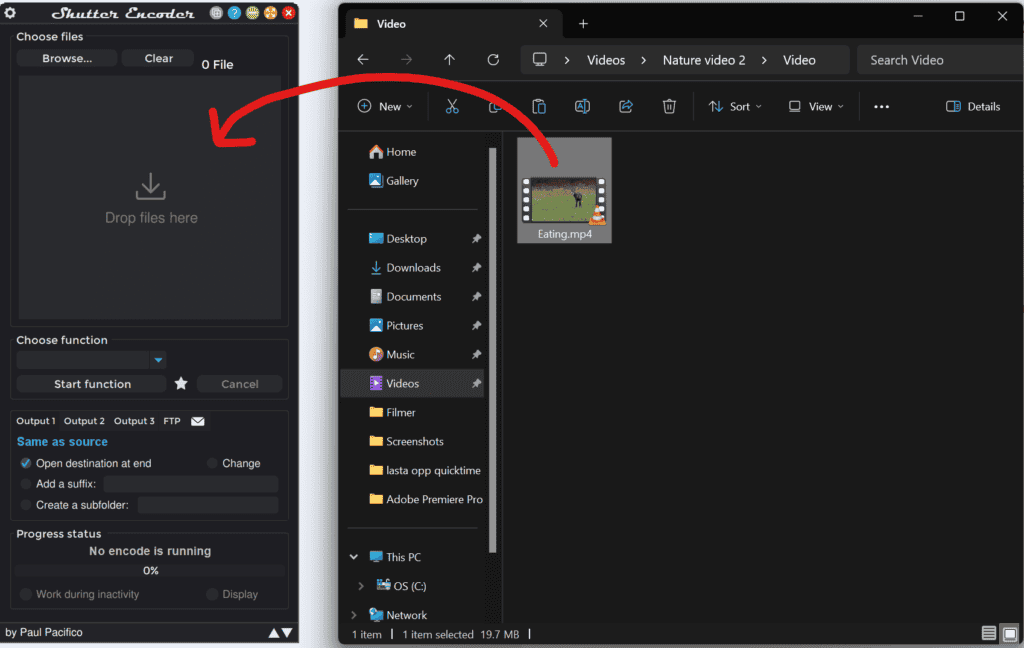
- Drag and drop the file(s) in the “Drop files here” box to import.
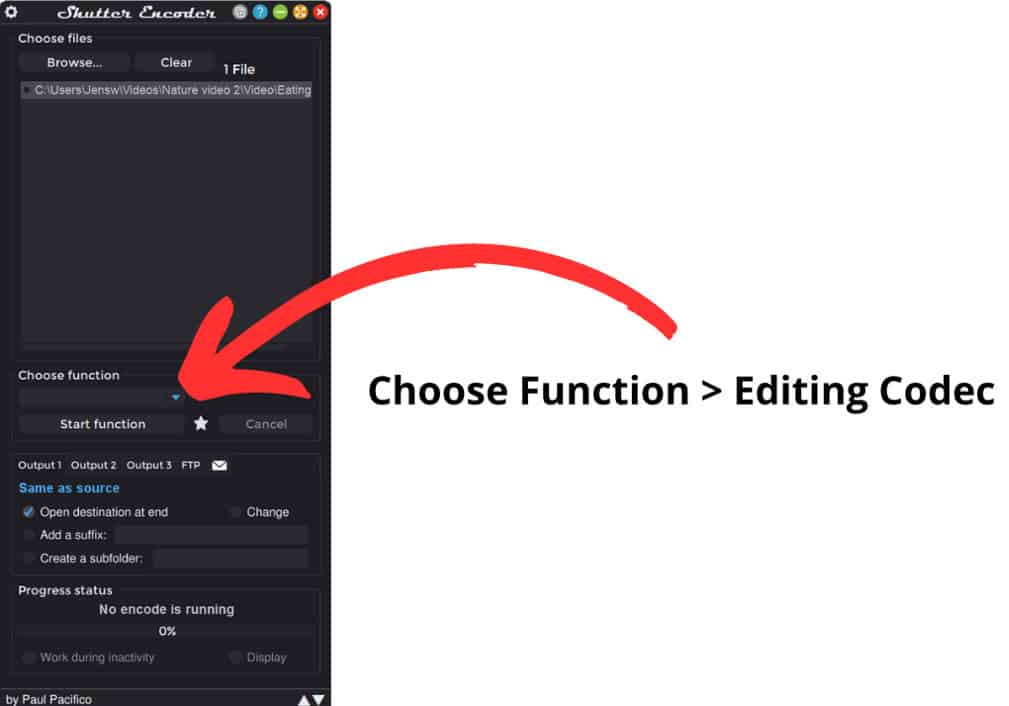
- Open the drop-down menu under “Choose function” and select one of the codecs under “Editing Codecs” I usually choose “Apple ProRes” and set it against “LT” which is supported by most editing software.
- Click on “Start function” & once finished you’ll find it in the same folder as your original clips.
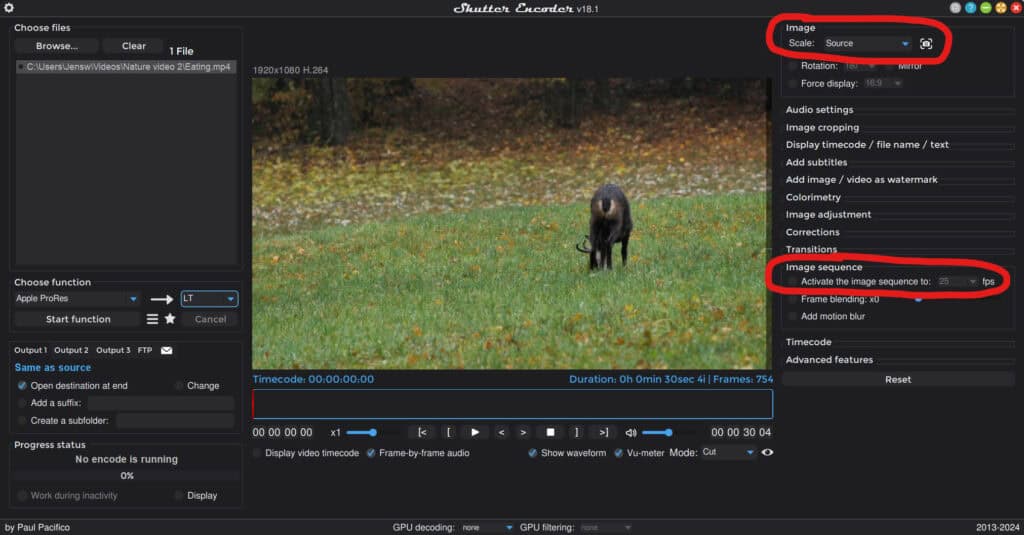
- By default the resolution, frame rate and all encoding settings will match your original video, so if you don’t have any special requirements you don’t have to do anything!
- However, if you want to change resolution you can do so under “Image” > “Scale“, and frame rate under “Image Sequence” (the image sequence setting is not enabled until activated).
How to Rewrap files using Shutter encoder
If you rewrap due to import issues with a editing software, I recommend “.mp4” as this is the most accepted container.
- Download Shutter Encoder (opens in a new tab).
- Open Shutter Encoder.
- Drag and drop the file(s) in the “Drop files here” box to import.

- Open “Choose function” and set it against “Rewrap” (under “Without conversion“).
- Set the “Rewrap” against “.mp4“.
- Click on “Start function“.
- You’ll find the rewrapped clips in the same folder as the original ones.
Transcoding vs. Rewraping: What’s the Difference?
Transcoding, simply put, is decoding a video file and re-encoding it using a different codec. Basically, the whole code is re-written.
Rewrapping is a lot less drastic and only changes the container or “wrapper” of the file, it does not touch the encoding of the video.
Which one should I choose?
This depends on your situation:
- If you are having import issues with “.avi” or “.mkv” files I recommend to rewrap your files before transcoding (these are just the ones off the top of my head).
- If your files are .mp4 or .mov, trancoding is usually necessary.
- You could always try to rewrap one of your files just to test.
- Transcoding is generally a great way to solve import- and playback issues.
- If your computer is lagging and the video is choppy when editing I recommend transcoding to a “Editing Codec” (in Shutter Encoder).
How does Video Files work?
Here’s a quick way to grasph the idea: When light hits the image sensor of your camera it starts to convert the information “seen” to data. The data at this point is known as RAW files (N.B. some cameras process raw files).
These RAW files contains all the information the image sensor “saw,” giving the video editor endless of opportunities when it comes to color management, but, they also require it. Without fixing the colors they will just look flat.
Luckily, most cameras interpret the data (raw information) and does the color management for you in varying degrees and this processed information is encoded and stored in a container, and that’s how a video file is created. You can think of the container as the file type.
- .mp4, .mov, avi, .mkv are all abbreviations for the container type.
There are many different ways a video is encoded depending on what software or hardware your recording device ultilize.
- The software or hardware used to encode a video is called a codec. Many cameras (and screen recorders) use H.264.
You can think of codecs as the language in which the video is written, and there are probably hundreds of different ones. The problem that arises then is that most decoders and editing software only know a dozen of them… If they don’t know it, you’ll not be able to import or play the video.
- Luckily for us, Shutter Encoder is a polygot, and knows way more languages then the average editing software. Thus, we can use it as a translator and convert our video into a language which the editing software understands.
I hope this tutorial was useful! Make sure to check out my Premiere Pro playlist for beginners on Youtube.