How to Export Audio ONLY in Davinci Resolve (+ Best Format)
In this article, you will learn how to export audio ONLY from Davinci Resolve.
This is actually quite simple so let’s get to it:
- Open the “Deliver” page inside Davinci Resolve.
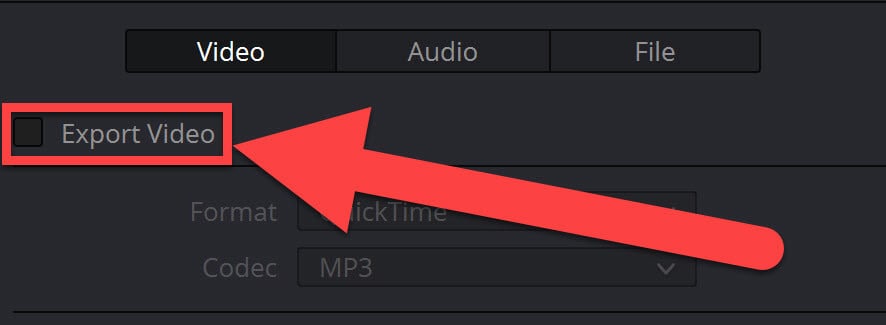
- In the “Render Settings” window, open the “Video” tab and uncheck “Export Video“.
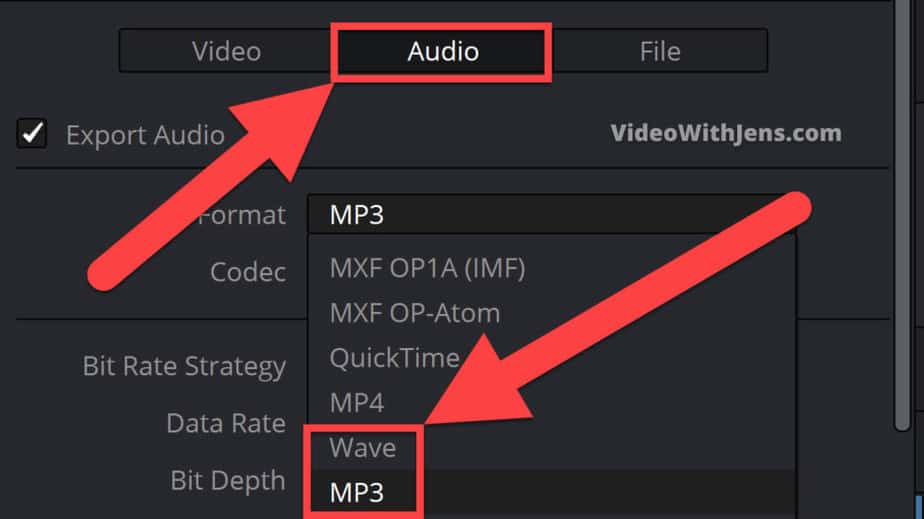
- Click on “Audio” to open the tab, and change “Format” to “MP3” or “Wave“.
- Click on “Add to Render Queue“.
- Click on “Render All” on the right-hand side of the screen.
That’s the straightforward answer on how to do it!
For a more detailed explanation of this, and whether “MP3” or “Wave” is best, read on!
(You’ll also learn how to render only one audio track).
How to Export Audio Only From Davinci Resolve! (Detailed Guide)
So let’s explain what was discussed above with a bit more details (and pictures!).
It does not matter if it’s a video or simply a song you have added to the timeline.
Your final product will end up how you set the export settings anyways.
Below, you can see that I’ve added a normal MP4 file to the timeline, which I’m going to export as an MP3 file:

The next step is to go to the “Deliver” page in Davinci Resolve:

Inside the “Deliver” page you should be able to see the “Render Setting” in the top corner on the left-hand side. Watch the picture below if you can’t see it.
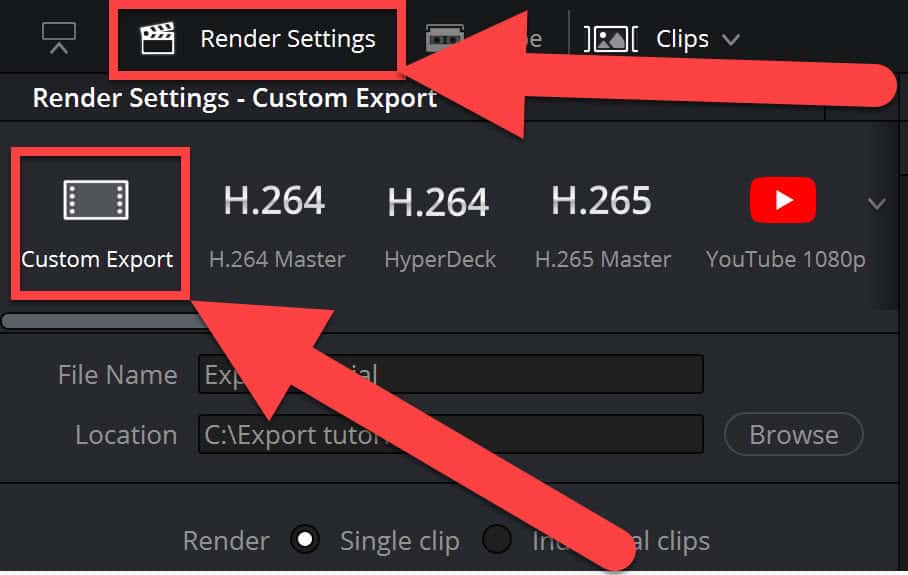
Inside the “Render Setting“, the first thing you see is some pre-made render settings. Which is awesome, and something we are going to use!
By default this one is set to “Custom Export“, we want to change this one to “Audio Only“.
To find this option you have to scroll sideways:
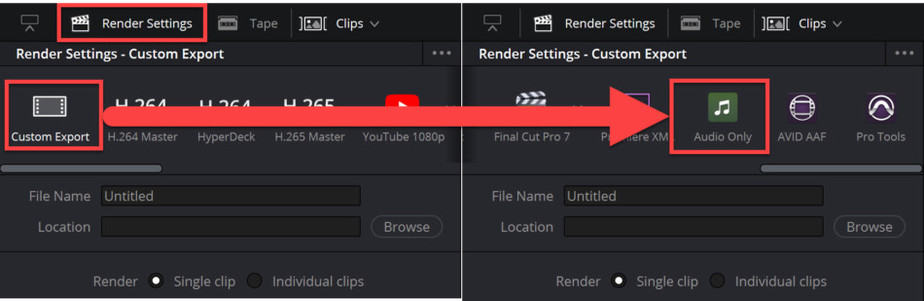
Once that is done, scroll a little further down in the menu and select the one that says “Audio“:
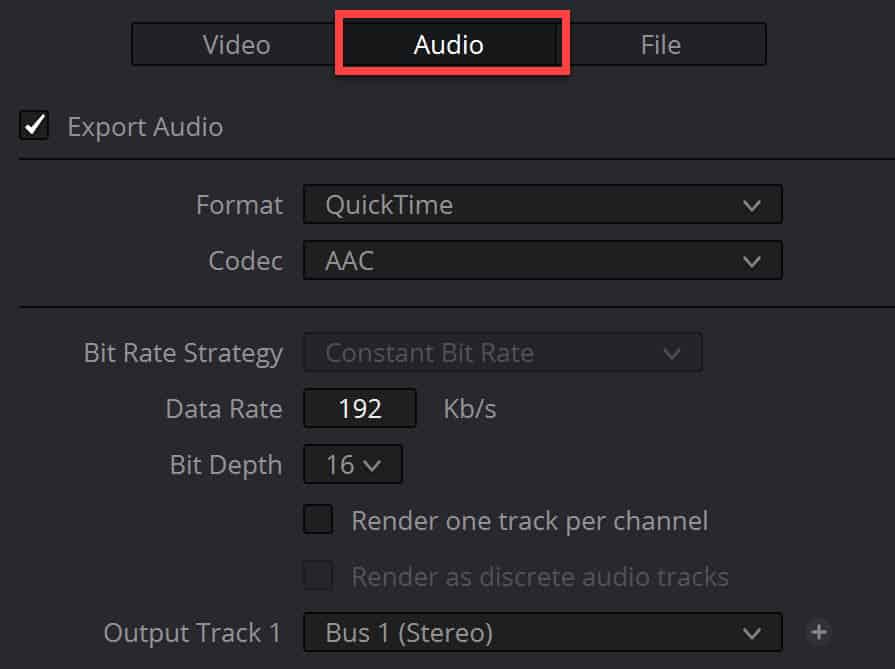
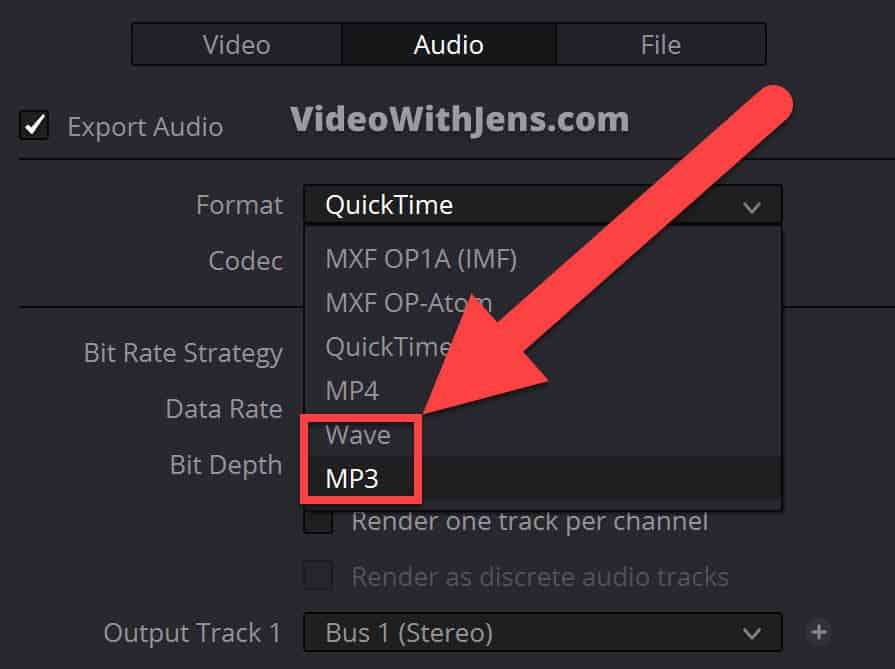
Now we want to change the “Format“. This one is by default set to QuickTime, which is a video format. So we want to change this one to an audio format.
The audio formats we have to choose between are “Wave” and “MP3“.
What’s the difference?
- MP3 is a compressed audio file. Meaning the file size is many times smaller.
- Wave is an uncompress “lossless” audio file. Meaning the file size it’s a lot bigger.
Which is best?
The wave file is the best in terms of quality than the MP3. However, it may not be accepted to upload everywhere, while the MP3 is almost certainly supported.
Now, MP3 isn’t really that bad either. And if your audience is not obsessed with audio, they may not even hear the difference. It’s also less expensive to send around and stream in terms of internet usage.
If you are going to edit the audio file, then go with the wave format, as the compression of the MP3 takes away some of the finer details in the audio waves.
Go ahead and select one of them, the choice is yours!
Next, there are some different settings you can change.
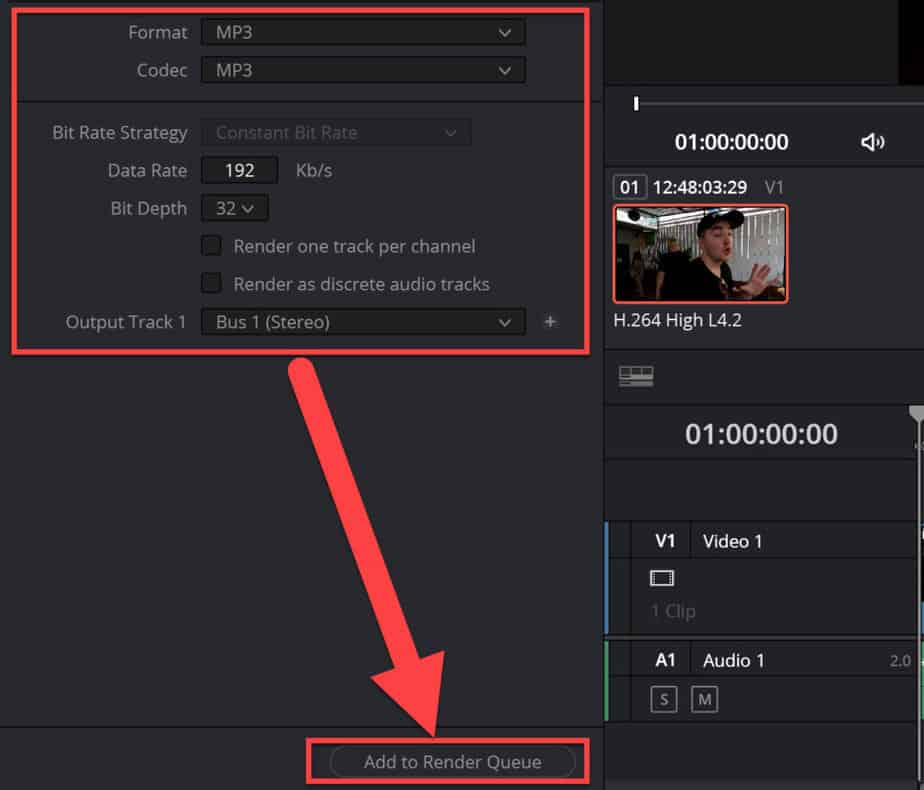
For MP3 the only codec you can choose is MP3. While for the wave go with the “Linear PCM”, if you don’t have any other preferences of course.
The MP3 has the option to change “Bit Depth”. This one is set to the max by default. You can’t make it higher than 192 Kb/s using Davinci Resolve. Don’t worry, this is a good amount!
For both MP3 and Wave, you can set “Bit Depth“, where 32 is maximum quality. I would just leave it as is. However, if you want to reduce the file size of the wave you could turn set it to 24, and still, have very good quality.
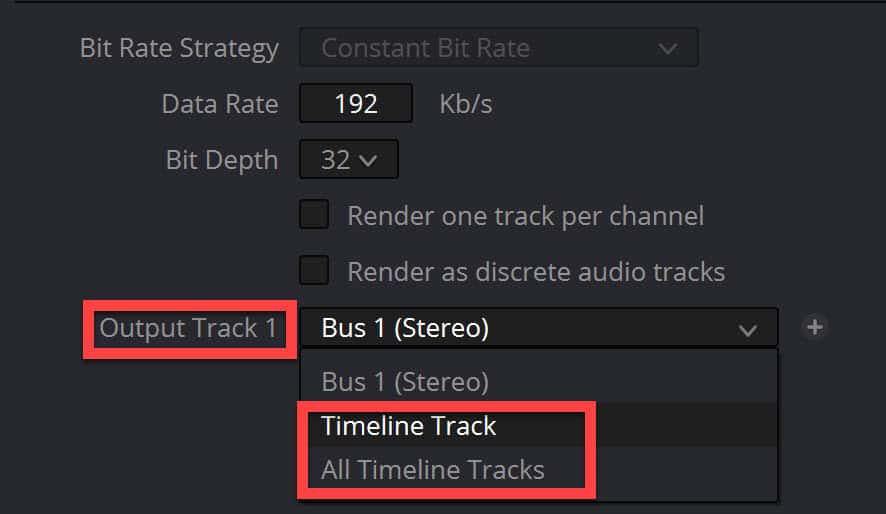
Lastly, the “Output Track 1″ you can see has a drop-down menu. If this is set to “BUS 1″, it renders how the audio sounds through the master channel, basically how you hear it when editing. This is only relevant if you have multiple tracks in your timeline.
You can also set it to “Timeline Track” and then choose which track from the timeline you want to render. Or you can render all the tracks as separate files by choosing “All Timeline Tracks“.
Now, go ahead and click “Add to Render Queue“.
Next, the clip will appear in the “Render Queue” window on the left-hand side of the deliver page.
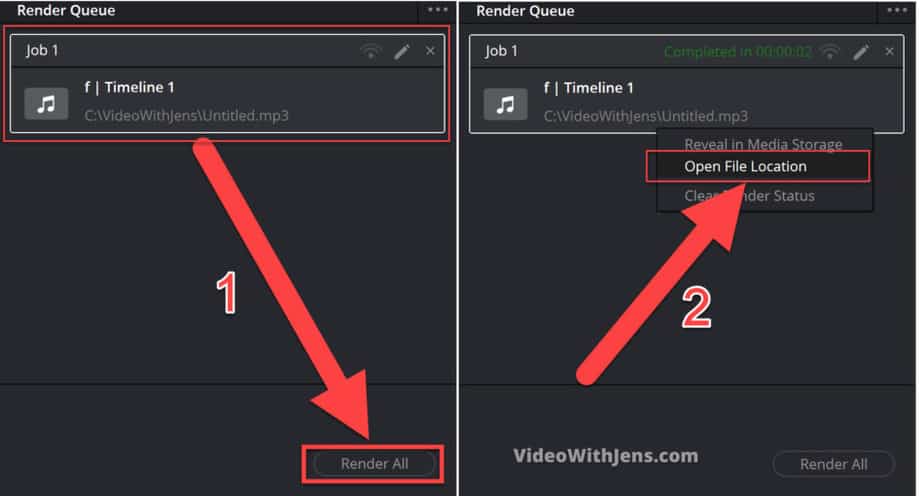
Click on the right one, that’s your project to select it, and click “Render All”.
Once it’s complete, you can right-click the “Job” and select “Open File Location” to find where it’s saved on your computer.
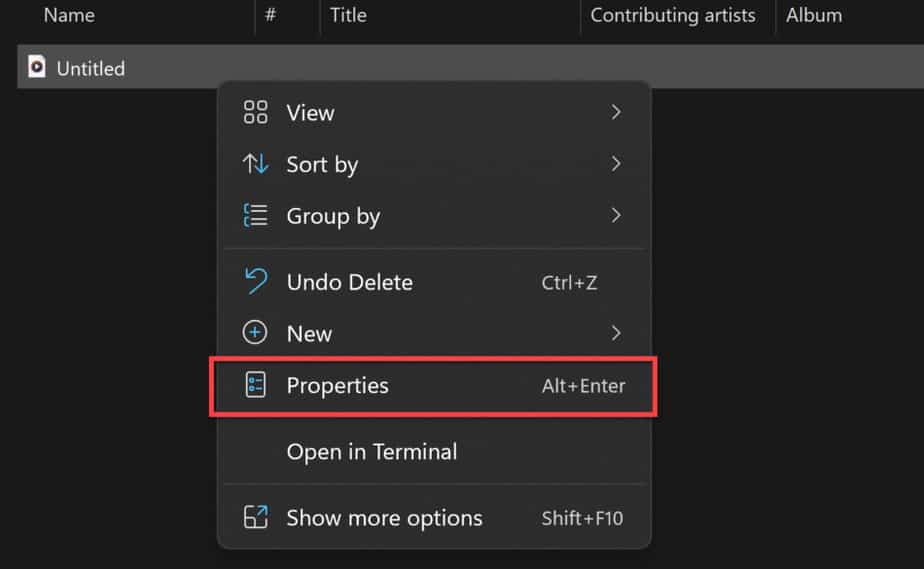
If you want to check the file type and make sure it’s correct, you can do so by right-clicking it in the location you found it on your computer, and then “Properties“.
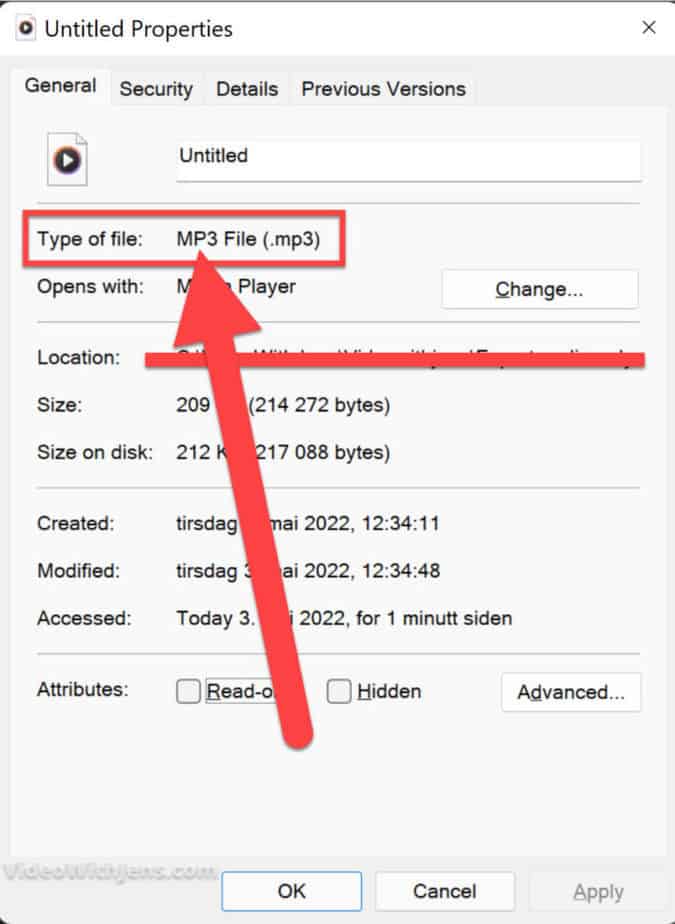
Here you can see, that we have successfully rendered our project out as an MP3 file!
How to Export Audio Tracks in Davinci Resolve
- Go to the “Deliver” page in Davinci Resolve.
- Open the “Render Settings” tab.
- Under “Video” uncheck “Export Video“, and click on “Audio“.
- Change “Format” to either “Wave” or “MP3“.
- Open the “Output Track 1“, and choose “Timeline Track“.
- Type in which track to export in the box “Track Number“.
I’ve received some questions about only one audio track or “how to export only track 1 and 3“.
Therefore, I want to answer that as well in this article. So no we will go a bit more in detail on the 6 steps I just wrote, and give a couple of tips you may find useful.
Once again make sure to be in the “Deliver” tab:
Next, go to the “Render Settings” tab and make sure the “Custom Export” is selected:
Scroll down in the “Render Settings” menu, locate “Video” and then uncheck “Export Video“:
Then go to “Audio”, and open the drop-down menu with “Format“.
By default, this is set to “QuickTime“, however, this is a video format, which is not what we want in our case.
The audio formats we have to choose from are either, “Wave” or “MP3“. If you didn’t read it, I wrote a mini explanation about the difference between the two earlier in this article here.
Go ahead and choose one of the two:
Next, scroll down to “Output Track 1“. This one is by default set to “Bus 1”, which is the master channel. The audio channel which all of your tracks together are played through.
In order to export only a single track, you will have to change this one.
Then your choice is either “Timeline Track” or “All Timeline Tracks“:
- Timeline track is the one you want if you want to export one track or two specific tracks.
- All Timeline Tracks will export all your tracks as their own audio file.
Let’s say you are the one who wanted to export track 1 and 3.
How do you do this?
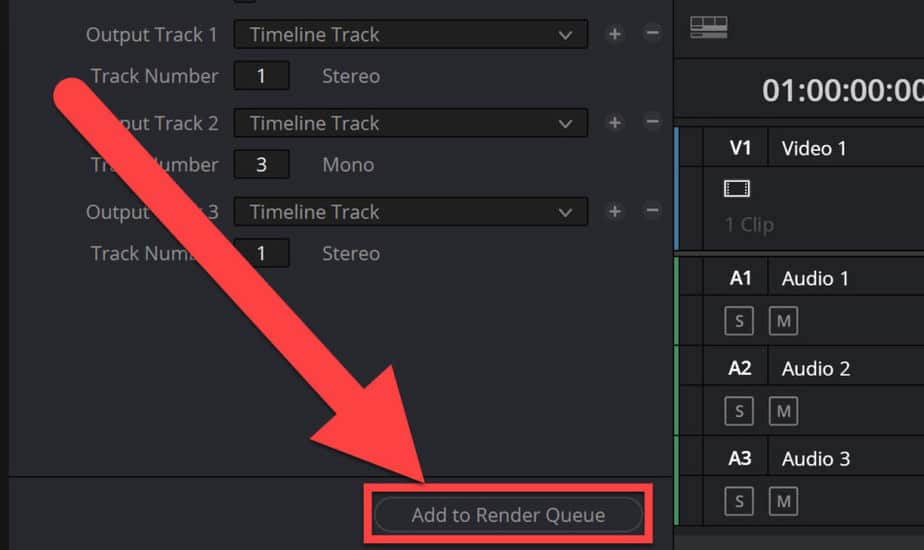
I’m glad you asked! I’ve made a handy illustration below:
Alright, so let me explain to you how to do that with these cool numbers in the picture above.
If you set “Output Track 1” to “Timeline Track“, you can see below it, that you have a “Track Number”. Change this number to one of the tracks you want to export.
Next, click on the plus inside rectangle 1 in the picture, to create “Output Track 2”. Then you set this one to the other track you want to export, in our case this is track 3.
What’s pretty cool about doing this is that my track 3, was a mono track. Which you can see inside rectangle 2, meaning I’ll get one audio file which is mono sound.
You can see that my number 3 and arrow are pointing at “Bus 1”, meaning that we can export track 1 and 3 as their own file, but also export the project audio at the same time!
That’s what you need to know about this matter! Now, go ahead and export those audio files as you would with a normal video export:
How to Export MP3 in Davinci Resolve
- Go to the “Delivery” page.
- Open the “Render Settings” tab, and under “Video” uncheck “Export Video“.
- Click on “Audio” and change “Format” to “MP3“.
- Click on “Add to Render Queue“.
- Go to the “Render Queue” tab on the right-hand side of the “Delivery” page.
- Click on “Render All“.
That’s it for this article! I hope you found it useful.
Best regards,
Your friend and mentor,
Jens.