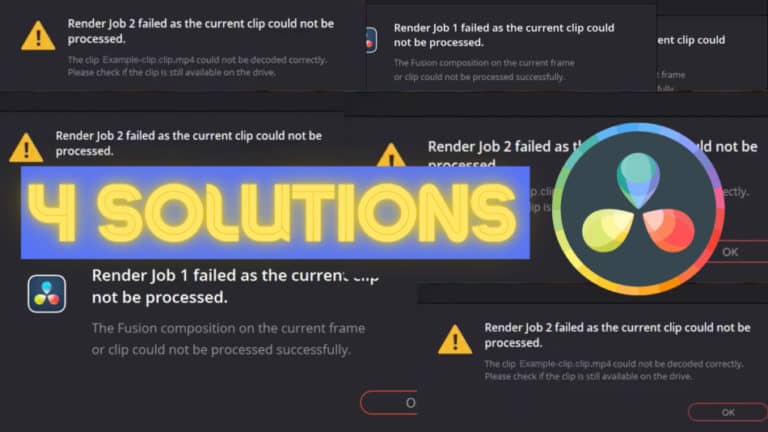
DaVinci Resolve: “Add to Render Queue” GRAY Button [SOLVED]
You’re trying to render out of Davinci Resolve, but are unable to click on the “Add to Render Queue” button as it’s gray and unfunctional.
In this article, I’ve gathered 4 quick methods for you to try, in order to fix this problem. I’ve researched it a BUNCH so these are tested and proven solutions.
Here’s an image of what the problem looks like:

The solutions are organized in the order I would test them. However, if you’ve already tested some of those listed here, you can jump directly to the section you are interested in here:
- Solution 1: Create a compound clip.
- Solution 2: Create a new timeline.
- Solution 3: Render project without video file.
- Solution 4: Render the project with an invisible video file.
Now, let’s get to it:
Fix Gray Render Queue Button [Solution 1]: (Compound clip)
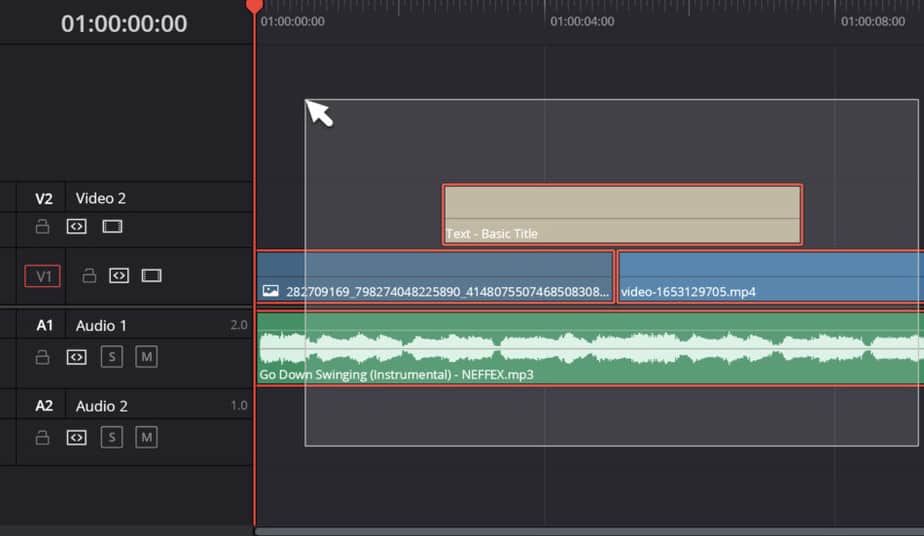
1. Select all clips in the timeline.
Select all clips in the timeline.
You can do this in many different ways. In the picture below, I’ve just clicked and dragged over all of them.
However, a much easier way is by just pressing the shortcut CTRL+A or Cmd+A for a MacBook user. This selects everything in the timeline:
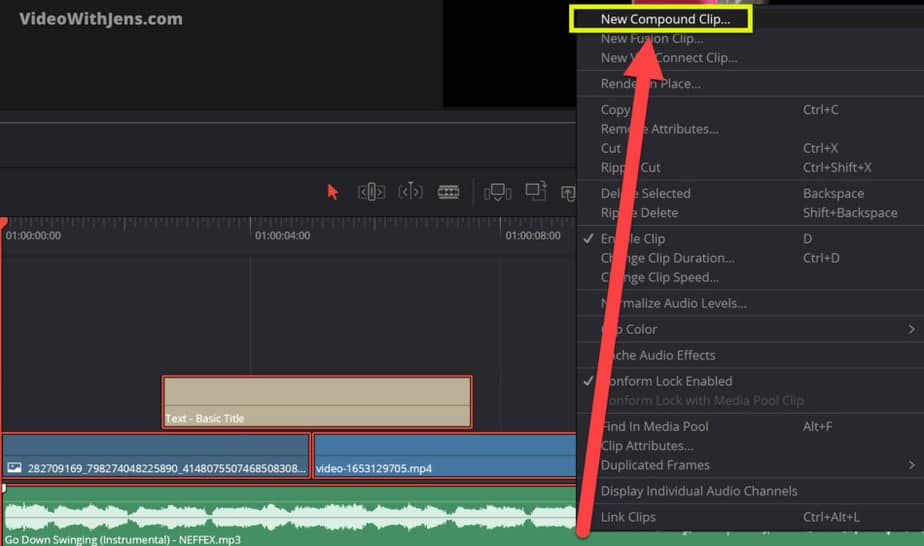
2. Right-click one of the clips, and select “New Compound Clip”.
Next, right-click on any of the clips (it does not matter which one), then select “New Compound Clip“:
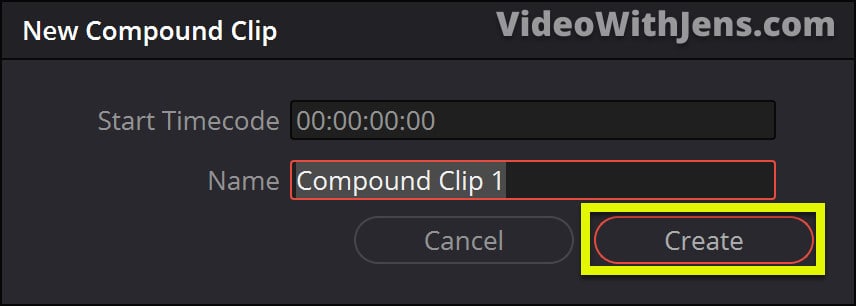
3. Click on “Create” in the window that pops up.
In the window that pops up, you can choose to give the clip a name (optional).
Then click on “Create“.
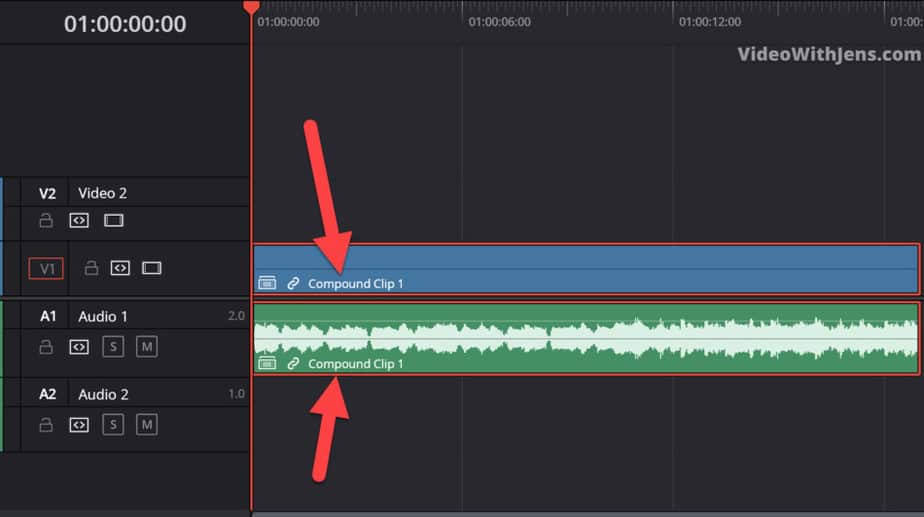
Now all your clips should have been made into one “Compound Clip” like this:
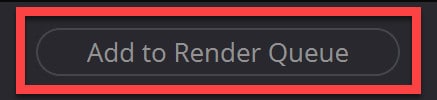
4. Go to the “Deliver” page, and click the “Add to Render Queue” button.
Next, go to the “Deliver” page, and try to use the “Add to Render Queue” button.

If it didn’t work:
Then you can just undo the action of creating a compound clip by pressing the shortcut: CTRL+Z or CMD+Z for a MacBook. Next, test out solution 2:
Fix Gray Render Queue Button [Solution 2]: (Create new timeline)
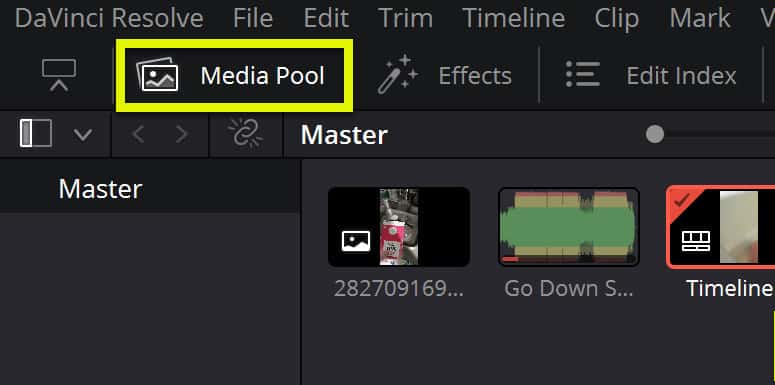
1. Open the “Media Pool” (Top left-hand corner).
Click on the “Media Pool” inside Resolve to open it (located in the top right-hand corner).
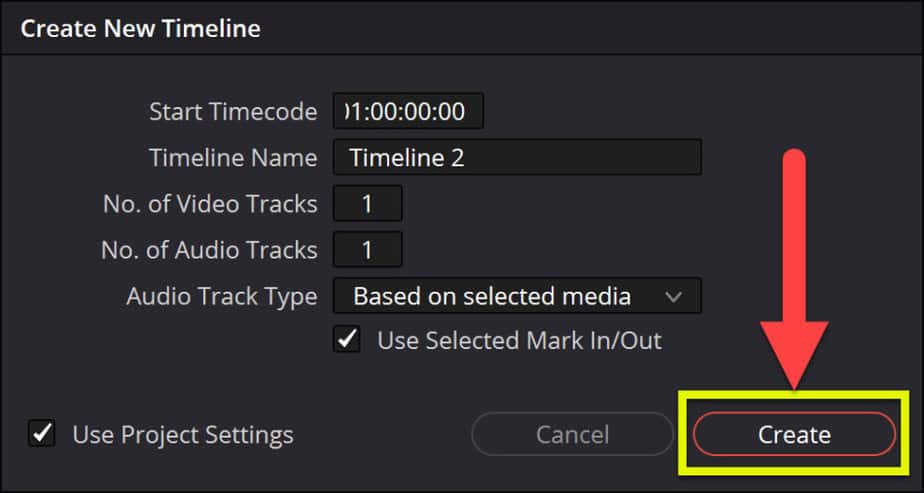
2. Right-click “Timeline 1”, and click on “Create New Time Using Selected Clips”.
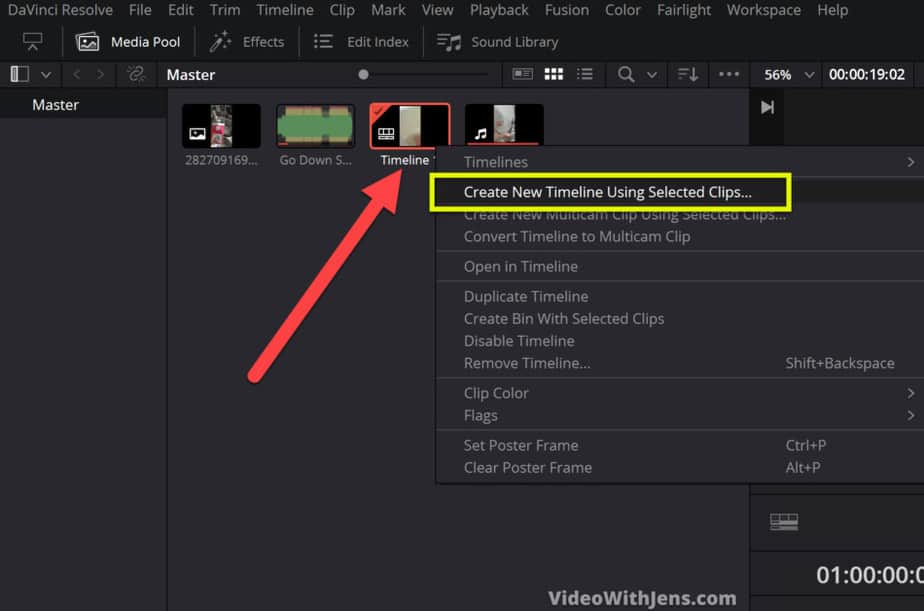
3. Click on “Create” in the window that pops up.
In the window, that pops up just ignore what’s in the menu, and click on “Create“:
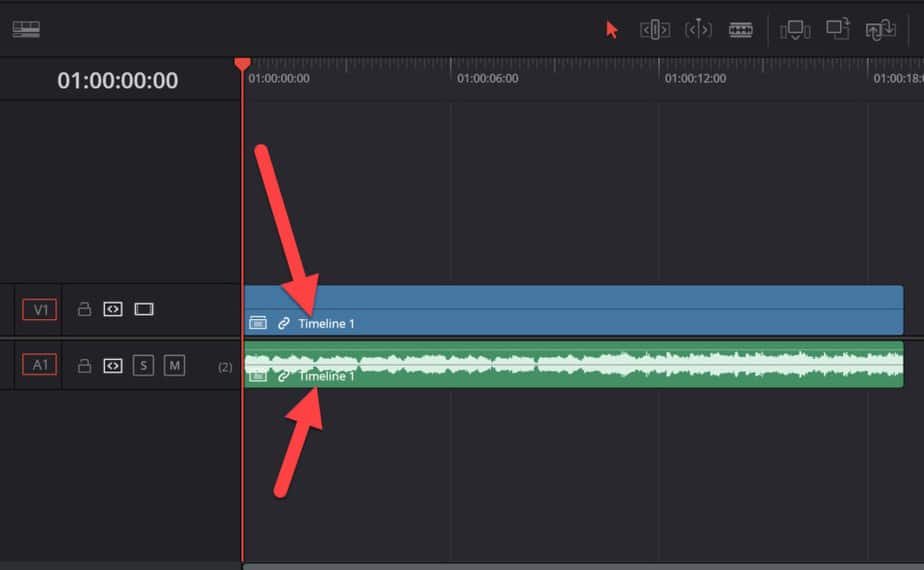
Then all your clips are now in a new timeline, and should look like this:
4. Go to the “Deliver” page.
5. Click on “Add to Render Queue”.
Check if you are able to click on the “Add to Render Queue” button:
If it didn’t work:
Then you can just undo the action of creating a compound clip by pressing the shortcut: CTRL+Z or CMD+Z for a MacBook. Next, test out solution 3:
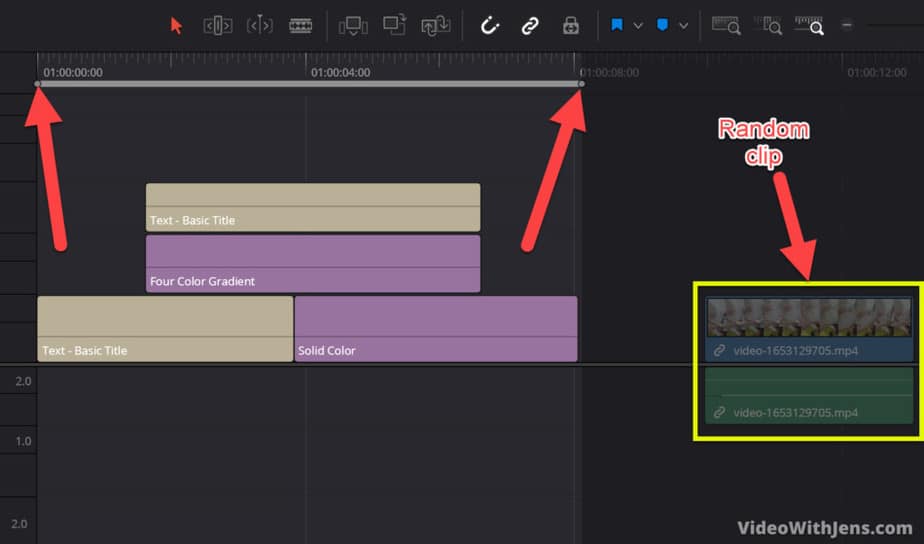
Fix Gray Render Queue Button [Solution 3]: (Add a Video Clip)
This method is for those who have only added generators and such to their timeline. It’s been a “rule” in Resolve that there has to be at least one video or audio clip in the timeline for the render to work. This may have been fixed, however, if you are in this situation I recommend testing it out.
NOTE: If you are trying to render out an AUDIO FILE ONLY, check out this article (opens in a new tab).
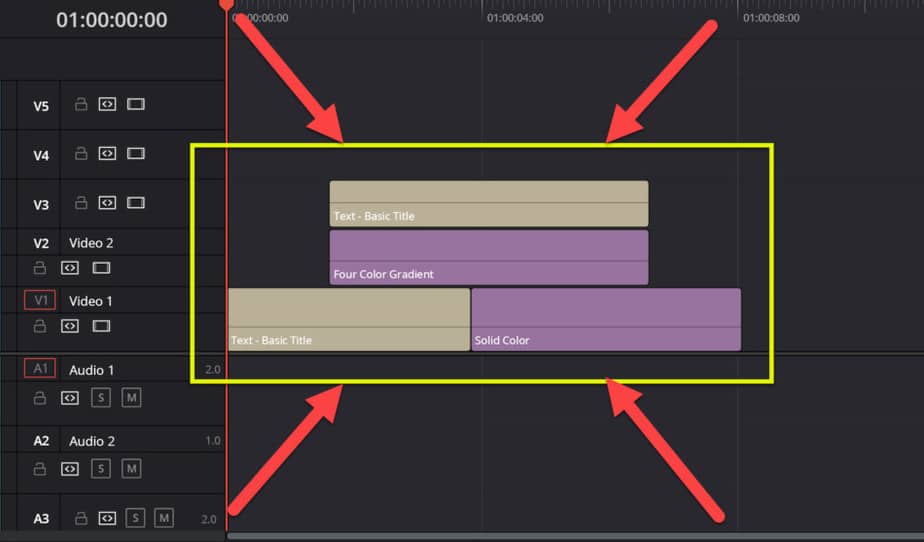
Here you can see an image of my timeline containing only generators and titles:
Go ahead and add a video clip to the timeline.
Then place it outside/at some distance from your project’s generators and titles, like in the image below.
Next, you want to create an in- and outpoint for the area you are going to render.
To the start of the timeline, then press shortcut “i” to create an in point.
Then, go to where you want your video/project to end in the timeline. Press “o” to create an outpoint.
It should look like this:
Go to the “Deliver” page inside Resolve.
Over the timeline, there is an option called “Render” with a dropdown menu. Set this to “In/Out Range“. Then you’ll only render the part of the video which is inside the in- and outpoint!

Now, check if it’s possible to click on the “Add to Render Queue” button:
If this solution didn’t work:
Then go back to the “Edit” page, and test out this next method:
Fix Gray Render Queue Button [Solution 4]: (Video clip on top)
This next solution is almost like solution 3, however, this time we are going to include the clip in the rendering part.
To do this, we are going to use a normal video file (that’s supported by Resolve).
NOTE: Your clip probably does not have to match the length of the project like mine in the example. However, it does not hurt either.
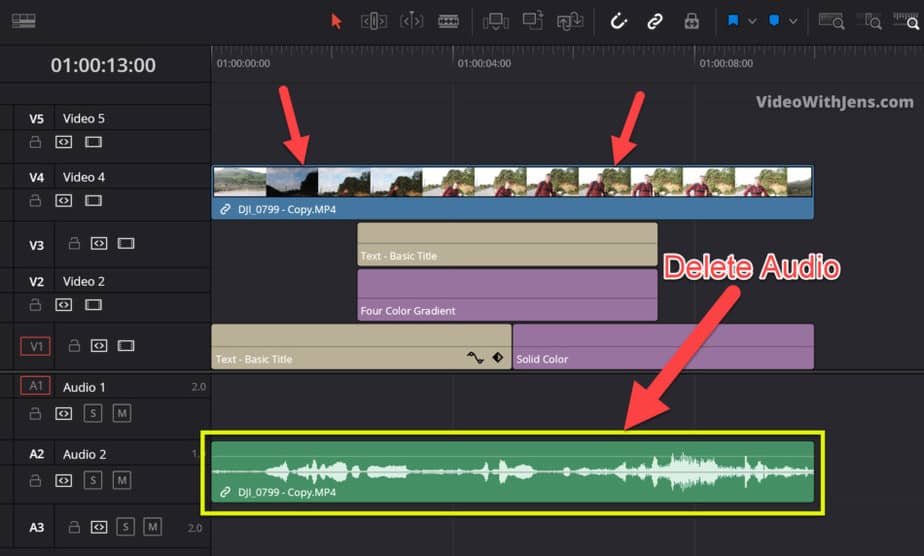
Start off with placing a clip in the timeline. It does not matter which track you choose. It can be above the other elements or it can be placed in track 1 beneath for example.
If there are audio belonging to the clip, remember to delete it.
To delete the audio and not the video clip, hold down the ALT key and click on the audio, then press BACKSPACE on your keyboard.
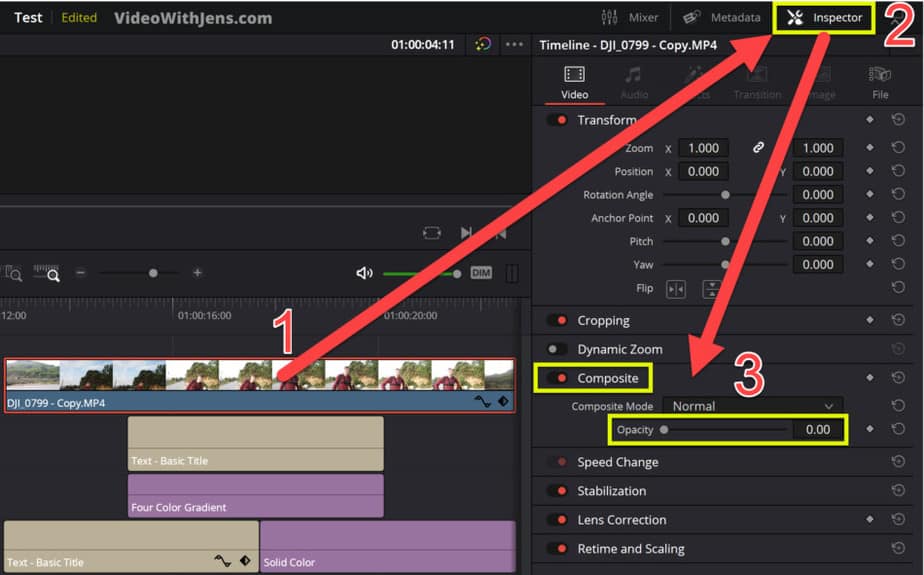
Next, click on the video part of the clip to select it.
Then open the “Inspector” tab in the right-hand corner of the page. Make sure to be under “Video” and go down to the section called “Composite” (click on the name to open it).
Here you can see the “Opacity“, set this to a value of “0.00“. To adjust it simply drag that white dot to the left.
By doing this, your video is now invisible, and impossible to notice! However, your project will behave like a video file!
Then go to the “Deliver” page, and try to click on the “Add to Render Queue” button!
That’s it.