How to Freeze Frame in Davinci Resolve (Updated Version)
We’ll start by throwing your computer in the freezer. OK, I got your attention. How to freeze-frame in Davinci Resolve is what we’ll focus on in this article and I will show you the best method to do it! Now! Let’s just dive into it. Firstly, there is the short version: If you want a more detailed description with video and picture you’ll find that below!
- Go to the “Edit” page inside Resolve.
- Cut the frame you want to freeze in the timeline.
- Right-click on the frame, and select “Change Clip Speed“.
- Check off the box next to “Freeze Frame“, and click on “Change“.
To freeze a frame in DaVinci Resolve, go to the “Edit” page. Then cut out the frame you want to freeze from your video. Right-click on the frame and select “Change Clip Speed”. In the menu that appears, check off the box next to “Freeze Frame” and click on “Change”.
For a more detailed version and also how to change clip duration, you’ll find that below.
How to Freeze Frame (with Pictures and Videos)
Now for those who want a little more details about who to do this, read on!
If you’re the type of person who appreciates audiobooks more than black on white. I’ve also included a video version of the article below:
Firstly, you must of course have a clip added to your timeline. Then make sure to be on the edit page.
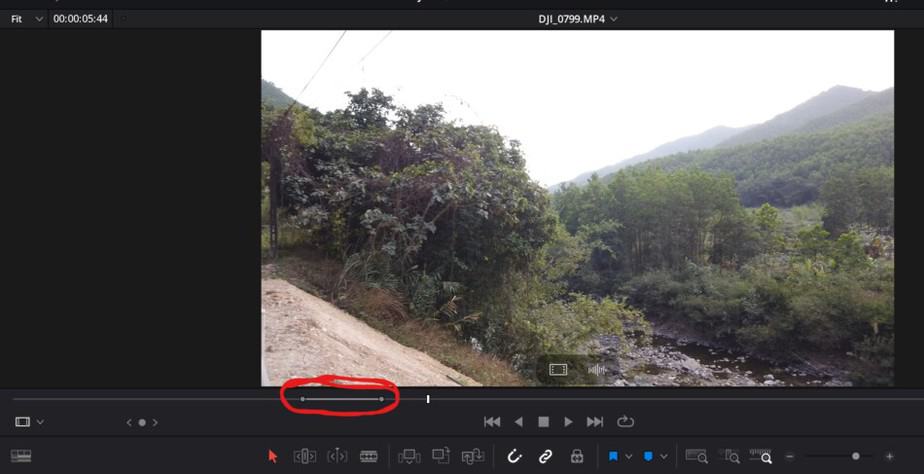
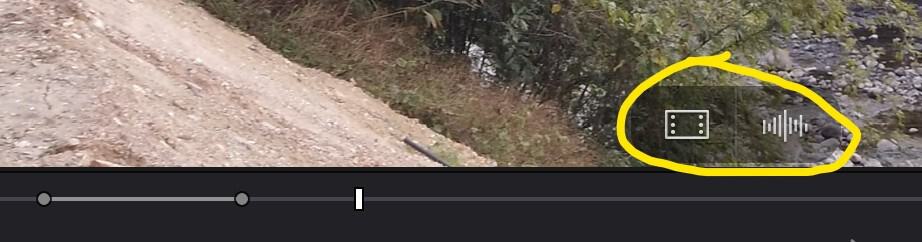
There can be a lot of reasons why you want to freeze a frame in your video. It could be you want to highlight a particular moment, to do a freeze-frame effect, etc. this method can be used for all those things. Let’s get to it, first locate the frame or part of your video you want to freeze. Once that’s done go ahead and zoom as far into the timeline as possible. You can either tap on the plus sign above the timeline or use the shortcut “CTRL” + “+” (on a MacBook cmd instead of CTRL).

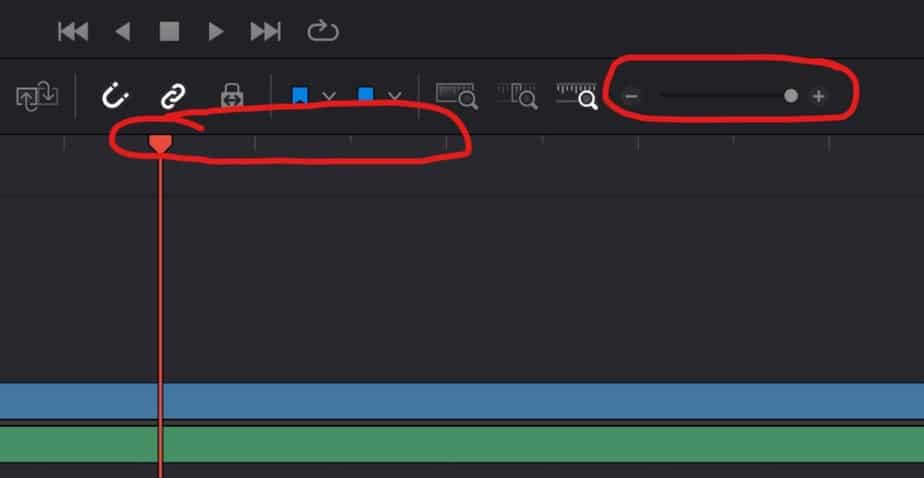
In the image above I’ve drawn a circle around the zoom buttons, and when you’re fully zoomed into the timeline you can see the lines in the second circle very clearly. Each of those lines is one frame of your clip and one of those frames we want to freeze!
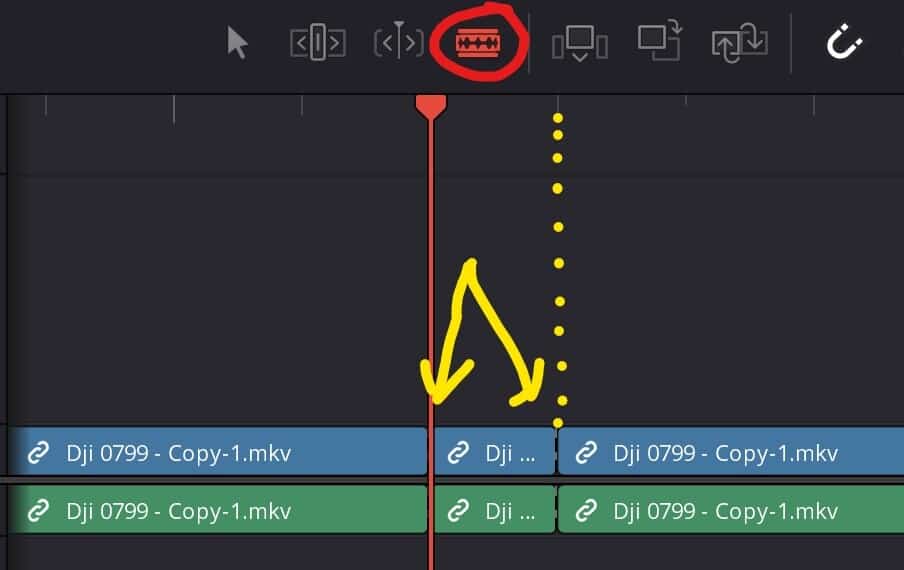
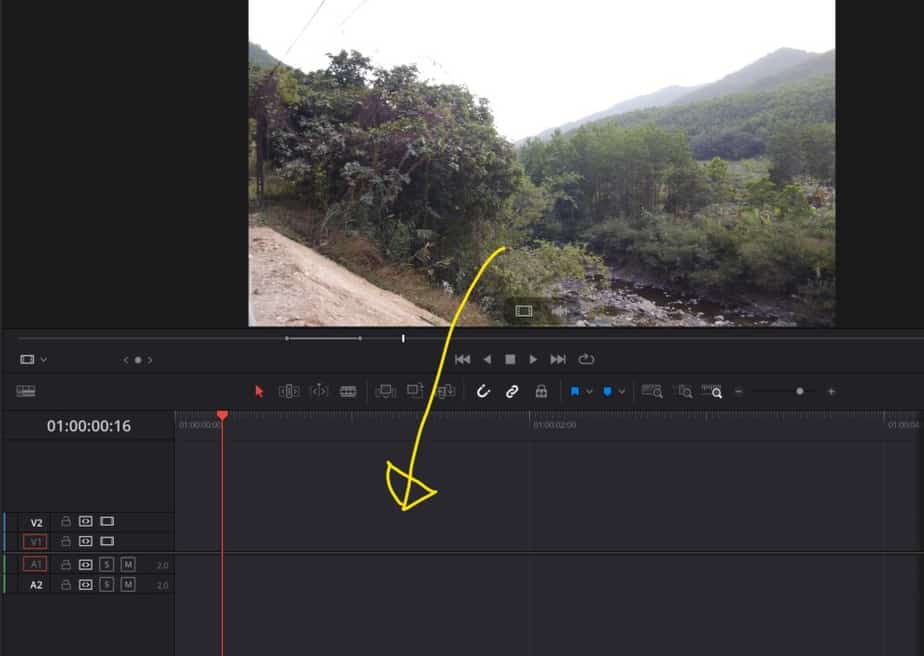
Now timeline cursor (which is the red arrow/line) will be located on the frame you want to freeze. Then go ahead and select the razor tool (in the red circle) then click on the clip where the timeline cursor is and also on the and of the frame which is where the yellow arrow is pointing to the left. You can also cut where the timeline cursor is placed by simply pressing “CTRL + B” (Command on MacBook), then jump one frame to the left with the arrow keys and press “CTRL + B” one more time…
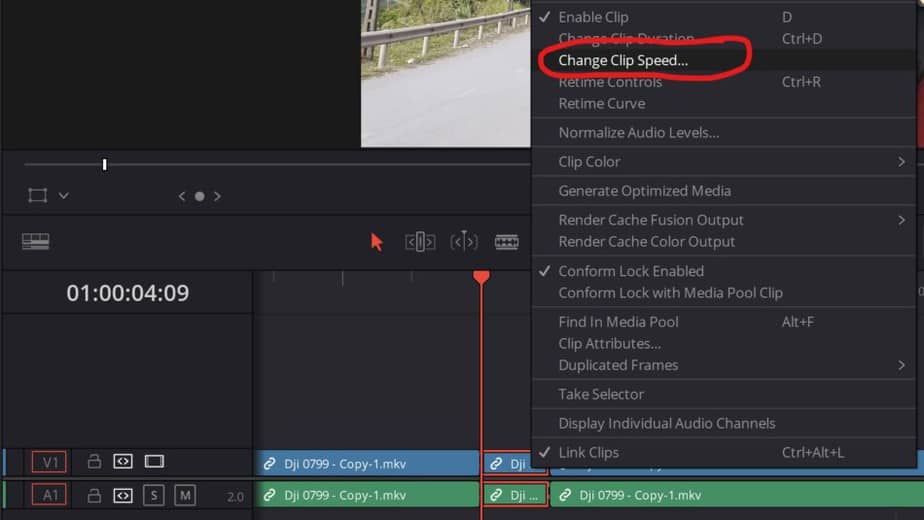
Now right-click the frame in the timeline and go to “Change Clip Speed…” in the menu which pops up.
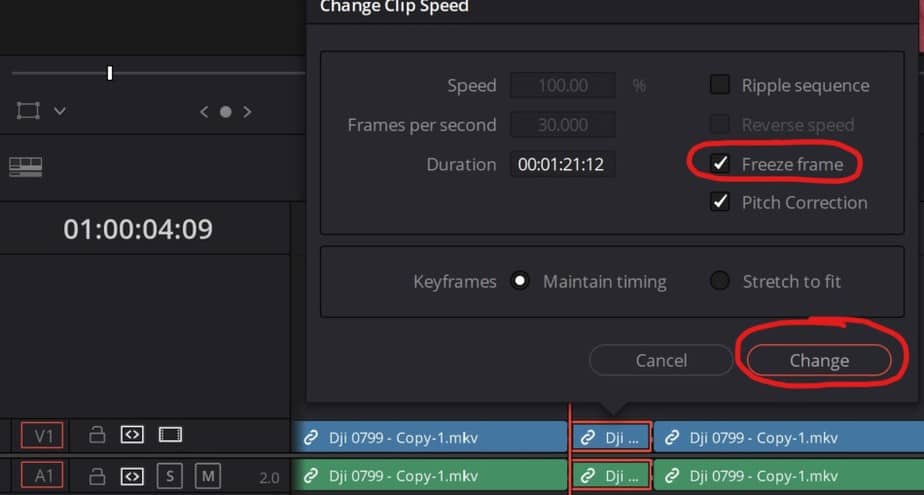
Then this menu should who up, and all you have to do is check the “Freeze frame” box and then hit change!
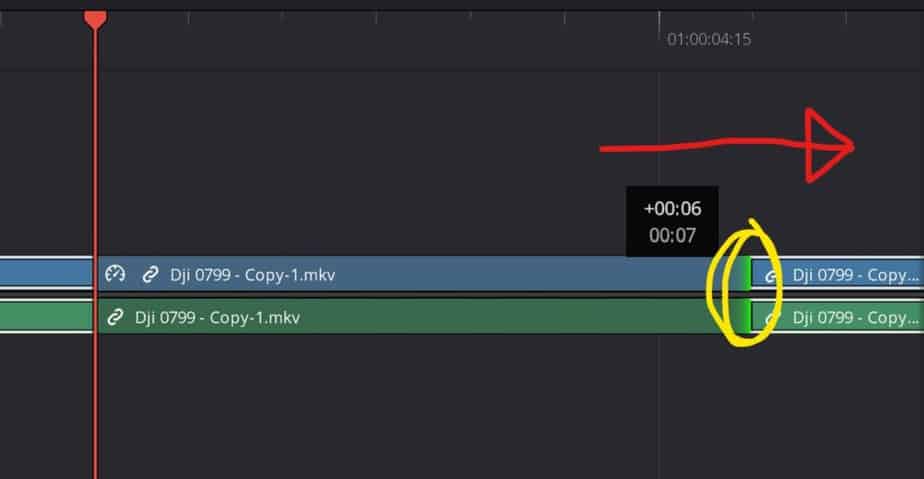
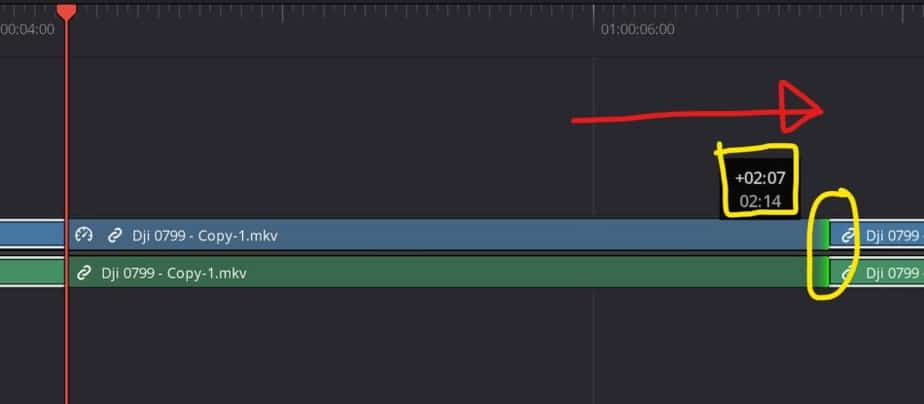
Now, this won’t really do any difference if you don’t extend the duration of the frozen frame! And since it’s frozen it will now behave like an image would instead of a video. Since you’re fully zoomed you won’t get to stretch it too much. Zoom out and stretch it further like in the image below. If you want a much easier way instead of having to stretch it like this scroll down to the headline “Changing Clip Duration”.
Change Clip Duration in Davinci Resolve (Recommended way)
Ok, so just stretching it is a way of doing it and most likely what most people do. But it’s a really time-consuming and clumsy way of doing it. Therefore, I refuse to just leave you by yourself right now! This way of changing clip duration will save you a lot of time!
To change clip duration, first, make sure to be on the “Edit” page of Resolve. Now, right-click the clip in the timeline & choose “Change Clip Duration”. Next, just type in the number of seconds you’d like the clip to last in the box on the right side of “Duration”, then click “Change”.
Here is a more detailed description with pictures + some other helpful tips:
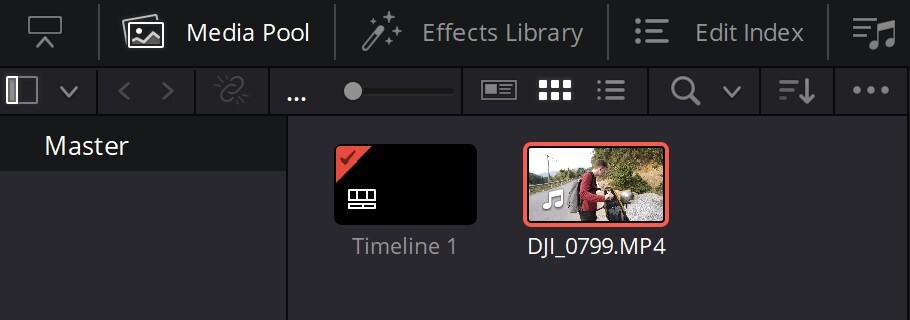
The best thing to do now is simply select the clip/frame (when it’s selected it gets a red frame around it). Then press shortcut: “CTRL + D”.
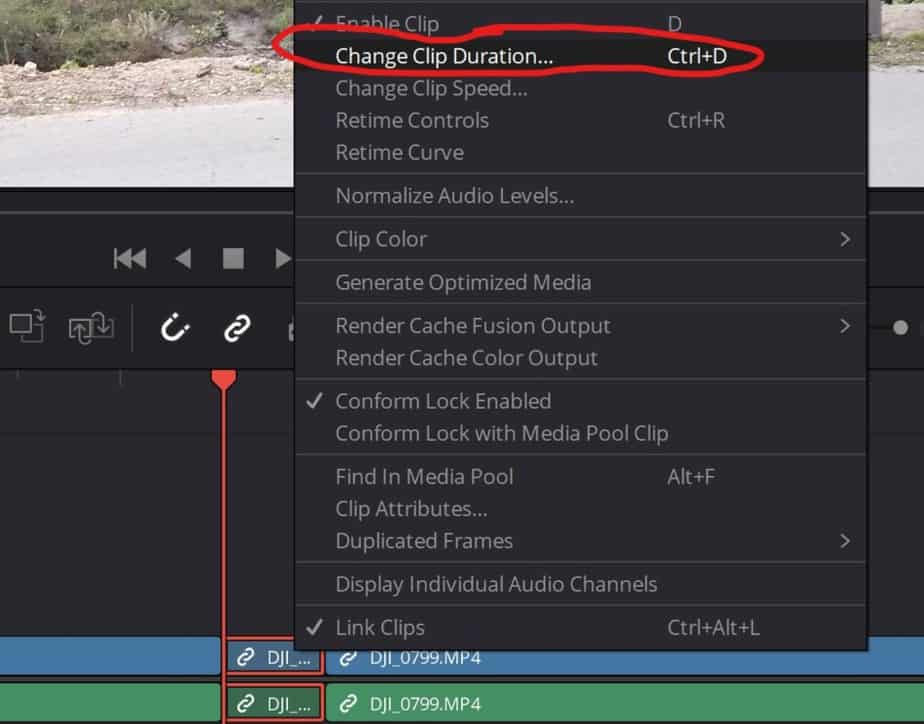
Or you can right-click the frame then go to “Change Clip Duration…”

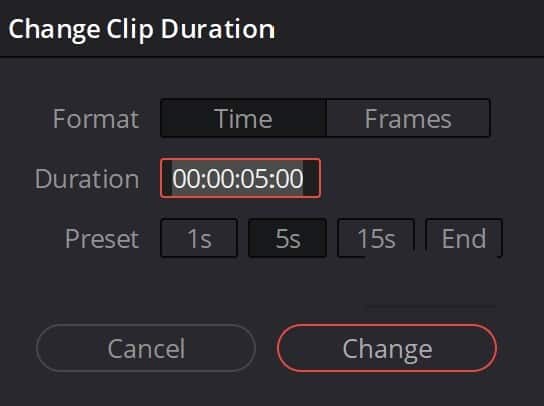
Now, this is where the magic happens! Here you have two different options either you can change: “Time” or “Frames”. What you choose is just what you prefer.
By using the: “Time” you are affecting how long the frozen frame will last in exact time. Here you can either write in the duration box or select a “Preset” which is set in some fixed seconds. If you want to change the duration box the first two zeroes are milliseconds, meaning “00:00:00:30” would be half a second, “00:00:02:00” = two seconds.
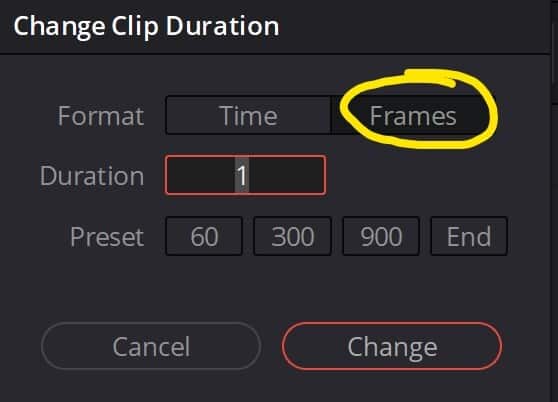
By using the: “Frames” you are not changing directly the time but instead the number of frames it will last in relation to the rest of the video. It will show 1 second if you have not changed anything after freezing the frame since we only cut on frame out if you have changed time or stretched it the number will differ (no problem). Only to clear up some confusion: the time the frozen frame will last depends on the framerate or FPS which your video is shot.
For example: if the video is 30 FPS that’s 30 frames being shown each second when your video is being played. If you set the duration to 30, that’s the same as 1 second.
You also have “Preset” which is a fixed number of frames you could choose from!
As you can see by using these methods instead of stretching you will spare a lot of time! This is only one method of changing clip duration, in other situations this may not be the preferred method anymore. Therefore I’ve made a short video on some different methods you can use! The menu will look a bit different as it was shot in Davinci Resolve 16, but the video is still very useful so make yourself a favor and watch it. If you prefer just skim reading I’ve written all the important stuff from the video down below. Here at Video With Jens, we want everyone to be satisfied!
Most Effective Methods to Change Clip Duration:
These methods will most likely feel lifesaving in some situations once you know them. At least they did for me.
In- and outpoints!
This one is amazing as you can set the duration of your clip before even adding it to the timeline which will save you from having to deal with some massive clips and having to trim them down in the timeline.
The clip you want to change is not added to the timeline yet. Now double-click the clip as it shows up in the Viewer.
Now go to where you want the video to start then press “I” for input and go to where you want the clip to end then press “O” for outpoint.
Once that is done you just pull down the clip. Then you’ll only add the part between the in- and outpoint!
BONUS TIP: If you drag the video down from one of those icons in the yellow circle you can add only the video (without audio) and vice versa!
By pulling the in- or outpoint after adding the clip to the timeline you can still affect the clip duration!
Stretching when it’s effective… (Updated info from video)
Stretching the clips is definitely a nice way to change duration but not when totally zooming into the timeline as discussed earlier in the article. Here comes some additional tips on doing this method.
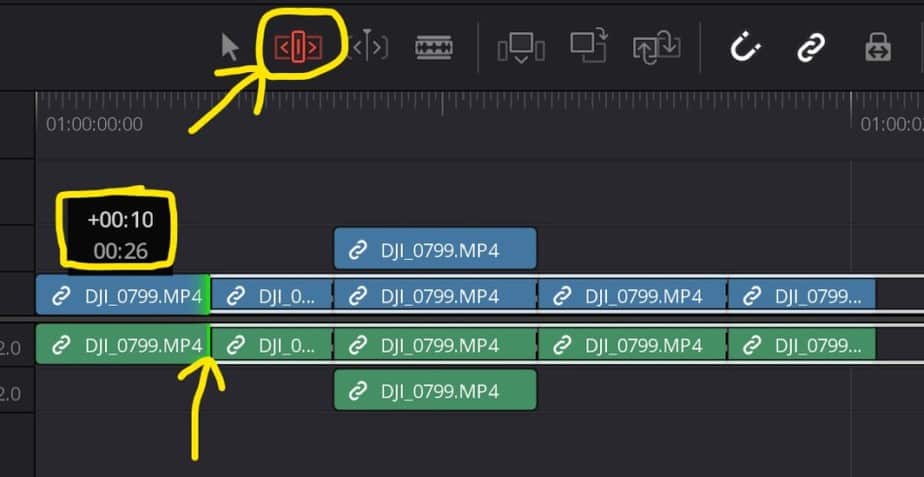
As the arrow at the bottom suggests, to do this you have to grab the edge of the clip in the timeline and then pull to the side. The box that says “+00:10” is the amount of time you have increased your clip or in other cases decreased it. An important thing to mention is the “Trim edit mode” which I have circled at the top of the image. By enabling this you can stretch clips in the timeline without overlapping neighbor clips and affecting them in any way!
In the video I mention that you can select multiple clips and stretch them, this is sadly not the case anymore in Davinci Resolve 17… Anyways if you want to change the clip duration of multiple clips I’ll show you that in the next method.
Changing Clip Duration of Mulitple Clips
To do this we’ll use the method I taught you earlier. The one with the “Time” and “Frames” menu. So in case, you missed it click here to get to that part of the article and then come back after reading that. Anyways, let’s get to it.
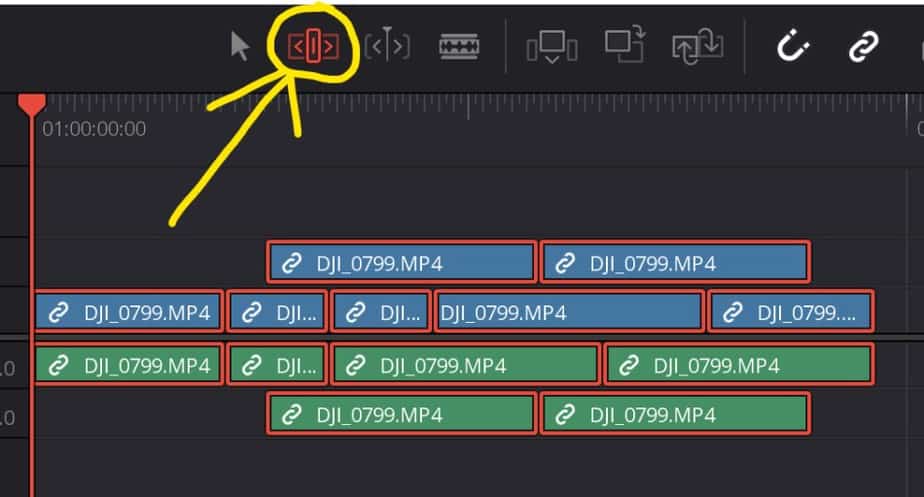
Select all clips either by click hold and drag over them or use the shortcut: “CTRL + A”. The most important thing to remember here is to enable “Trim Edit Mode” (the one in the yellow circle) if not you can’t change all the clips to the same duration for example. Then go to “Change Clip Duration…” (shortcut: “CTRL + D“).
Then you’ll see this menu, which you should know how to use by now 😉
That’s it!
Check out this article on how to blur stuff that moves, for example, a face or a car.