How to Fix Error Code 19 in Premiere Pro (Easy Solution)
Are you facing the error code 19 in Premiere Pro?
Then, read on, as that’s what we will fix in this article!
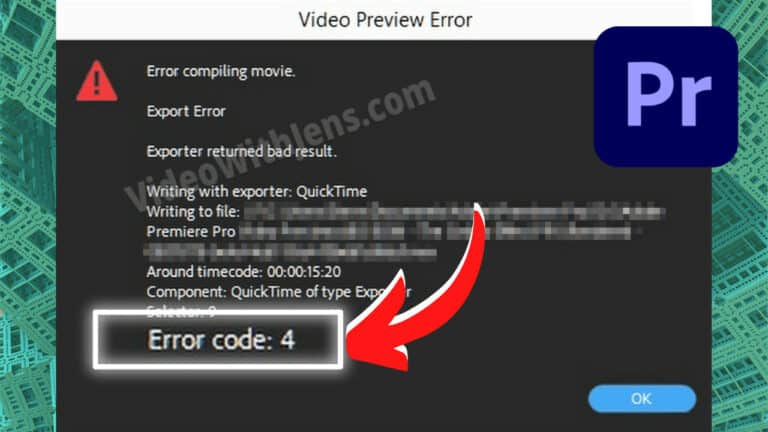
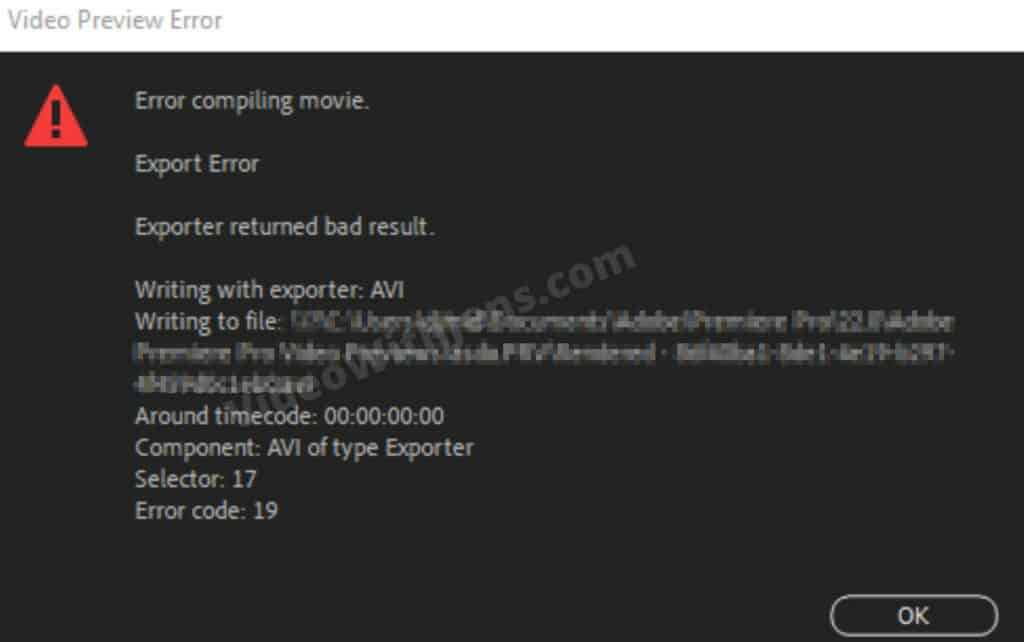
This error falls into the export/render category “Error compiling movie” and is most frequently seen while rendering a sequence (creating video previews).
Here’s a quick answer: (you’ll find images below)
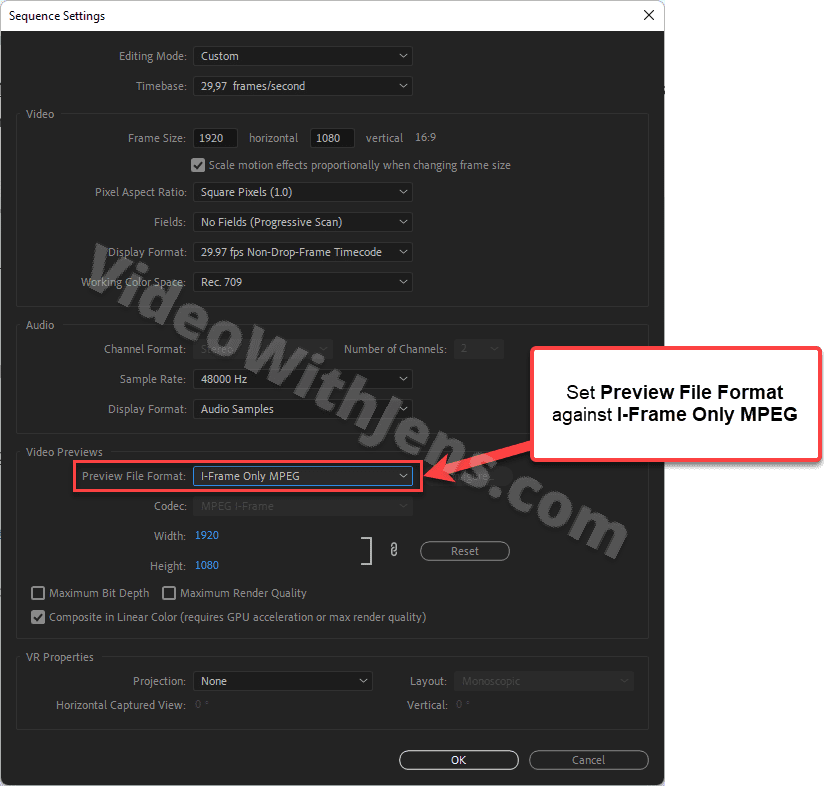
To fix the error code 19 in Premiere Pro, open Sequence > Sequence Settings, and under Video Previews set Preview File Format against I-Frame Only MPEG, and click OK. Next, render your video, and error 19 should not appear.
How to Fix Error Code 19 (Detailed answer)
Most people experiencing this error have set their video preview’s format to AVI.
And after changing it to I-Frame Only MPEG many people have solved their issue.
According to Kevin Monahan, you should also consider using some of the other formats:
I recommend QuickTime > ProRes LT for the codec, which will provide smooth playback and an option for faster rendering, called smart rendering. The community seems to be finding I-Frame MPEG working OK too.
Kevin Monahan (Source)
I’ve written about smart rendering below.
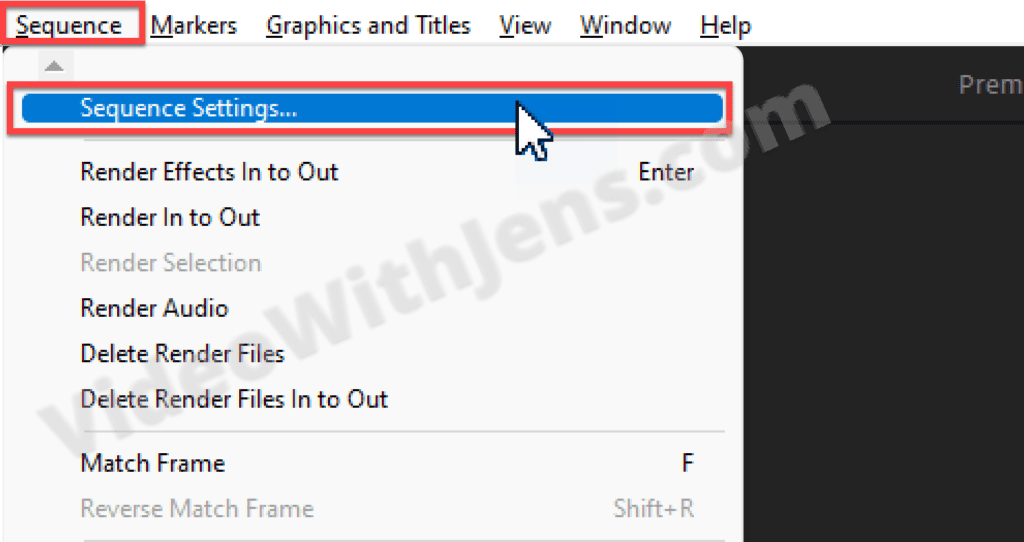
But first, to change the video preview’s format, click on Sequence and then open Sequence Settings:
Inside the Sequence Settings set the Preview File Format against I-Frame Only MPEG, and click on OK.
- Alternatively, choose QuickTime or GoPro Cineform, or any other mezzanine codec.
How to Enable Smart Rendering (Faster Export Times)
Smart rendering is excellent for exporting faster and provides smoother playback while editing.
Smart rendering is done by creating preview files. Then, instead of encoding the video when you hit the export button, Premiere exports the video using the “pre-exported” video previews.
Additionally, creating video previews will make things more smooth if you are struggling with lag when editing highly compressed codecs like H.264 or H.265.
- As you probably already knew…
Requirements:
- Supported smart rendering codec; check out this list.
- Most QuickTime codecs are a safe bet.
- Export settings must match the video preview files.
The process is simple:
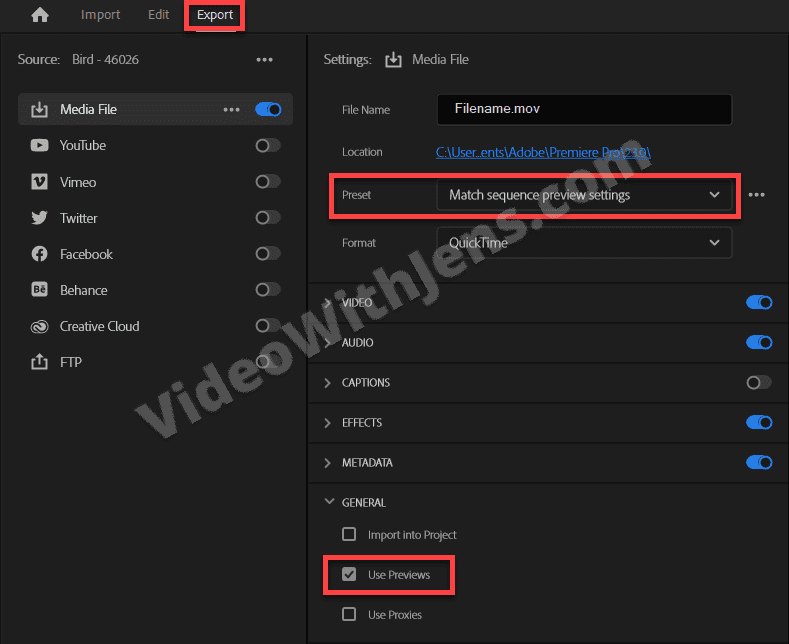
- Create video previews.
- In the Export window, set Preset against Match sequence preview settings.
- Make sure Use Previews is enabled in the General tab.
- Click on the Export button.
- Voilà.
What if I want to upload it to social media?
Usually, when uploading to any social media, you will export to H.264 or H.265.
So, naturally, you might wonder how to combine this with the workflow described above.
There are two methods to go about this:
Method 1:
For YouTube, it will cause no harm uploading an intramediate codec (mezzanine codec) like the ones used for smart rendering. Many people recommend doing it this way.
However, I can’t speak for social media platforms, but it’s definitely something to test.
The only downside is that the files are much bigger, requiring more bandwidth.
Method 2:
After exporting the video, import it to the Adobe Media Encoder, and re-encode it using H.264, H.265, or whatever you prefer!
This process should be much faster than exporting H.26x in Premiere Pro unless you use hardware encoding (which is pretty fast too).
Check out this post for more information.
For more information about the “Error compiling movie” group of export/render errors; check out this article.
![[SOLVED] File Importer Detected an Inconsistency in the File Structure Premiere Pro](https://videowithjens.com/wp-content/uploads/2023/01/File-Importer-Detected-an-Inconsistency-in-the-File-Structure-Premiere-Pro-768x432.jpg)