
How to Fix Error Code 4 in Premiere Pro (4 Quick Ways)
Getting an error when exporting your project is a painful experience.
Luckily, the error code 4 in Premiere Pro is usually easy to fix.
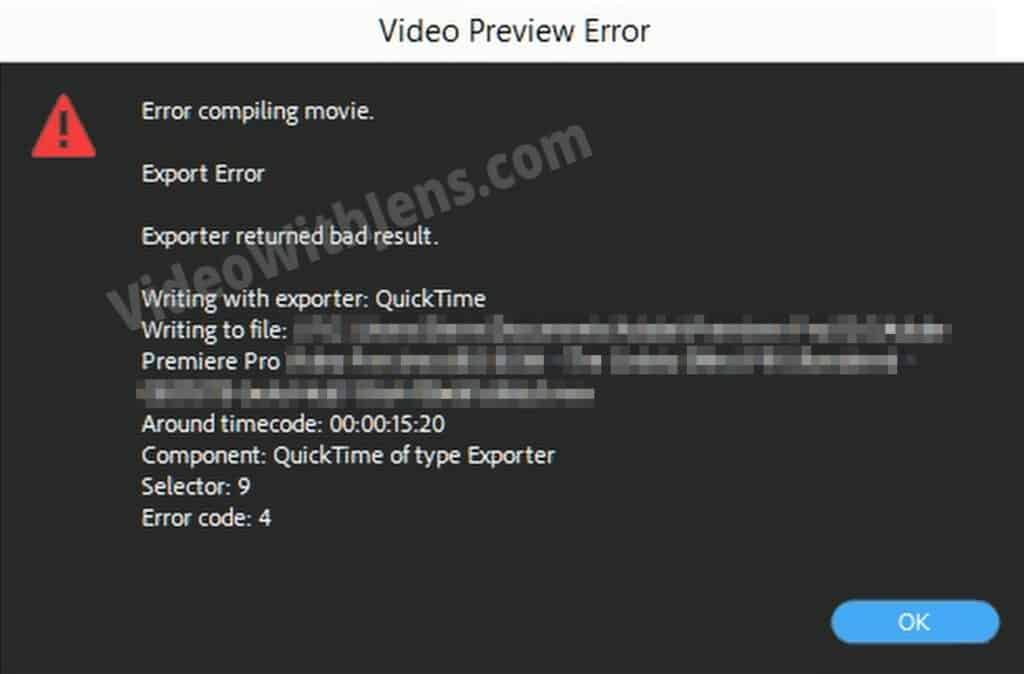
This error is part of the “Error Compiling Movie” category.
The error code 4 in Premiere Pro means that you are out of storage, i.e., your disc is full. To fix this, free up drive space or export to another drive.
Instead of deleting a bunch of your vacation photos to free up space, there are a couple of things you can do first:
I’ve also made a video version of the article:
1. Delete Media Cache
If you have been editing a couple of projects in Premiere, chances are the “Media Cache” files are starting to fill up.
And once they do, they can eat much of your precious disc space!
Therefore, an easy way to free up space on your drive is to delete these.
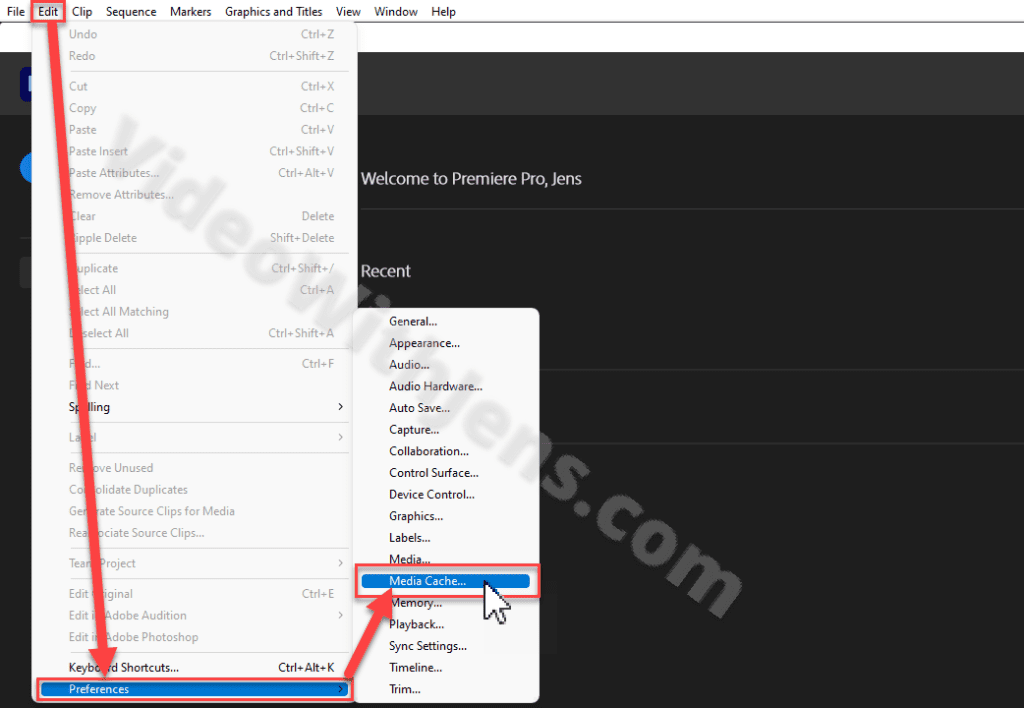
Inside Premiere Pro, click on Edit (top left-hand corner), then Preferences > Media Cache, like this:
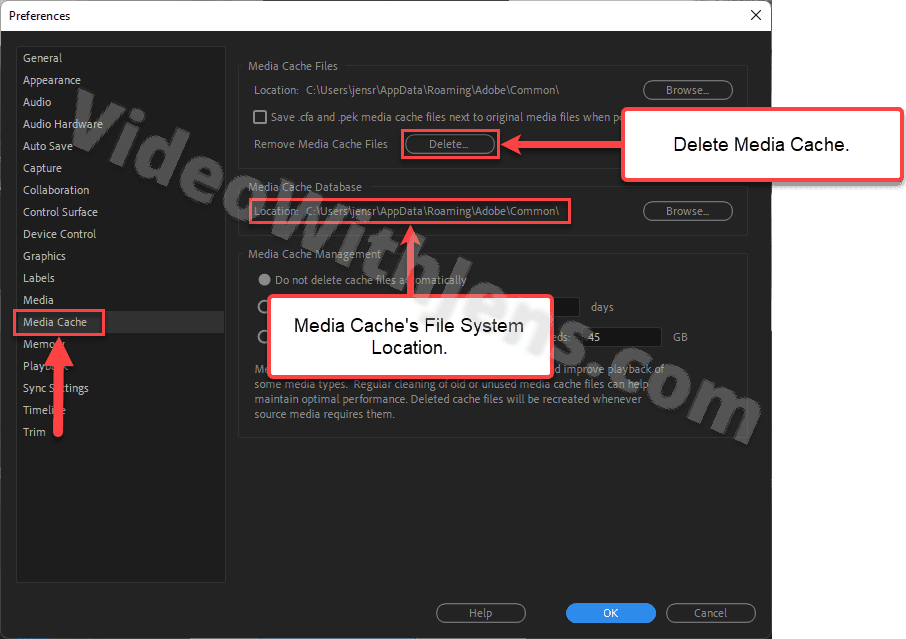
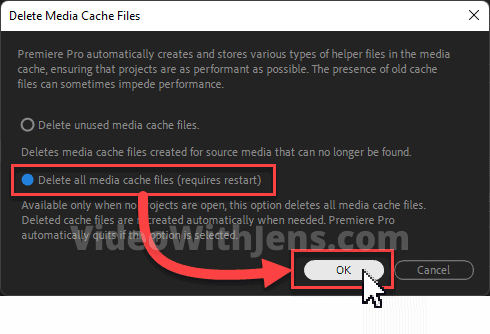
Next, click on Delete under Media Cache Files:
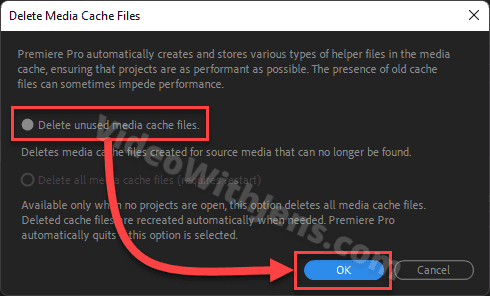
Inside the windows that pop up, you only have one option if a project is already open inside Premiere.
However, I recommend starting by selecting the Delete unused media cache files and then clicking OK.
- This will remove all unnecessary media cache files. If you have been deleting any projects or moved any source files, their cache files will now be removed.
- Depending on how long you’ve been saving up, this may free up a lot of space.
Once you’ve cleared up the unused media cache, check if there is enough disc space to export this time.
If not, I would proceed to delete all media cache files.
This should not hurt your project, other than you have to regenerate the media cache once you open old projects (automatic process).
- However, sometimes there’s been a bug where I have to re-link a couple of clips; I think this is because I’ve started previewing the project before the cache was done regenerating. So let Premiere generate the files before starting to edit.
Yeah, and you must close any open projects for this to work.
Restart Premiere and click on Edit > Preferences > Media Cache > Delete > Delete all media cache files > OK before opening any project.
Then Premiere will do a restart, and hopefully, there will be enough disc space to avoid error code 4.
If you want to learn more about media cache files, I found a great article from Screenlight (opens in a new tab).
2. Export to a Drive with more Space
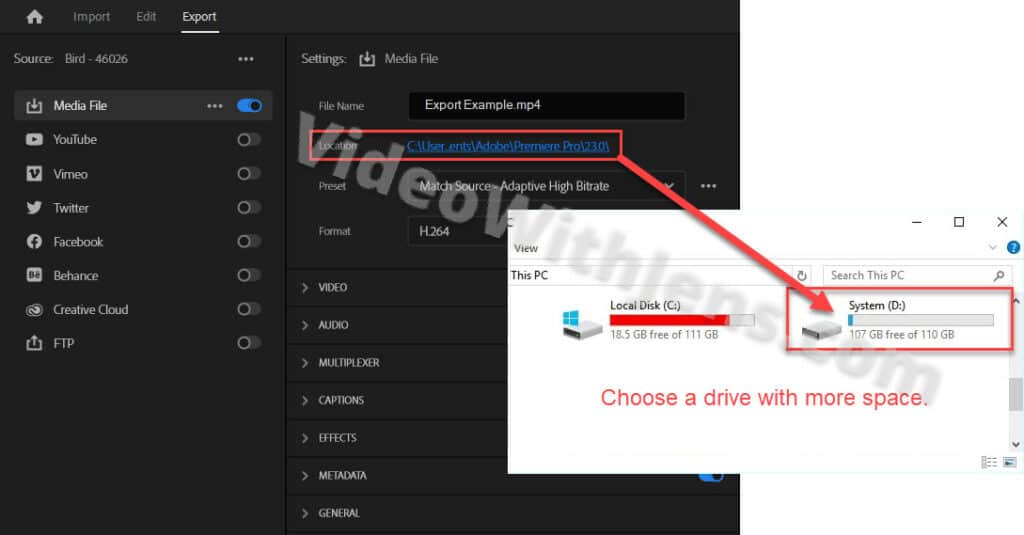
Another alternative is exporting your video to another drive if it has more disc space.
You can change the export location in the export tab inside Premiere by clicking on the blue link next to Location.
Then, browse to a folder on your second drive, and click on Open to set the export location.
3. Free Up Space on Drive
If you only have one drive and deleting the media cache doesn’t free up enough space, you’ll have to free up space another way.
On Windows, you can check out the «Cleanup recommendations,» where you can find files and apps you don’t use, etc.
- Click on Start (Windows key), and search for Storage settings. There you’ll find the cleanup recommendations.
QUICK TIP: Delete everything in the Recycle Bin and then what’s in the Downloads folder. I cleared up 100 GB this way while writing the article!
Check out this tutorial from Microsoft for more ways to free up disc space.
4. Change Media Cache Location
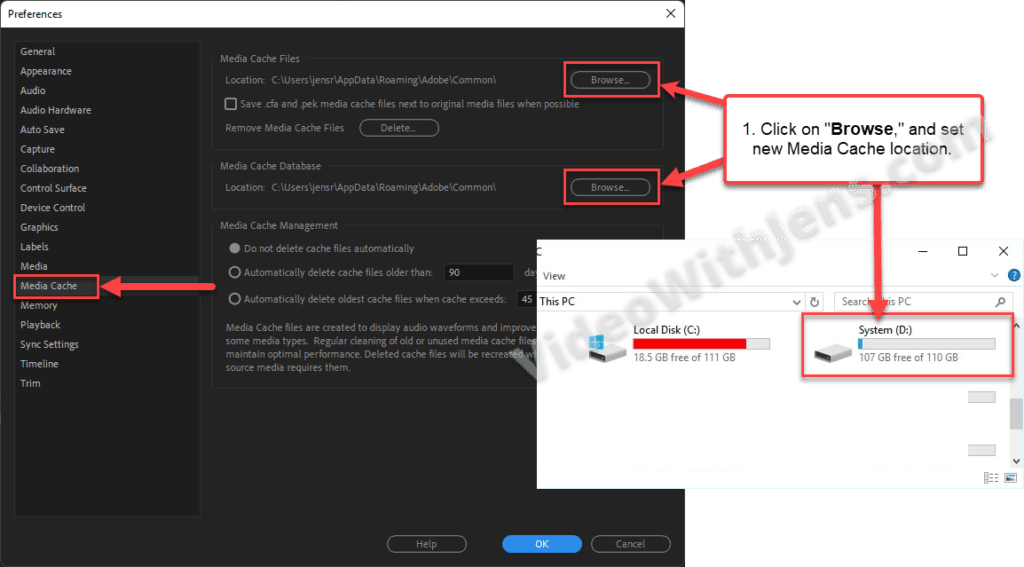
Instead of deleting the media cache files, you can change the location where they are saved to another drive. This way, you can free some space from the drive you are exporting to.
What’s nice about this is that you can speed up performance by setting their location to your fastest drive! So if you have them stored on a hard drive, moving them to an SSD would make the communication between the cache files and Premiere faster.
However, since SSDs usually are smaller, you’d have to delete the cache files more frequently (probably worth it, though).
To change the location of your media cache, go to Edit > Preferences > Media Cache, and click on Browse.
Then, in your file system, navigate to where you want them to be saved
Error code 4 is part of the “Error compiling movie” category, which I’ve written about in detail here.

![[SOLVED] File Importer Detected an Inconsistency in the File Structure Premiere Pro](https://videowithjens.com/wp-content/uploads/2023/01/File-Importer-Detected-an-Inconsistency-in-the-File-Structure-Premiere-Pro-768x432.jpg)