Premiere Pro: GPU Render Error -1609629695 (8 Solutions)
If you cannot export from Premiere Pro due to the “GPU Render Error,” keep reading!
The solutions you’re about to learn have worked for thousands of people experiencing this error.
AND, I’ve spent the last week researching this error, so I sincerely hope this article can help you.
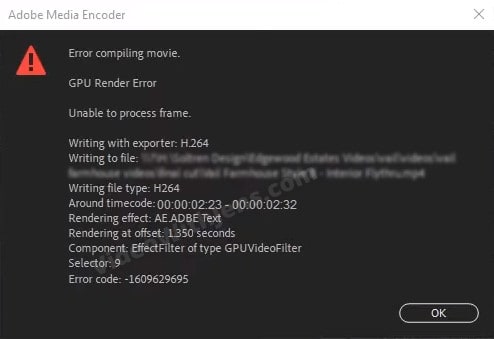
This GPU Render Error occurs because it’s “Unable to process frame” and belongs to the “Error compiling movie” category, with error code -1609629695.
Here’s a video explaining some of the solutions mentioned below:
1. Reboot Computer
This solution is quite obvious, but it’s not without reason; rebooting your system is known to fix many bugs.
So, it’s worth giving it a shot since it might solve your error.

2. Check Timecode
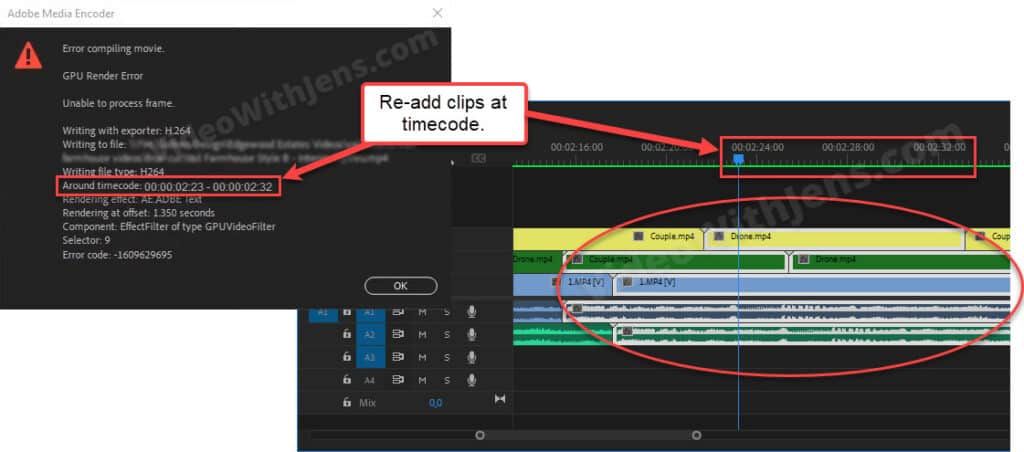
If you look closely at the information given in the GPU Render error, you can see that there is one line called “Around timecode.”
The timecode gives you information about where in the video the error was triggered when encoding (exporting) it:
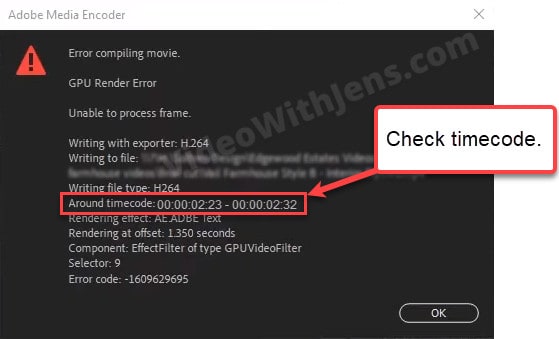
It’s worth checking if there are any particular elements around the time the error was triggered.
Things that might trigger the error:
- Effects.
- Color adjustments.
- Sound design.
- Titles/text.
- Clips that start around the time code.
However, you might not find any of the things mentioned above.
In that case, people have had success removing all clips shown around the timecode, and then adding them to the timeline again:
3. Software Encoding (Quick Fix)
Since this is a GPU-related error, it makes sense that rendering the video using only the CPU would not trigger the error.
This method solves the error for most people; therefore, it’s included pretty early in this article.
However, I recommend testing the other solutions mentioned first, as it’s sad just ignoring an excellent GPU. It will also increase rendering time for hardware-accelerated formats.
You can enable software encoding in two ways, the first is for export and the other is for rendering the sequence.
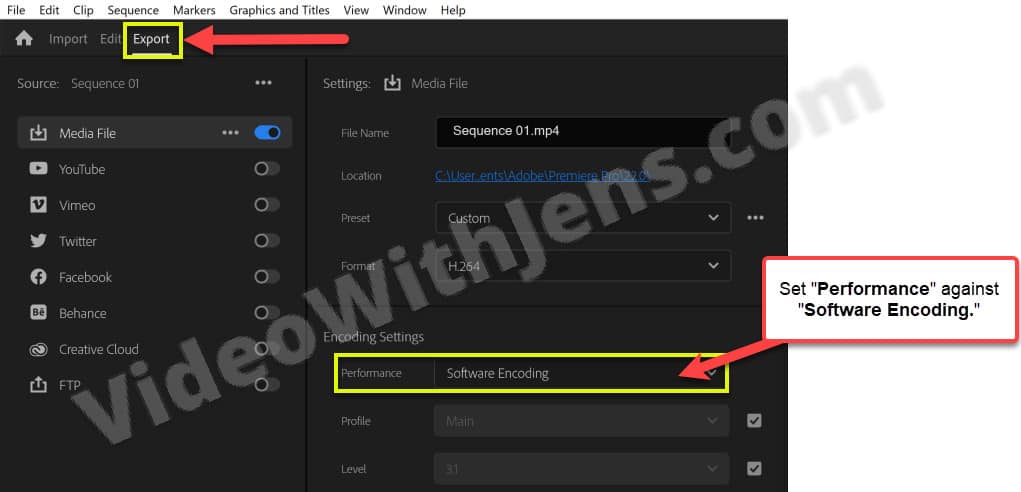
3.1 Enable Software Encoding for Export
You will find this option in the Export tab, under Encoding Settings, next to Performance.
- Set it against Software Encoding.
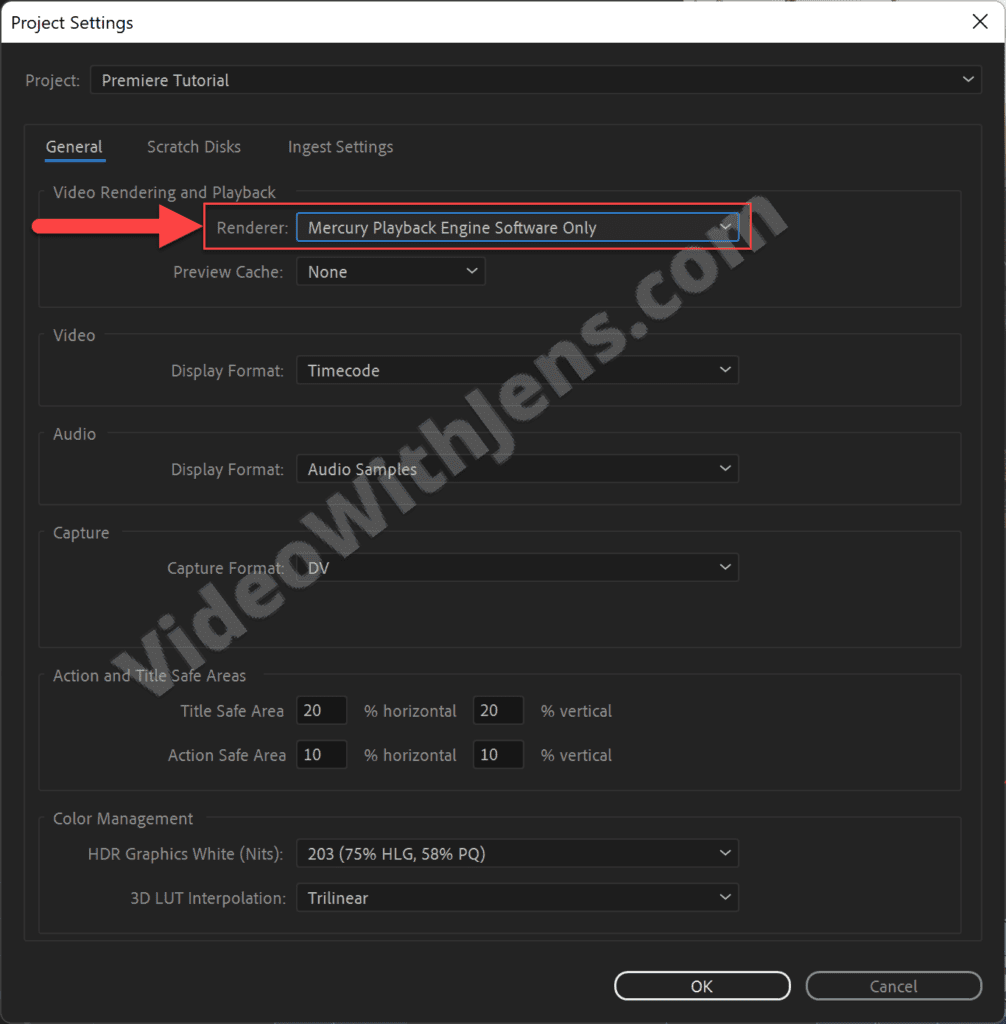
3.2 Enable Software Encoding for Rendering
Go to File > Project Settings > General, and set Renderer against “…Software Only.”
Here’s what it looks like:
Sometimes, you’ll also have to disable GPU decoding.
To do this, go to Edit > Preferences > Media, uncheck Hardware accelerated decoding, and restart Premiere Pro.
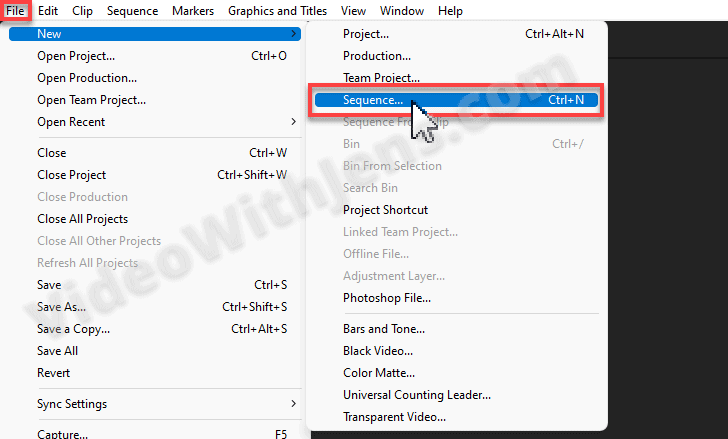
4. Copy Clips to a New Sequence
This solution seems to have solved the error for many people as well. It’s a method that solves many bugs and issues in general. So, you better remember this one!
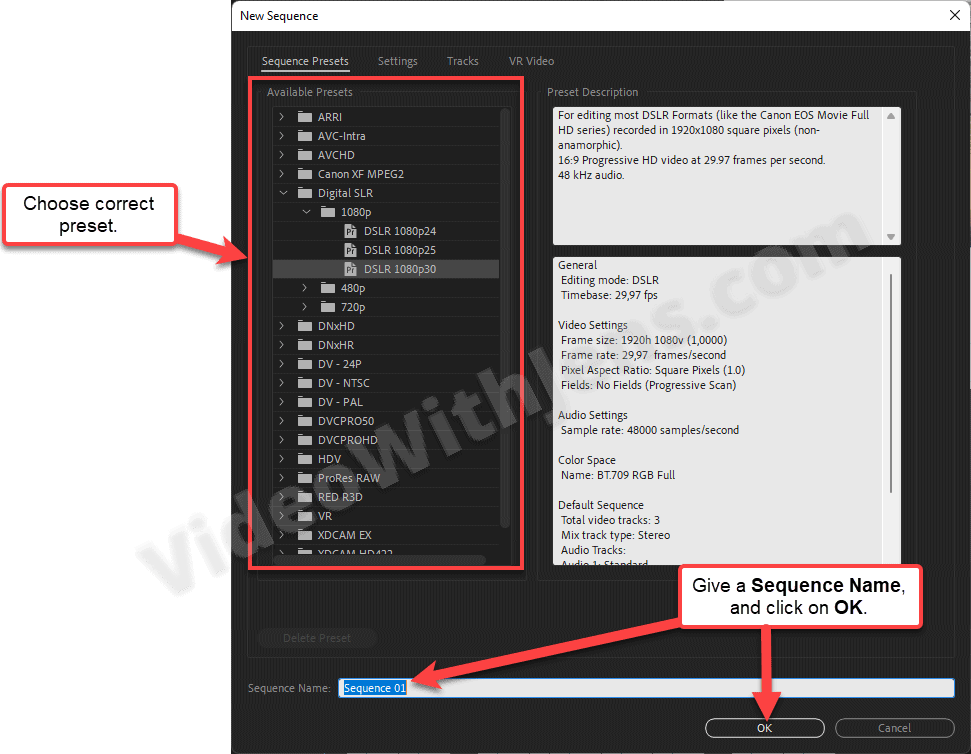
Click on File (top left-hand corner), then New > Sequence; alternatively, press the keyboard shortcut “Ctrl/Command + N.”
Then, choose a Sequence Preset that matches your videos’ settings, give the sequence a name, and click on OK.
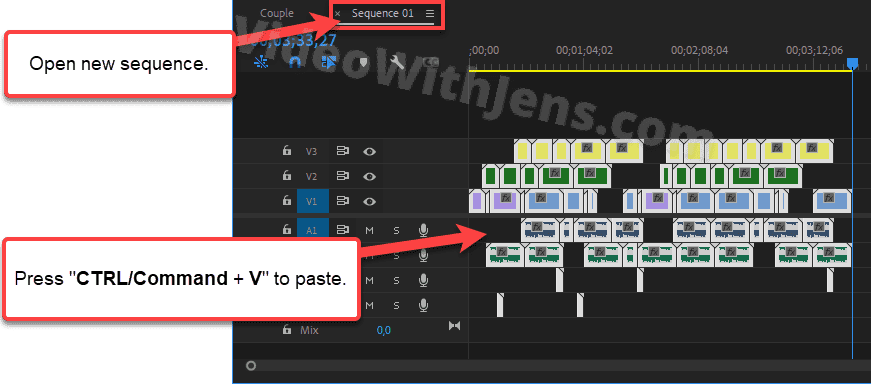
Then, in the Timeline Panel (Sequence), you’ll see two tabs (left corner of the timeline panel).
- Watch the second image below if you can’t find the tabs.
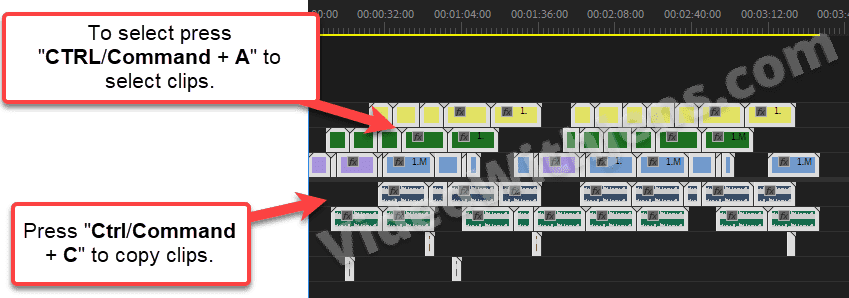
Open the “old” sequence, press the keyboard shortcut “CTRL/Command + A“ to select the clips, and then press “Ctrl/Command + C” to copy them.
Next, open the new tab/sequence, and press the keyboard shortcut “Ctrl/Command + V” to paste the copied clips.
- NB: You may have to fix the audio levels in the new sequence!
5. Unplug External Monitor
This solution is quite genius and seems to have solved the GPU render error for a few people!
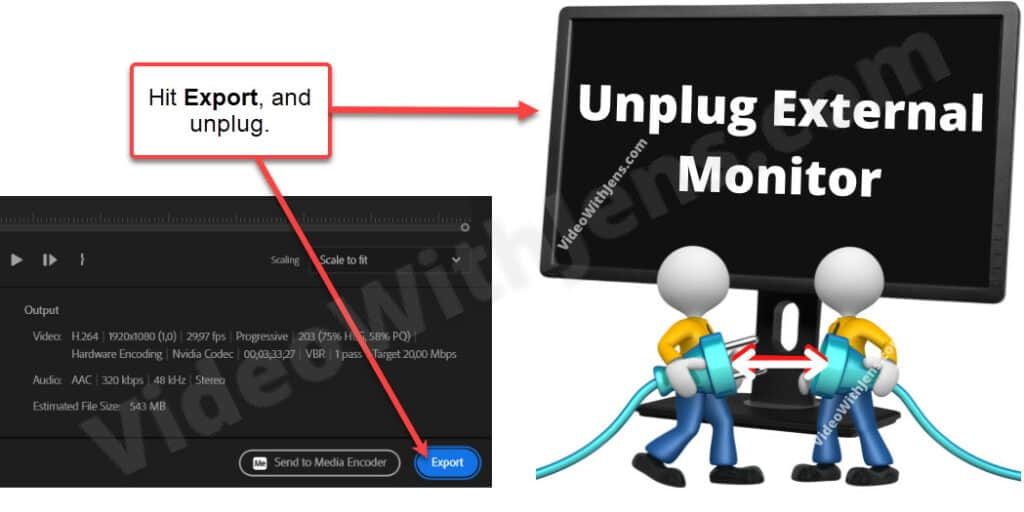
Simply click the Export button and immediately disconnect any external monitor connected to your computer.
- This will give your GPU extra power!
6. Smart Rendering
The smart rendering feature in Premiere is also reported to have fixed the error.
This feature encodes the video using pre-rendered files, which also speeds up the export times by 20x compared to software encoding.
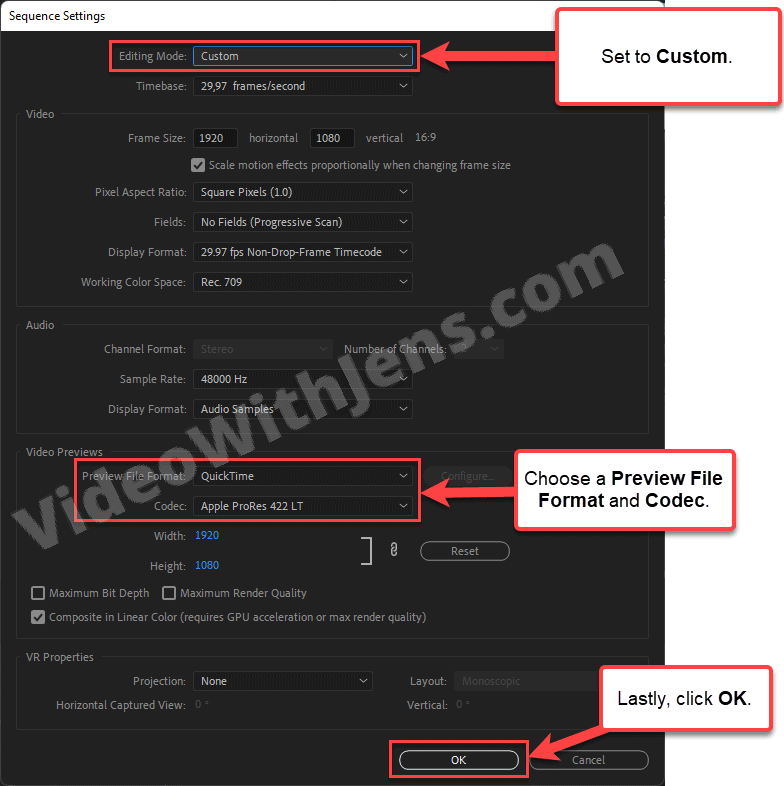
To do this, click on Sequence (top left-hand corner) and then open Sequence Settings.
Firstly, set Editing Mode against Custom.
Then in the Video Previews section, set Preview File Format to one that supports smart rendering (opens in a new tab), or you can choose QuickTime and one of the ProRes or DNxHx… codecs (these are supported).
Once that is done, click on OK.
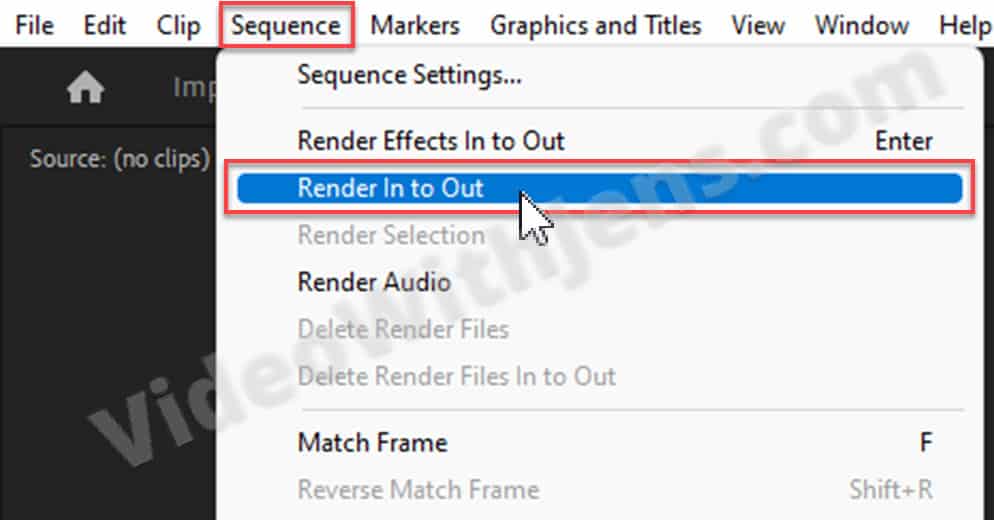
To create the video preview files, click on Sequence > Render In to Out and wait until the rendering is complete.
- To clear any existing in- and outpoints, go to Markers > Clear In and Out to remove them, and then click on Render In to Out again.
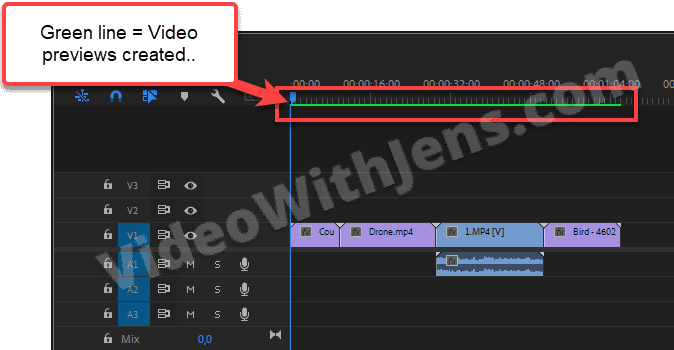
The line above the sequence should be colored green once you’ve created the video previews. If it’s yellow, try again!
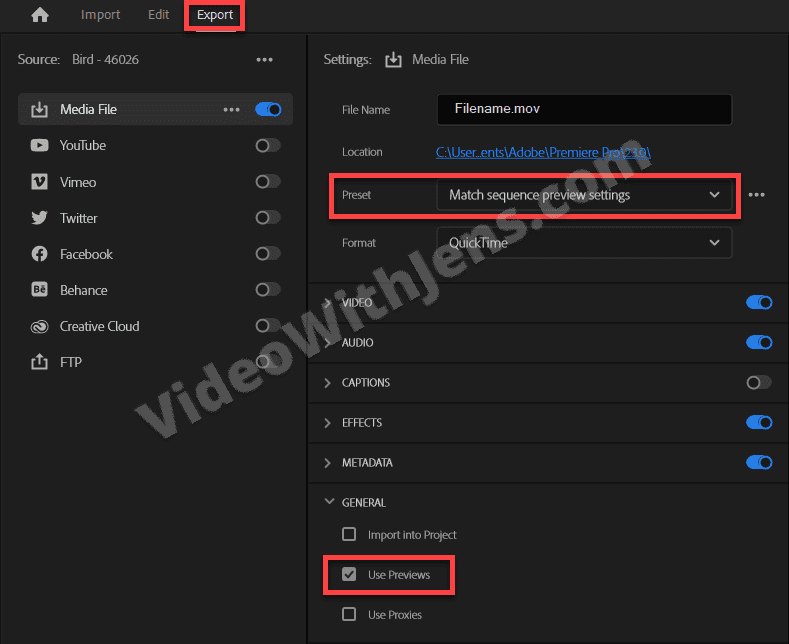
Now, head over to the Export tab.
Set the Preset against Match sequence preview settings, and under General enable Use Previews.
Then, cross your fingers and click on Export.
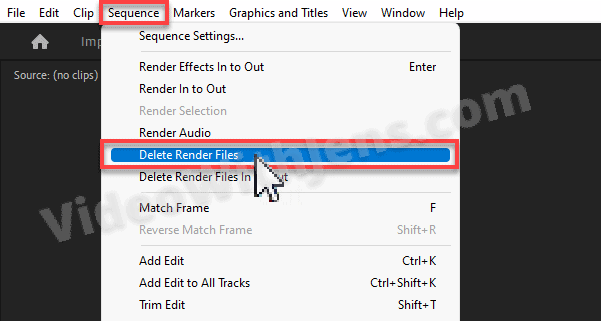
7. Delete Video Previews
On the contrary, if you already have created video previews, users have reported that deleting them fixed the rendering error!
To do this, click on Sequence > Delete Render Files.
Then you have two ways to proceed; export using the source files or create new video previews.
- I recommend trying both if the first way fails.
8. Export and Import again
Another solution is to check the timecode, and remove things that might cause the error one by one, as described above.
However, this method is different because you will import the file to Premiere again and then apply the effects you removed to the new clip.
BUT, I recommend that you export using lossless video previews if you are editing codecs such as H.264, H.265, etc., to avoid unnecessary compression.
So, check the timecode, remove things that might cause the error one by one, and try Exporting until it works.
- I am aware this can be time-consuming if you have a long video. In that case, remove all effects, export, and then import and apply them again.
- I recommend duplicating your sequence, in case this doesn’t work (as I showed you how to do here).
Once you’ve rendered the video, import it to Premiere, and add it to a new sequence.
Then, add effects, and try exporting! I recommend starting with a few effects to ensure it works before going all crazy with the editing.

This error belongs to the “Error compiling movie” category, which I’ve written more about here.
![[SOLVED] File Importer Detected an Inconsistency in the File Structure Premiere Pro](https://videowithjens.com/wp-content/uploads/2023/01/File-Importer-Detected-an-Inconsistency-in-the-File-Structure-Premiere-Pro-768x432.jpg)