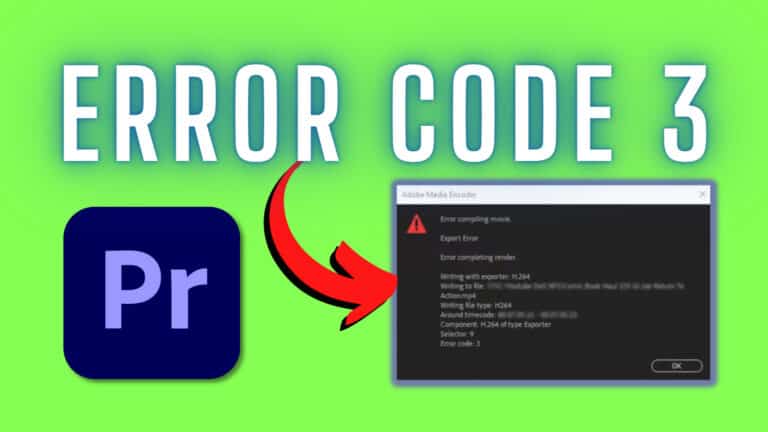
[SOLVED] File Importer Detected an Inconsistency in the File Structure Premiere Pro
Are you getting the “File Importer Detected an Inconsistency in the File Structure” error in Premiere Pro?
In this article, you’ll learn how to fix it.

The error has appeared frequently in version 23.1 of Premiere Pro due to a bug; the bug is fixed in version 23.2.
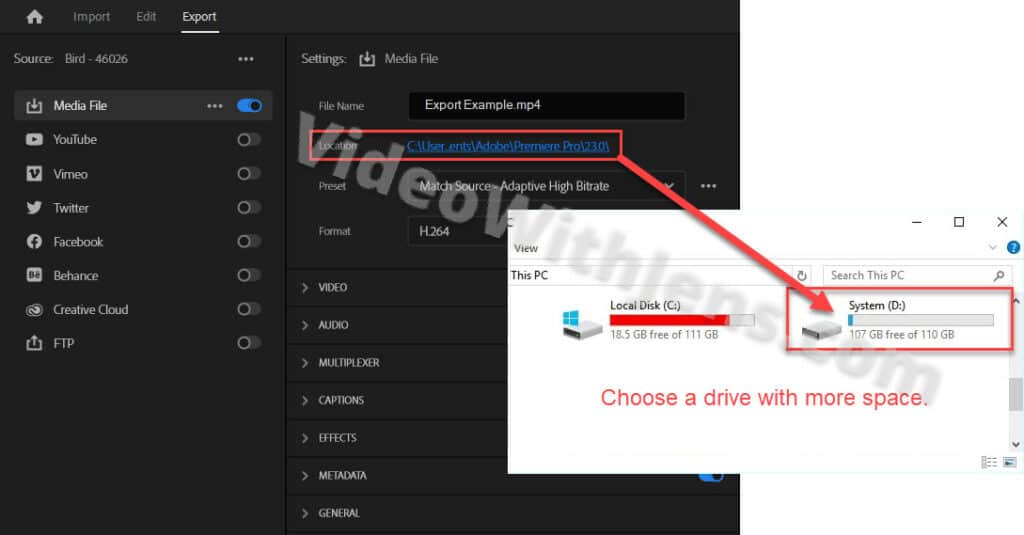
1. Free Up Disc Space
It’s been reported that exporting to a drive out of space has triggered the error.
Either free up some space (empty recycle bin, downloads folder, etc.) or export to another drive with sufficient space.
2. Update Premiere Pro
Ensure that Premiere Pro is up-to-date; this is especially important if you’re using version 23.1, where this error occurs due to a bug.
However, it’s always recommended to use the latest version if possible.

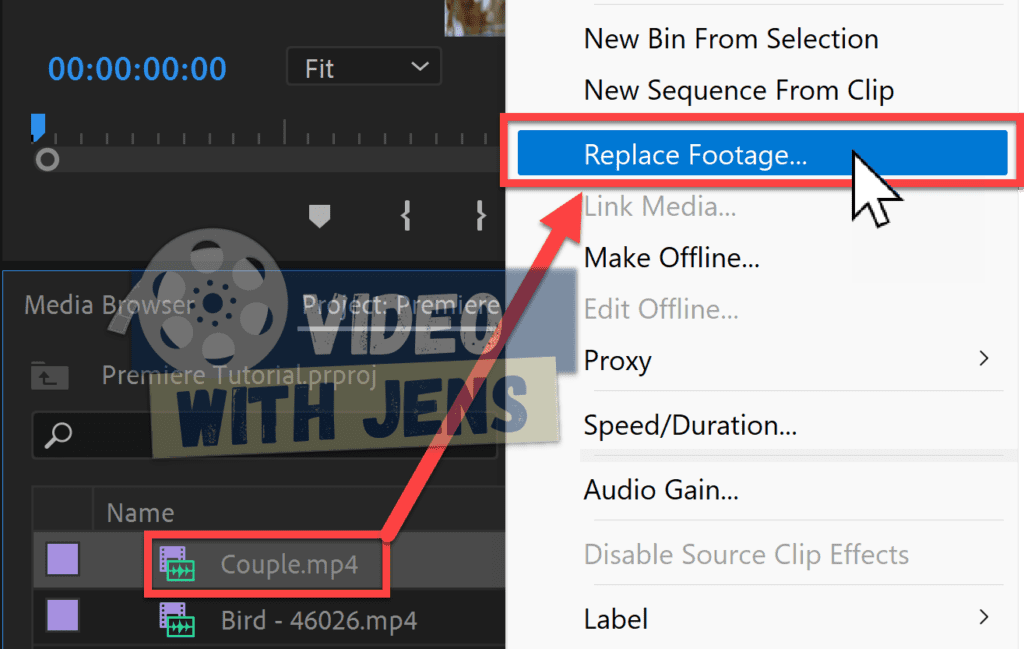
3. Replace Footage
Some users in the Adobe Community solved the error by replacing the clips.
Here’s how to do it:
- Navigate to the folder where your clips are saved on your computer.
- Copy all your clips, and paste them into another folder (not a sub-folder).
- Right-click a clip in the Project panel inside Premiere Pro, and select Replace Footage.
- Navigate to the new folder, and select the clip you copied.
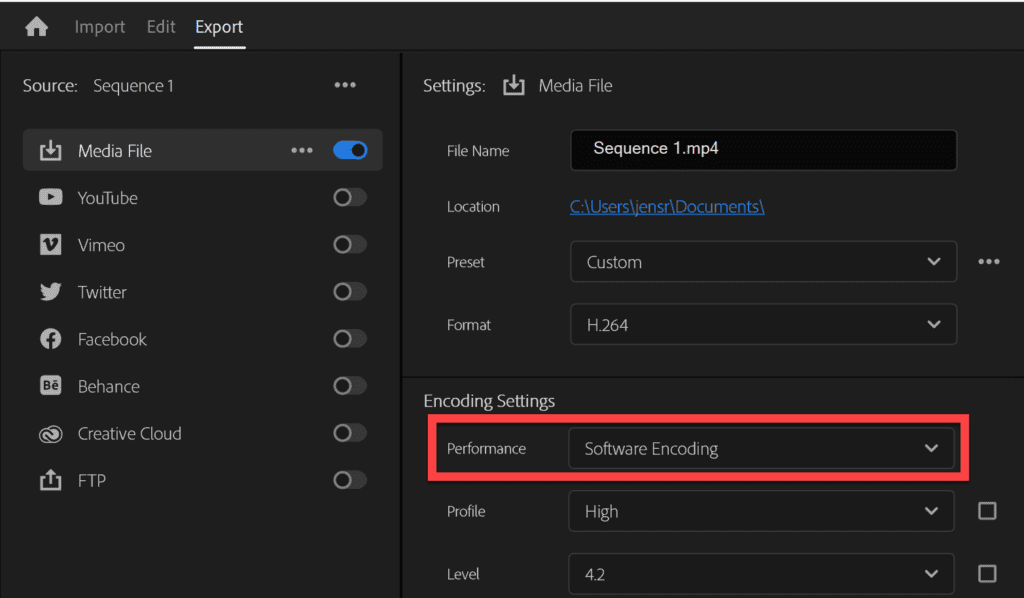
4. Use Software Encoding
If you don’t want to rename the destination folder, it seems the issue only affects GPU-accelerated encoding.
Therefore, setting the Performance against Software Encoding may be a better option for you. This option is available in the Export tab > Video > Encoding Settings.
Be aware that using Software Encoding may increase encoding times.
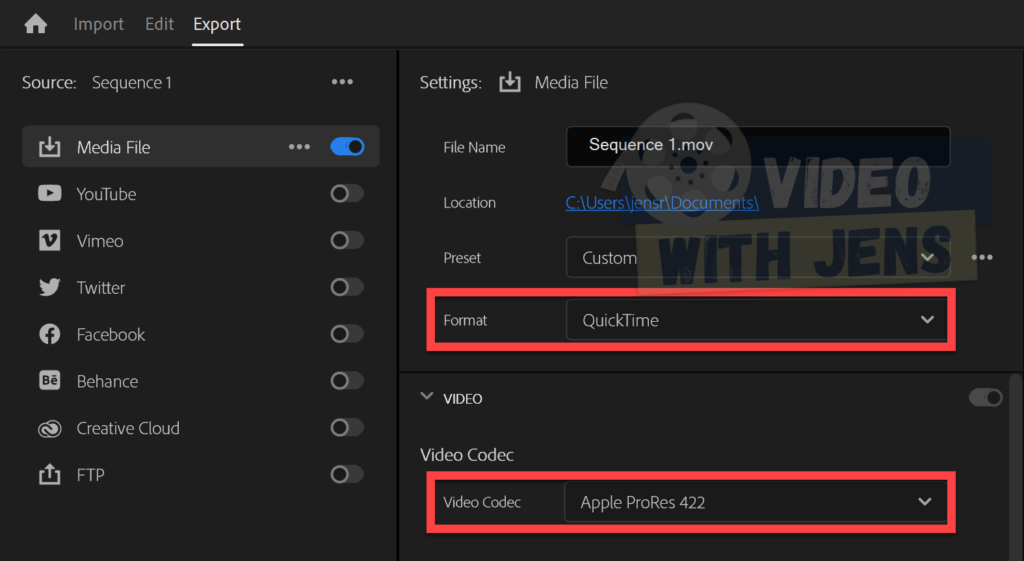
5. Export to Another Format
Exporting to another format than H.264 or H.265 should solve the error if it’s caused by the bug mentioned above.
An alternative format is QuickTime, and then under Video, setting the Video Codec against Apple ProRes.
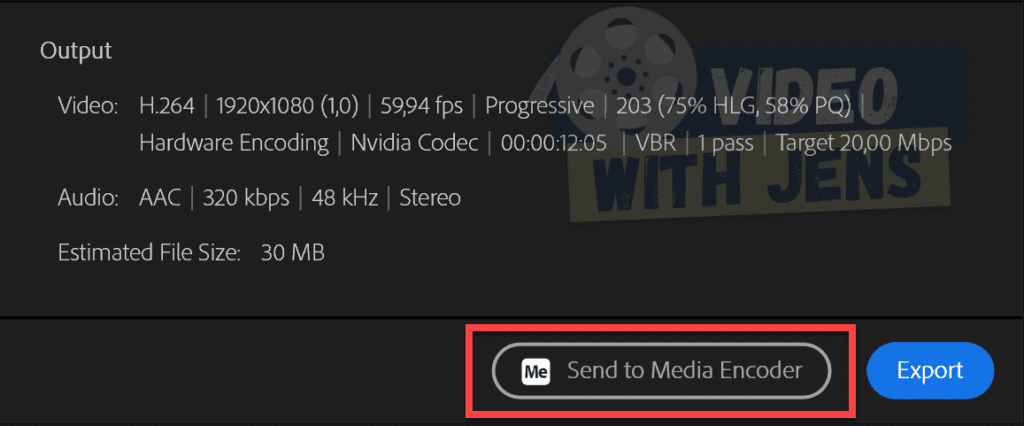
6. Send to Media Encoder
If you are unfamiliar with the software, it’s included in your Premiere Pro subscription, and you can download it from the Adobe Creative Cloud desktop application under All apps.
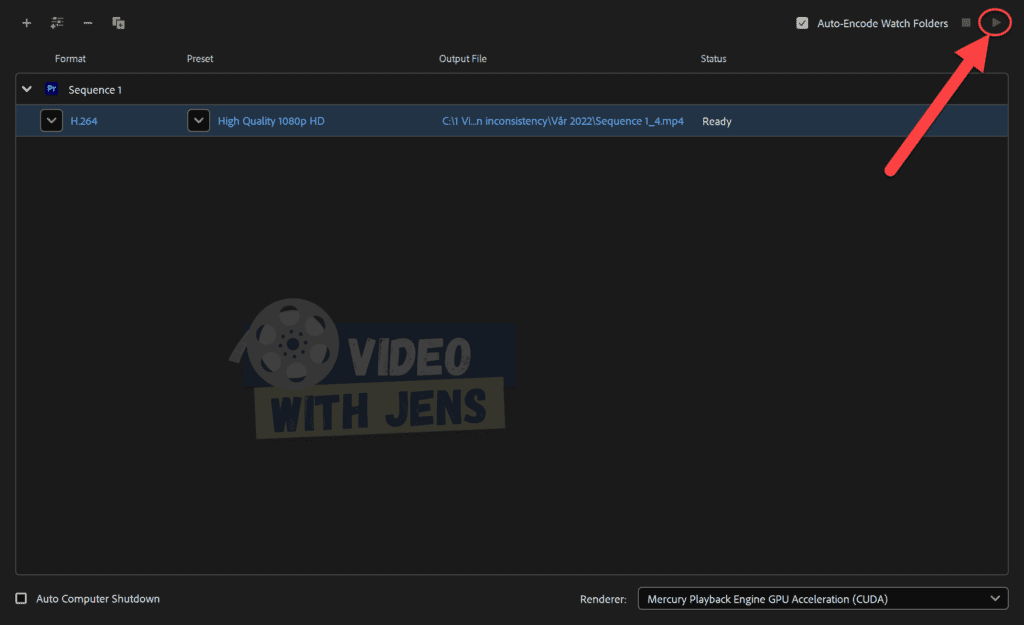
Here’s how to use the Media Encoder:
In the Export tab of Premiere Pro, click on Send to Media Encoder instead of clicking on the blue Export button.
Then, the Media Encoder will automatically launch, and you should be able to see your sequence in the Queue window.
Next, click on the play button:
Check out this article, where I’ve gathered the most common errors inside Premiere Pro in one place!
- TIPS: Bookmark it, as you can fix future errors immediately!