9 Solutions to “Media Pending” Error in Premiere Pro
Does your video in Premiere Pro keep showing the yellow “Media Pending” error?
Very frustrating, I know!

However, after using Premiere for years, I’ve found different methods to solve this issue.
And today, I will share them with you. So, let’s get started!
Here’s a video I made about the error as well:
What is a “Media Pending” Error?
The “Media Pending” error in Premiere Pro means that the software cannot connect successfully to your clips. It’s commonly happening with nested and dynamically linked clips; however, it can happen to all file types.
No matter what’s causing it for you, I have various solutions I’ve found to work!
1. Disable & Re-Enable Clips
Many times, I’ve found this quick and easy solution to fix the pending error.
Here’s how to do it:
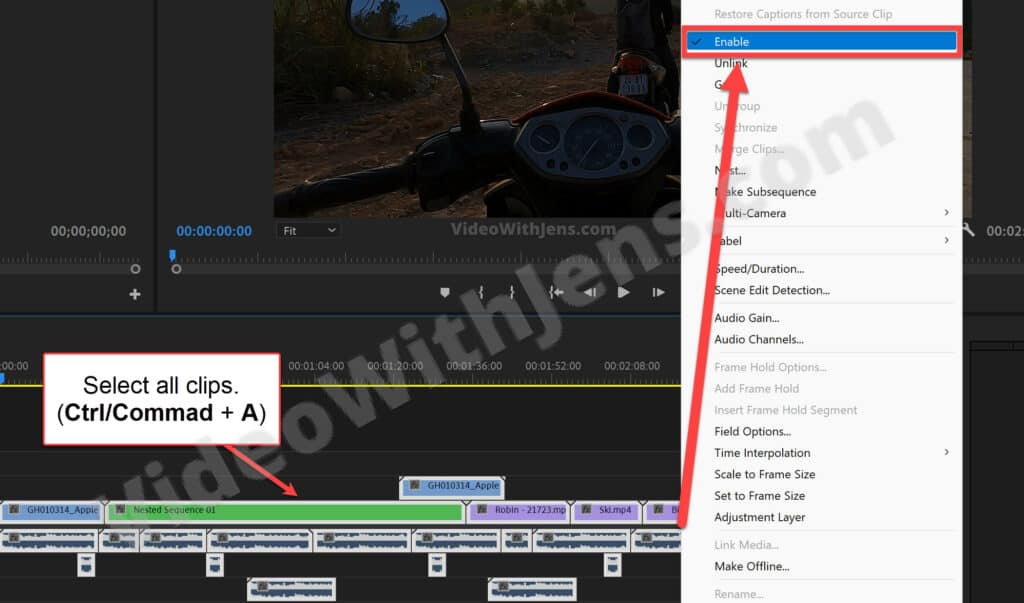
- Select all your clips in the sequence.
- Shortcut: “Ctrl/Command + A.“
- Right-click a selected clip, and click on Enable (to disable).
- Repeat step two, right-click, and select Enable (to re-enable).
I usually try this first; if it does not work, check out my next solution.
2. Make a Small Adjustment
Making a minor adjustment to the problem clip has also worked several times.
This solution is also quick & easy to do and worth testing before we get more “advanced.”
There are two things you can try:
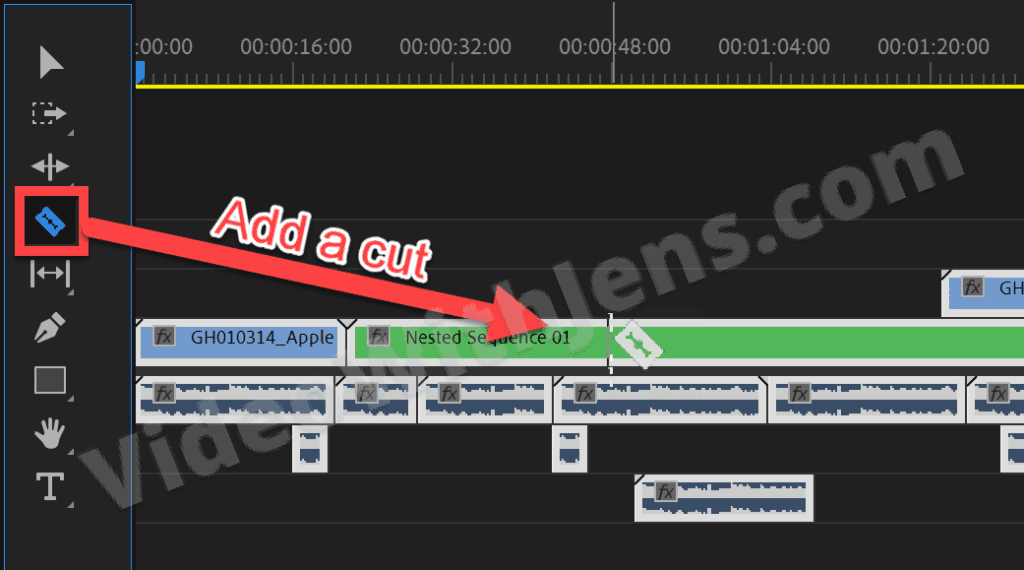
The first is to select the Razor Tool (shortcut: “C“) and then cut the problem clip once, like this:
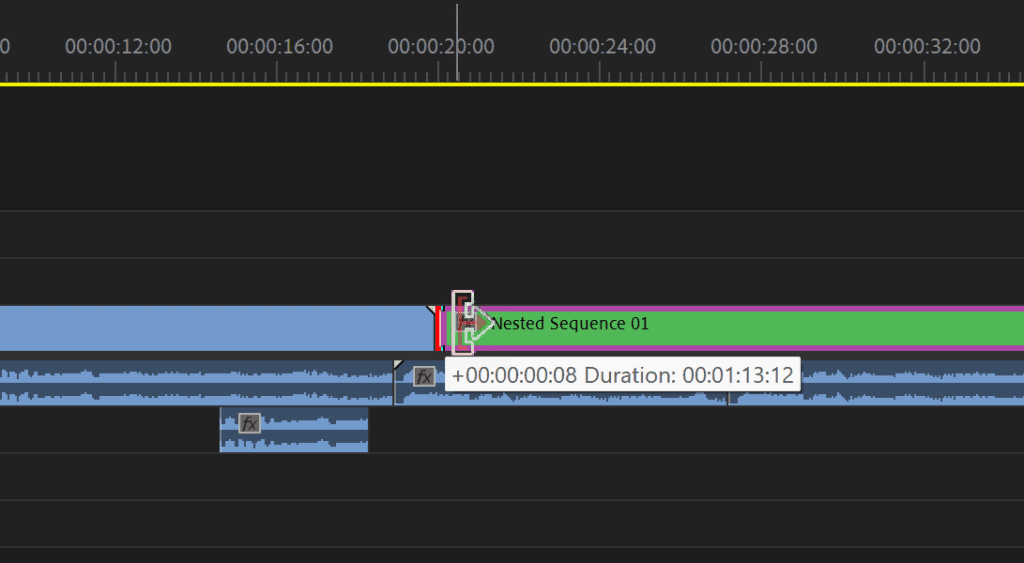
The second thing you can try is to trim one frame at the start or end of the clip. Also, try to extend the clip by one frame if possible:
3. Restart Premiere
Many times restarting Premiere Pro has been my solution, not only for this bug but also issues in general.
4. Copy Clips to a New Sequence
Sometimes the “Media pending” error is caused by a corrupt clip or sequence.
An easy fix to this is by creating a duplicate sequence/timeline.
Here’s how to do it:
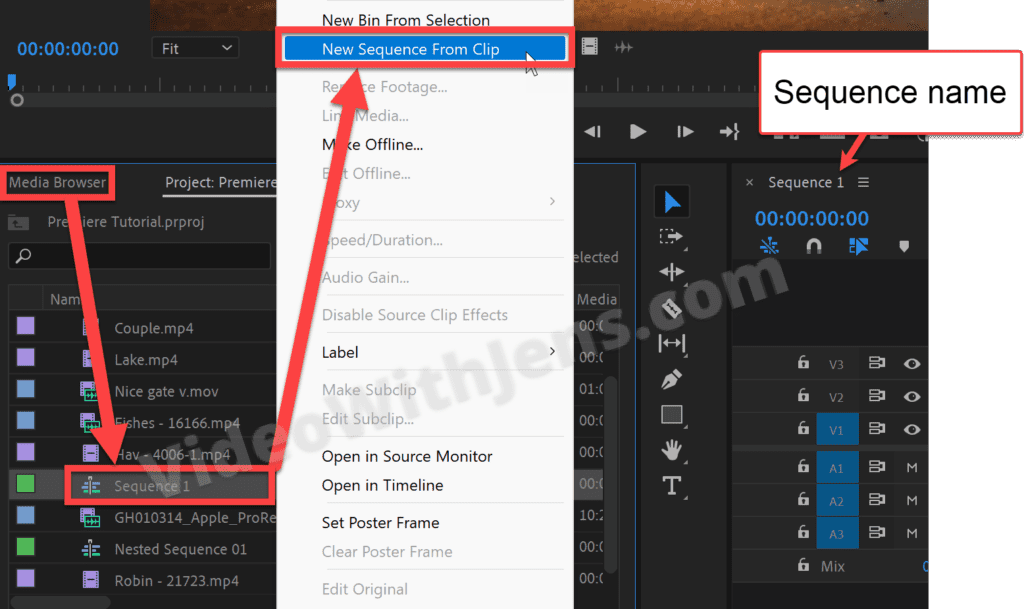
- Right-click the sequence in the Media Browser, and select New Sequence From Clip.
- This will give you all the correct settings.
- Remove the clip located in the new sequence.
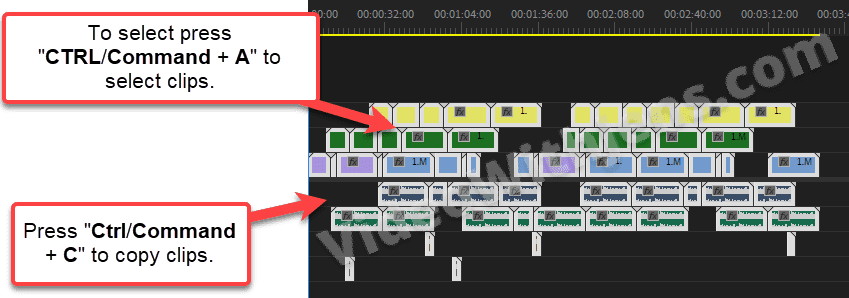
- Select all clips in the original sequence, right-click, and select Copy.
- Alternatively, use keyboard shortcuts:
- “Ctrl/Command + A” (select all clips).
- “Ctrl/Command + C” (Copy).
- Alternatively, use keyboard shortcuts:
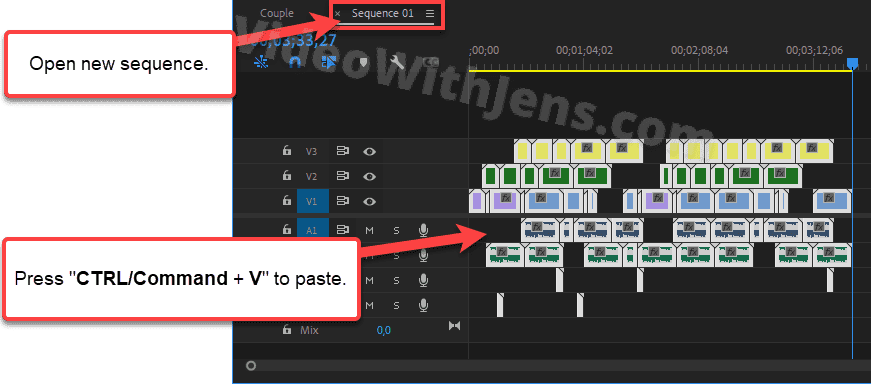
- Open the new sequence, and press the keyboard shortcut “Ctrl/Command + V” to paste the clips.
- NB: You might have to re-adjust the audio levels.
That’s it. Hopefully, this solution did the trick! If not, the problem may be a corrupt media cache file; I’ll show you how to fix that next.
5. Delete Media Cache
Sometimes, corrupt or outdated media cache files may cause Premiere to throw some errors at us.
To fix this, we will delete all existing media cache, and Premiere will generate new problem-free ones (which happens automatically).
Here’s what to do:
- Click on File > Close Project if you got one open.
- Click on Edit > Preferences > Media.
- Click on Delete under Media Cache Files:
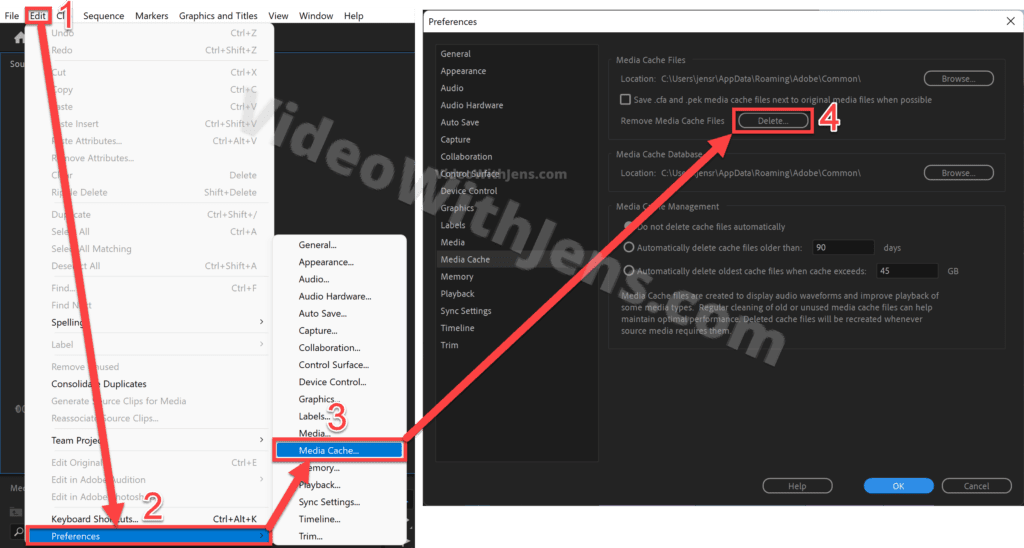
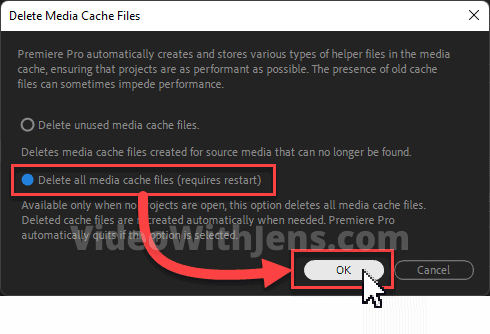
- In the window that pops up, select Delete all media cache files (requires restart).
- Click on OK.
- Premiere will then automatically restart.
- Open your Project, and give Premiere time to generate new cache files.
6. Delete Video Preview Files
Like the media cache files discussed above, the video previews can also corrupt and cause the “Media pending” error.
This solution is only relevant if you render the sequence feature.
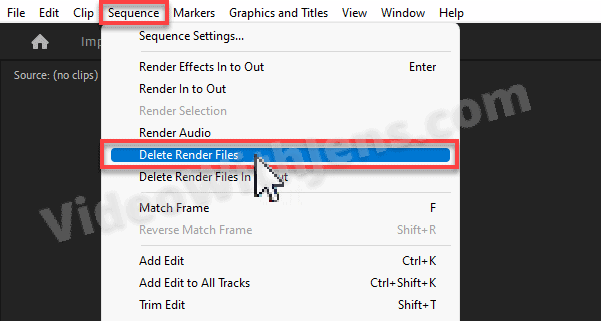
To delete your video previews, click on Sequence > Delete Render Files and create new problem-free ones.
7. Change the Location Folder’s Name
A user reported in a forum regarding the “Media pending” error that re-linking the clips solved the error.
To do this, he suggested renaming the folder containing your footage in your file system. Doing this will make the file path to your clips unrecognizable for Premiere Pro, which is excellent.
This will, in turn (by default), trigger a “re-location” window, where you show Premiere the new path to your clips.
- Check out this article for more information on how to re-link clips.

8. Export In- and Outpoint, Then Import.
Another solution is to export only the problem clip and then import it to the project again.
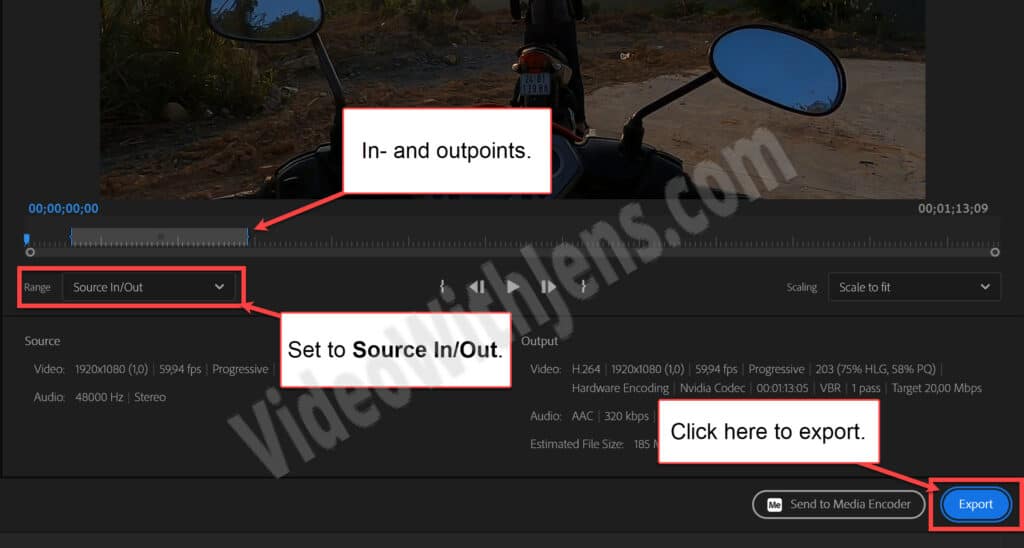
Press I and O to create an in-point and outpoint; do this at the start and end of the problem clip.
Then, go to the Export tab, set Range against Source In/Out, and click on Export.
Once it’s exported, replace the problem clip in the sequence with this one.
Alternatively, if it’s a standard clip in the sequence, right-click it, and select Render and Replace.
9. Use Software Encoding (Workaround)
Using software encoding is more of a workaround than a solution. However, you might find it helpful if you are in a hurry!
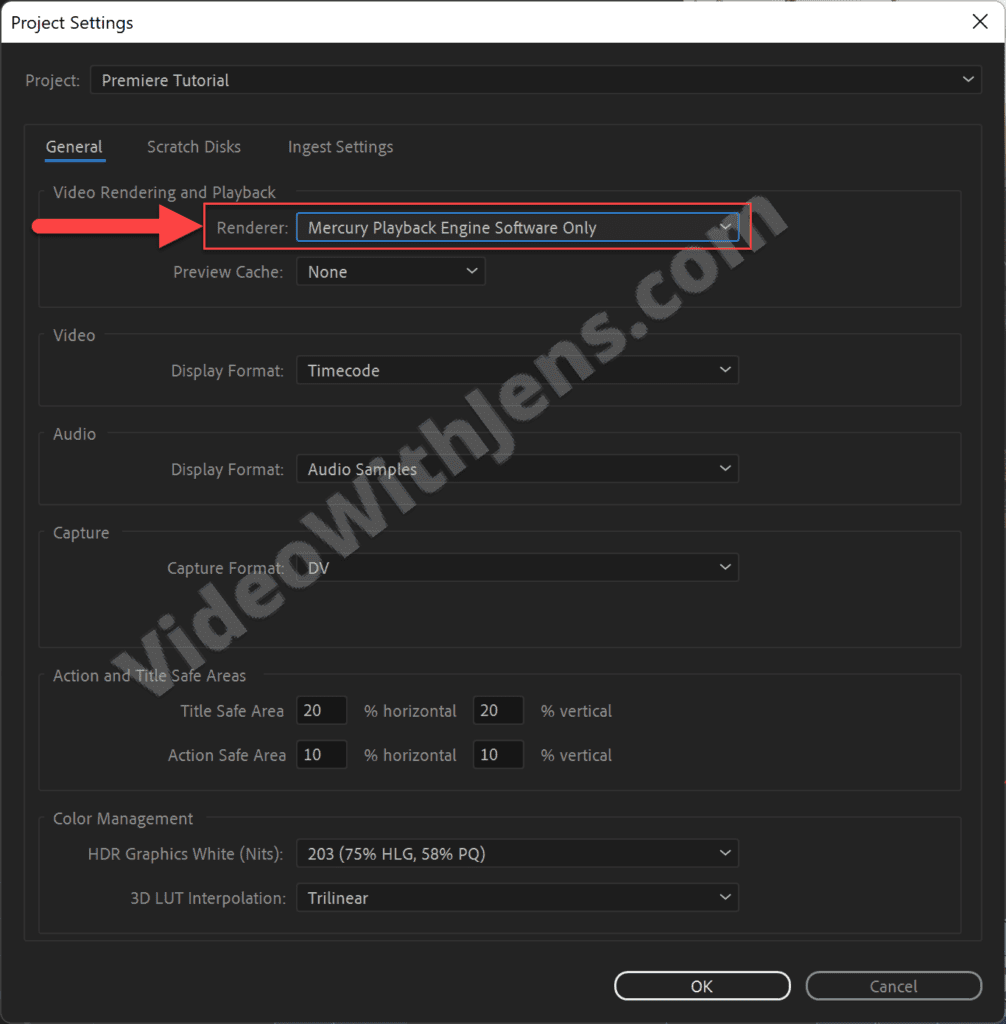
Click on File > Project Settings > General, set Renderer against “…Software Only,” and click OK.
Now Premiere Pro will not be able to use your GPU and only utilize your CPU.
- Some people found that turning the GPU back on once the error disappeared worked.
If the above did not solve the pending error, try this as well:
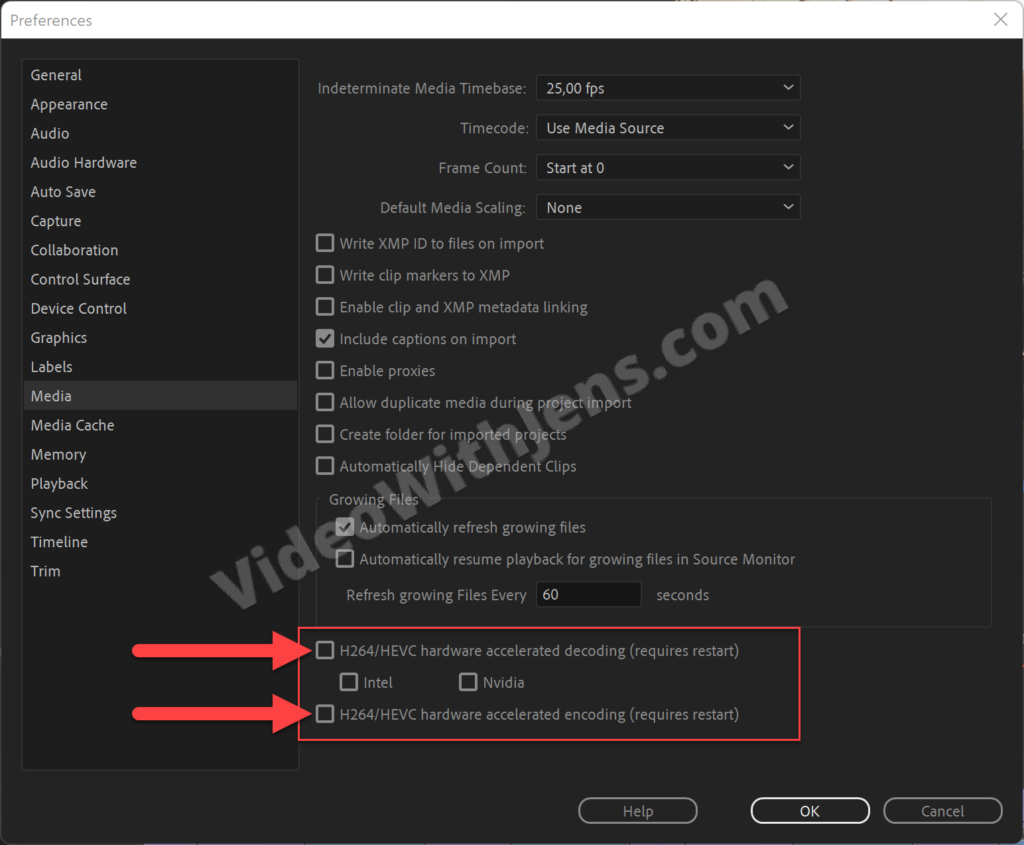
Go to Edit > Preferences > Media, and uncheck H264/HEVC hardware accelerated decoding/encoding.
Once that is done, restart Premiere Pro, and hopefully, the pending error will be gone!
Check out this community thread discussing the error for more information.
Here’s a handy article listing all the most common errors in Premiere Pro and how to fix them. Save it as a bookmark for later!