How to Download & Install DaVinci Resolve 18 (+ Fix issues)
In this tutorial, I will show you exactly how to download & install DaVinci Resolve 18, step-by-step.
And if you were to face any installation issues, I got your back as well!
Click on the links to go directly to a specific section:
- How to Download DaVinci Resolve.
- How to Install DaVinci Resolve.
- Fix Common Install & Launch Issues.
- How to Backup Existing Projects & Restore them (for those who are updating).
How to Download Davinci Resolve
Quick Version
- Visit Black Magic Design’s Official Website.
- Go to “Products” > “DaVinci Resolve and Fusion Software.”
- Click on “DaVinci Resolve” > “Free Download Now“, and choose your OS.
- Fill out the form, and click on “Register & Download.”
Detailed Version
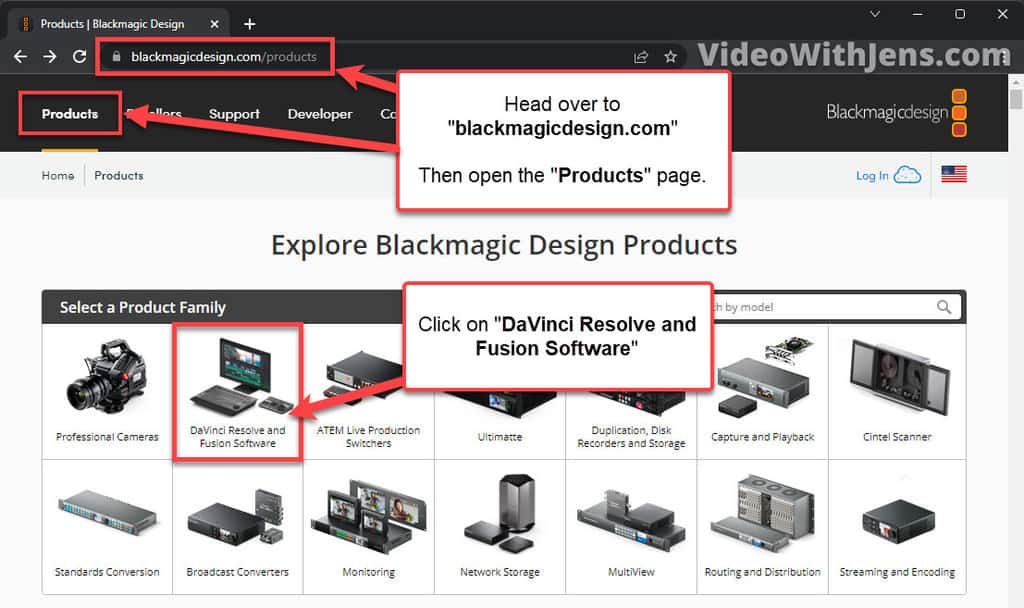
To download DaVinci Resolve, head to Black Magic Design’s official website (the link will take you there) and click on “Products” in the top left-hand corner.
Then if you scroll a little down on the “Products” page, you should see a bunch of different options; click on “DaVinci Resolve and Fusion Software“:
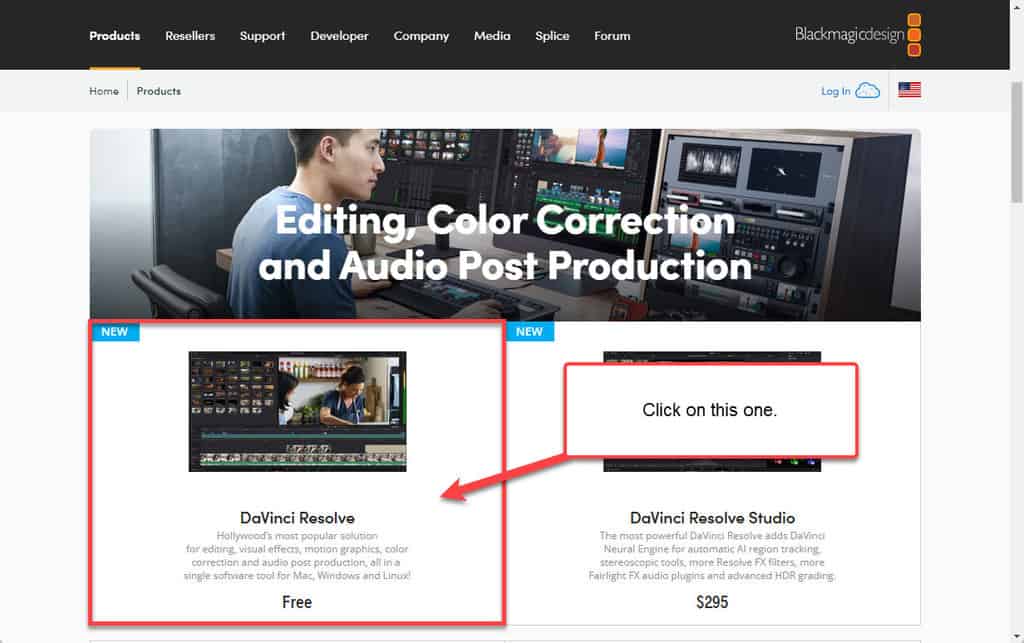
Next, you’ll be presented with two options; DaVinci Resolve Free and the studio version (paid version).
Choose the one you want; I’m going with the free version:
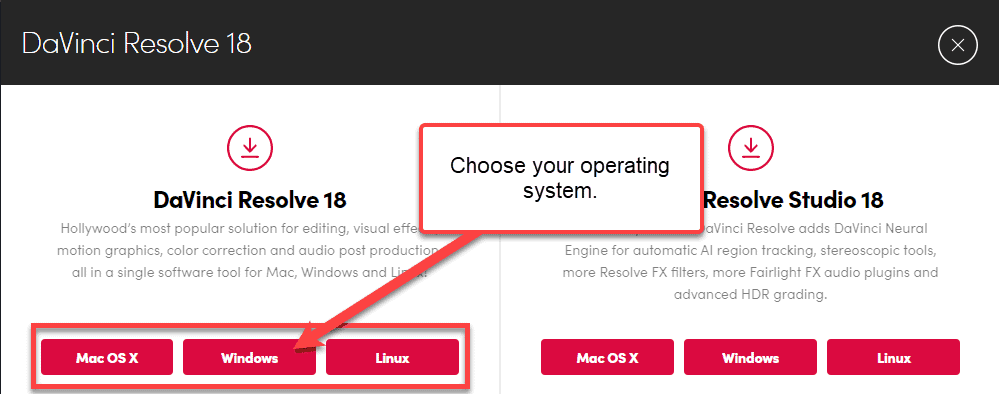
Next, click on “Free Download Now,” located somewhere on the page:

Here you’ll again get to choose between the free and studio version; click on the operating system you are using to get further:
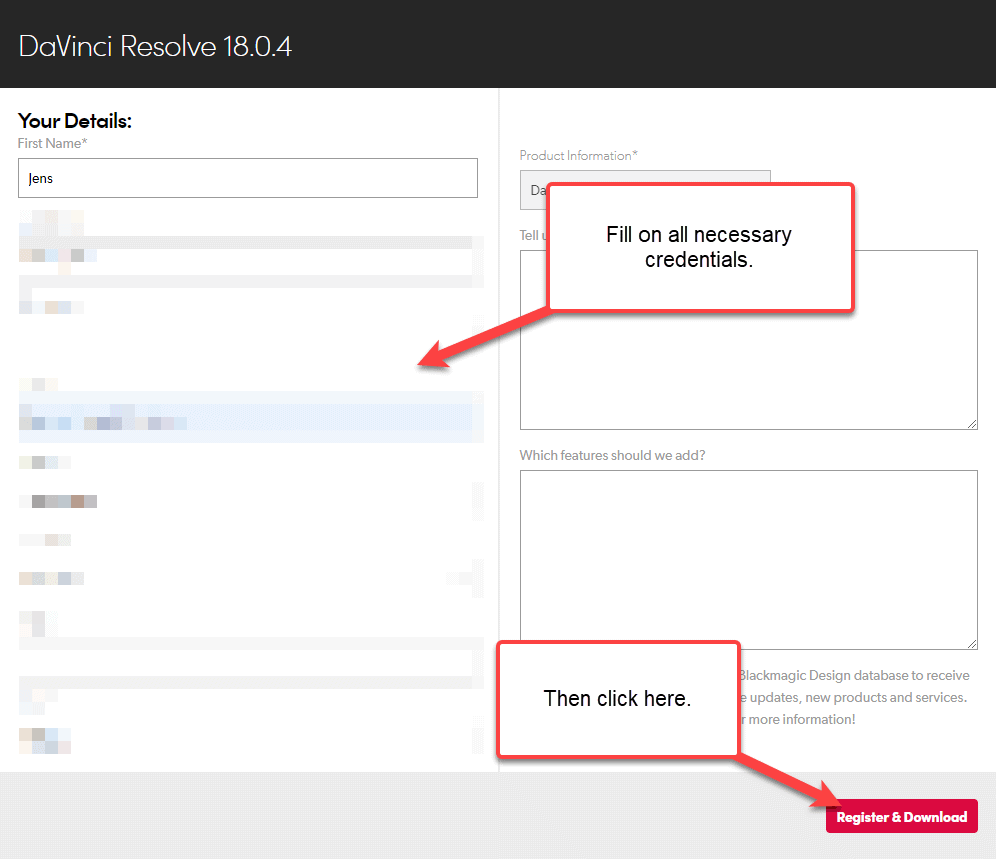
Now you have to fill out a form with some personal information; the ones with a “*” is the one you have to fill out.
Once that is done, click on “Register & Download“:
Wait for the file to download, and then it’s time to install it:
How to Install DaVinci Resolve
Quick Guide
To install DaVinci Resolve, you first need to download the installer file from Black Magic Design’s official website. Then extract the .zip file, and open the installer file (.exe file). Next, follow the installation wizard and launch DaVinci Resolve once it’s installed.
Detailed Guide
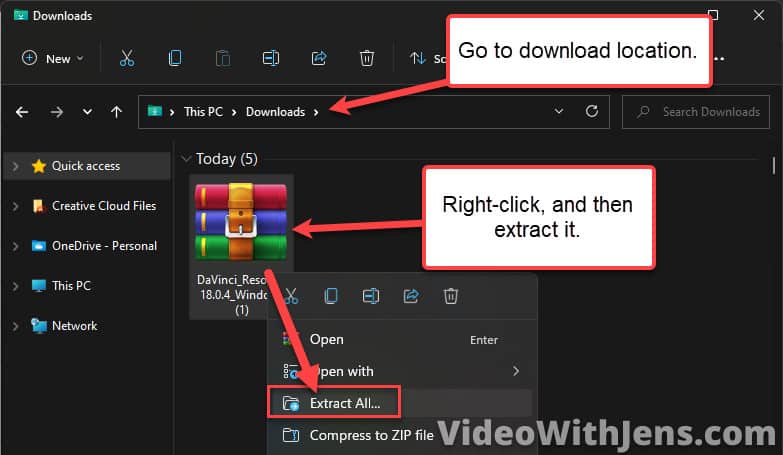
After downloading the DaVinci Resolve installer file, you will find it in your computer’s «Downloads» folder (by default).
It should be a .zip file, meaning we have to extract it:
To do this, right-click the file and select “Extract All“:
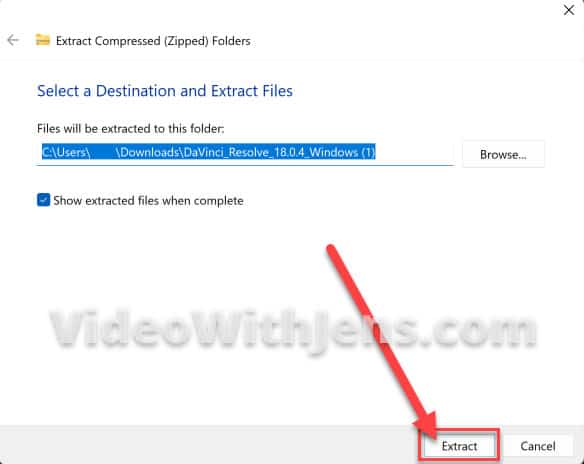
Then (on Windows at least), you get a popup window showing you the location where the file is going to get extracted; click on “Extract“:
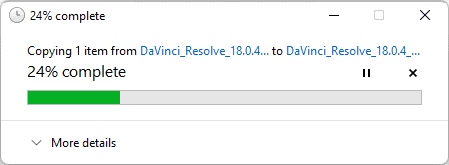
Wait for it to finish…
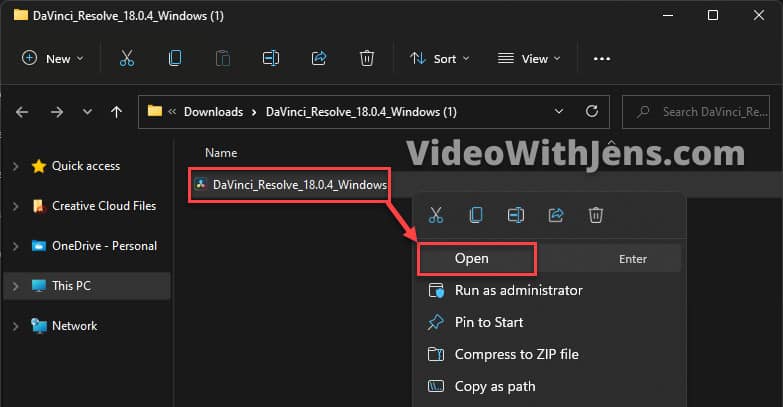
Once it’s done, find the DaVinci Resolve file where you extracted it, right-click it and select “Open“:
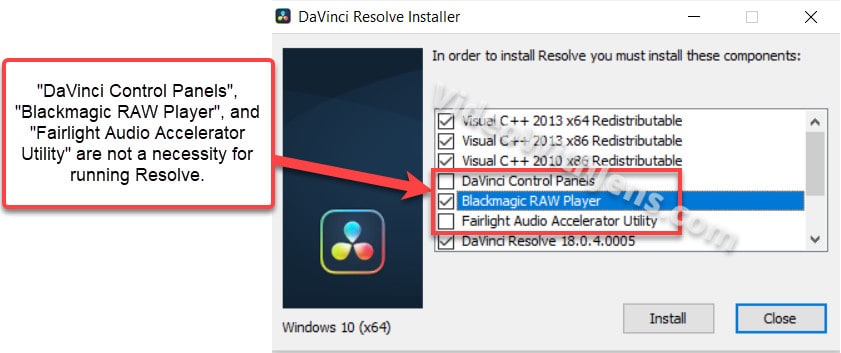
Then the “DaVinci Resolve Installer” window will pop up, where many different components are checked off.
If it’s your first time installing Resolve, you will see the “Visual C++,” which you will need to install DaVinci Resolve. These are not possible to uncheck.
However, you can uncheck the “DaVinci Resolve Control Panels,” “Blackmagic Raw Player,” and the “Fairlight Audio Accelerator Utility” without having any problems installing & running DaVinci Resolve.
For example, you don’t need to install anything for the control panels without having the physical panels on your desk. The same is true for the two other options; they are only necessary if you get what they are intended for.
However, it doesn’t hurt to install them, either, other than filling up your disc space.
Once you have made your decision click on “Install“:
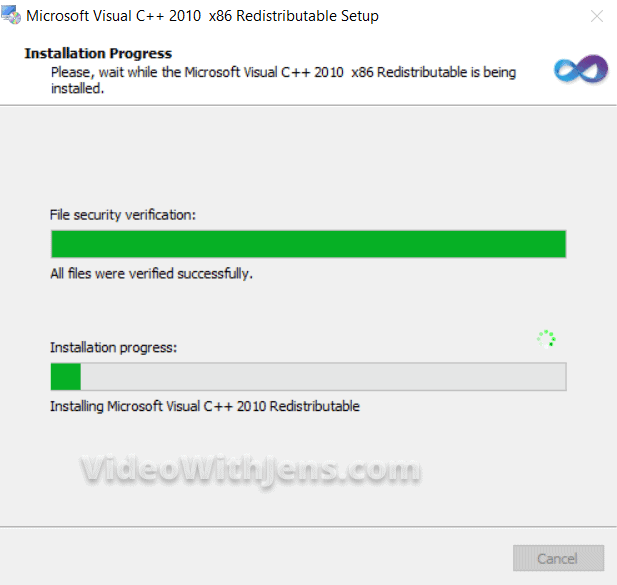
The first thing that will get installed is “Microsoft Visual C++,” as it’s essential for installing DaVinci Resolve.
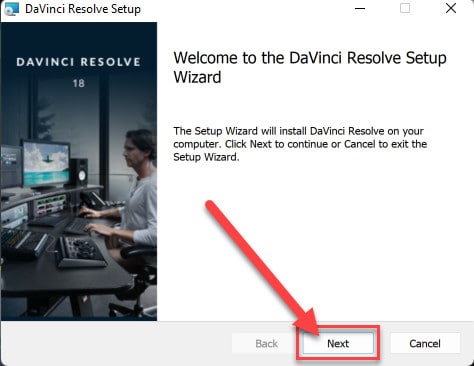
Next, you should be staring at the installation wizard. To continue, click on “Next“:
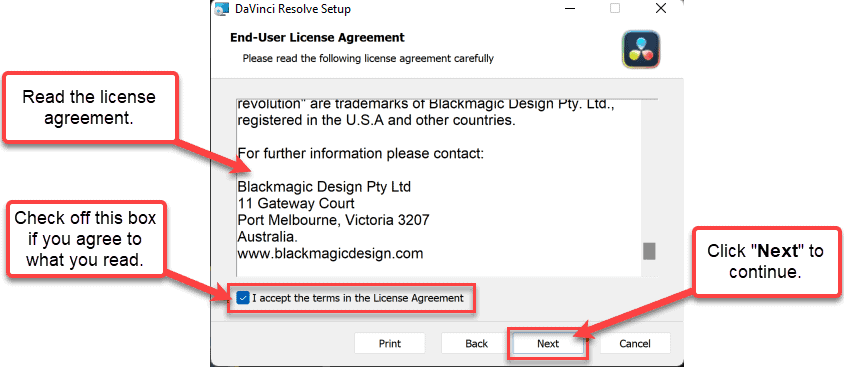
Next, read through the license agreements; once you are done, check the box next to “I accept the terms in the License Agreement“, and click on “Next“:
Now, you can see the path to the “Destination Folder” where DaVinci Resolve will be installed.
Click on “Change” to set a new location.
If you have the choice, I recommend installing it on the fastest driver to make DaVinci Resolve launch faster.
Once the location is correct, click on “Next“:

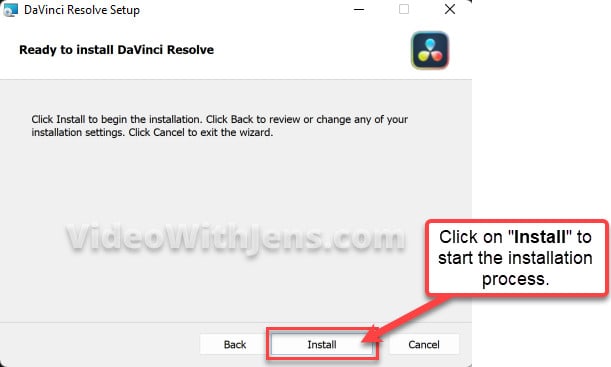
Now DaVinci Resolve is ready to get installed; click on “Install” to start the installation process:
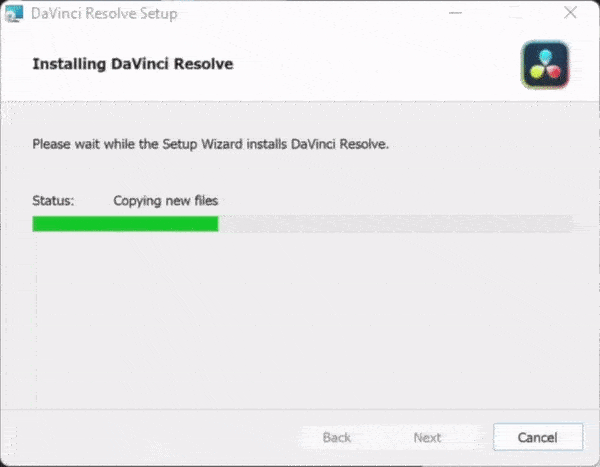
Then it’s just to wait.
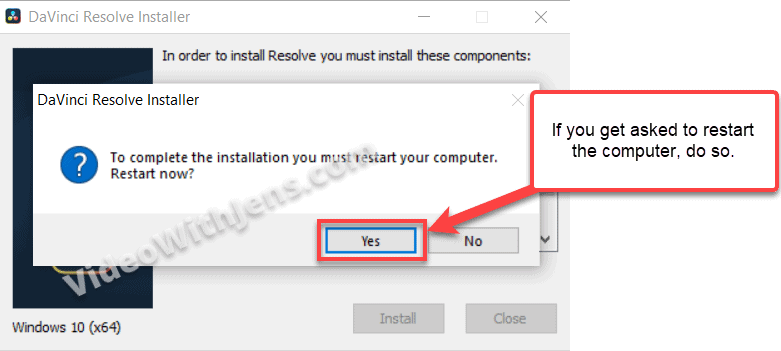
Depending on the components you chose to install (Fairlight, Blackmagic raw player, etc.) you may have to restart your computer once it’s complete, do so and come back to the tutorial for what to do next.
If you don’t get asked to restart, proceed to the next step.
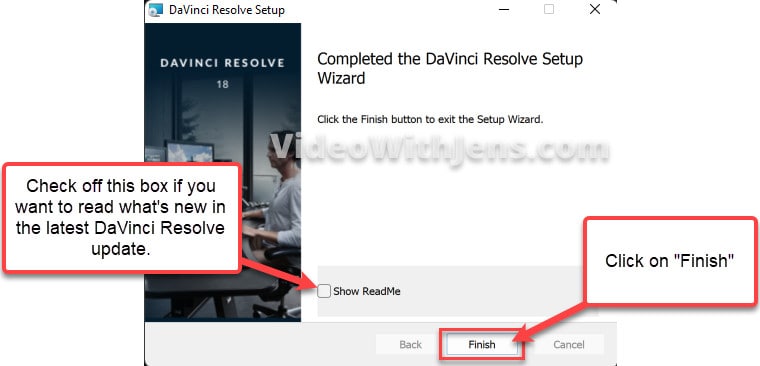
If you didn’t have to restart the computer, you’ll see a window saying, “Completed the DaVinci Resolve Setup Wizard.”
If you want to read about what’s new in the latest update of DaVinci Resolve, check off the box next to “Show ReadMe” and then click on “Finish“:
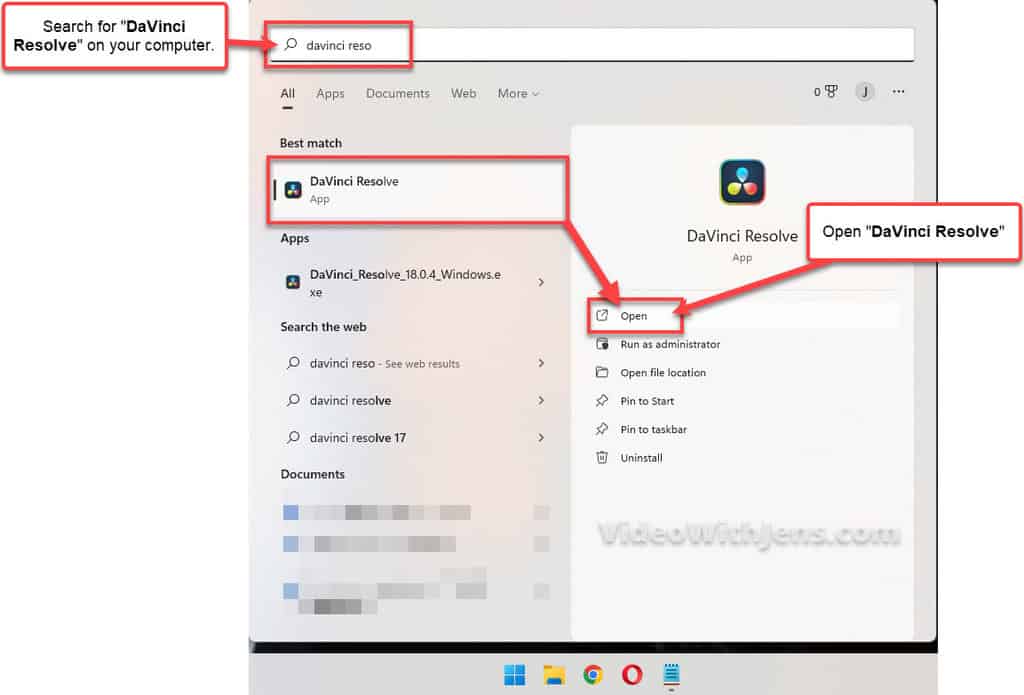
Now, locate DaVinci Resolve and launch the software to create your (first?) video!
A great way to locate the program is to open “Start” (Windows) or press the “Command + Space bar” (Mac) and search for “DaVinci Resolve.”
Quick Setup: For first-time installations
If this is the first time you are installing DaVinci Resolve, you have the opportunity to use the quick setup!
I recommend using it, as you won’t have the opportunity again before getting a new computer, and also, it’s pretty useful.
- Yeyeye, you could do a clean installation or reformat your hard drive, etc. and get access to the quick setup again… Please leave me alone, you nerd.
Let’s proceed:
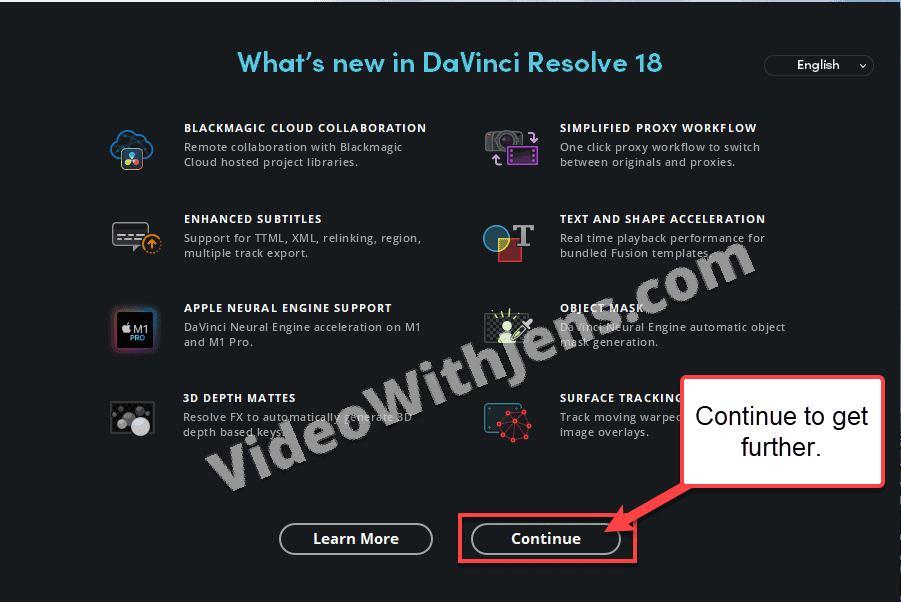
First, you get to see what’s new in DaVinci Resolve 18; click on “Continue” to get further:
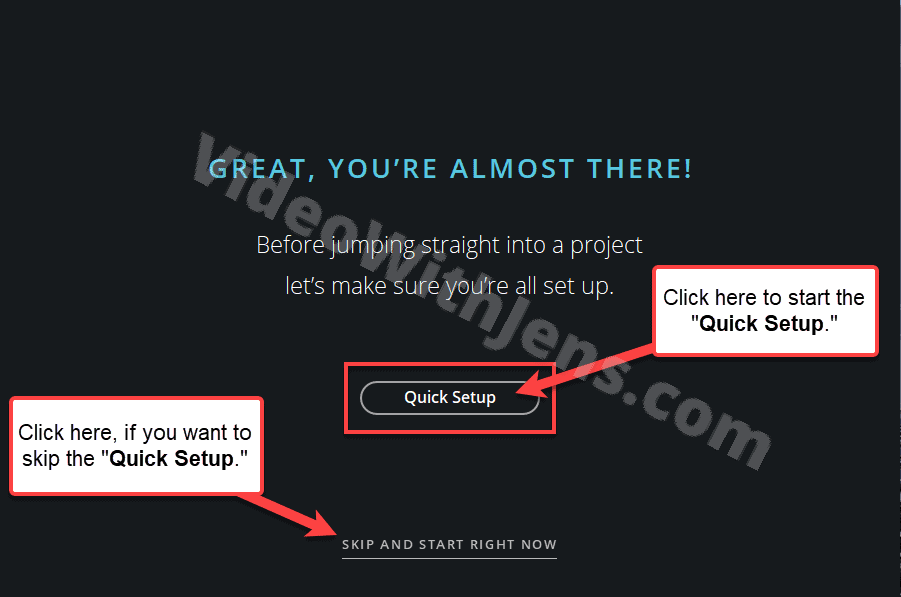
Now you have the choice: either do the quick setup or launch DaVinci Resolve immediately.
Click on “Quick Setup“:
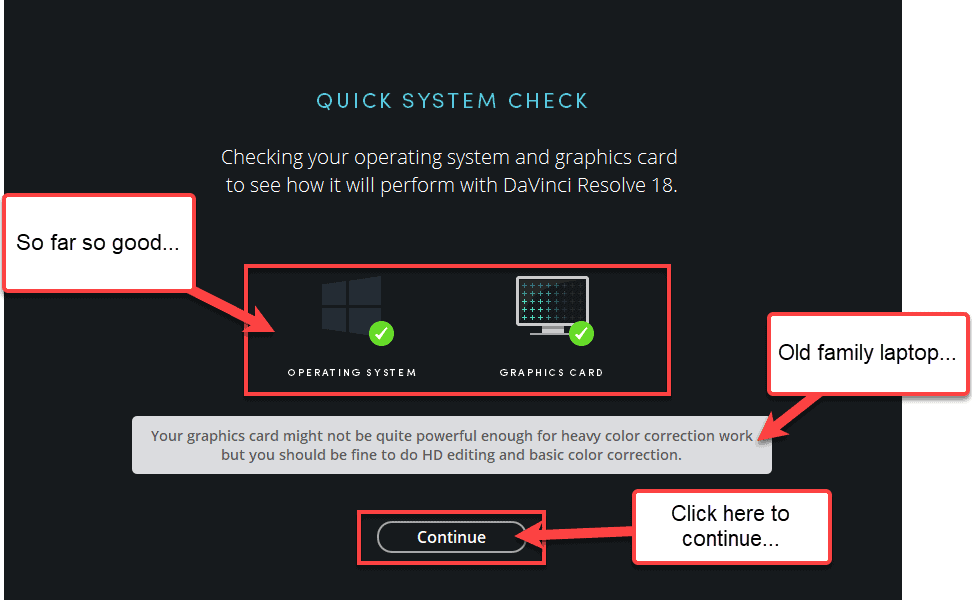
Then there is a “quick system check”; in my experience, you can’t trust this entirely…
You can see in the image below that I got a notification saying my graphics card might not be good enough for color grading. That’s probably true, as I grabbed an old computer to access the quick setup…
But editing should still work according to this message.
Click on “Continue” to proceed:
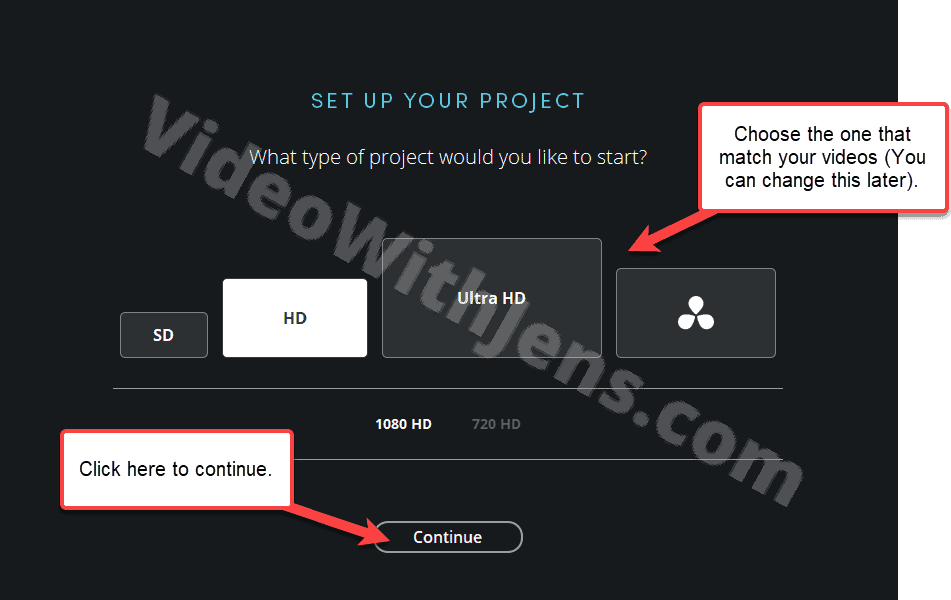
Now it’s time to choose the project resolution.
Match it to the videos you will edit; you can always change it later.
Click on “Continue” when you are ready:
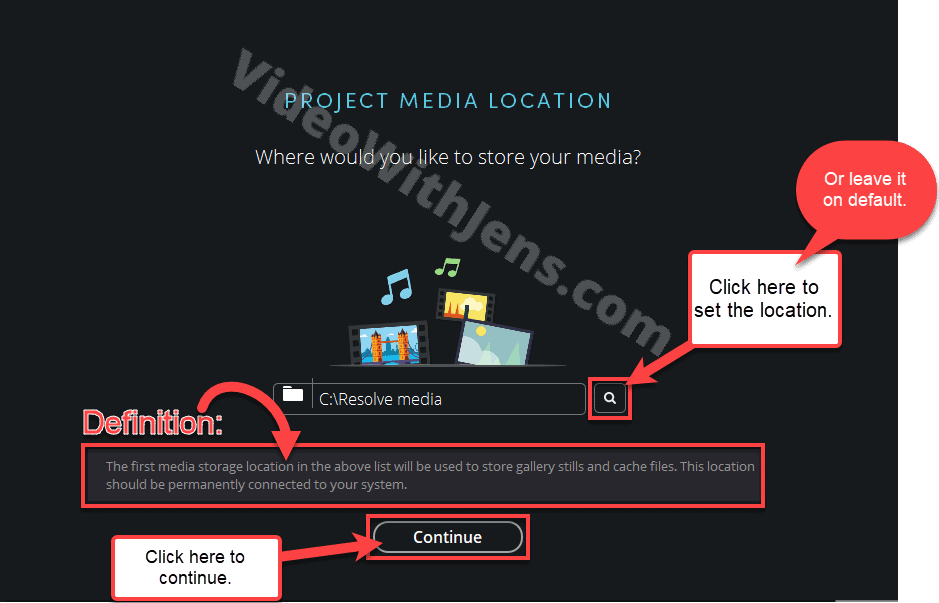
Next, you can set the media location manually by clicking on the magnifying glass icon (this is where cache files will be stored), or leave it by default.
Cache files quickly add up and fill up your computer memory; therefore, having them on a drive with enough space is ideal.
- Cache files are often used if your computer has a hard time running Resolve.
- Here‘s an article about that.
As you can see in the definition box I’ve included in the image; the location of the media files should be permanently connected to your computer; so not an externally connected drive like a USB stick.
You’ll probably be fine leaving the location as default if you are not sure yet.
Once you have decided what to do, click on “Continue“:
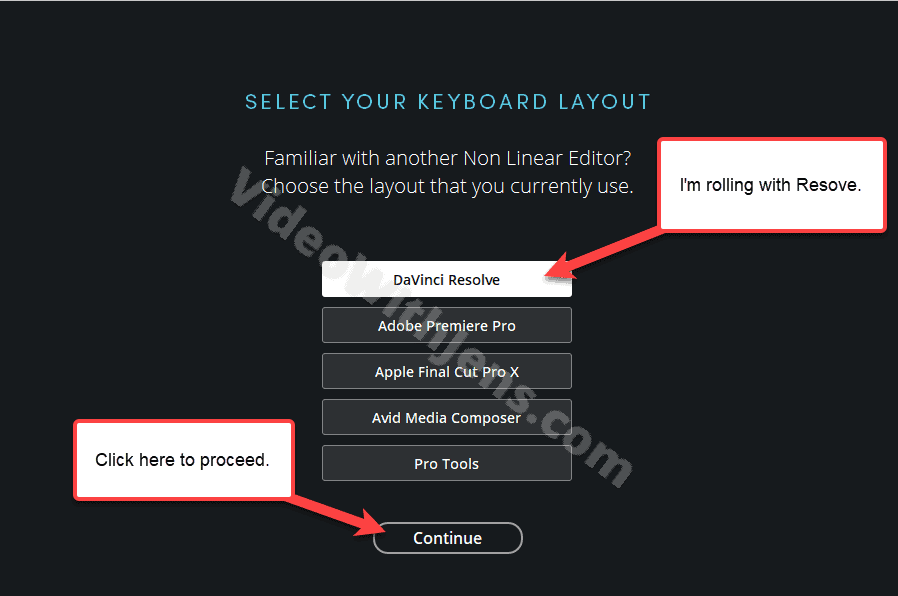
Next, if you are coming from one of the NLE software included in the list below, you can use choose that one, and you should be able to use the same editing shortcuts in DaVinci Resolve.
Once you’ve chosen a layout, click on “Continue.”
That’s it!
Click on “Start” to launch DaVinci Resolve:

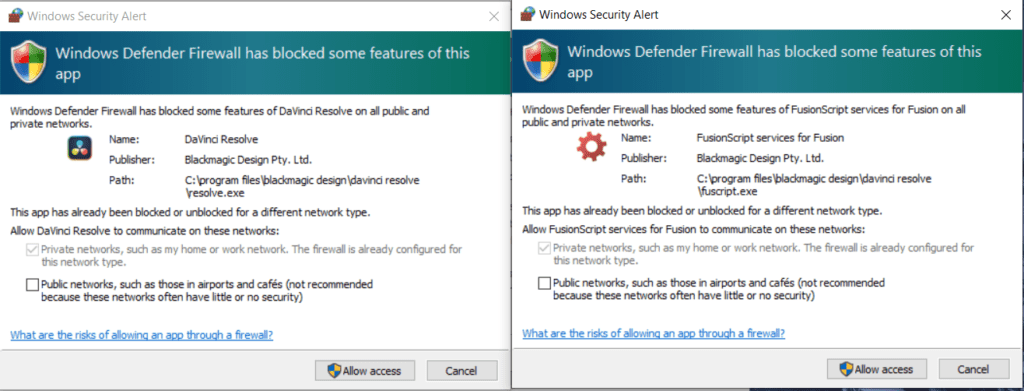
(You might have to allow Resolve access to get past your firewall)
You don’t have to enable the “Public network” communication for it to work; it’s on by default, yet not recommended…
If everything went perfectly you’re all set!
Check out this complete DaVinci Resolve beginner tutorial to get started.
Common Installation & Launch Issues
GPU Error Message
A lot of people are faced with a GPU error message when launching DaVinci Resolve for the first time.
There are many reasons why this might happen, luckily for you, I’ve written some articles on how to fix the most common errors:
(Click on the links below to find a solution)
Here are the minimum requirements for your GPU:
- Integrated GPU or discrete GPU with at least 2 GB of VRAM.
- GPU, which supports OpenCL 1.2 or CUDA 11.
- NVIDIA/AMD/Intel GPU Driver version – as required by your GPU.
Stuck “Loading Fairlight Engine” when Launching Resolve
Some users have reported that they get stuck on “Loading Fairlight Engine,” when trying to start DaVinci Resolve.
DaVinci Resolve: “Network Resource That is Unavailable” FIX
To fix the error “network resource that is unavailable” when trying to install or uninstall DaVinci Resolve is quite simple. Install and run the Microsoft install and uninstall troubleshooter, let it scan your computer, then select “Installing” or “Uninstalling“, and select “DaVinci Resolve” from the list.
Don’t worry if that sounds confusing because the process is relatively straightforward.
Here’s a link to Microsoft’s official website, where you can download the troubleshooter.
Once downloaded, double-click to run it and follow the instructions.
Here’s a YouTube video of a guy explaining the process:
Unable to Install DaVinci Resolve
There are many different reasons why you might not be able to install DaVinci Resolve.
Here are a few common solutions to such problems:
- Right-click on the .exe (installer file), and select “Run as administrator.”
- Move the installer .exe (installer file) to another drive.
- If you only have one drive, try another location.
- Make sure there is enough disc space.
- Re-download the installer.
- Check the DaVinci Resolve section on the Blackmagic forum.
How to Backup Projects Before Updating (& Restore them)
How to Backup a database:
If it’s not the first time you install DaVinci Resolve and are going to update the software manually, I suggest backup your files first.
This is always recommended to do in case something goes wrong.
It’s also a quick thing to do, so let me show you:
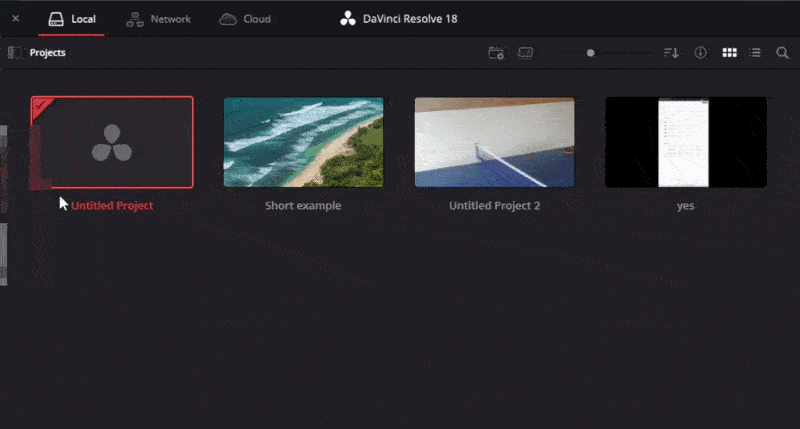
Launch DaVinci Resolve as you see the “Project Manager” with all your saved projects.
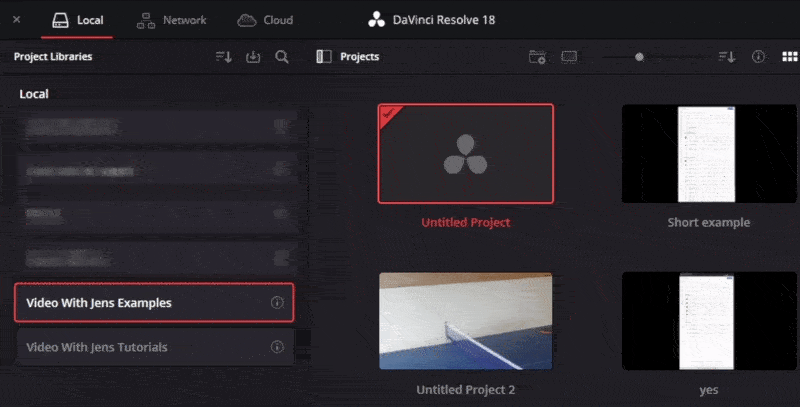
Next, open the list with your “Databases/Project Libraries,” as I’m doing in the illustration below:
If you have multiple databases in this list, you need to back up all of them.
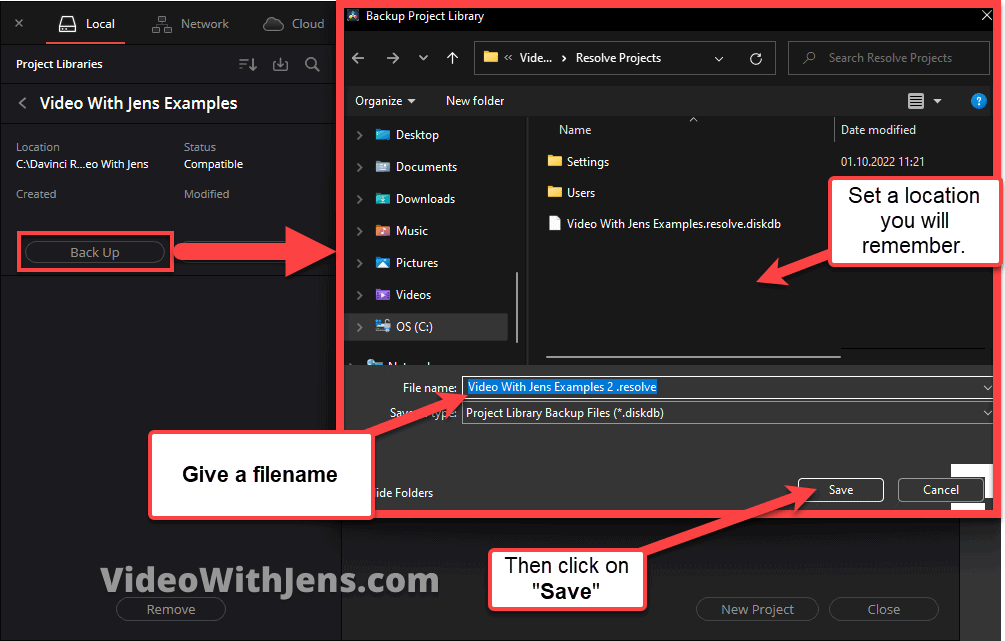
To do this, click on the circle with an “i” inside to open the “Details“:
Then, click on the “Back Up” button and set a location where the backups will be saved. You must remember where they are if anything goes wrong when updating.
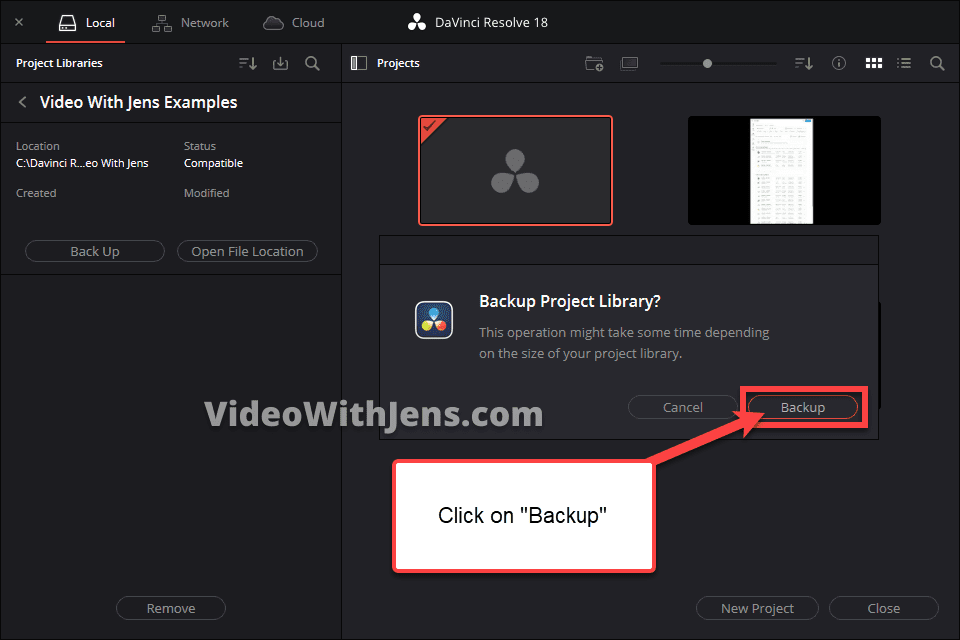
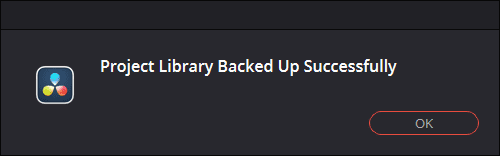
Next, you should get a popup window asking if you want to “Backup Project Library” click on “Backup“:
Then, you hopefully get this message saying the backup is successful:
(If not, try again with a different location for the backup files.)
Once you’ve made a backup, follow the download & installation guide above. If you were to lose your projects, you can come back and read this next section on how to restore them.
How to Restore Project Using the Backup Files:
If you have lost your files when updating Resolve (or for any other reason), I will show you how to recover them using the backup files.
This only works if you have backed up your database beforehand.
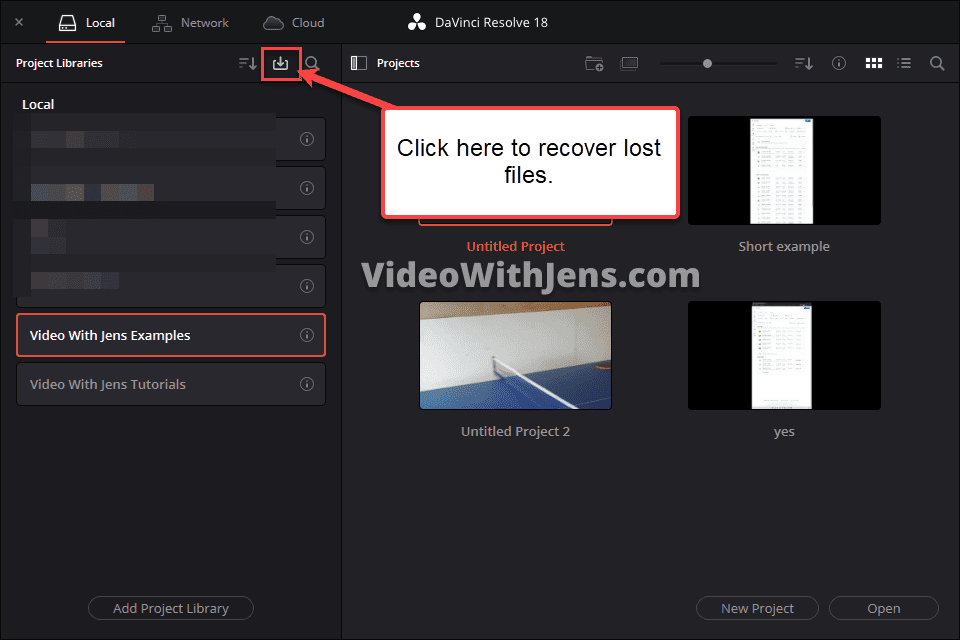
To restore your projects, open the “Project Libraries” (list of your databases) by clicking on this icon:
If you haven’t created any additional databases, you can probably only see one called “Local Database” in the list.
Then select that one, and click on the “Restore” icon I’m showing you in the image below:
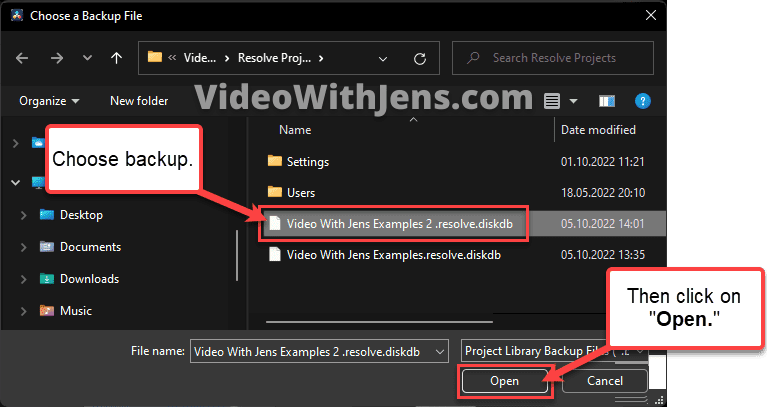
Next, you have to locate where you have saved your backup files, select it and click on “Open“:
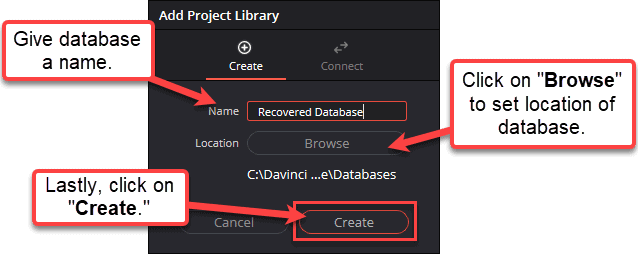
Now, you must create a new database to restore the files.
Give the database a “Name,” and then set the “Location” where the database will be saved.
Once that is done, click on “Create“:
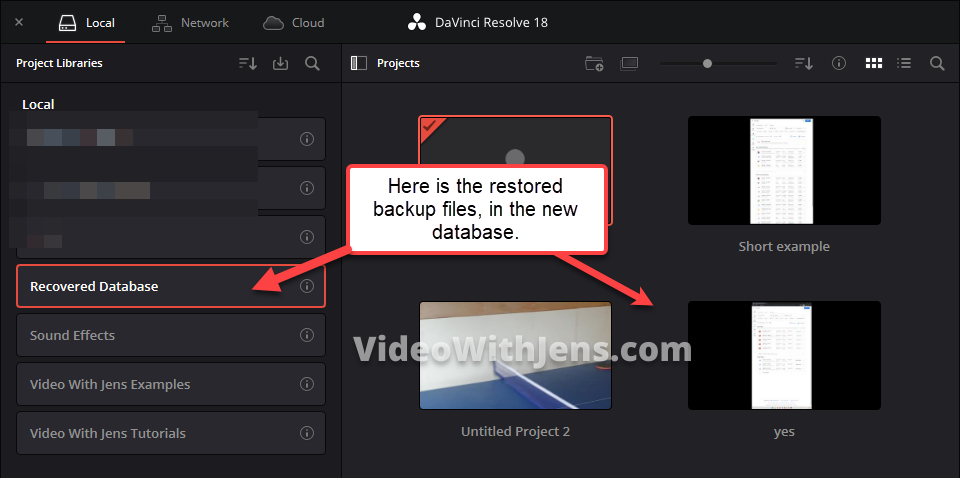
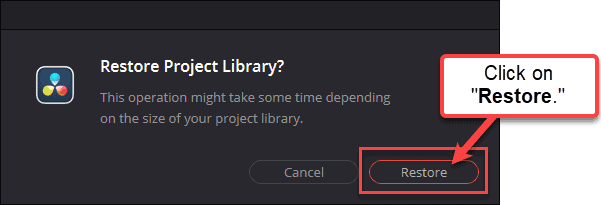
Then click on “Restore“:
Once that is done, you should be able to see a new database in the “Project Libraries” list and the restored projects if you open it.